In this tutorial, we will show you the procedure of making an online store with WooCommerce. We will walk through the process of installing WooCommerce features and the configuration of your settings.
If you are deciding to use WordPress to create your E-commerce site, then you have to setup WooCommerce. This plugin has become an important factor and the solution for online stores.
By using WooCommerce, users will get flexibility and a variety of customization options.
Luckily, the significant reason to setup WooCommerce is becoming popular is because it is easy to set up. The beginner eCommerce users also can easily enable, install and configure the feature to create a professional eStore in a very short time. The store owners can easily operate all kinds of store-related options on WooCommerce.
Getting Started with WooCommerce
Ecommerce is now very popular, and it is growing exceptionally. According to statistics, digital buyers are 2.05 billion out of 8 billion people in 2020. The prediction shows that it will grow more in the future.

Moreover, WooCommerce provides lots of customization which helps online retail to expand, grow and look professional. The WooCommerce extension adds new options to the store and a dedicated theme like Storefront makes a sleek look to the E-commerce store.
It is a great choice for store owners to consider installing WooCommerce to create eStore in WordPress.
Now, let’s focus on the tutorial below.
How to setup WooCommerce in WordPress
Step 1: Install and Activate the WooCommerce Plugin
First of all, you have to click the Plugins menu from the dashboard of your WordPress site. Then click Add New. Next, search for WooCommerce and press the Install Now button. After that click Activate Now and you will launch its configuration wizard. That will help you in setting up your online shop’s key backgrounds.
Step 2: Add Your Store’s Basic Information
After activation of the WooCommerce plugin, you will find the setup wizard. It will help you to set up the store in just a few steps.
The first page of the wizard contains general information about your Shop. It will ask you to set location, currency, and product types. You can choose physical, digital, or both types of products.
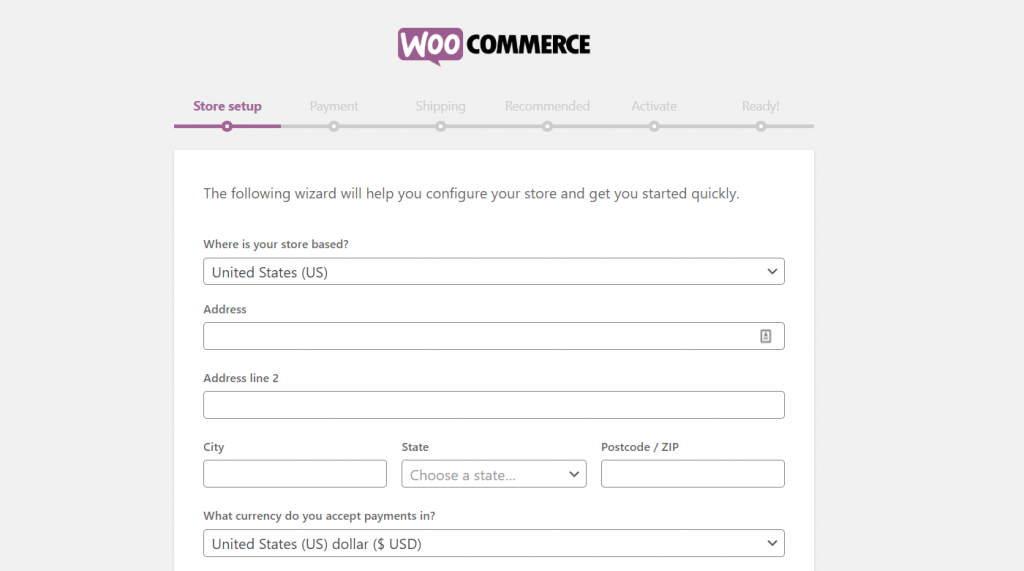

You have to choose the currency of the store product. The owner can use only one currency at a time. However, to use various currencies, you can use a currency converter plugin.
The last part is to focus on the types of products you are planning to sell. It might be digital, physical, or both.
Finally, there is a checkbox you should only tick if they are also planning on selling items in person.
After that, you have to press the Let’s go button.
Step 3: Set Up Payment Options
Once you completed the first step, it will automatically redirect you to the payment setting page. Here, you can select your desired payment gateway option. WooCommerce features usually support offline payments, PayPal and Stripe.
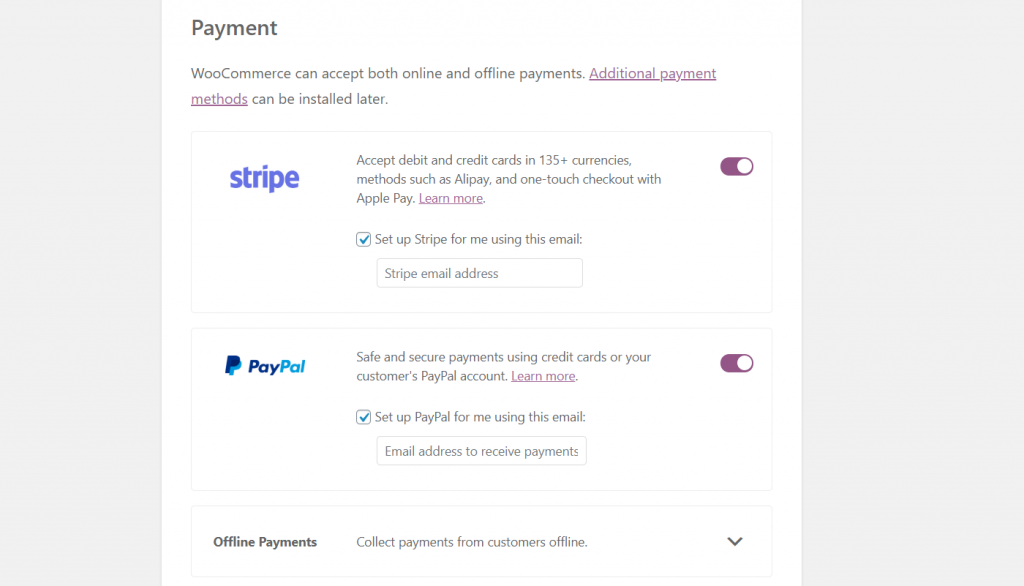
If you use offline payments, you have to choose the Offline Payments option. While selecting the option, the panel with more detailed selections will appear. You can choose your desired option from that list.
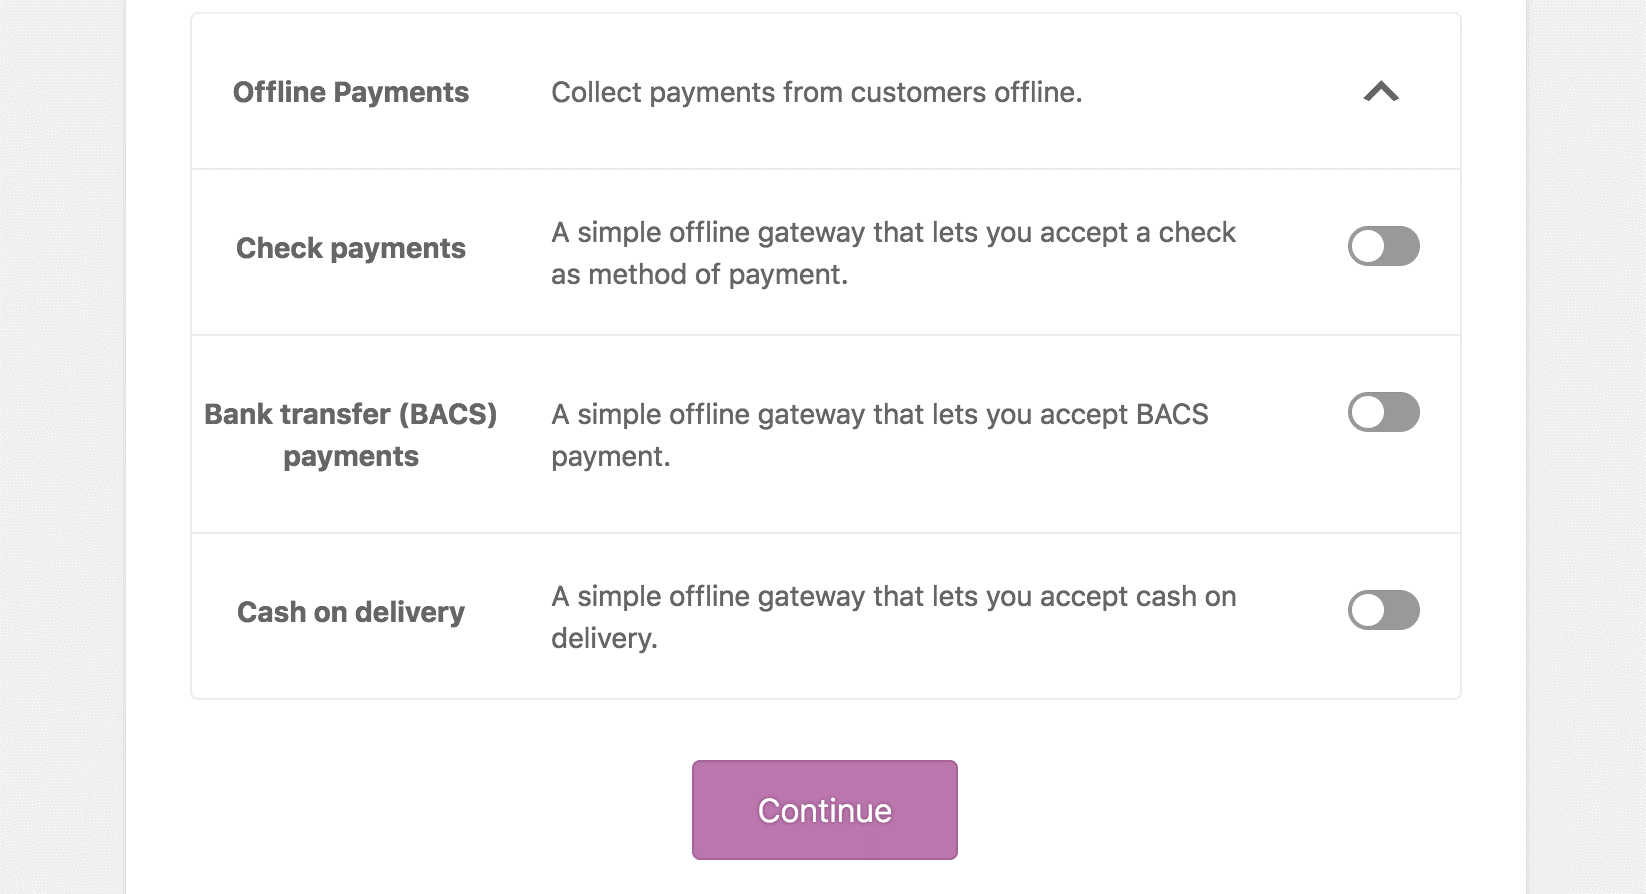
After completing all these options, you need to click the Continue button for proceeding to the next page.
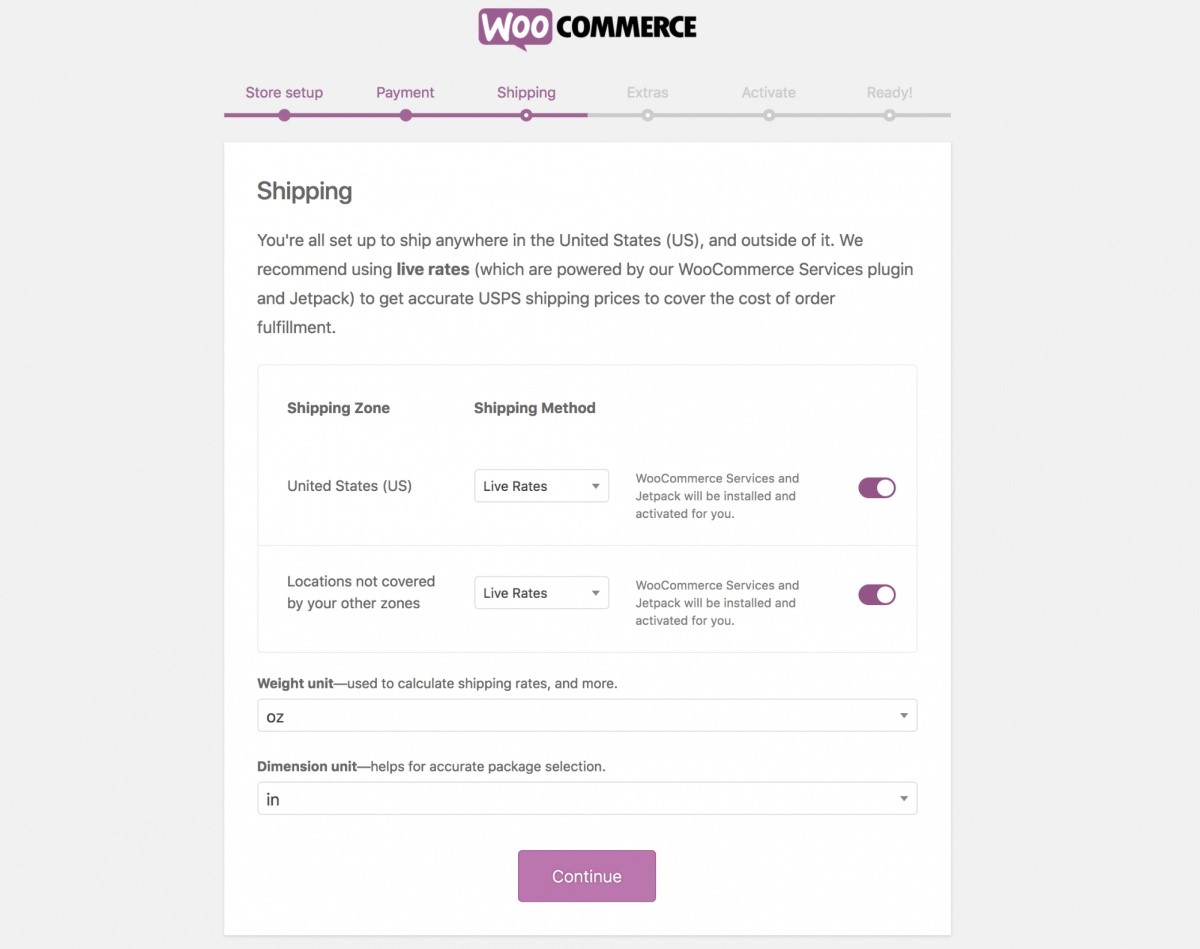
Step 4: Configure Shipping Settings
Now, you have to configure the shipping features of online retail. Select the zone to ship the products and the rate of shipping your products. You will also have to provide the units and dimensions of the products according to the located area.
Simply choose all the options correctly including units, and weight, then select Continue to progress.
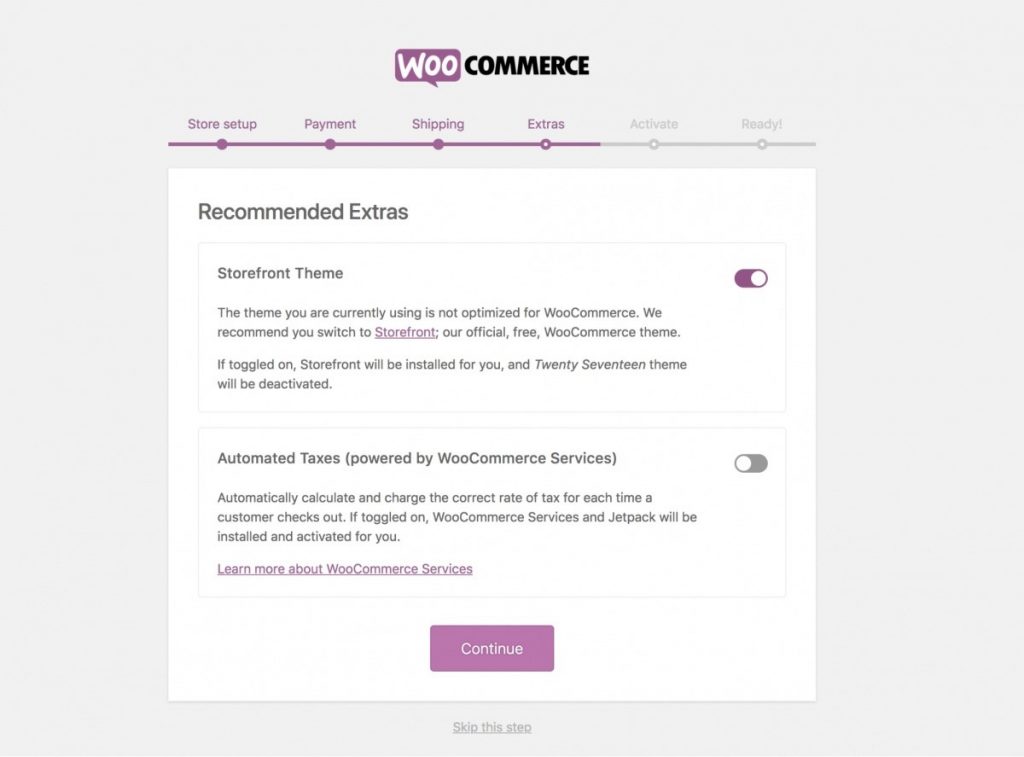
Step 5: Complete The Extra Section
In the Extra section, the user gets two choices.
In the first option, it asks you to enable the Storefront theme. This theme is suggested because it is the official WooCommerce theme.
Next, you can also select the Automated Taxes option to calculate tax. It’s an effective feature for you to add tax manually on your location and business. After choosing all the options, you have to press the Continue button for the final step.
In the next step, you can connect your eCommerce to Jetpack, which will enable several options. You can see the live rates and taxes with the help of Jetpack. If you need the plugin, press Continue with Jetpack. Otherwise, press Skip this step to complete the whole installation.
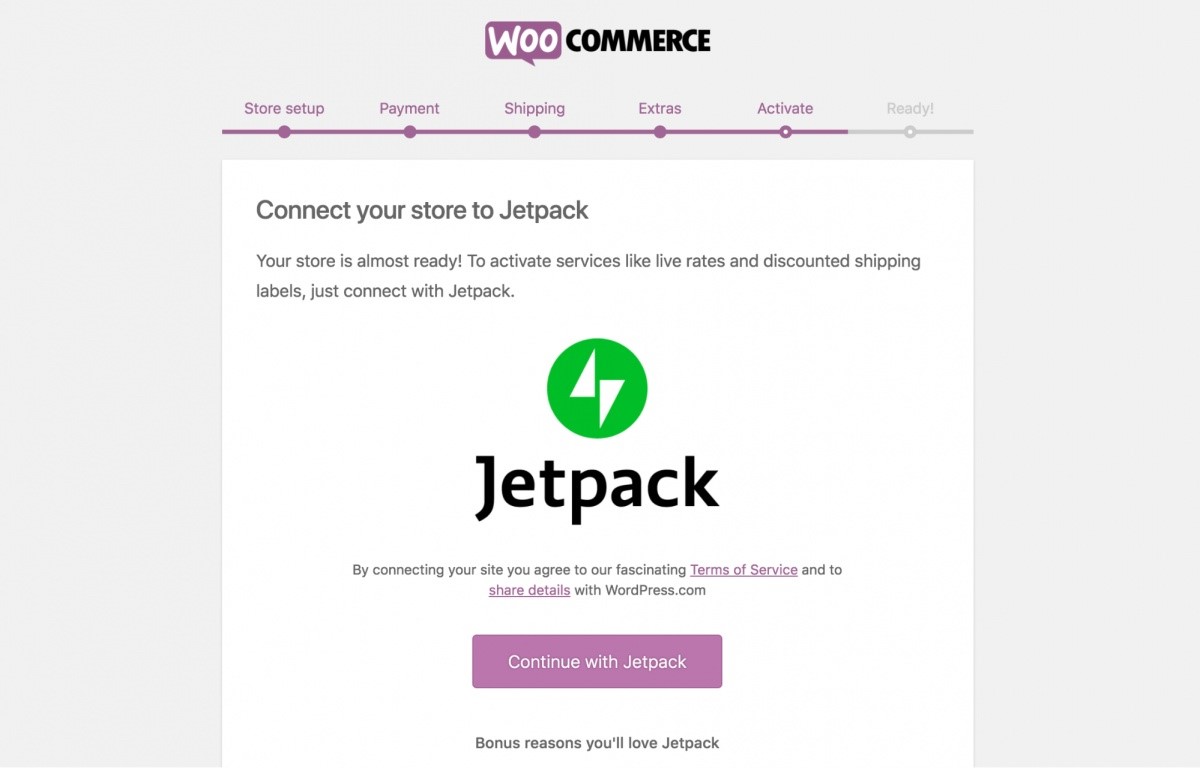
Finally, your online shop is ready for action. You can also check out the documentation of WooCommerce to see all available options.
Conclusion
The advantage of creating an online shop with WooCommerce helps you to control it smoothly and make it look more professional. If you want to know more about WooCommerce, you can simply check out our other blogs on WooCommerce.
