A wishlist ensures that customers can save products for buying later. If you are using the Flatsome theme, you can give customers a smooth experience in shopping. Setting up the wishlist in your Flatsome theme is a straightforward process and you can create wishlist in Flatsome easily. It doesn’t require any coding knowledge. All you need is to follow these 12–steps to add the wishlist correctly. Also, the wishlist will be automatically added to every product.
Benefits of Wishlist Option
The wishlist assists customers in saving the products for later buying, or saving for other purposes
You can have the data of your customers if you add the wishlist to your site. Which type of data they’re keeping on their wishlist can help you to understand their mindset
Using their wishlist, you can give them reminders to purchase the products.
Overall, using the wishlist properly can boost your sales and grow your business.
How to Create Wishlist in Flatsome Theme – 12 Steps Only
Step 1: Go to the Dashboard, hover the pointer on Plugins, and click on the Add NewStep 2: A new page will appear. On the top right, you’ll find a search section, type YITH Wishlist there. From the search result, Install the first one, then Activate it. We’re using YITH Wishlist for demonstration purposes, you can choose any wishlist plugin for WooCommerce. Step 3: After activating the plugin, a list of plugins will appear. Find YITH WooCommerce Wishlist, and click on the setting section of it. Step 4: A new setting page will appear. You can find four sections of the setting. From the General setting, Enable AJAX Loading. Then save it by clicking on the SAVE OPTIONS button. Then click on the second setting section, named Add to Wishlist options. Step 5: A new setting section will appear. From here, you can change the position of the Add to wishlist and the loop setting. For demonstration, we’re turning on the loop and selecting On top of the image for the position. Step 6: You will find various customization of the wishlist here. For simplification, we’re avoiding further customization, you can do it if you need. After skipping other customization, scroll down and click on the Save Changes. Step 7: Then click on the third setting, named Wishlist page options. Copy the shortcode of it, and save it.Step 8: Now, hover the pointer on Pages, and click on the Add NewStep 9: A new blank page will appear. You can name it as you want. For demonstration purposes, we’re naming it as Wishlist. Then click on the add block, and select the shortcode.Step 10: Then paste the shortcode you’ve copied. Click the publish button on the top right. Step 11: Now, you’ve successfully added a wishlist to your Flatsome-powered website. Go to your website, and find the products. You’ll find a Heartshaped button that represents the wishlist. Clicking on it will add the product to your wishlist. Step 12: After adding products to your wishlist, you need to find all the products you’ve added to the wishlist. Hover the pointer on the Heartshaped button again; you’ll find an option of Browse wishlist, click on that.Final Preview: Now, you’ll find the wishlist page where you can find all the products you’ve added to your wishlist.
Conclusion
If you’re facing issues with setup the Wishlist in Flatsome, try this from scratch again. You can also try another wishlist plugin instead of the YITH wishlist. Though the plugins are different, the setup process is very similar. Feel free to drop a comment about what issues you’re facing or what tutorial you need for the Flatsome theme. If you’ve no queries, visit Flatsome tutorials for better usage of the theme.
 Step 2: A new page will appear. On the top right, you’ll find a search section, type YITH Wishlist there. From the search result, Install the first one, then Activate it. We’re using YITH Wishlist for demonstration purposes, you can choose any wishlist plugin for WooCommerce.
 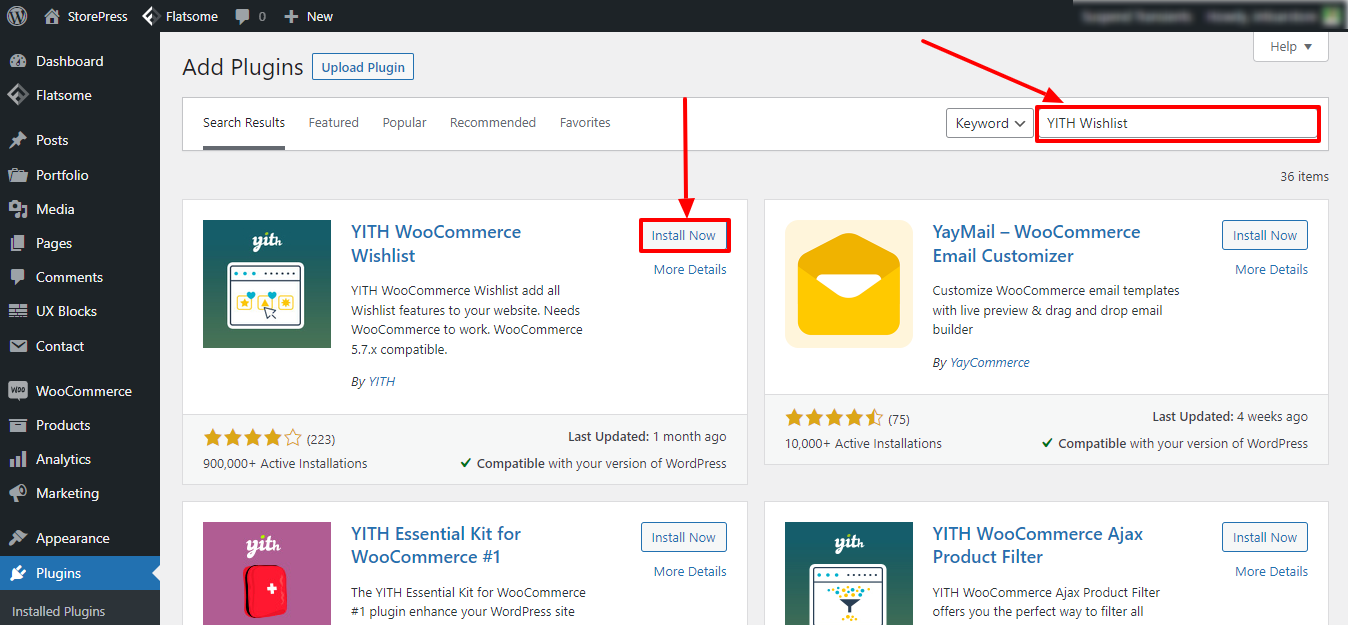 Step 3: After activating the plugin, a list of plugins will appear. Find YITH WooCommerce Wishlist, and click on the setting section of it.
 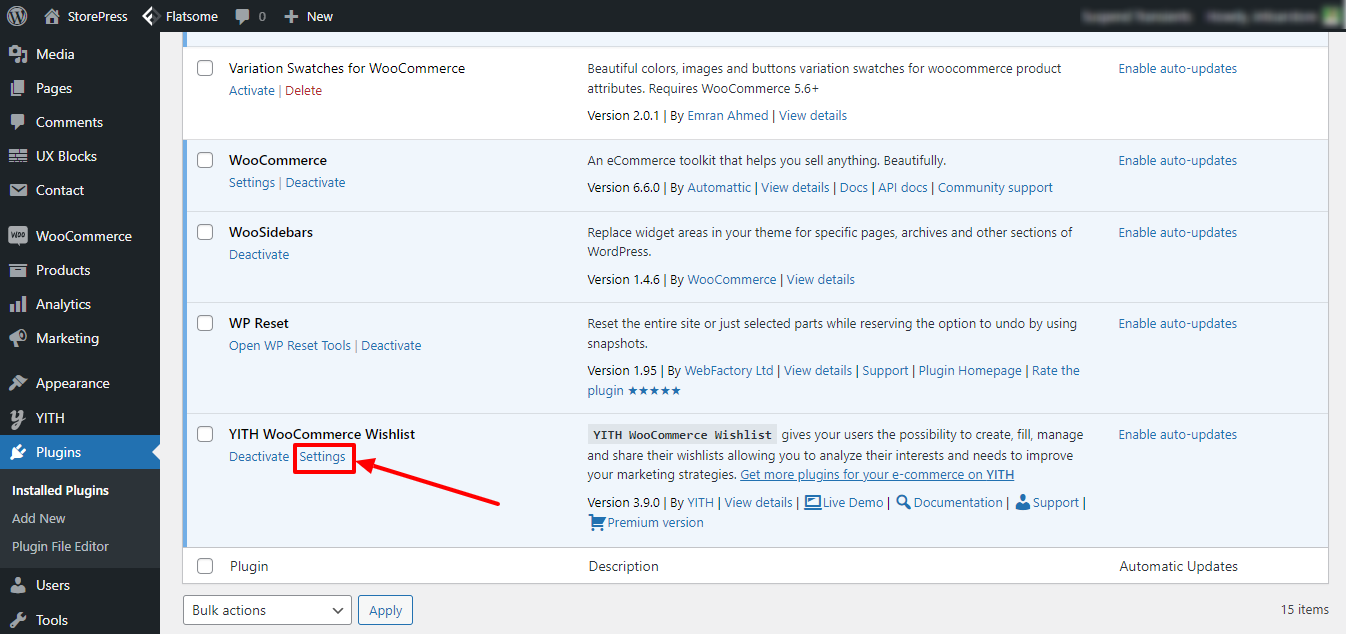 Step 4: A new setting page will appear. You can find four sections of the setting. From the General setting, Enable AJAX Loading. Then save it by clicking on the SAVE OPTIONS button. Then click on the second setting section, named Add to Wishlist options.
 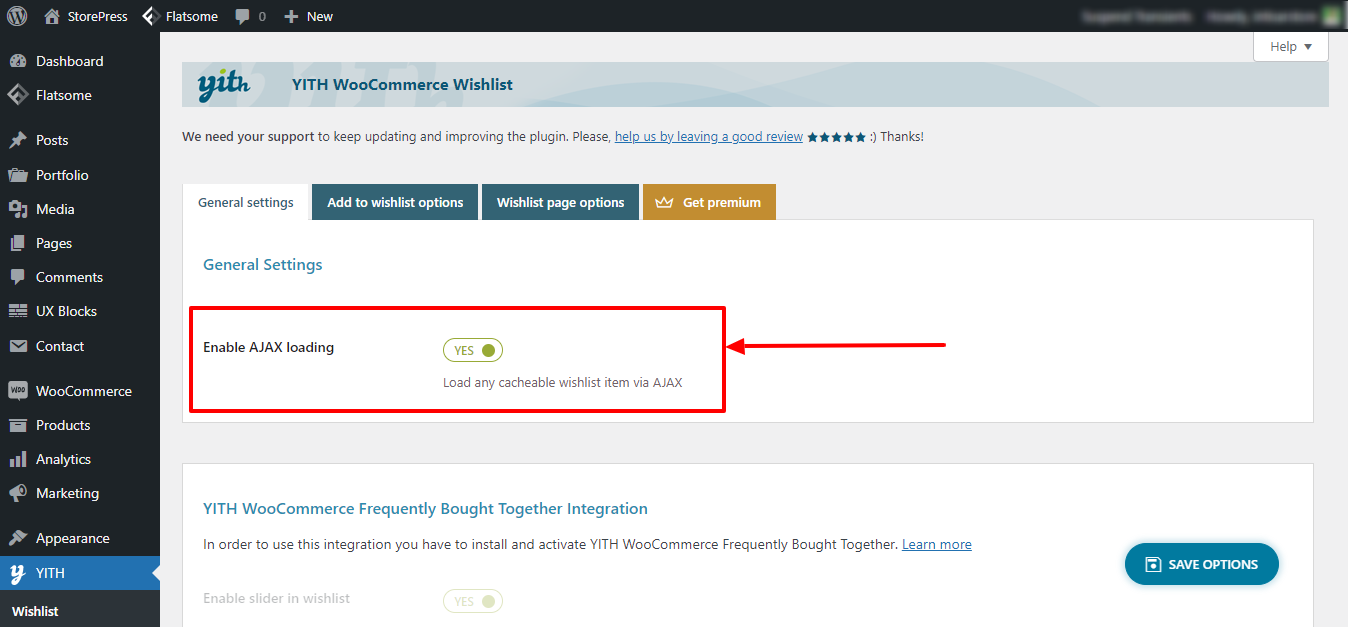 Step 5: A new setting section will appear. From here, you can change the position of the Add to wishlist and the loop setting. For demonstration, we’re turning on the loop and selecting On top of the image for the position.
 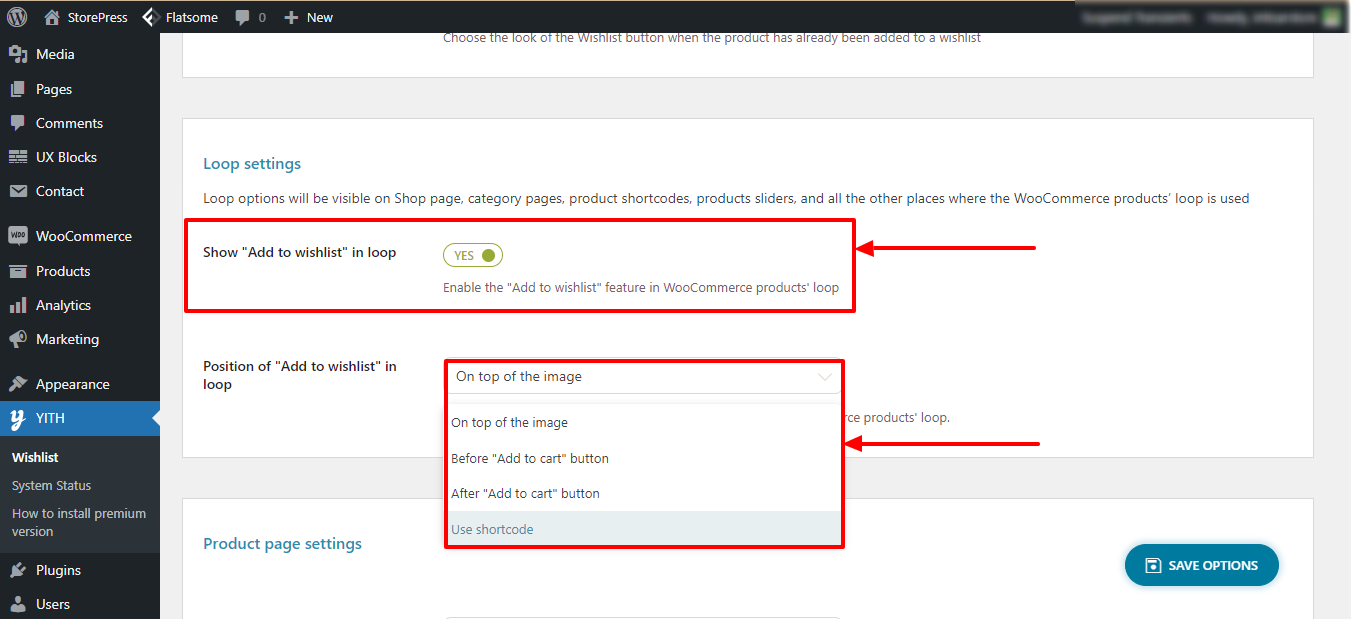 Step 6: You will find various customization of the wishlist here. For simplification, we’re avoiding further customization, you can do it if you need. After skipping other customization, scroll down and click on the Save Changes.
  Step 7: Then click on the third setting, named Wishlist page options. Copy the shortcode of it, and save it.
 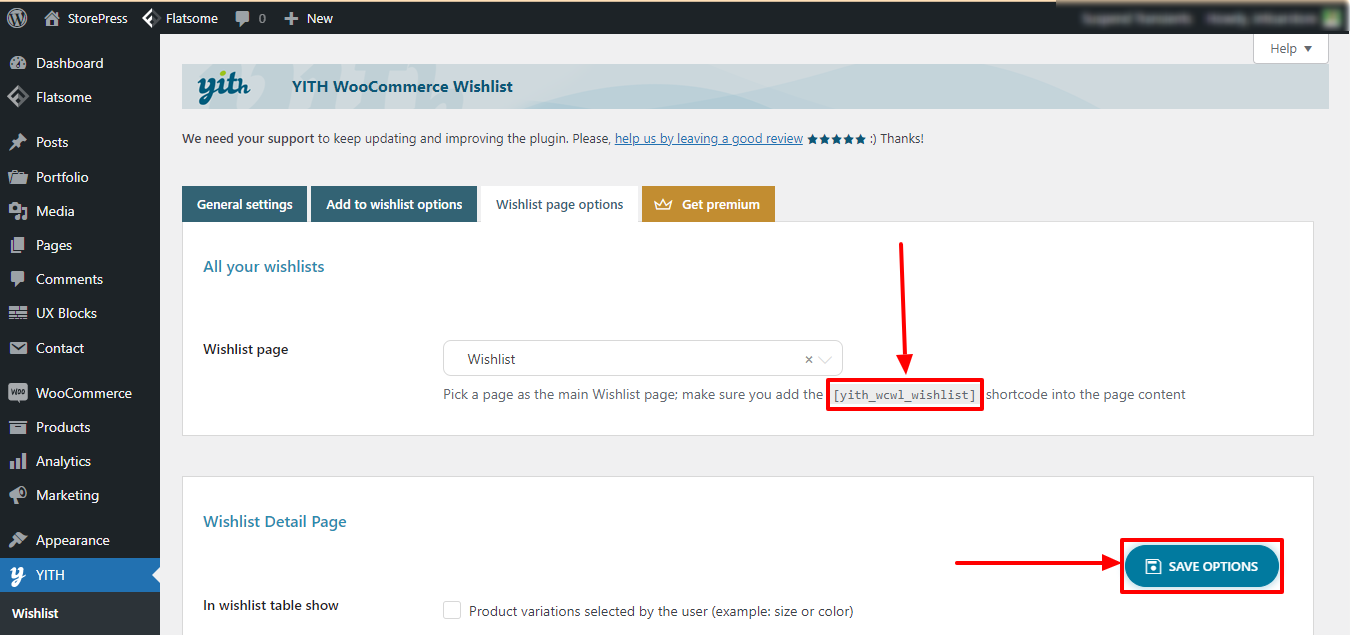 Step 8: Now, hover the pointer on Pages, and click on the Add New
  Step 9: A new blank page will appear. You can name it as you want. For demonstration purposes, we’re naming it as Wishlist. Then click on the add block, and select the shortcode.
 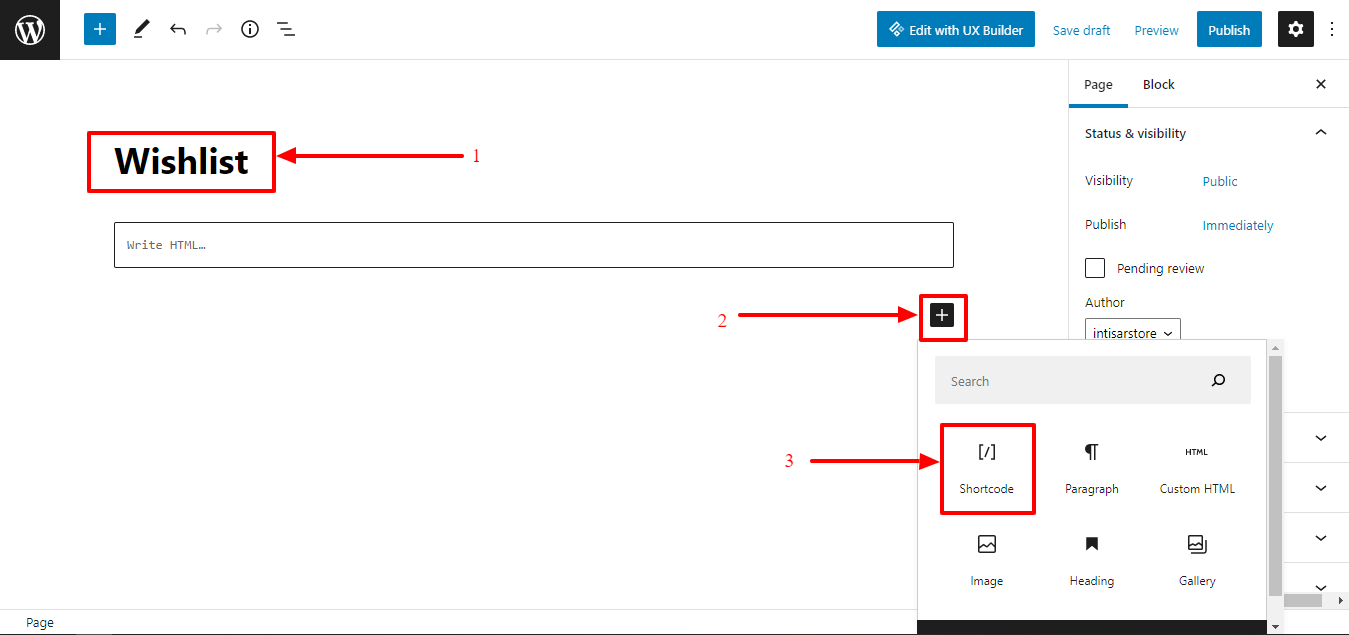 Step 10: Then paste the shortcode you’ve copied. Click the publish button on the top right.
  Step 11: Now, you’ve successfully added a wishlist to your Flatsome-powered website. Go to your website, and find the products. You’ll find a Heartshaped button that represents the wishlist. Clicking on it will add the product to your wishlist.
 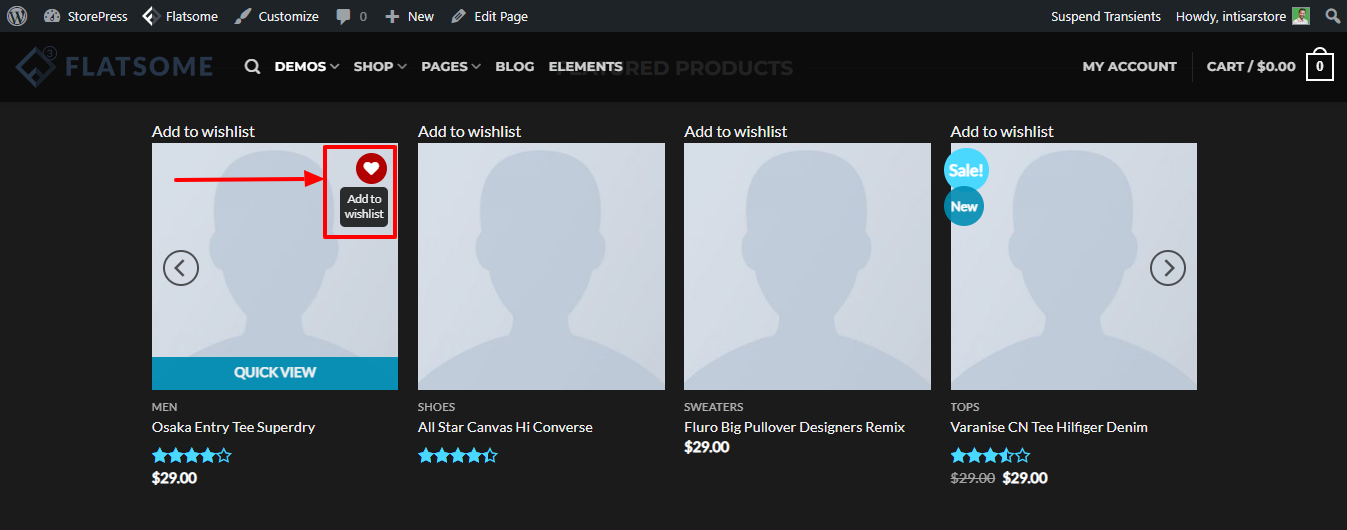 Step 12: After adding products to your wishlist, you need to find all the products you’ve added to the wishlist. Hover the pointer on the Heartshaped button again; you’ll find an option of Browse wishlist, click on that.
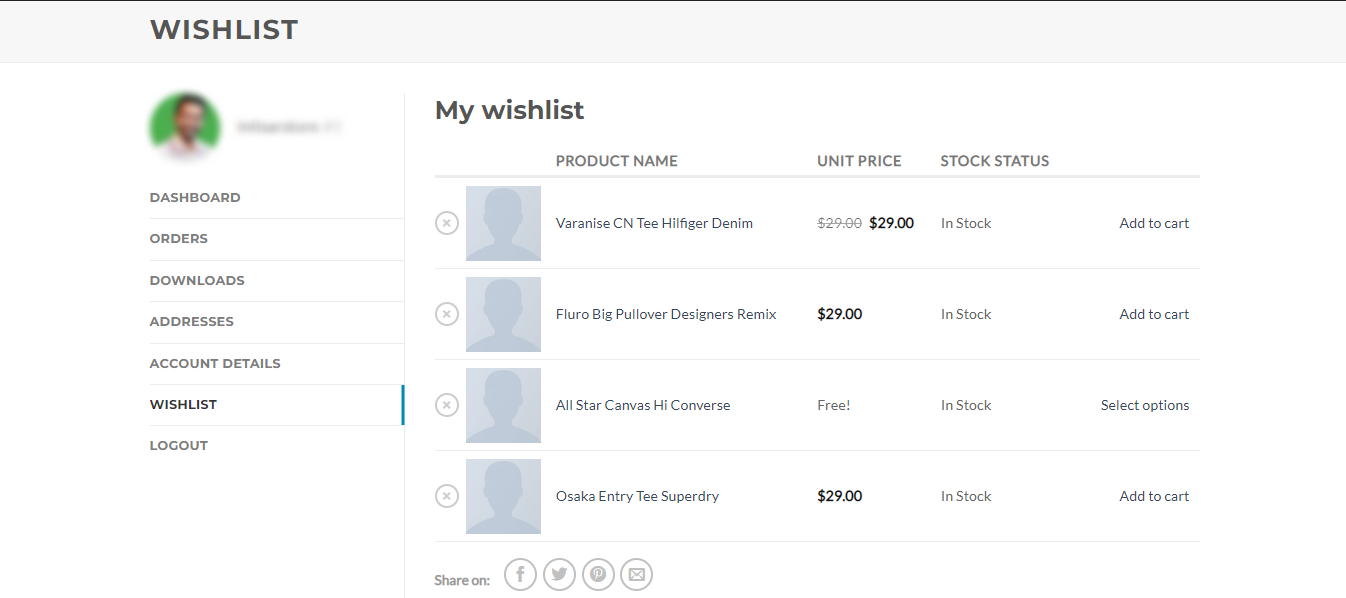
 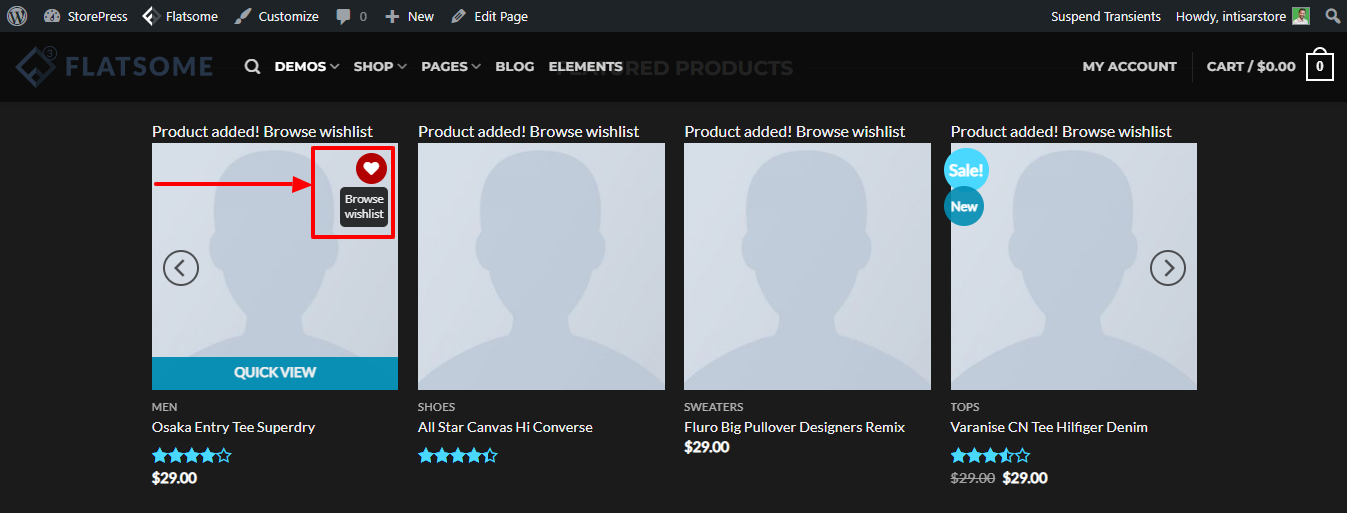 Final Preview: Now, you’ll find the wishlist page where you can find all the products you’ve added to your wishlist.