“How to start a blog website on WordPress” is the most common question of someone who wants to start his own blog in 2022. Building a blogging site is a complicated task requiring a lot of technical expertise. But WordPress has made it so easy that even a non-technical person can create a blogging site within 5 minutes. So, if you want to build a blogging site, WordPress is your best choice. Because it was WordPress that made blogging sites easy to build. Also, WordPress has contributed to making blogging popular. We’ve tried to make a complete tutorial for any beginner who wants to learn how to start a blog on WordPress. If you’re starting from scratch, you should follow the steps from the beginning unless you can jump wherever you need to.
Benefits of Using WordPress
- Most blogging websites are made with WordPress, so there are so many free resources and WooCommerce WordPress free themes that can help you to make a website.
- WordPress updates its technology frequently. So, using WordPress can keep your site updated with the latest technology. You can also know how to update the theme WordPress without losing customization easily.
- Handling multiple admins, editors, and other roles is easy using WordPress. You can control every permission of users in WordPress. In that case, You can use user management plugins in WordPress to easily manage your users.
- Blogging sites are heavily dependent on SEO. WordPress can give you the best SEO themes for WordPress to create your blogging site so that you can easily do SEO on your site.
- It offers many SEO plugins in WordPress that can make SEO easy for your website.
- It can save you from spamming comments and block malicious attacks with the help of the best comment plugins for WordPress,
Prerequisites for Starting a Blog
Writing on your website is a different and more powerful experience than writing on others. If you want to learn how to start a blog on WordPress, there are some extra tasks you need to focus on, such as needing a domain, hosting, learning a few things about websites, etc. Make sure you’ve such things before starting your blog.
- A relevant domain name for your blog
- A hosting plan according to the need
- Have a payment method to pay for the domain and hosting services
- If you hire a developer, the process will be smooth. But if you want to maintain your blog, you should have the mentality of learning new things continuously for upgrading your blog
Start a Blog Website on WordPress in 2023
Setting Up Domain & Hosting
Before starting, you need to start with the domain, and hosting solution. Choose a service site for the domain, and hosting, buy a domain as your desired name. For example, you can start with DreamHost. You can also see the DreamHost review for a better understanding of this hosting. Step 1: Go to DreamHost, and click on the Get Started button on the top right of the homepage. 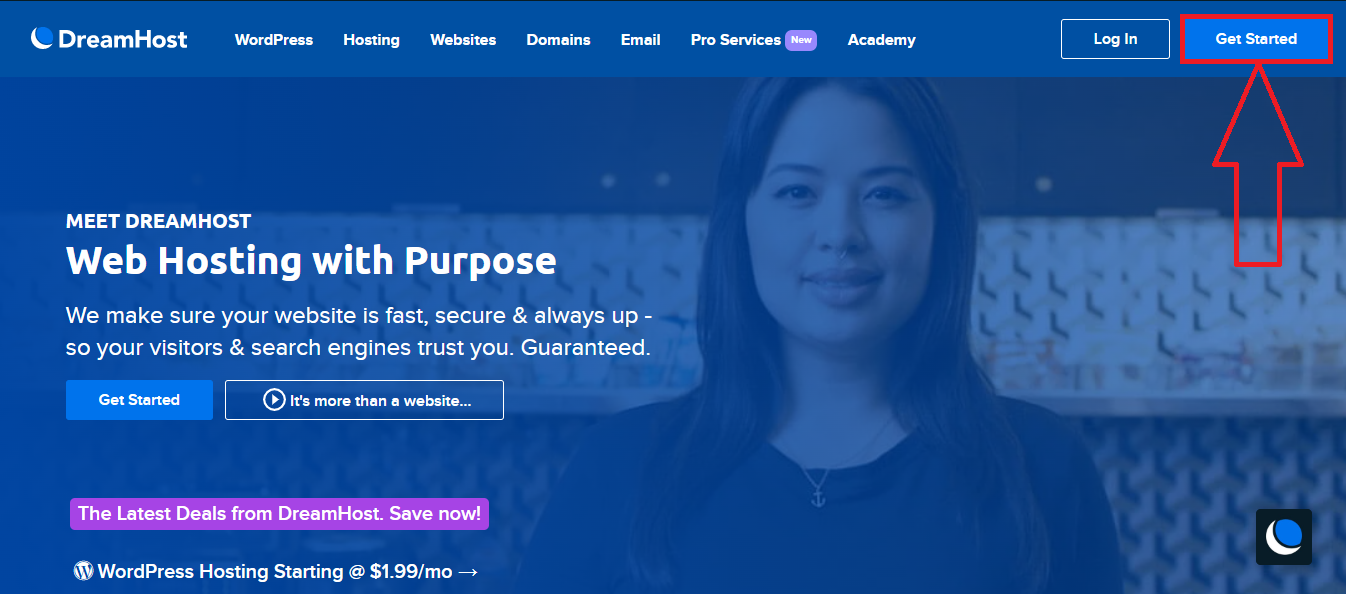 Step 2: A new window will appear. There are 3 options for you to choose from. If you don’t have any domain and want to buy one, click on the Register a new domain.
 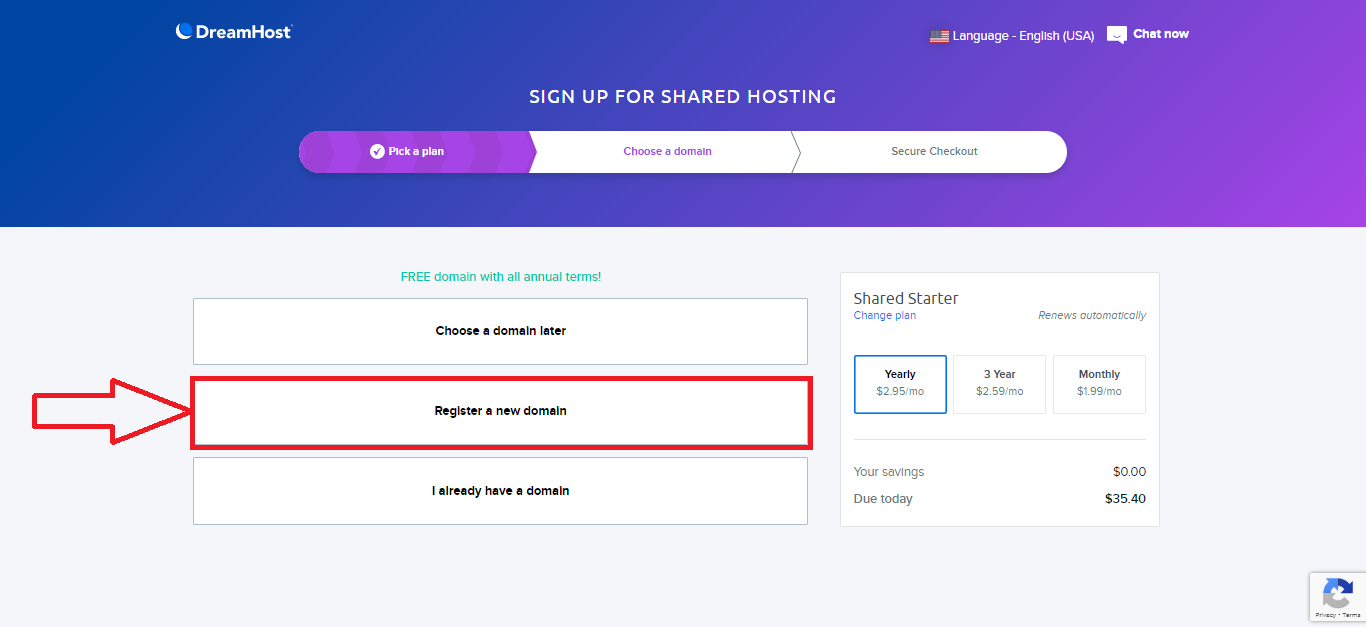 Step 3: Click on the search bar and try finding your desired domain name. Then add it to the cart.
 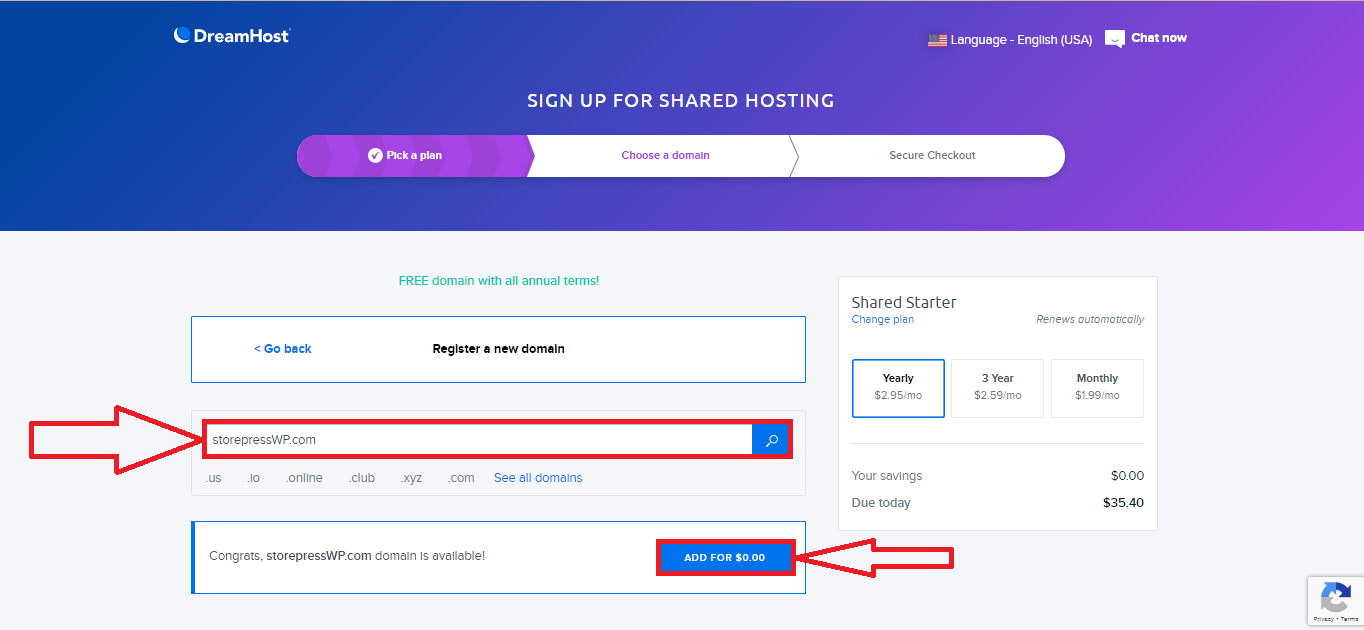 Step 4: After buying a domain, go to the DreamHost panel & login using the credentials.
 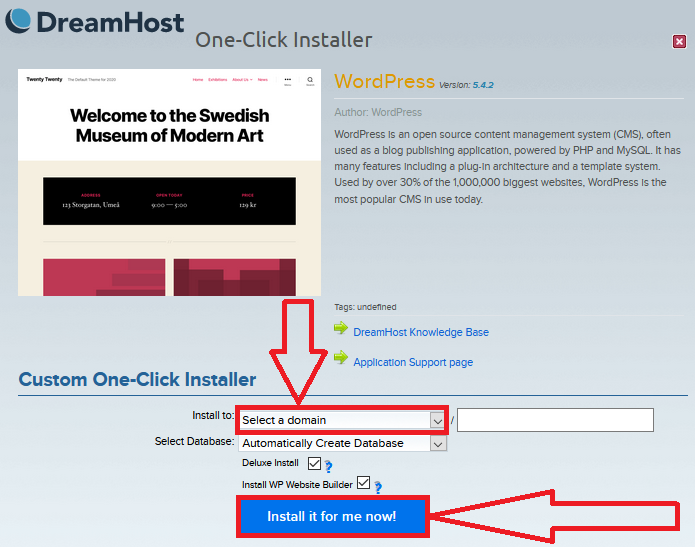 Step 5: To install WordPress, after logging in, go to DreamHost Panel. Step 6: Select the domain where you want to install WordPress. Then click on the Install it for me now! Step 7: After installing, go to the WordPress Dashboard by using yourdomain/wp-admin You can also use another WordPress hosting website that is preferable for you.
Setting Up WordPress with Your Domain
Step 8: Go to the Dashboard, and hover the mouse pointer on Setting. Then click on the General. 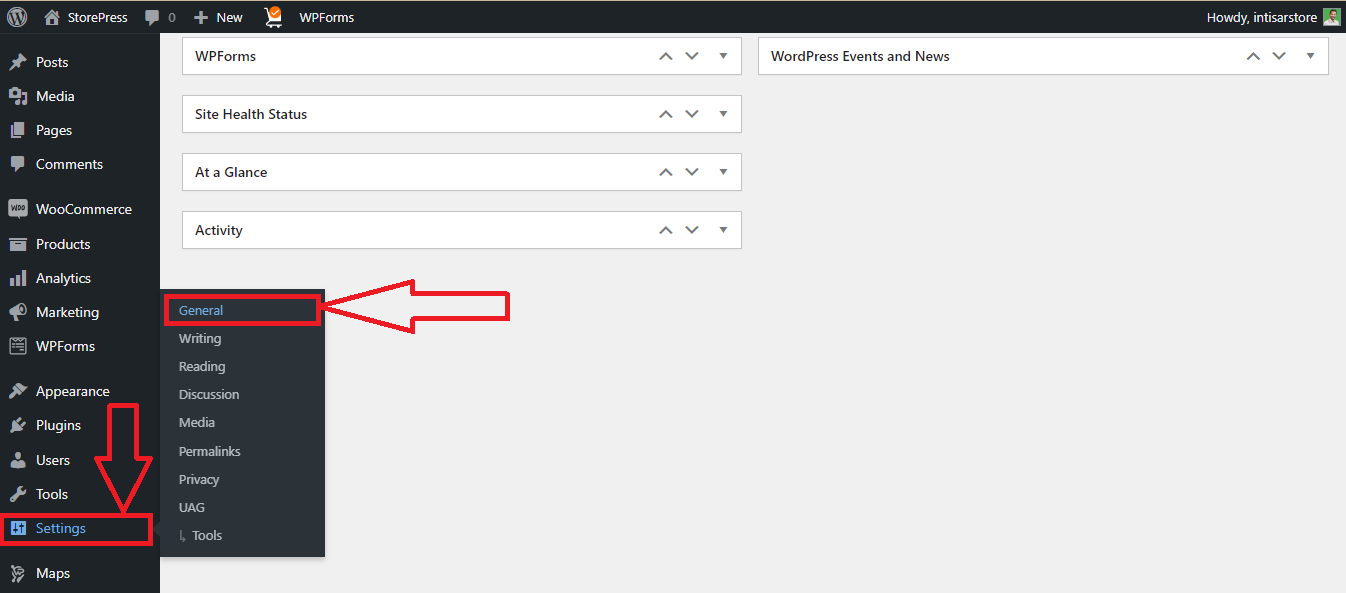 Step 9: You’ll find a window from which you can change the Site Title and Tagline.
 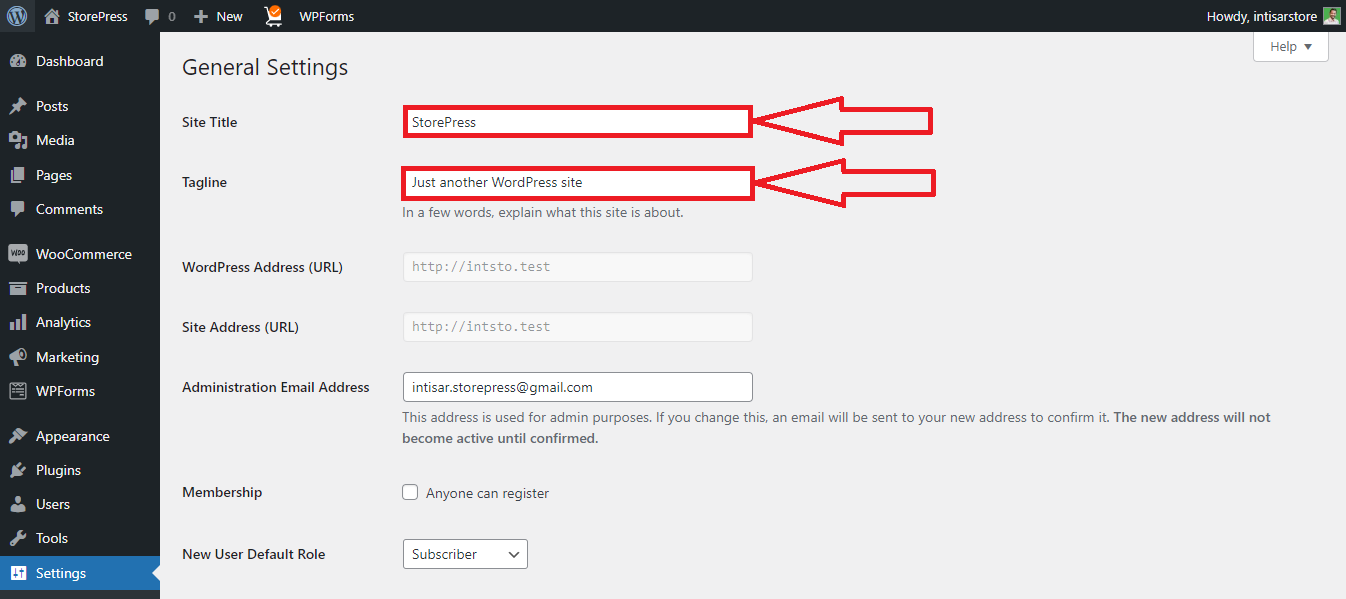 Step 10: Here, you can set your site Address(URL) and WordPress Address
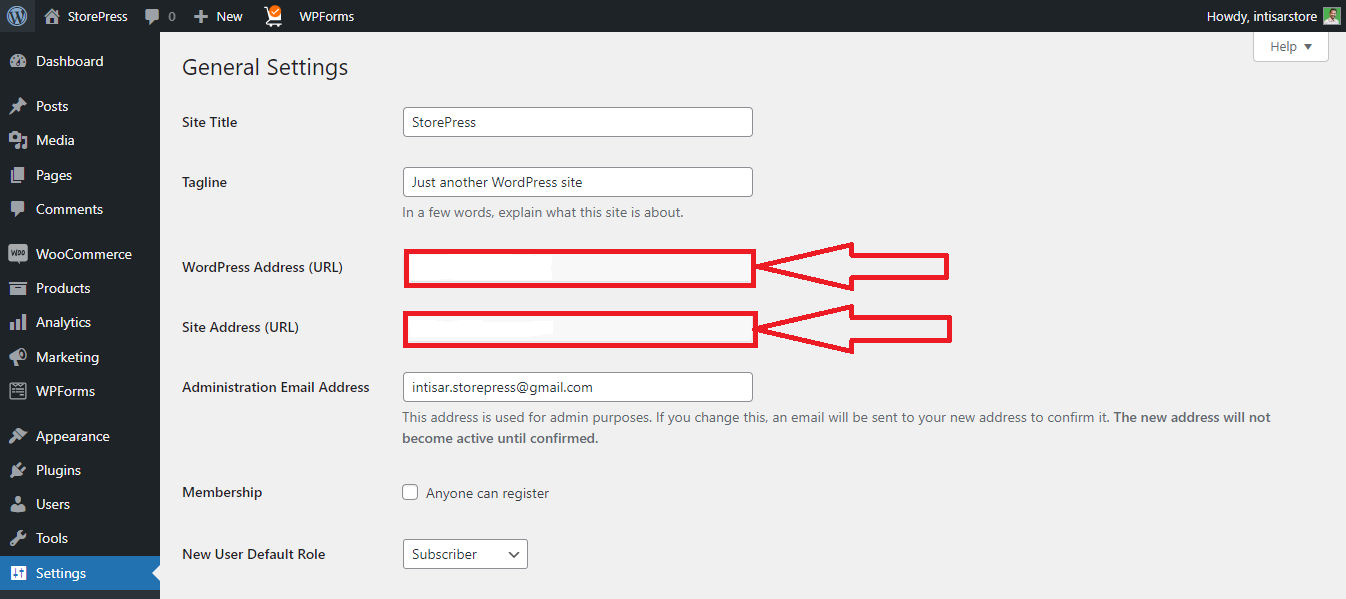
Activate Your Theme in WordPress
Step 11: Go to the WordPress Dashboard, hover the pointer to the Appearance, then click on the option, Themes.  Step 12: Then, a new page will appear. There will be a list of installed themes, choose any of them or click on Add New to add a new theme.
  Step 13: For demonstration purposes, we’re using the Beetan theme, you can use any theme you feel comfortable with. There are many blog themes for WordPress you can use. But we strongly recommend you use Beetan because it’s a brand new theme with the latest technologies and features. To add a new theme, type Beetan on the search box, then install and activate it.
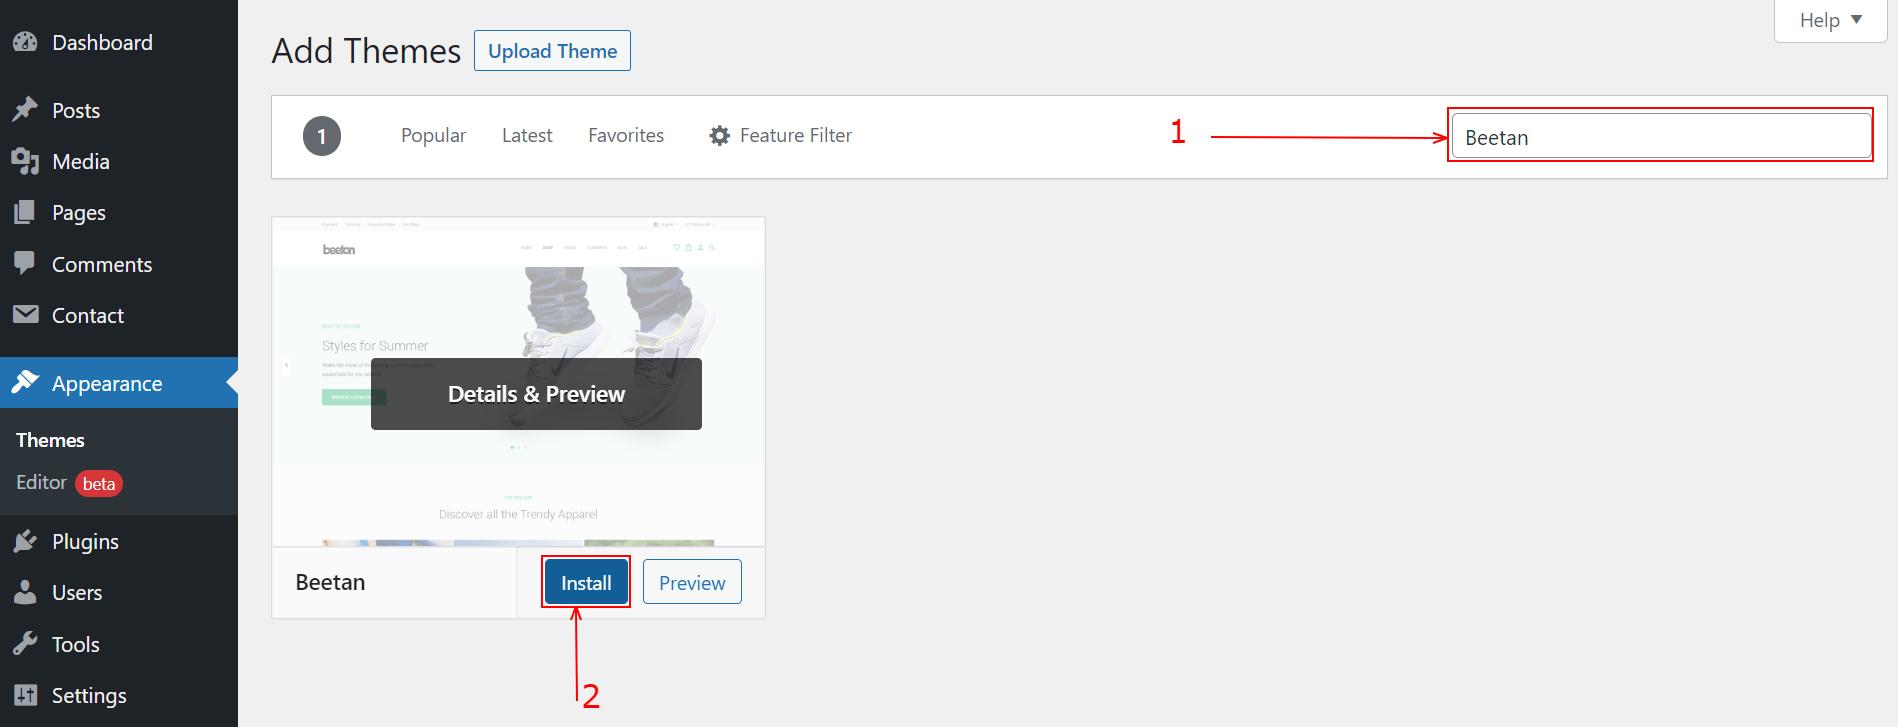
Setting Up First Blog
Step 14: Your site has been created. Now, you need to set content in it. To add a blog, go to the Dashboard, hover the cursor on Posts, and click All Posts. 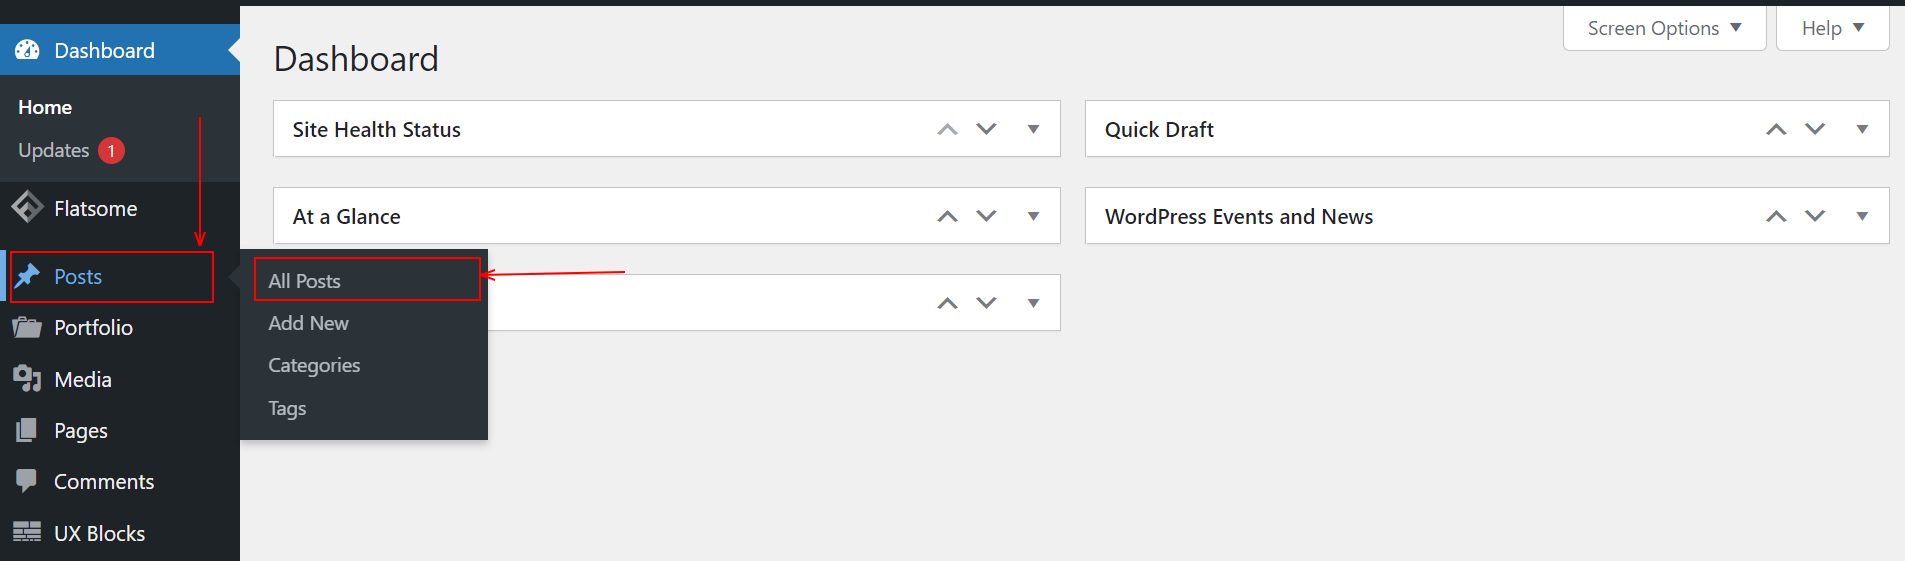 Step 15: The post page will appear. You’ll see all posts here. Click on the Add New to add a new post.
 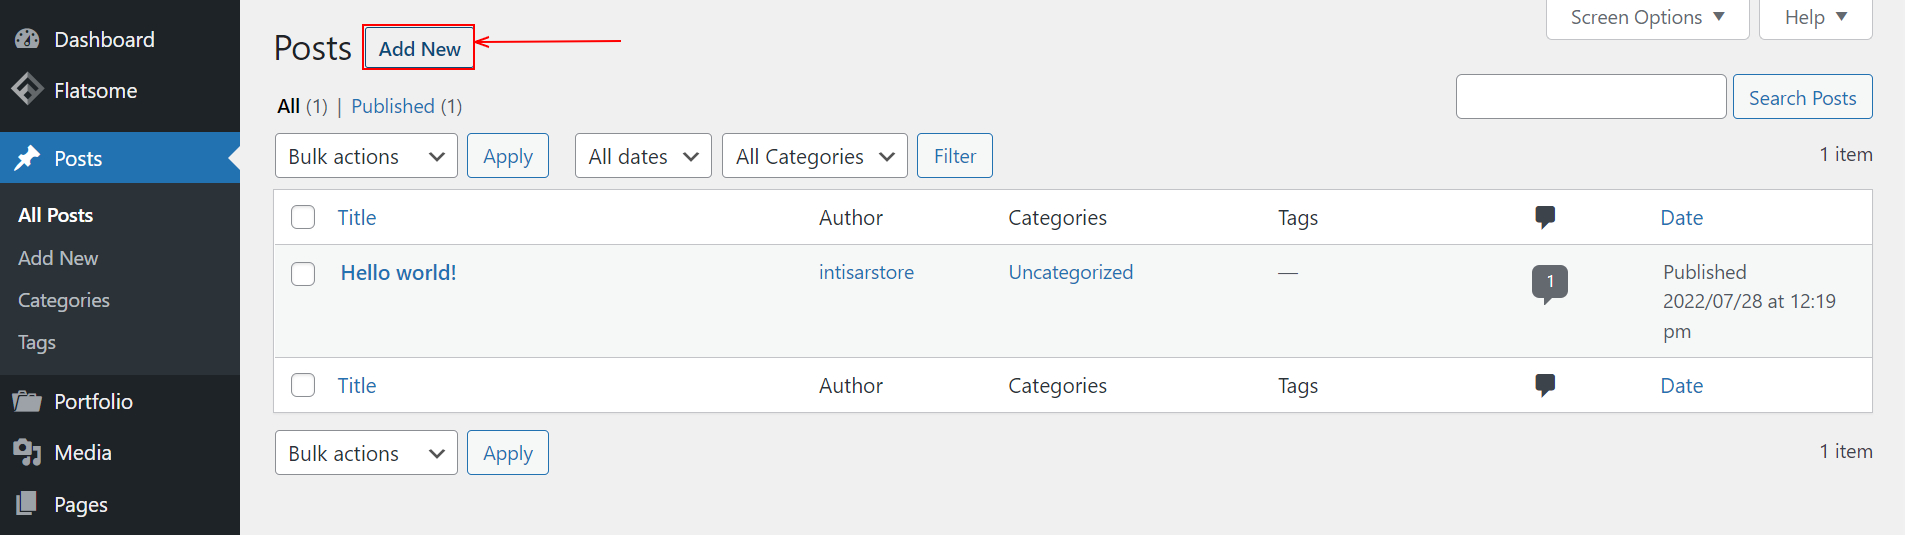 Step 16: Now, a blank post page will appear. Here you need to add a title on the top. Under the title section, there is an HTML section and a Plus sign that can help you to add new content.
 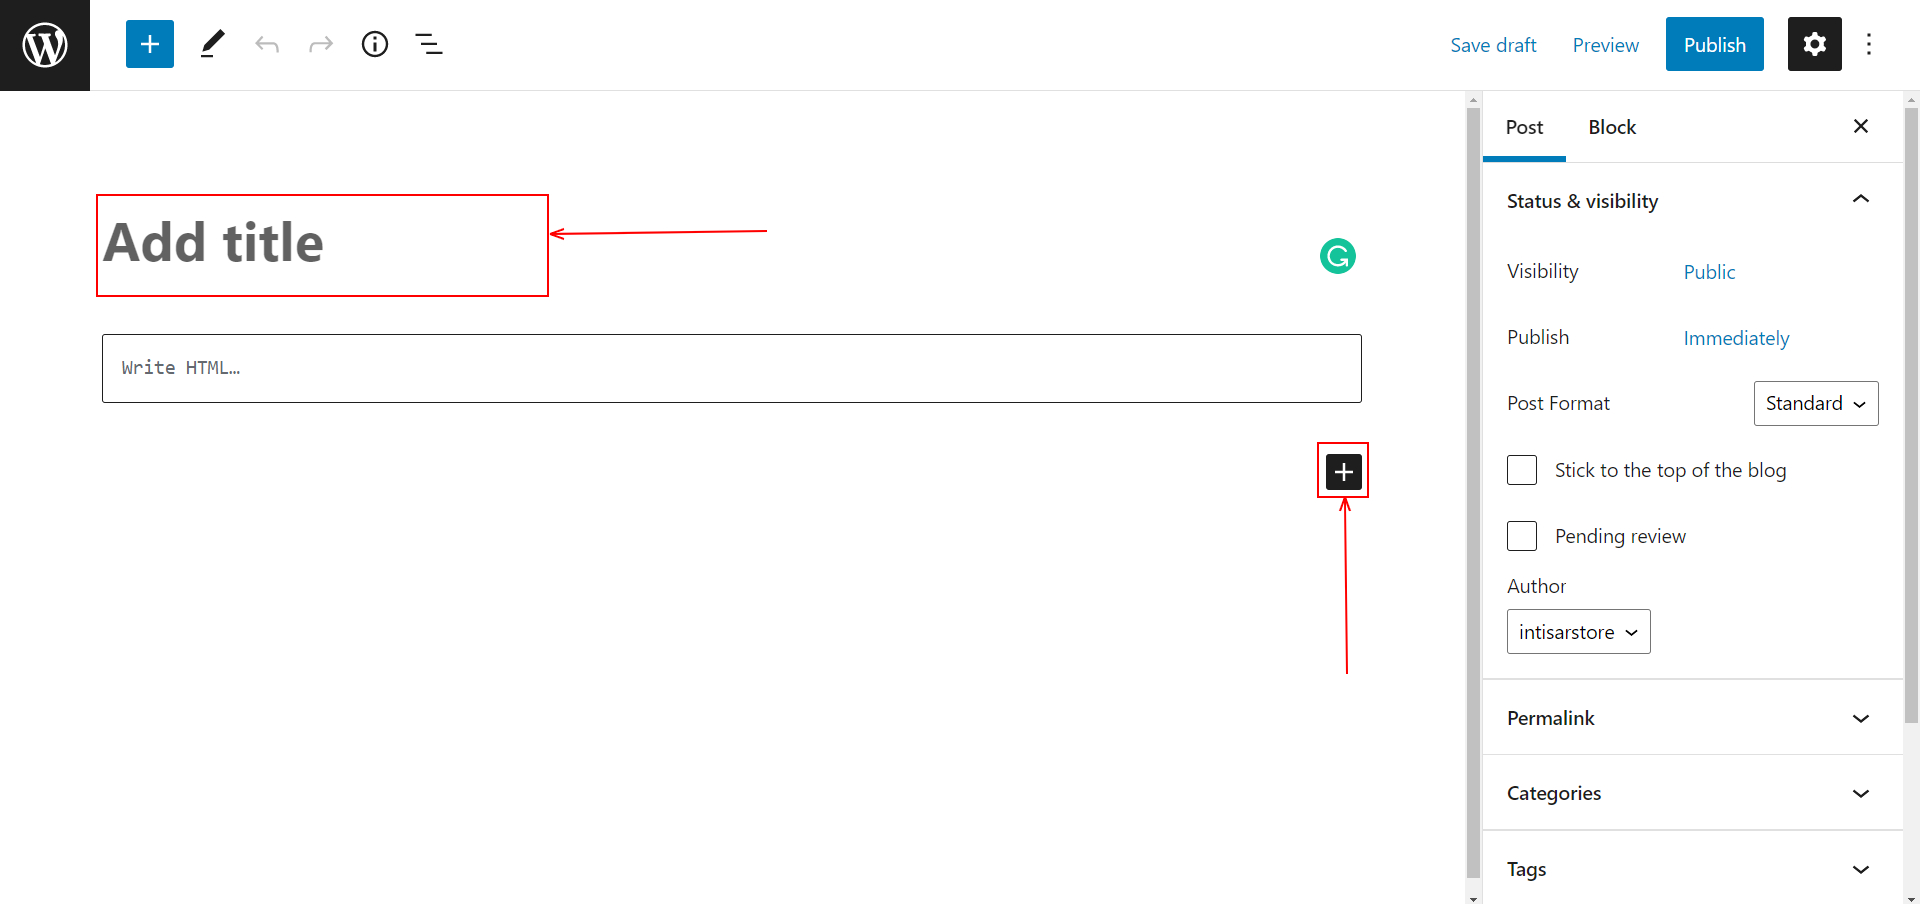 Step 17: We’ve put a title there. After that click on the Add Block section, and it suggests some new sections. Choose any block according to your need, we’re selecting Paragraph for demonstration purposes.
 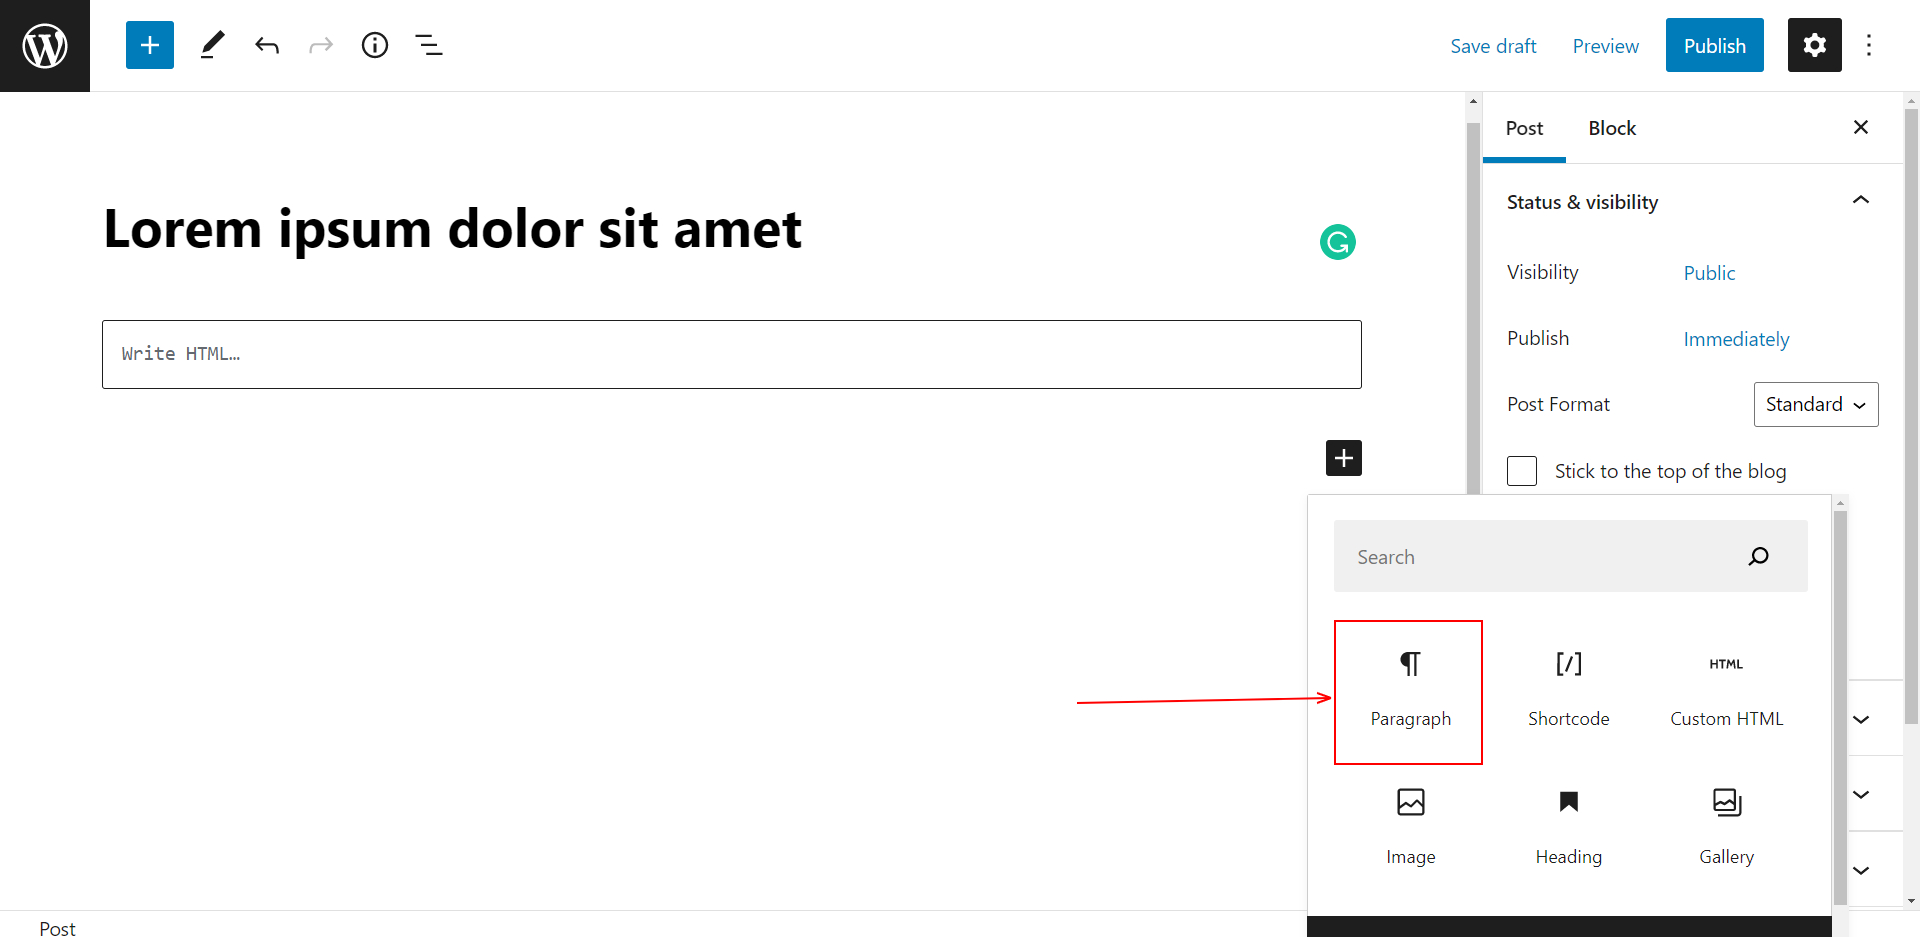 Step 18: A new section will appear on the page. We’ve put some texts here. There are many sections here from which you can customize the article as your need. After completing the article, click on the Publish button on the top right.
 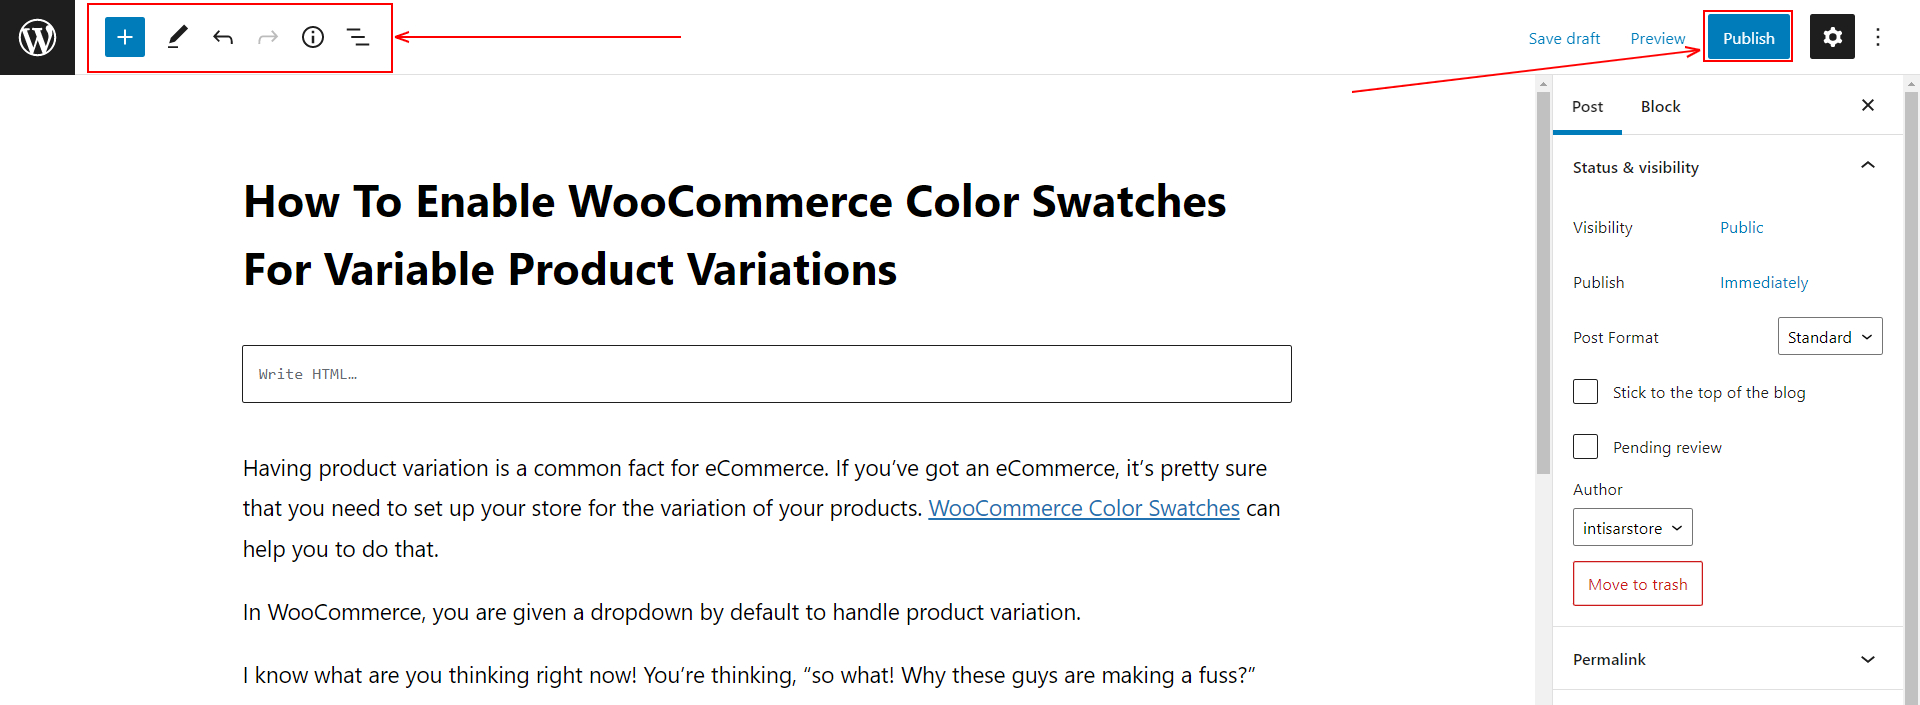 Step 19: Now, go to the site. You’ll find two blogs on the homepage. The default setting of Beetan shows full articles on the homepage, you can easily limit it.
 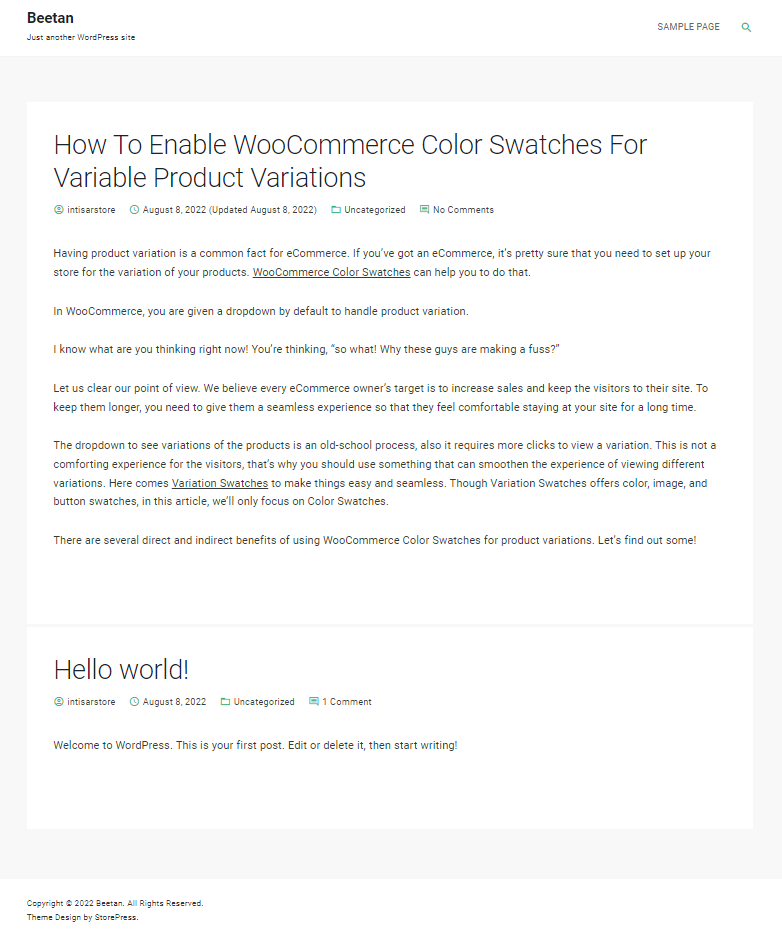 Step 20: To limit how much content a blog will show on the homepage, go to the main website first. You’ll find an option named Customizer at the top of the page. Click on that.
 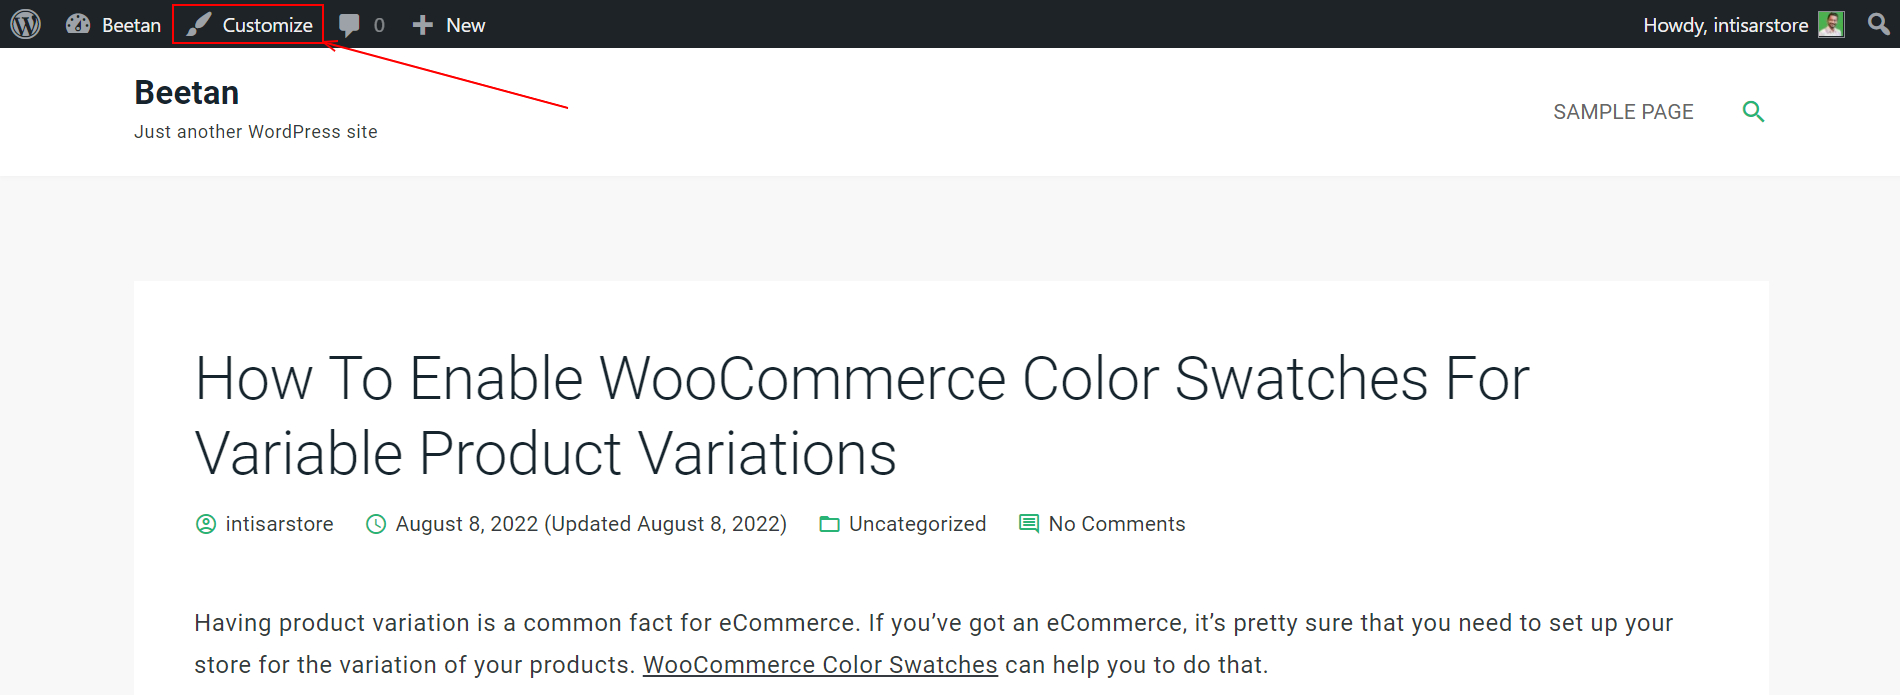 Step 21: Then a sidebar will appear from the left. Click on the Blog Options from there.
 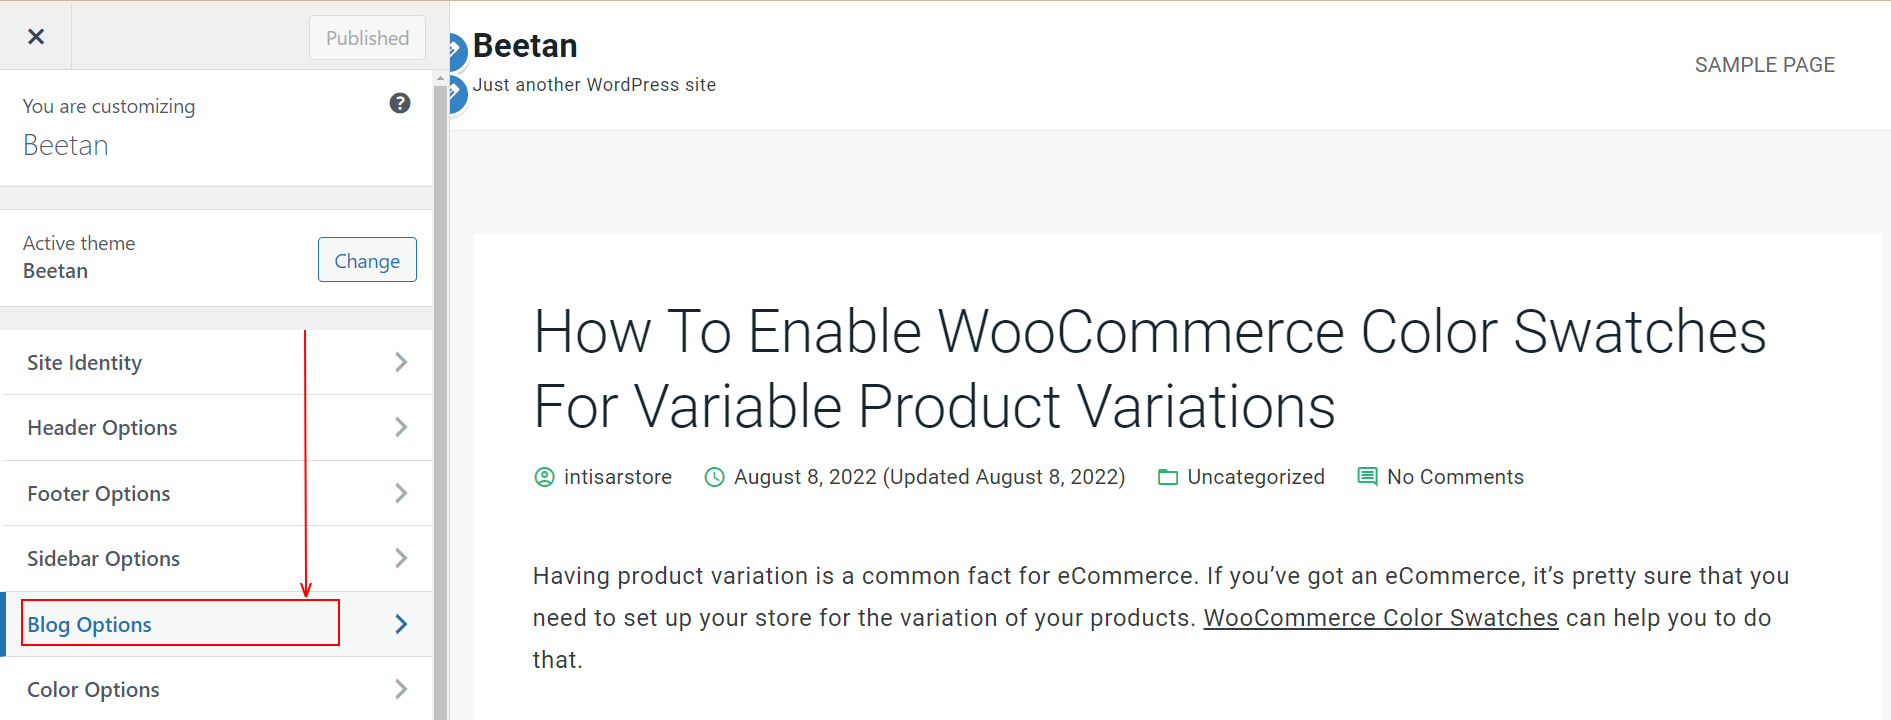 Step 22: Then choose Show Summary to show only the summary, and publish it.
 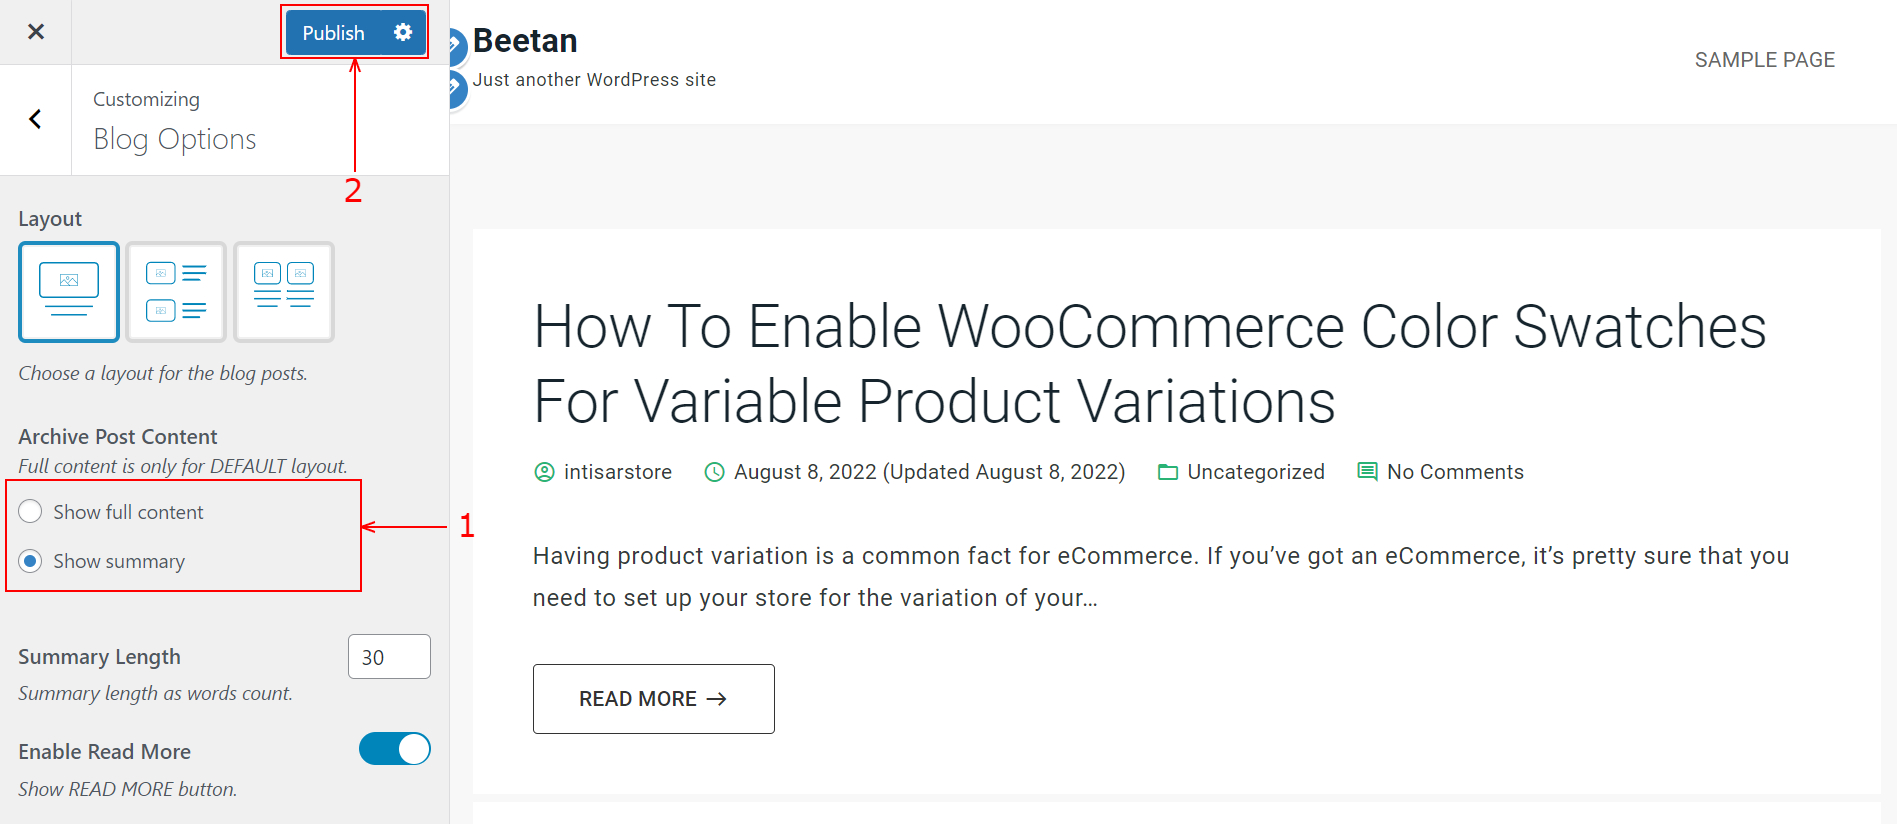 Final Preview The final preview of your blogging site will look like this.
Alternative Options Instead of WordPress– In Case You Don’t Have Domain & Hosting
Many CMS(Content Management System) is available for making blogging sites. Among those, WordPress is the most popular. Even 42% of all websites are made on WordPress. So, it’s tough for anyone to find a better option than WordPress. If you don’t have any domain or hosting plan, it’ll be impossible for you to use WordPress. In that case, you can use WordPress.com or Blogger. Those will be providing you with a free domain and hosting for your blog. But you’ve to keep their given domain name, and you won’t have 100% authority over your site.
Conclusion
Congratulations on building your first blogging website. This is the easiest way to create a blogging website using WordPress. Though Beetan is a WooCommerce-based theme, it gives a top-notch performance when used for a blogging site. It also has some blogging-specific customization that can help you to customize your website as you like. If you want to know how to add a widget on a blog site you can check out another article. Please let us know if you face any issues while following this tutorial. We will try our best to help you.
