You need to use as many SEO hacks as possible to rank your website. You can create a sitemap for WordPress is one of the useful techniques to index your site on Search Engines quickly.
Are you wondering what a sitemap is and how to add it to your WooCommerce website?
From an SEO standpoint, every site should have a sitemap. In this tutorial, we will show you how to build a sitemap that improves your SEO optimization tactics with the help of different SEO plugins in WordPress.
What is a sitemap?
You create a lot of excellent content on your website. But that content is only valuable to humans and search engines when they can find it.
A sitemap helps you accomplish that by essentially giving search engines and humans a map of all content on your website. It helps to make an essential tool for them (both usability and search engine).
Why do you need to create a sitemap for WordPress in the WooCommere store?
A sitemap tells search engine crawlers about the structure of your website. Whenever you add something new to your site (a new page, a new blog post, or a product), your sitemap is updated and communicates with web crawlers to tell the search engine. It shows the search engine that there is something new on your website.
The content on your site will eventually be crawled by the search engine, even without a sitemap. But some pages may not be indexed if your website structure is not well-organized. On the other hand, a sitemap will make crawling your site much sooner and easier. You can use any free online store templates and create a sitemap with our tutorials.
Now the question is how to generate a sitemap for your WordPress site.
Keep reading this guide. Below, we will show you how you can create an XML sitemap.
What is an XML sitemap?
An XML sitemap is a list of different pages on a website. XML is a short form of Extensible Markup Language, a way to display information on a site.
You want Google to crawl every essential page of your website. But, sometimes, pages end up without internal links pointing to them. That makes them very hard to find.
However, an XML sitemap lists a website’s essential pages to make sure Google can find and crawl them all. It helps to understand your site structure.
Note: an XML sitemap is not typically visible to your site visitors, unlike a regular sitemap made for people.
What websites need an XML sitemap?
Google’s documentation says XML site maps are beneficial when –
- When your site is vast.
- Your site is new and has few external links to it.
- When your site has a lot of rich media content (images, videos, etc.).
- Your site has an extensive archive of content pages that are isolated or not well-linked to each other.
These types of websites will benefit the most from an XML. However, we think every site needs Google to be able to know when they are last updated.
How to Create an XML Sitemap for WordPress?
There are a couple of ways that you can use to make an XML sitemap for your website. But here, we will show two popular methods to create an XML sitemap in WordPress. You can choose anyone that works best for you.
Creating an XML sitemap using the Yoast SEO plugin
One of the easiest ways to generate an XML sitemap in WordPress is using the Yoast SEO plugin.
You can compare Rank math vs Yoast plugin to get a better idea.
The main benefit of using Yoast for sitemap is that it updates automatically (dynamic sitemap).
Yoast SEO creates an XML sitemap for your website automatically. First, you need to install and activate the plugin. Here is a step-by-step guide on how to install WordPress plugins.
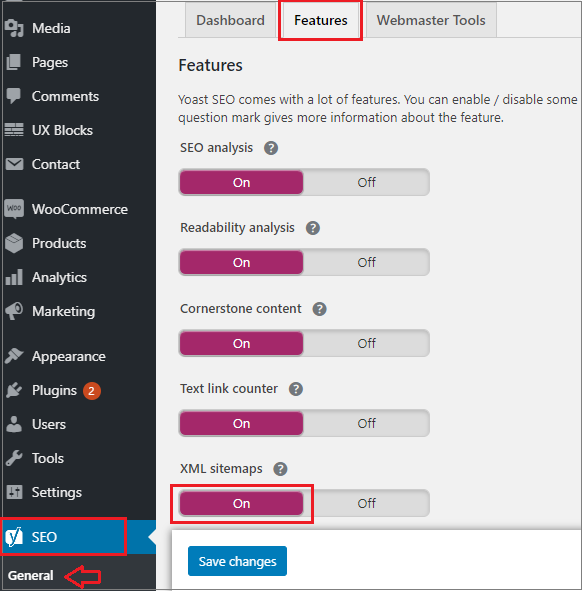
Once activated, head to General from the SEO option and select the ‘Features’ tab.
Then you need to scroll down to the ‘XML Sitemap’ and turn the option on. Click on the Save Changes button to store your changes.
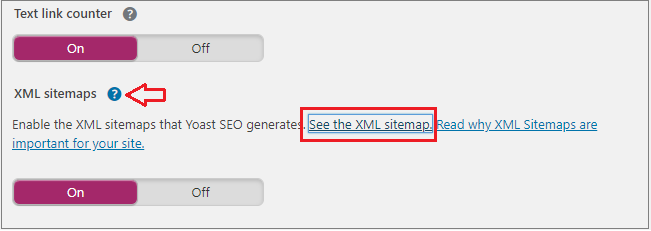
Next, click on the question mark icon next to the XMP sitemaps option on the page.
To view your live XML sitemap generated by Yoast SEO, click on the ‘See the XML Sitemap’ link.
You can also find your XML sitemap by adding sitemap_index.xml at the end of your website URL. For example – http://home.test/sitemap_index.xml
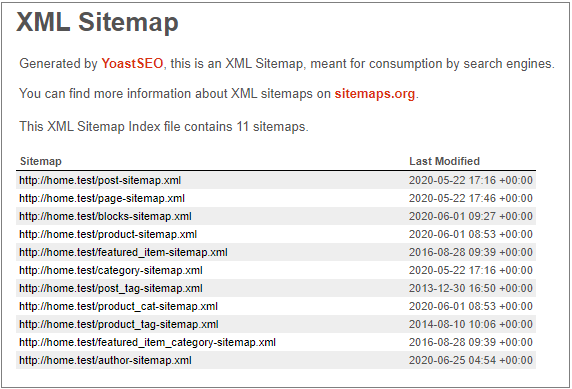
Nevertheless, running a WooCommerce online store will also generate a sitemap for your products.
Create an XML sitemap using the Google XML Sitemaps plugin
This method is recommended if you don’t want to use Yoast SEO’s XML sitemaps feature.
First, you need to install and activate the plugin. You can check this step-by-step guide on how to install WordPress plugins.
Once you have activated the plugin, it will automatically generate an XML sitemap for your website.
You can view it merely by adding sitemap.xml to your website’s address. For example – http://home.test/sitemap.xml
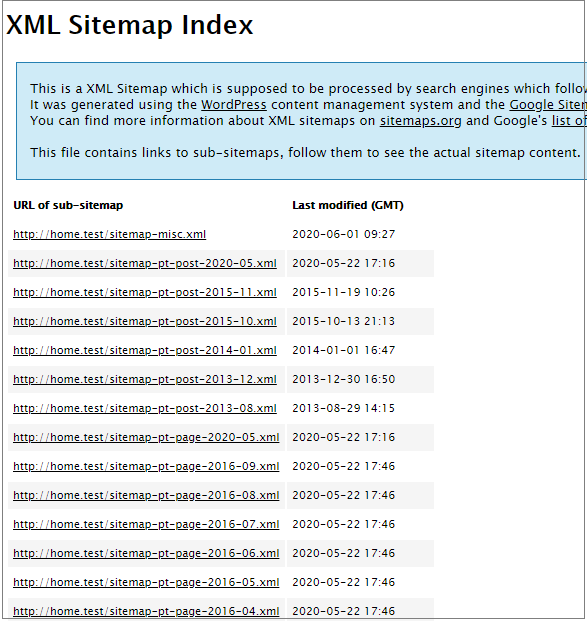
This plugin works out of the box for most blogs and business websites. You can review the plugin settings to ensure you are not missing anything.
Head to XML- Sitemap under Settings to configure the plugin.
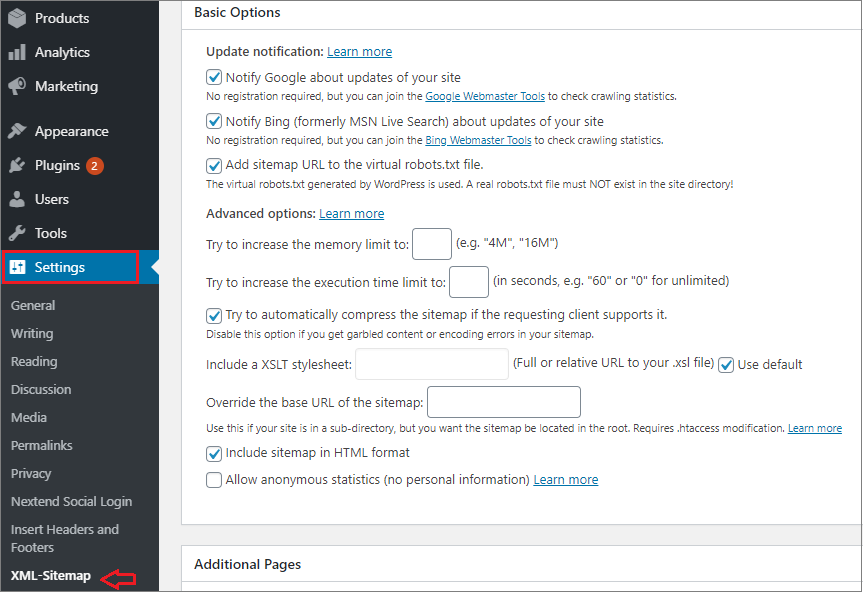
The plugin will give you status information at the top. Also, it will notify you if the plugin cannot ping any search engine.
You can check the plugin’s primary options, though the default settings would work for the best WooCommerce hosting environments.
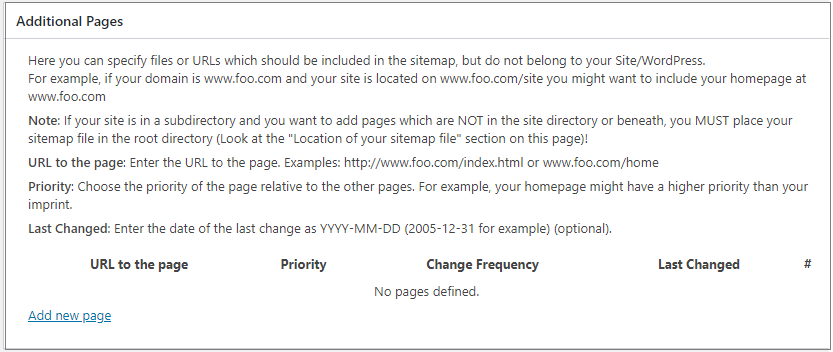
In the next step, you will see the Additional Pages section. You can manually add pages to your XML sitemap. This comes in handy if your website has static HTML pages not created by the WordPress CMS.
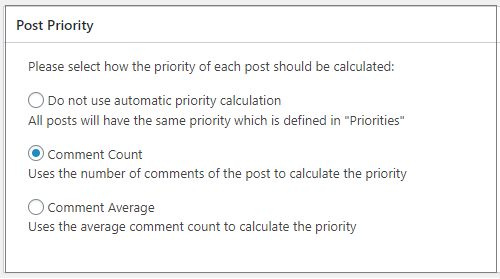
Now you can adjust how the plugin assigns priority to posts. By default, it uses the number of comments on the post to calculate the priority.
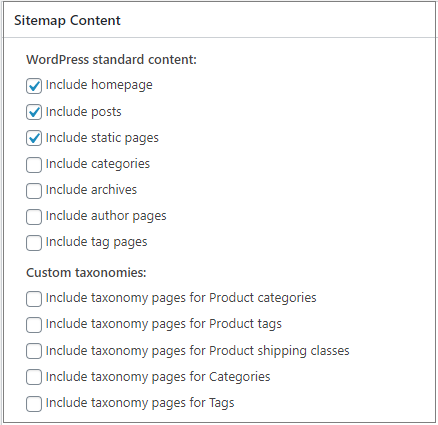
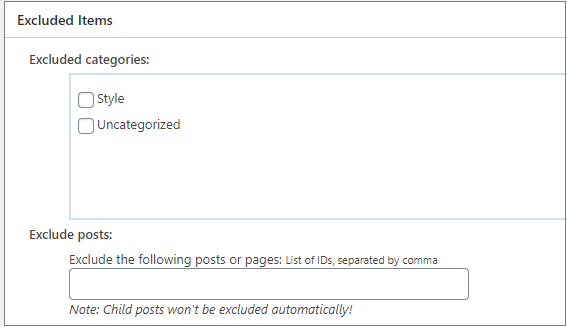
The next two sections of the plugin’s settings page allow you to include and exclude content from your WordPress sitemap. For example, you want to add the ‘Products’ content type to your sitemap.
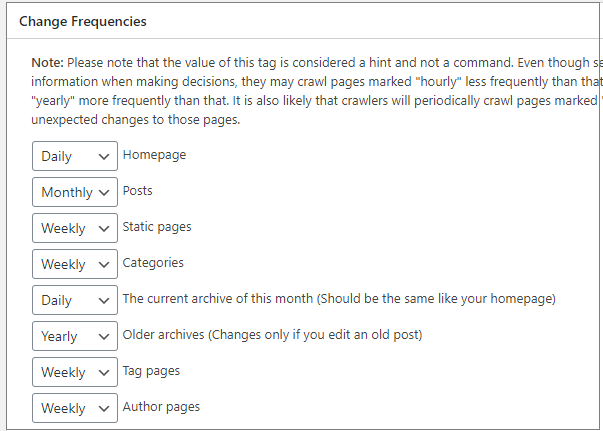
After that, you can adjust the priority and frequency of your sitemap contents. Search engines may follow or ignore these tags based on their criteria.
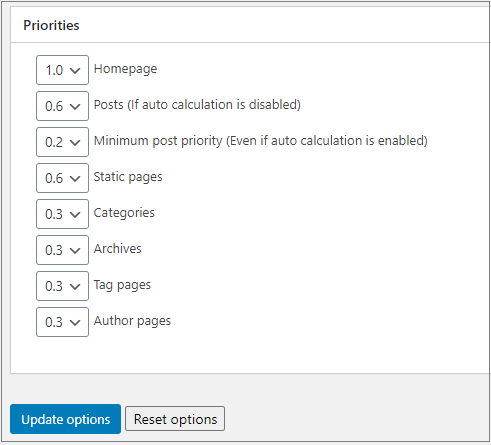
Lastly, click on the ‘Update options to save your changes.
You will need to submit the main sitemap index file for submitting the sitemap to search engines.
How to submit your XML sitemap to Google?
Before submitting your sitemap to Google, you must verify your website with Webmaster Tools. If you haven’t verified your site with Google Webmaster Tools, you can follow this guide.
First, you must sign in to your Google Search Console to submit your sitemap. Once you have logged in, click on the website property where you want to add a sitemap.
You can easily follow this guide to know how to make sitelinks appear on the Google search console.
Click on Sitemaps from the left bar of your account dashboard. Now you need to enter the last part of your sitemap URL under the Add new sitemap field and hit Submit button.

You will start to see information on your sitemap on this page if everything is set up correctly.

Click under Submitted Sitemaps once Google has crawled your sitemap.
If it shows the ‘Sitemap index successfully,’ that means Google has crawled your sitemap successfully.
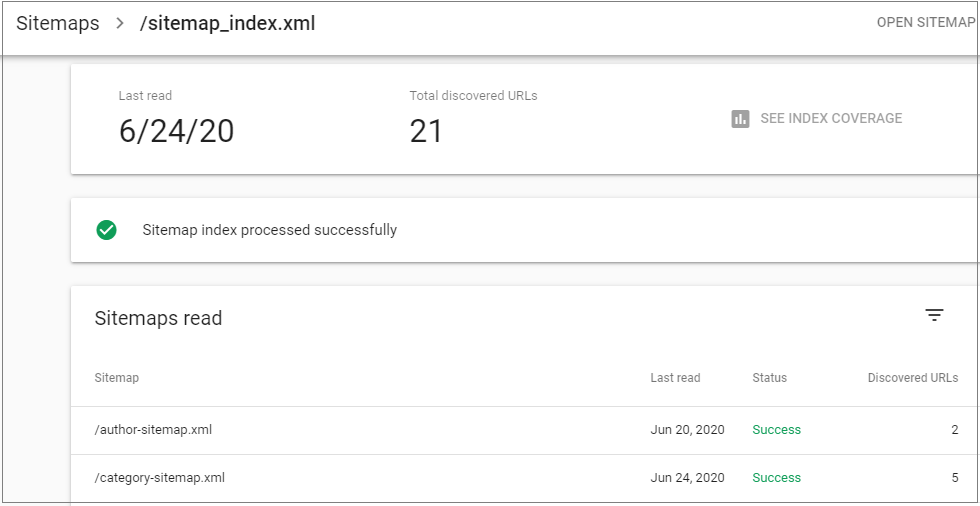
The report will show you how many URLs Google found in your sitemap and ended up in the Google index.
You can check the search coverage by clicking on the Coverage link. It will show you how many URLs Google found in your sitemap.
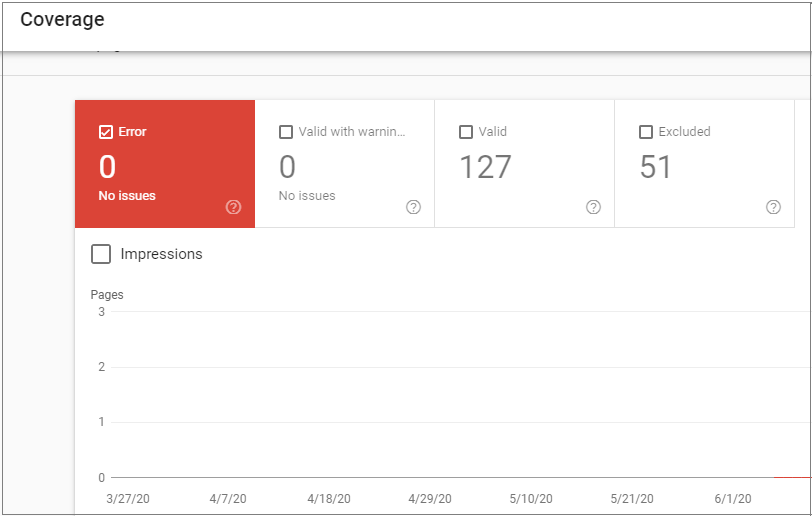
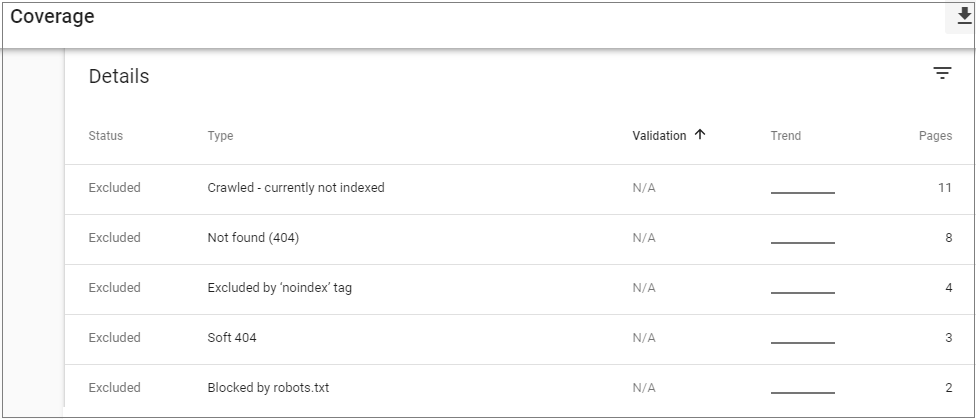
The chart will also show you actual URLs excluded or not indexed by Google.
We hope you can now create an XML sitemap for your website by following these guidelines.
You can also insert a sitemap on your WP site manually without the help of any WordPress plugin
You need to create a sitemap for your website if you are ready to take your SEO tips and tricks to the next level. Ensure you properly format, compress and submit your XML sitemap to get the most advantages.

