Widget is an inseparable part of a WordPress website. It lets you display almost any content or functionalities, making it easy for your users to access. In this tutorial, we will show you step-by-step how to add widgets in WordPress easily and if you don’t know how to start a blog website, don’t worry we covered it in another article. By the end of this tutorial, you will be able to add a WordPress widget of any kind in any widget section of your WordPress website. Note that the type of page templates, widgets and widget area varies depending on your theme. That’s why we recommend using the best WordPress theme for your website. This widget tutorial is compatible with the best blog themes on WordPress.
How to Add Widget in WordPress Step By Step Tutorial 2022
Step 1:
Let’s add a widget in the sidebar of a page.Go to the WordPress dashboard. Hover the mouse pointer and ‘Pages’ and click on ‘All Pages.’
Step 2:
Find the page you want to add the widget on. Hover the pointer on the page title and click on ‘Edit.’
Step 3:
Now click on the ‘Settings’ icon at the top right corner.
Step 4:
On the page settings, click on ‘Template’ and then choose ‘Page-Left Sidebar.’ Types of page templates may vary depending on your current theme. You can go through our best WooCommerce themes free list to find a modern and feature-rich theme.
Step 5:
Now click on ‘Update’ to save the settings and go back to the WordPress dashboard.
Step 6:
On the dashboard, hover on the ‘Appearance’ option and click on ‘Widgets’.
Step 7:
On the ‘Widgets’ page, click on the ‘Sidebar’ widget area. The type of widget areas depends on the theme you are using. Modern and Creative WordPress themes are a better choice for this purpose.
Step 8:
Now click on the ‘+’ icon to add a widget of your preference.
Step 9:
Click on the ‘Browse All’ button to see available widgets.
Step 10:
For example, scroll down on the available widgets section and click on ‘Latest Posts’. The variety of Widgets depends on the WooCommerce WordPress themes you are actively using.
Step 11:
We can see that the selected widget has been added to the sidebar section. Click on the added widgets on the sidebar section and you will find various customizing options like grid view, list view, change block style, options, etc.
Step 12:
Now simply click on the ‘Update’ options in the top right corner to save your widget.
Step 13:
Now open the page you wanted your widget to display on. We can see that our added widget is displayed perfectly in the page’s left sidebar.
Conclusion
We have guided you through each step of adding a widget to your WordPress website. You can add any widget to your website by following these above-mentioned steps. If this tutorial was helpful to you feel free to share it with your friends. You can read more about the widgets WordPress forum.

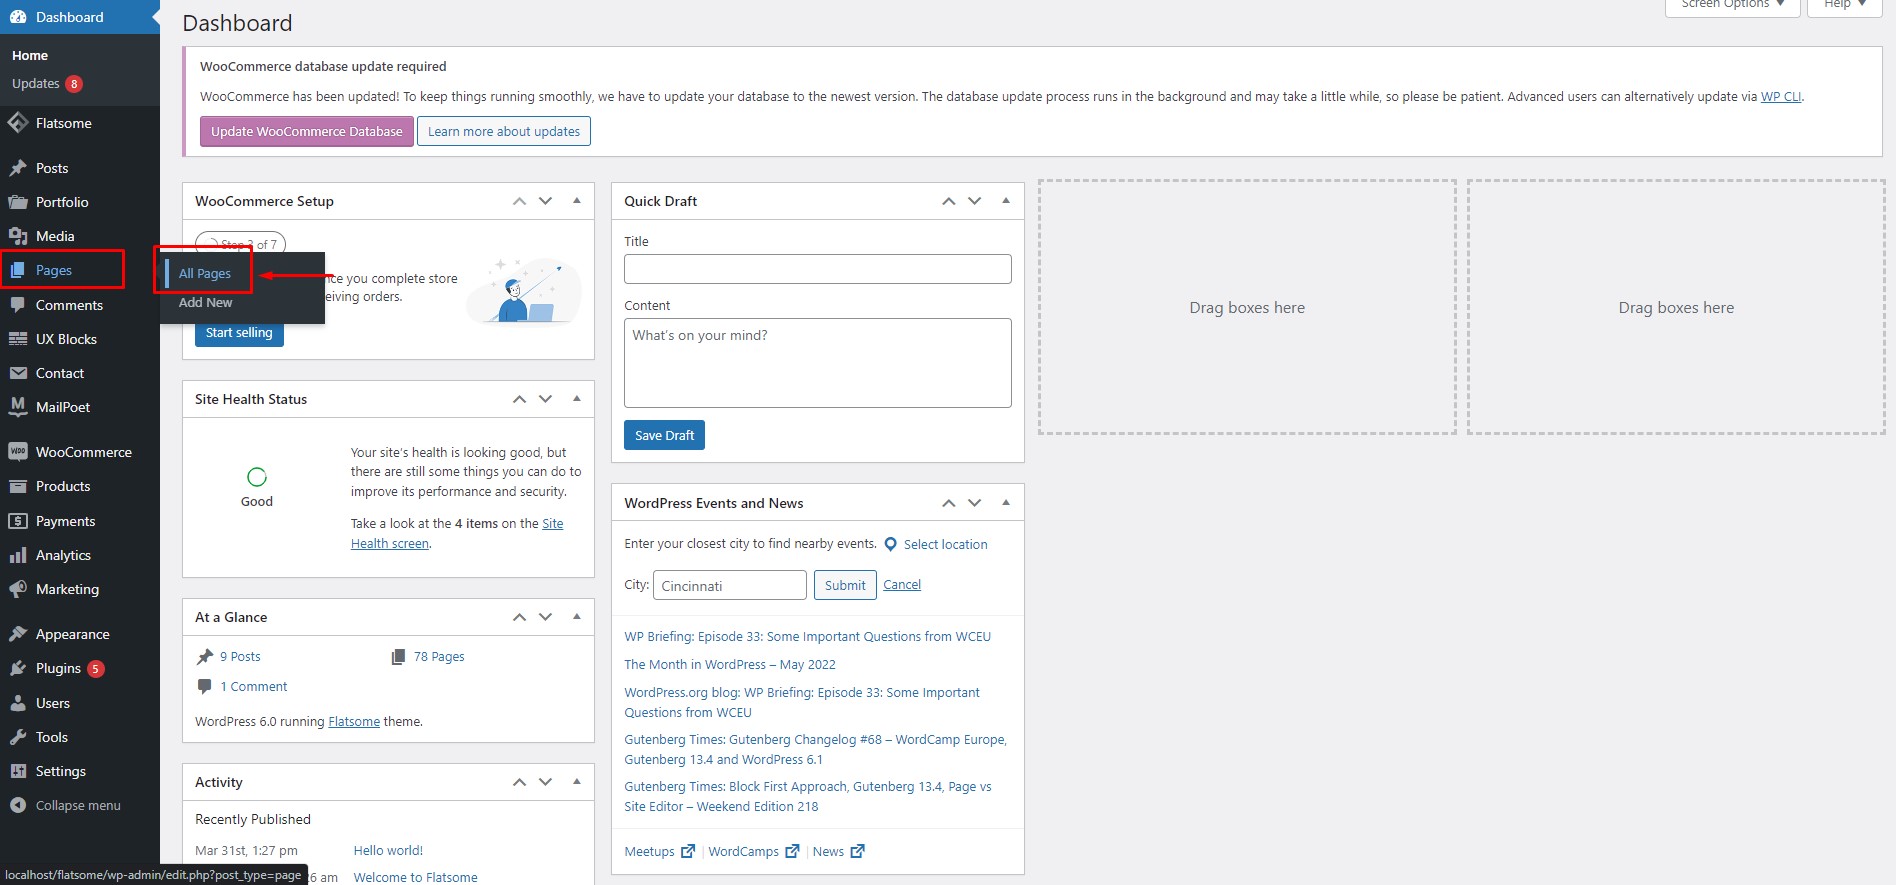 Let’s add a widget in the sidebar of a page. Go to the WordPress dashboard. Hover the mouse pointer and ‘Pages’ and click on ‘All Pages.’
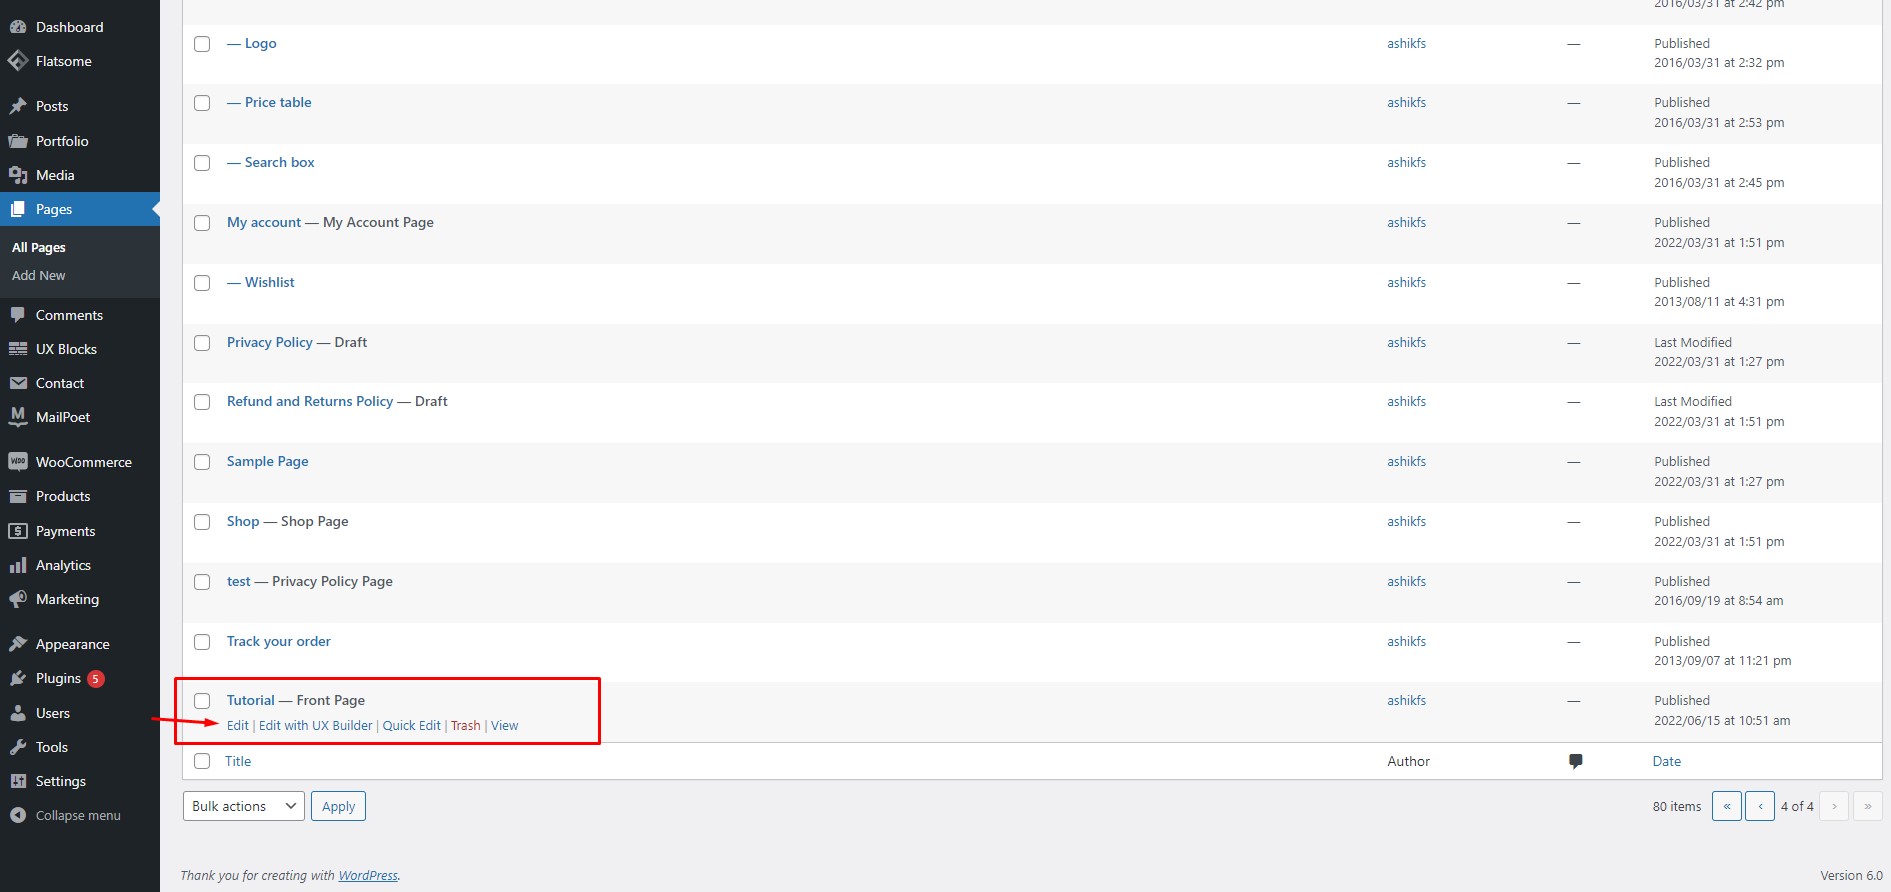 Find the page you want to add the widget on. Hover the pointer on the page title and click on ‘Edit.’
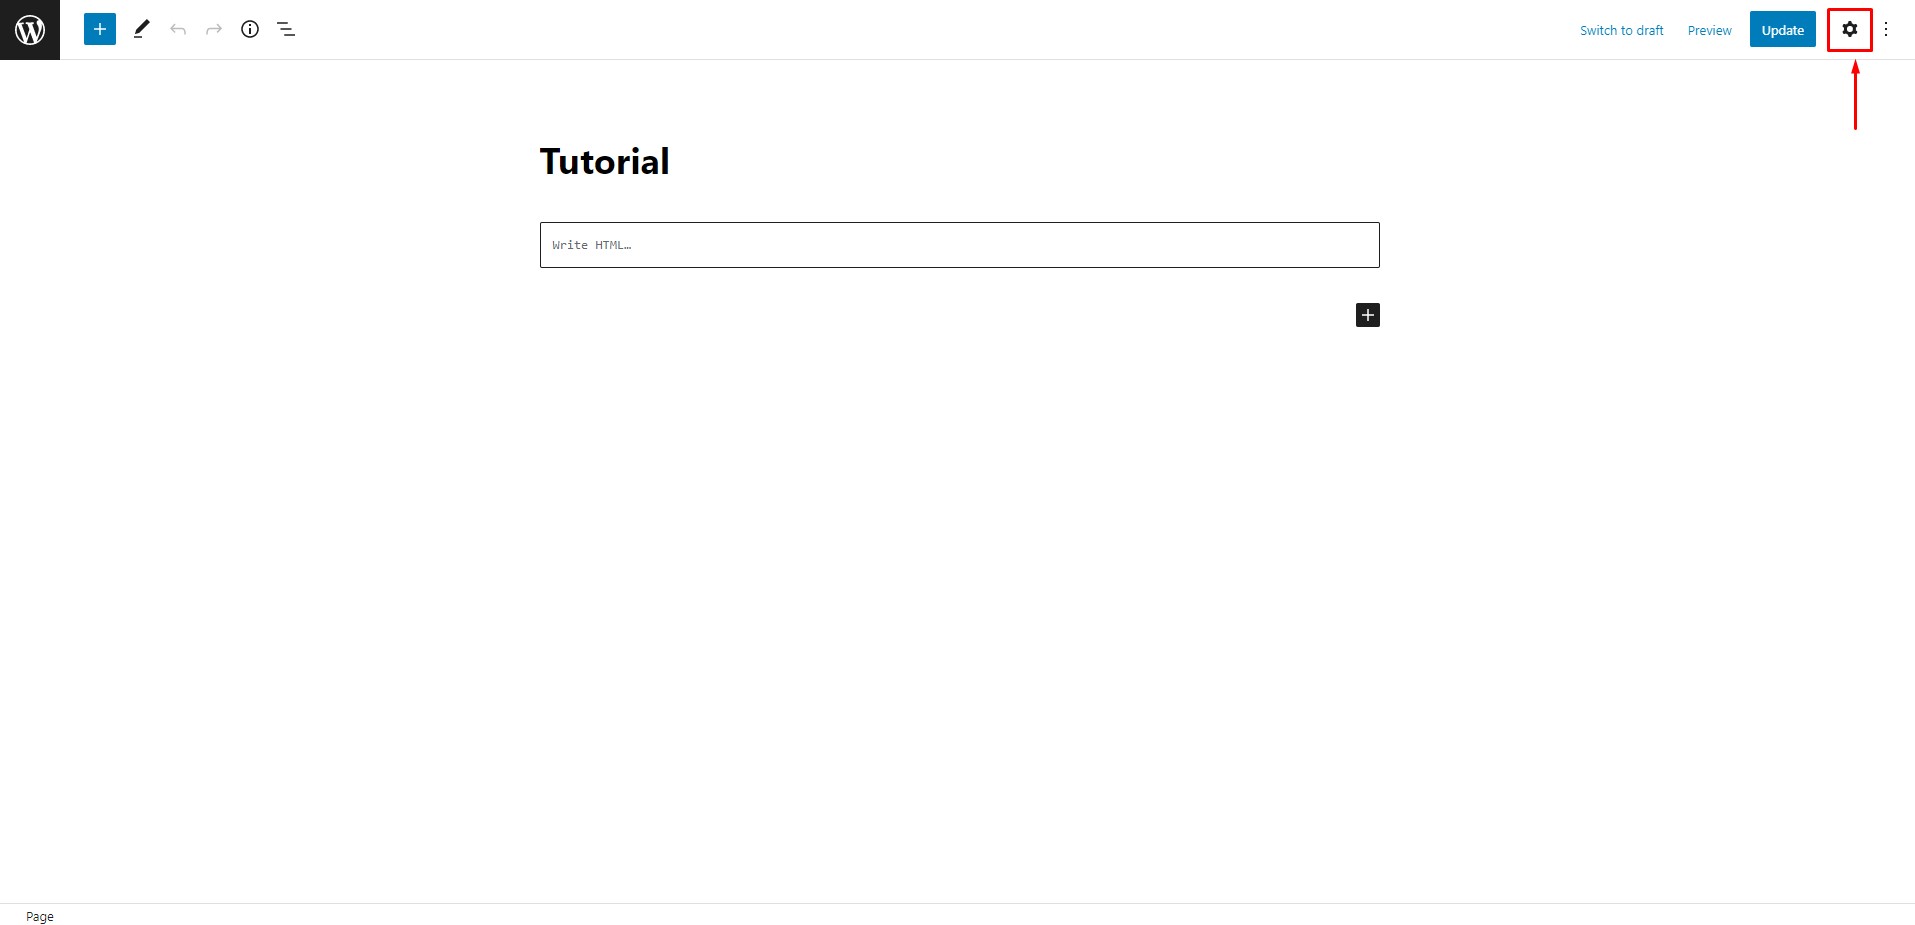 Now click on the ‘Settings’ icon at the top right corner.
 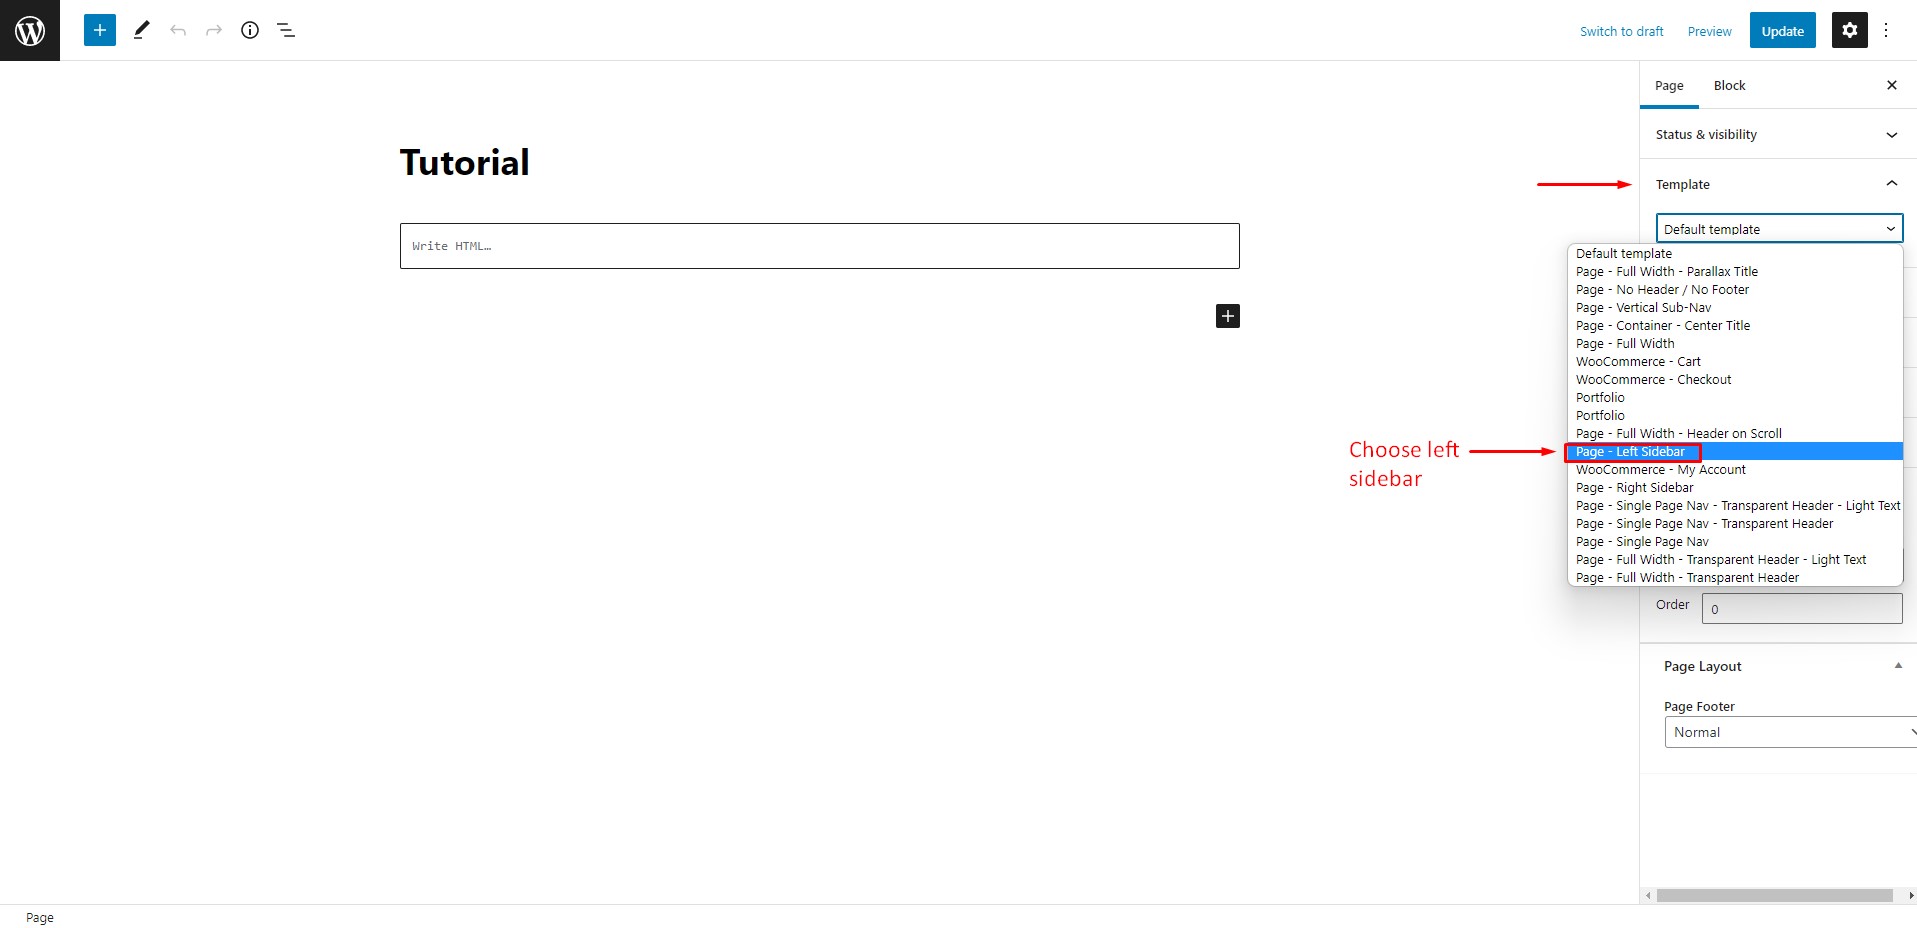 On the page settings, click on ‘Template’ and then choose ‘Page-Left Sidebar.’ Types of page templates may vary depending on your current theme. You can go through our best WooCommerce themes free list to find a modern and feature-rich theme.
 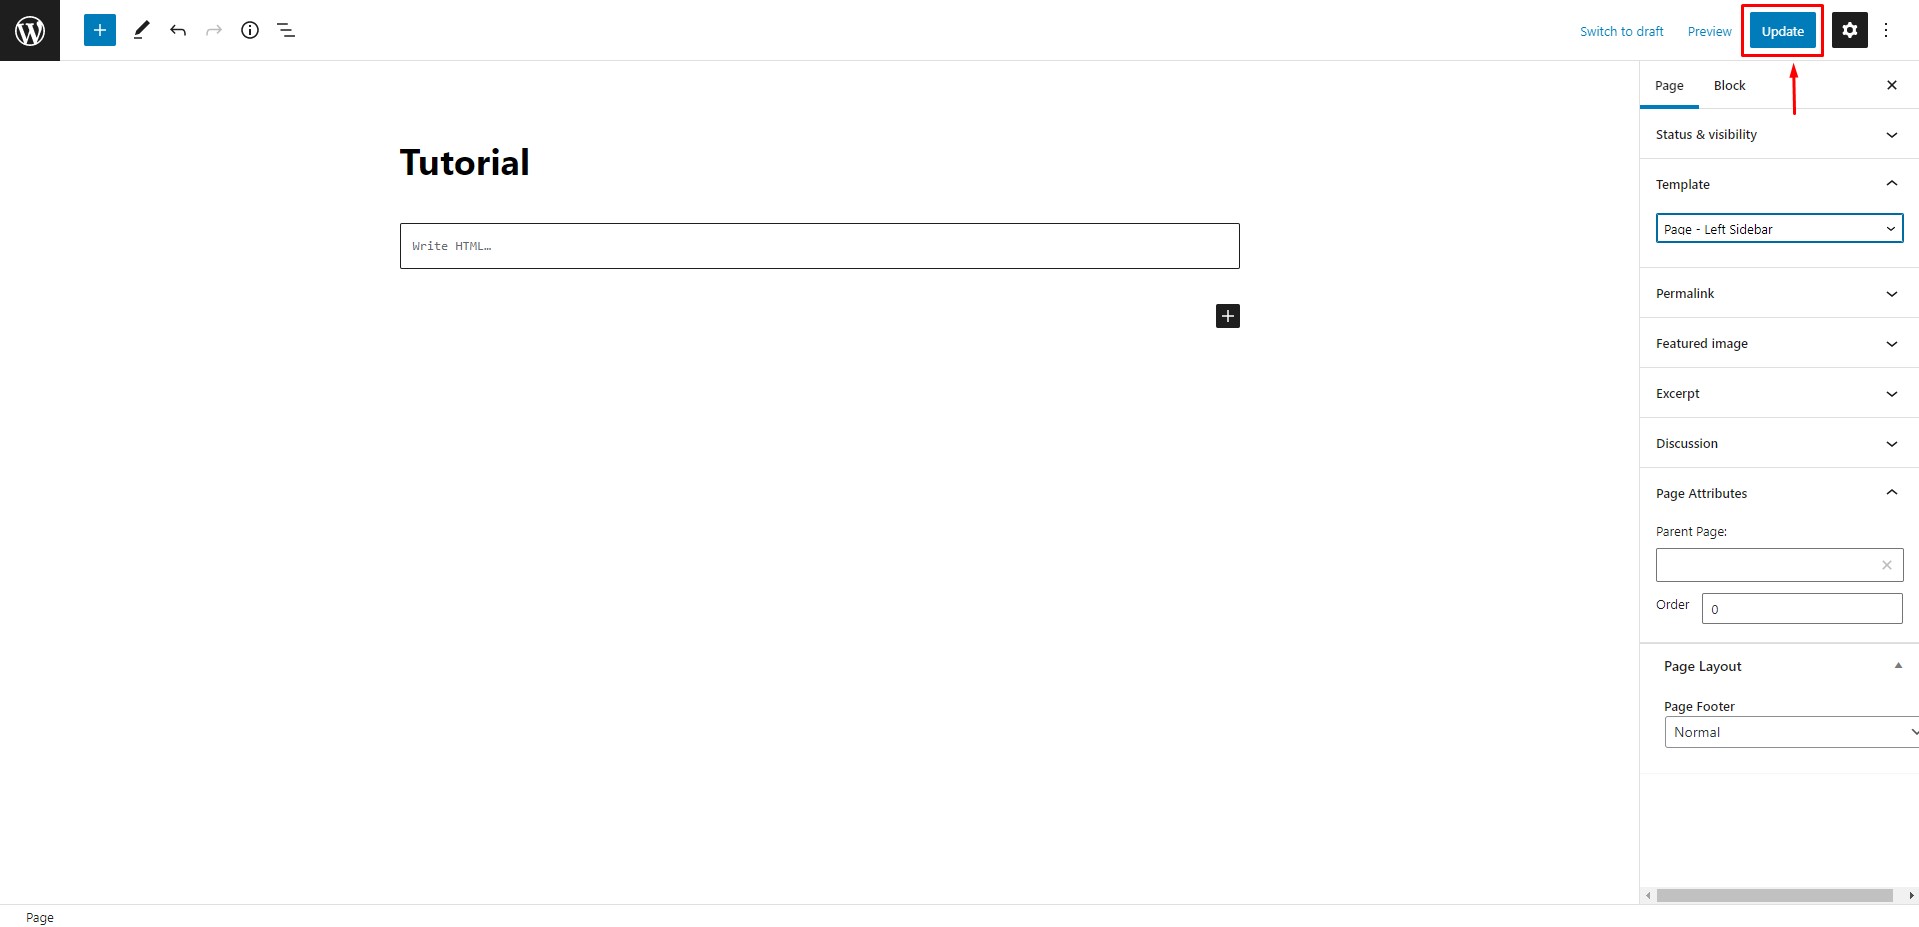 Now click on ‘Update’ to save the settings and go back to the WordPress dashboard.
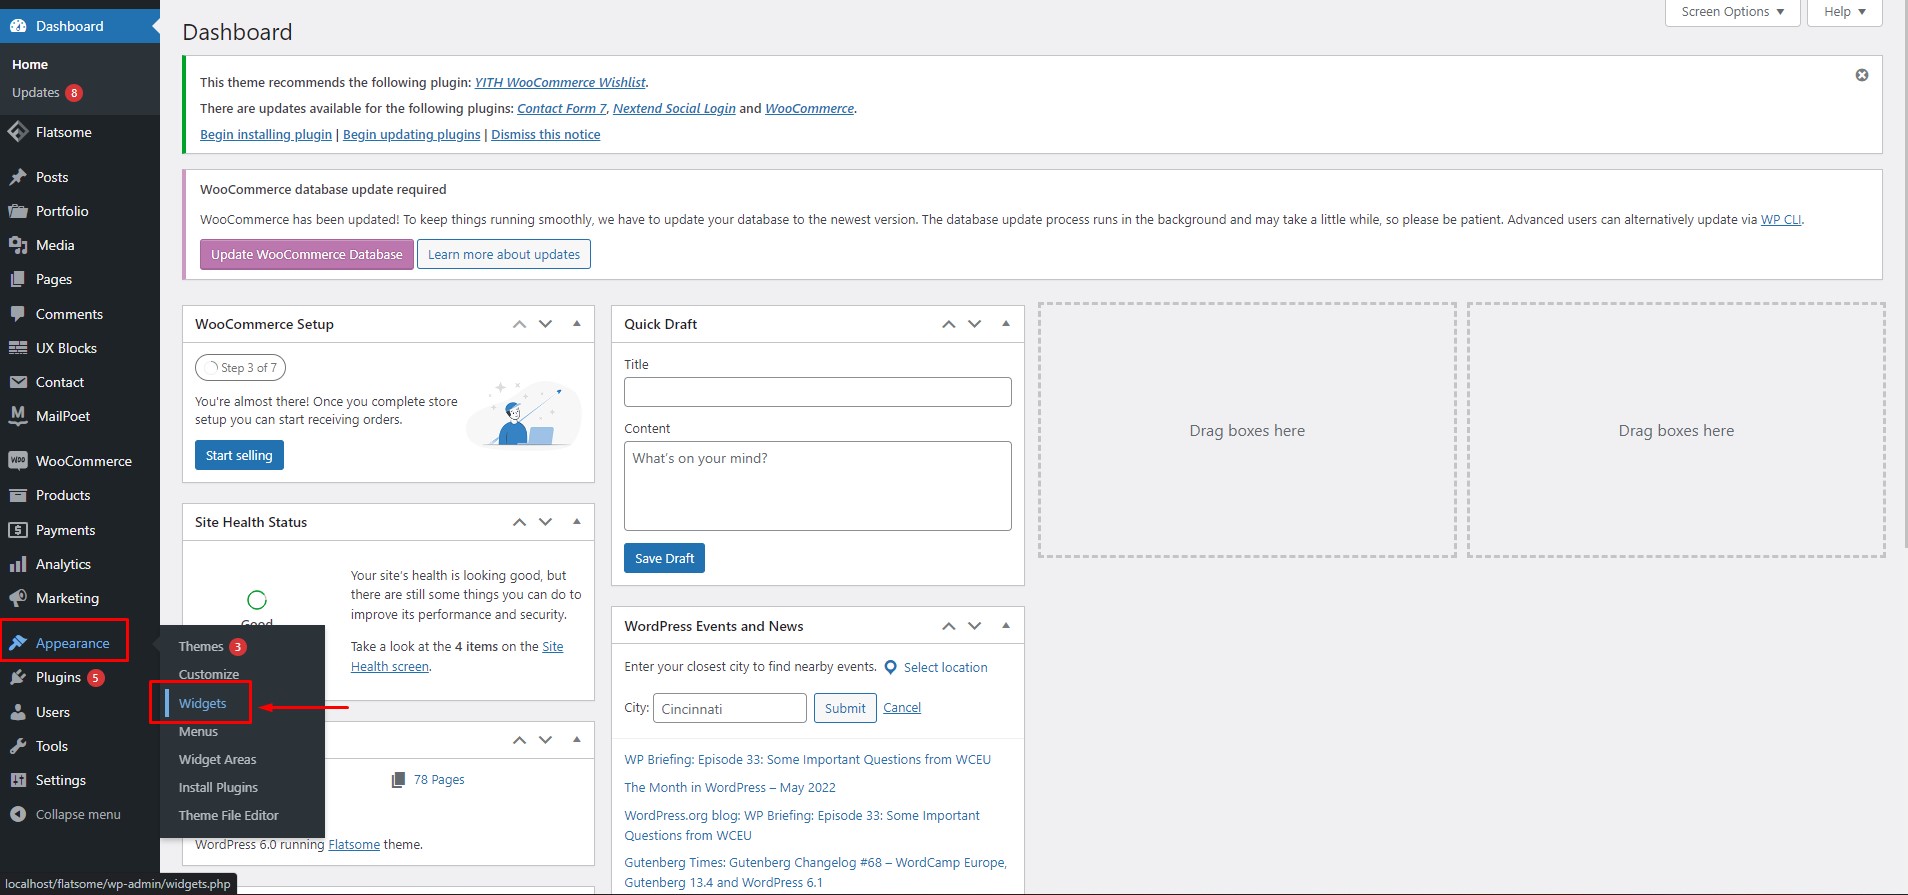 On the dashboard, hover on the ‘Appearance’ option and click on ‘Widgets’.
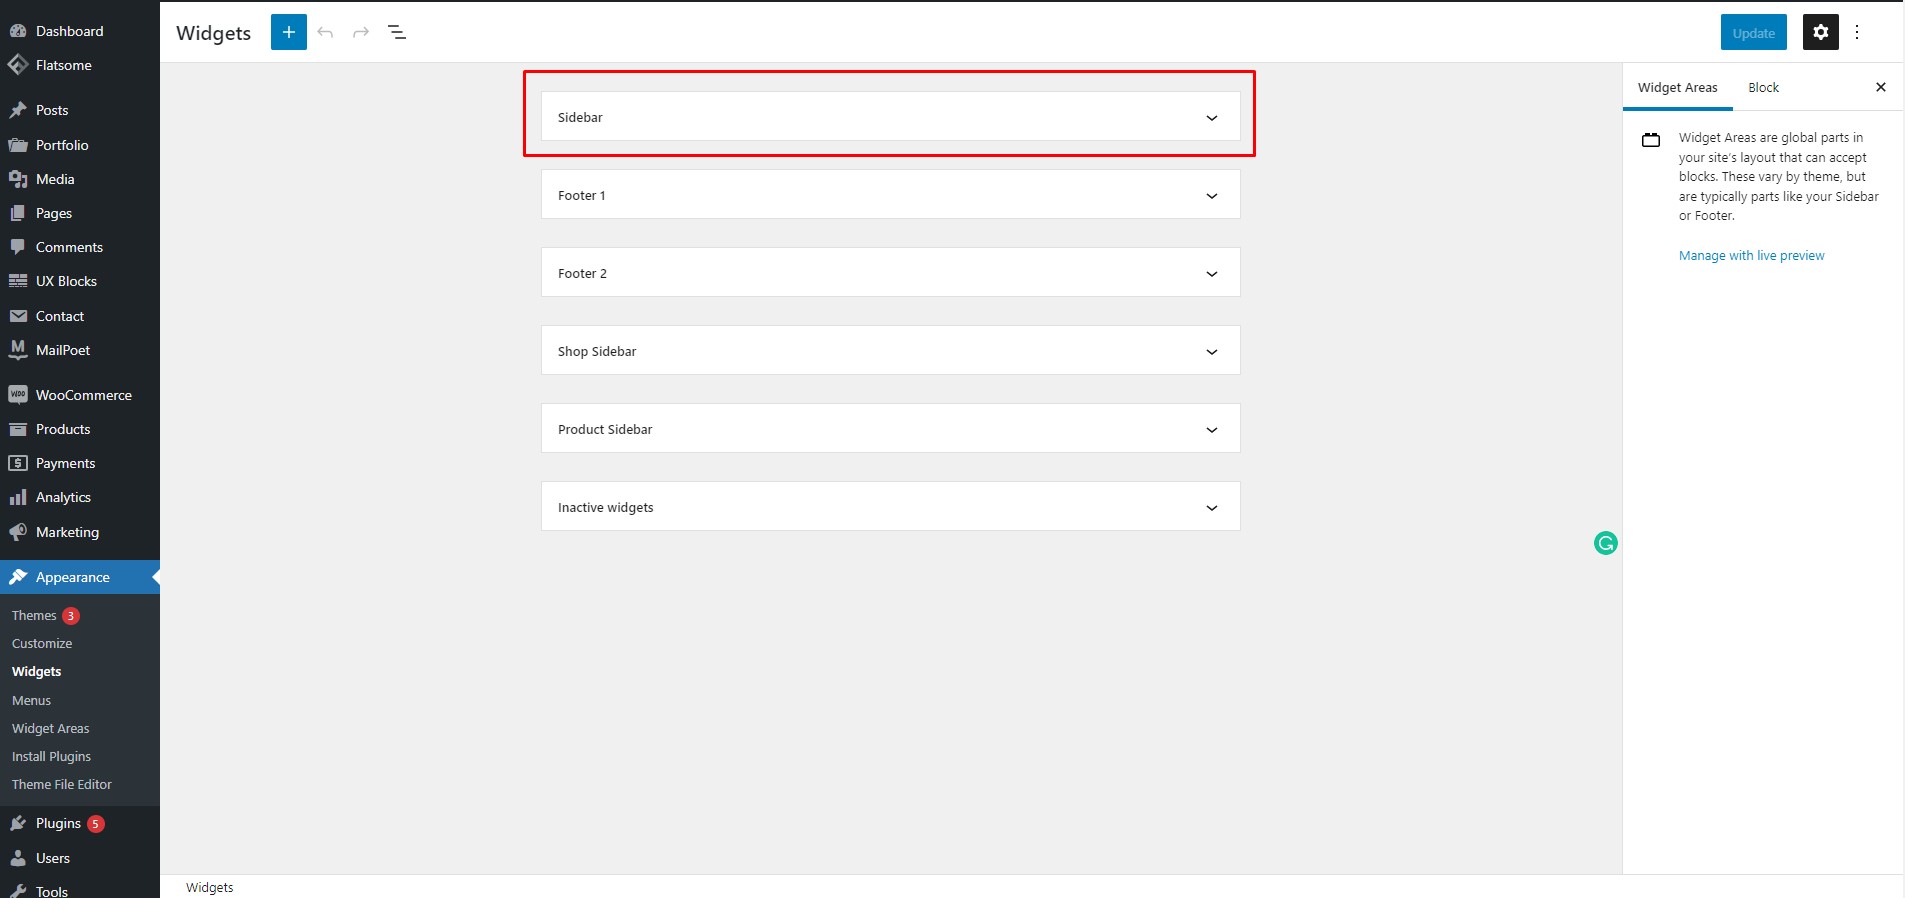 On the ‘Widgets’ page, click on the ‘Sidebar’ widget area. The type of widget areas depends on the theme you are using. Modern and Creative WordPress themes are a better choice for this purpose.
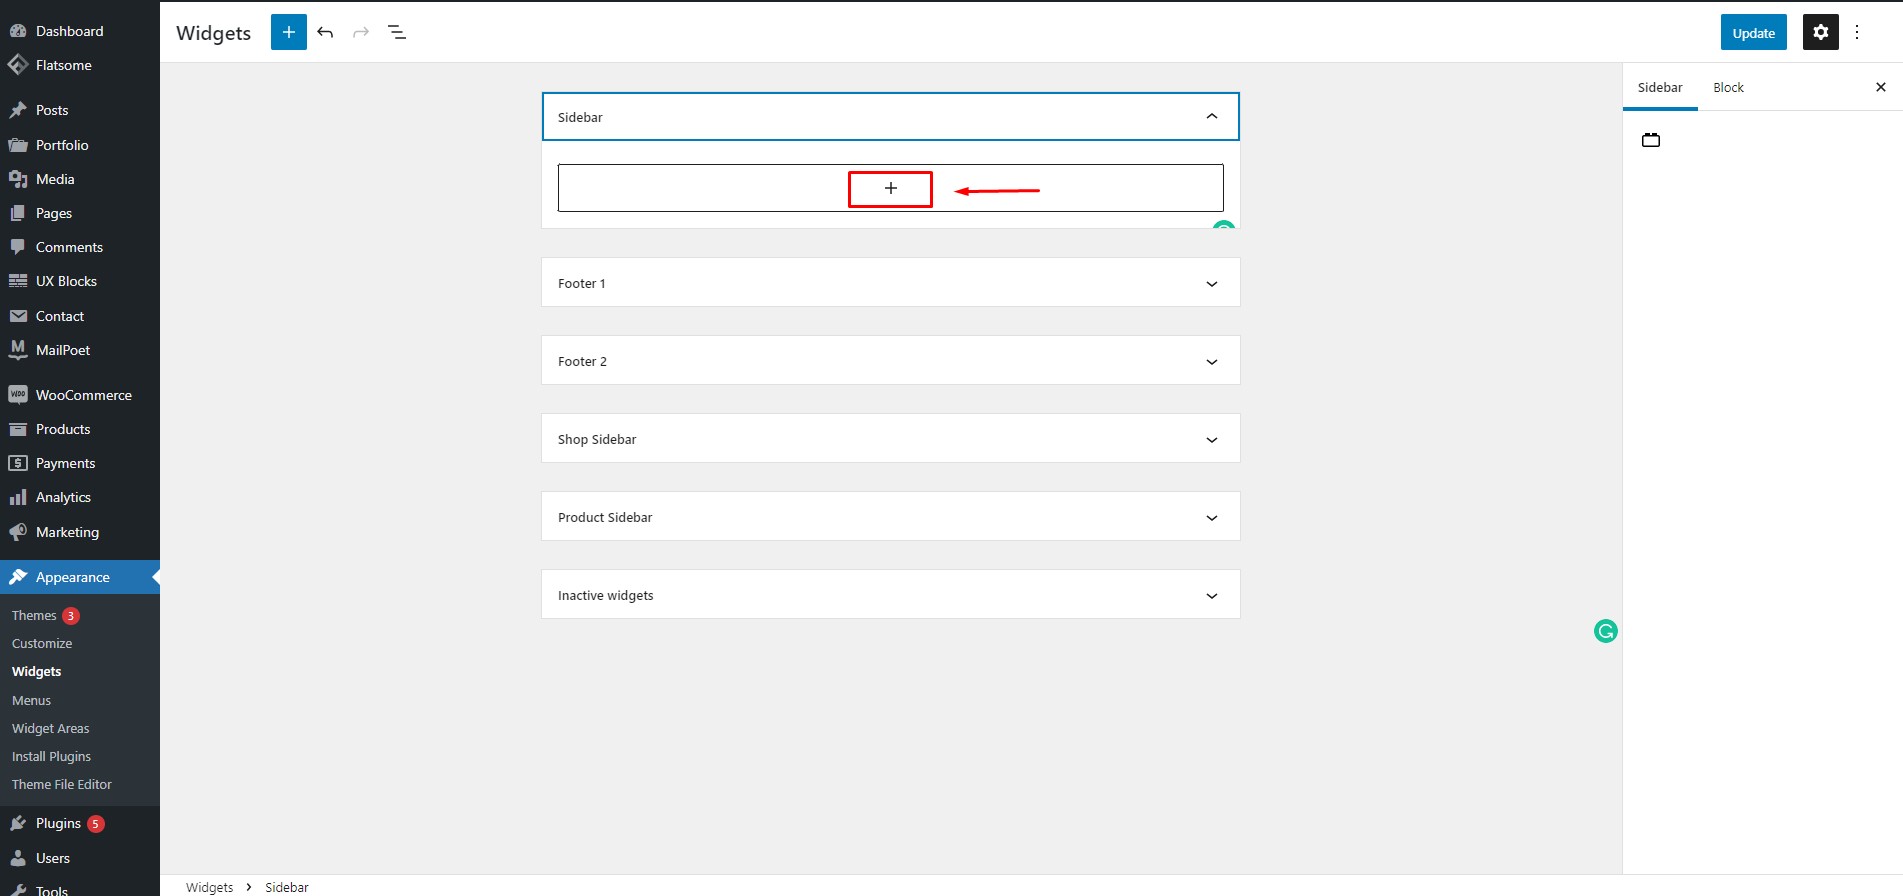 Now click on the ‘+’ icon to add a widget of your preference.
 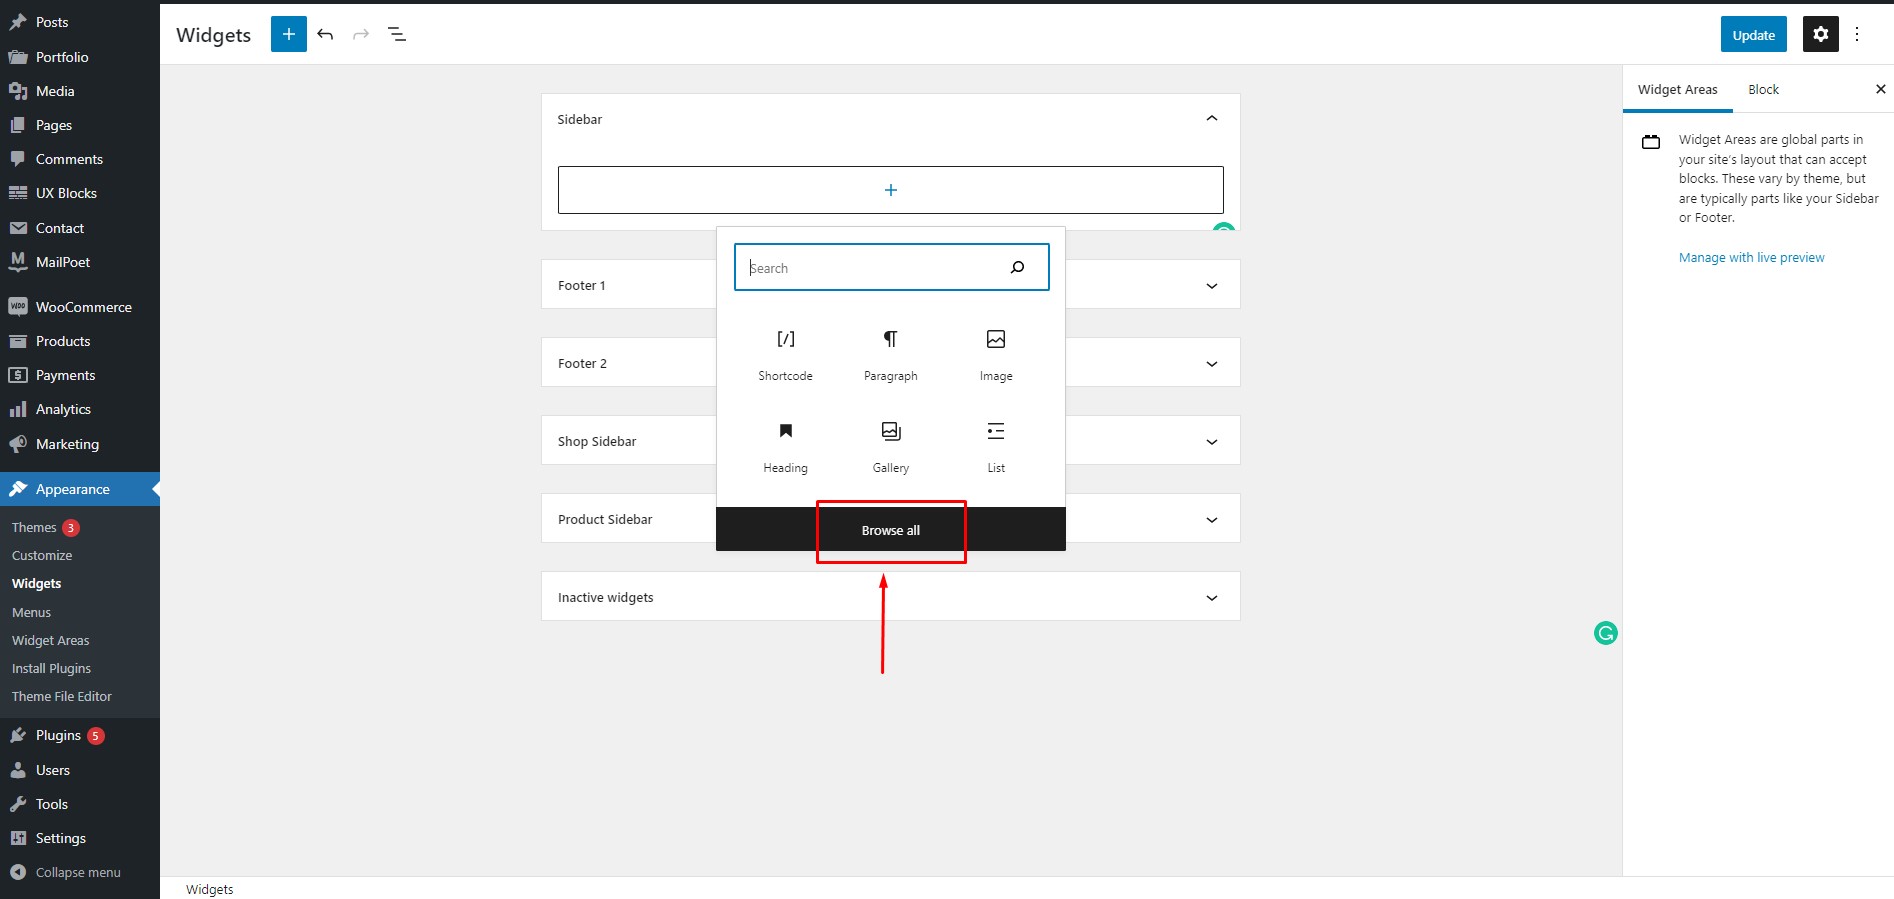 Click on the ‘Browse All’ button to see available widgets.
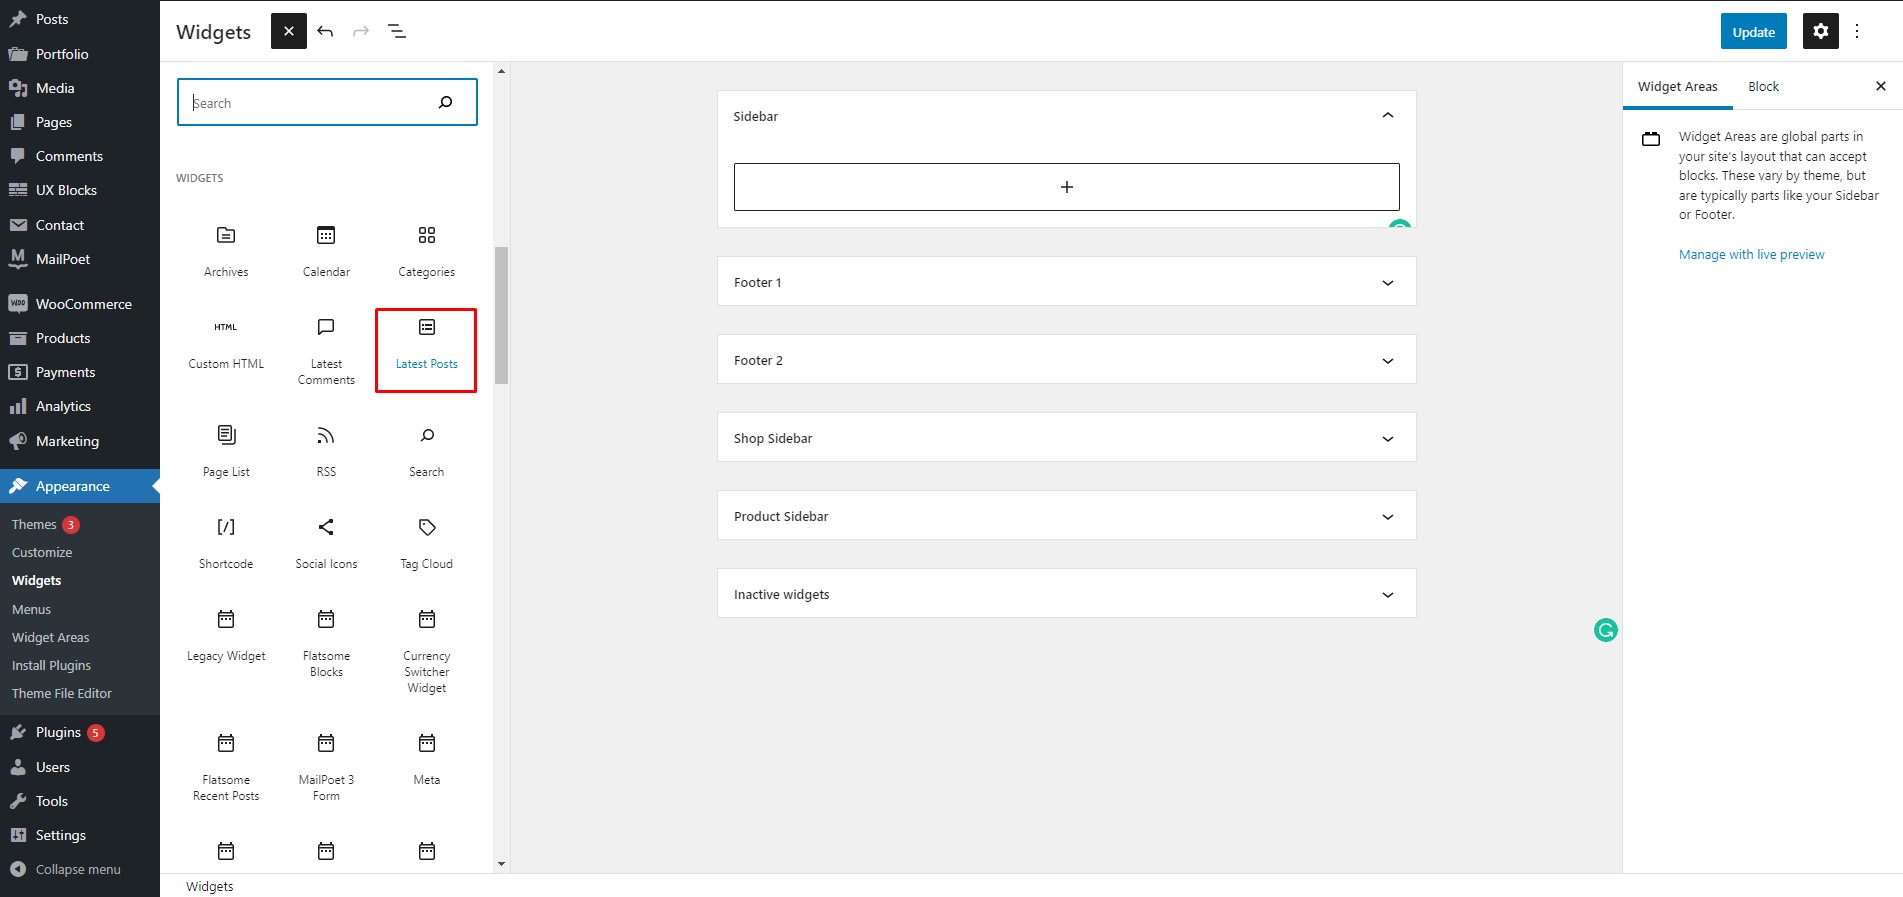 For example, scroll down on the available widgets section and click on ‘Latest Posts’. The variety of Widgets depends on the WooCommerce WordPress themes you are actively using.
 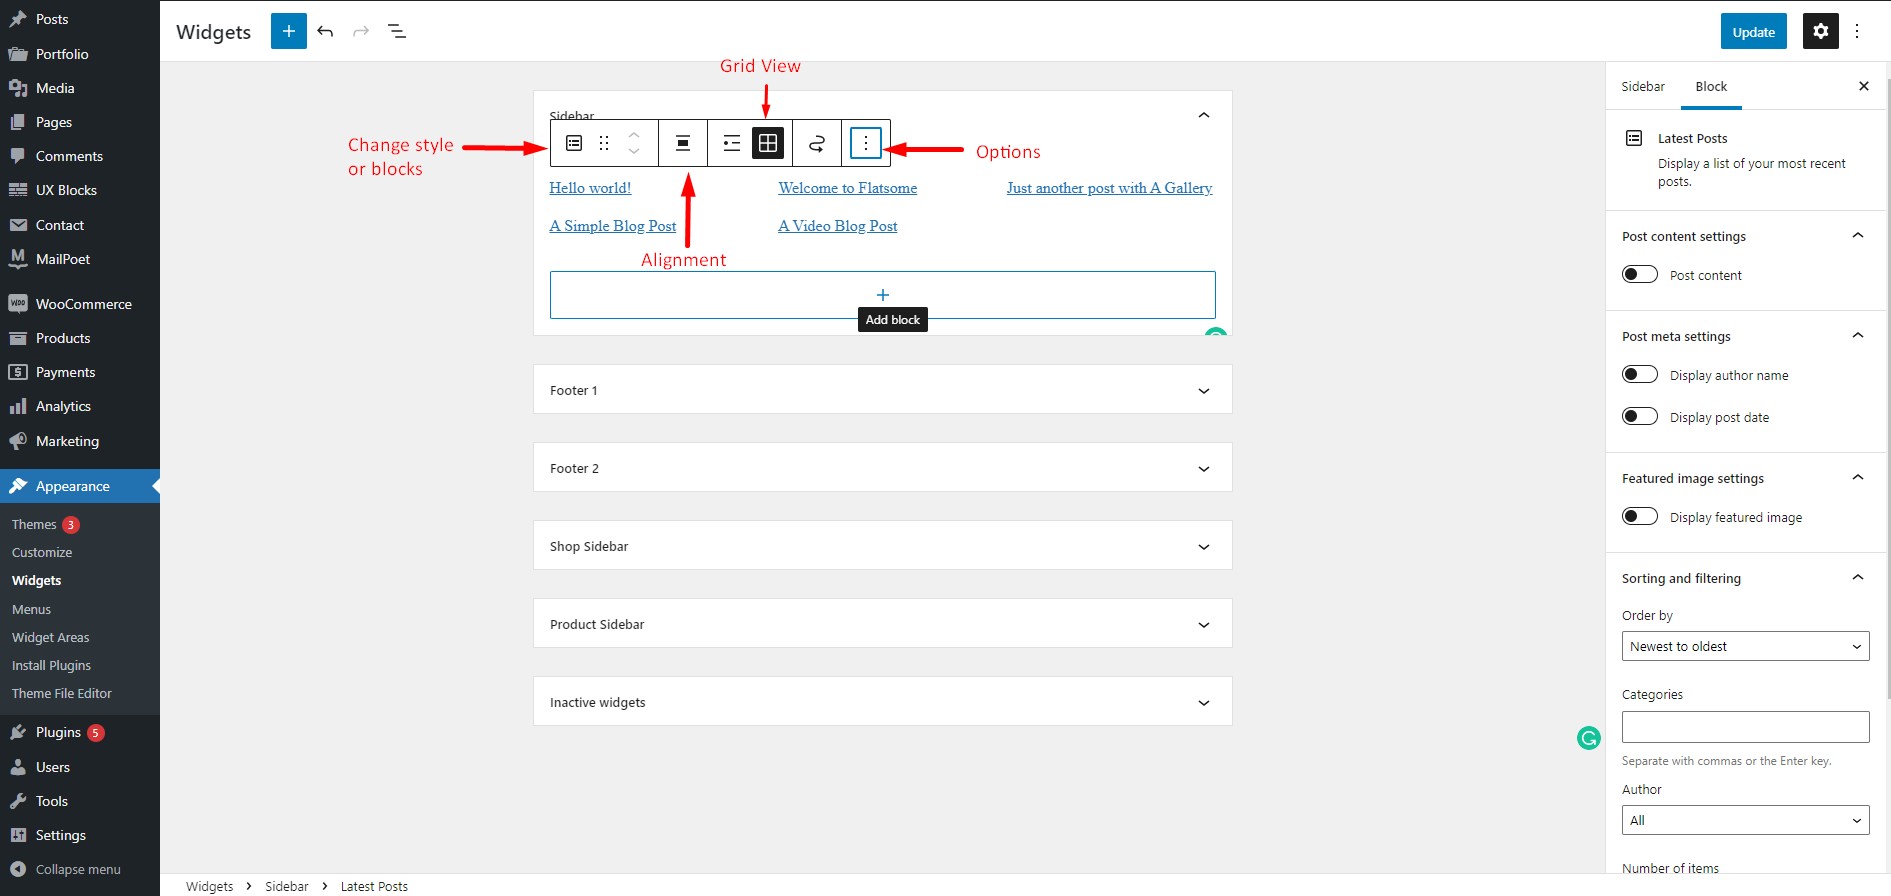 We can see that the selected widget has been added to the sidebar section. Click on the added widgets on the sidebar section and you will find various customizing options like grid view, list view, change block style, options, etc.
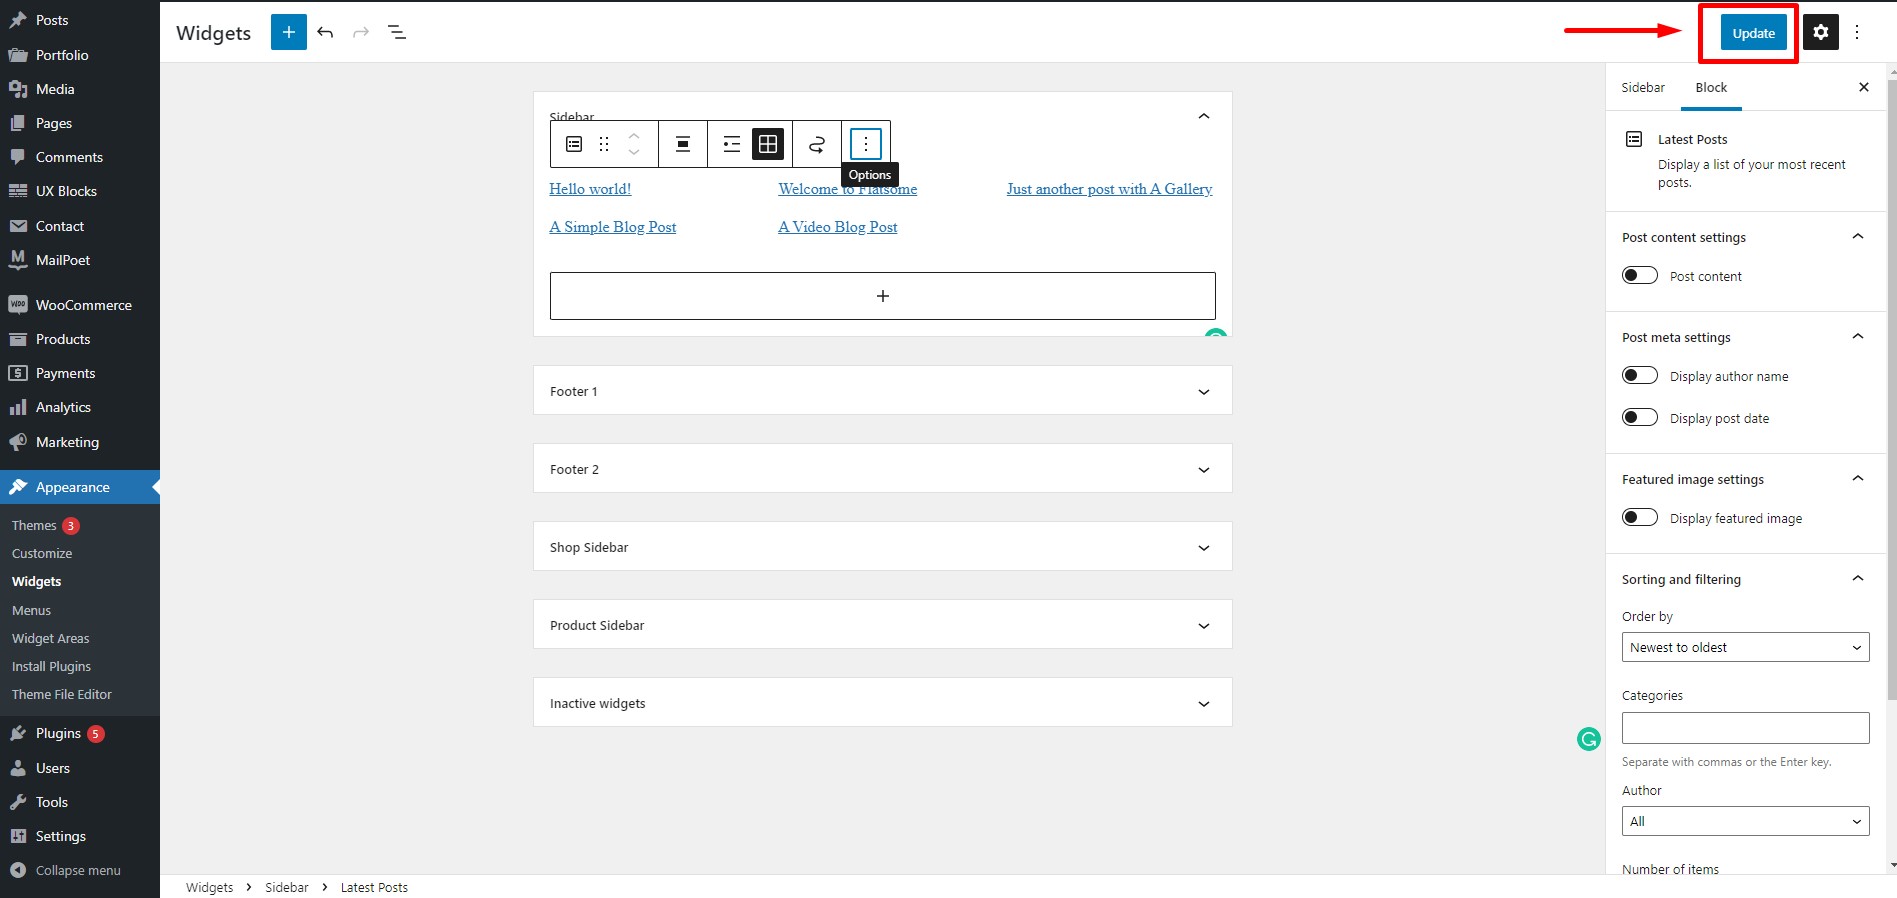 Now simply click on the ‘Update’ options in the top right corner to save your widget.
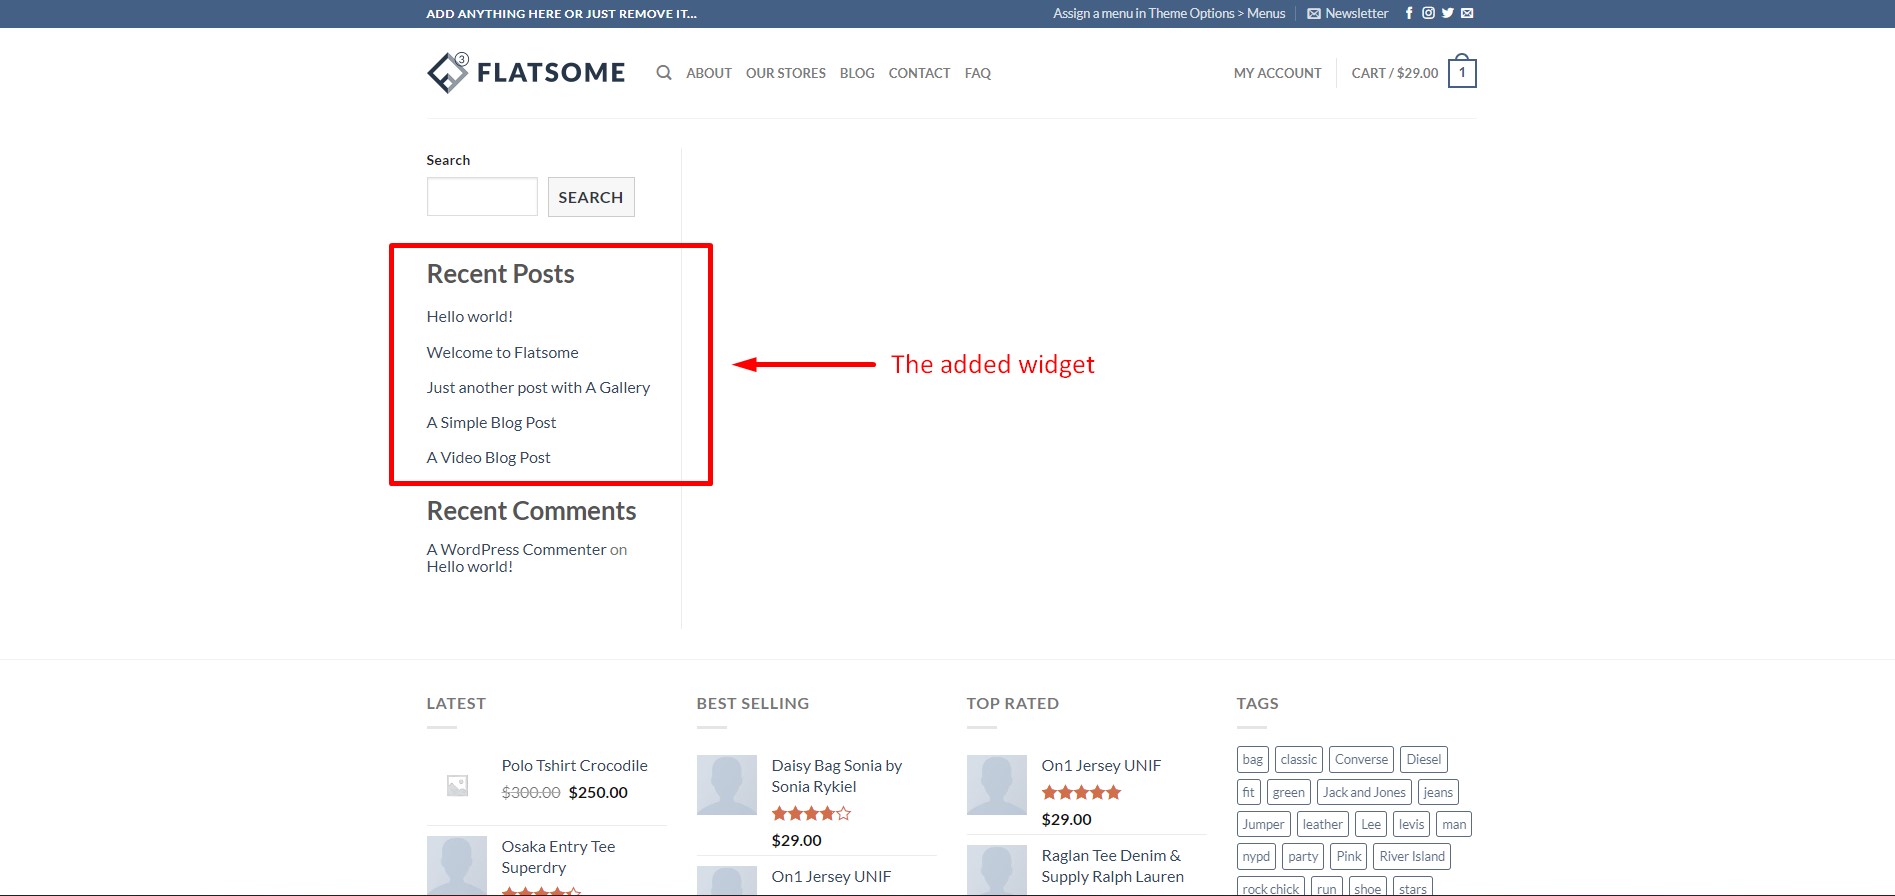 Now open the page you wanted your widget to display on. We can see that our added widget is displayed perfectly in the page’s left sidebar.