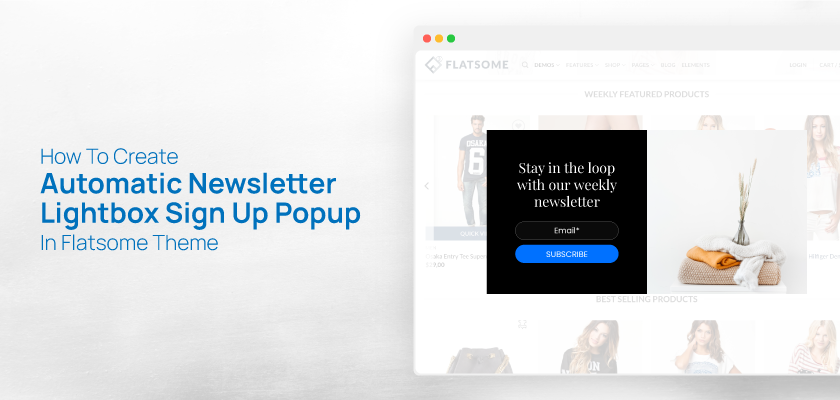
When it comes to build an email list, every marketer knows how incredible an effective email popups and newsletter popups are. Over time, people have called email popups with many different names such as “email subscription popups and “newsletter popups.” They all mean the same thing. Popups are a good marketing tool. It can be impressively high converting. They are able to grow your email list, increase subscriptions, collect user feedback, and many more. Millions of websites use popups to collect emails. Lightbox popups are one of the most effective ways to capture emails. But you need good-looking and eye-catching newsletter pop-ups. Automatic Flatsome lightbox sign-up pop-up for newsletter is an important feature that can help you to build a good relationship between you and visitors. it allows you to reach signed-up customers anytime by sending emails. Consequently, you can increase sales, hook customers, and build a solid customer base efficiently. If you already know how to add a lightbox in Flatsome theme, this will be a very easy tutorial for you. If not, don’t worry, this tutorial is detailed enough for beginners. Flatsome lightbox is a pop-up window that can display any text or image in front of the current page. It also darkens the page so that visitors can focus on the pop-up. There is also different kind of popup plugin in WordPress that can help you to attract visitors, but in this article, you will learn to implement the build feature of Flatsome lightbox to set up newsletter popup. In this tutorial, we’ll create an automatic newsletter sign-up pop-up which is a Lightbox. It’ll help us to get customers engaged with our site. This is a 12-step only tutorial with everything you need.
How To Create Automatic Flatsome Lightbox For Sign-Up & Newsletter Popups
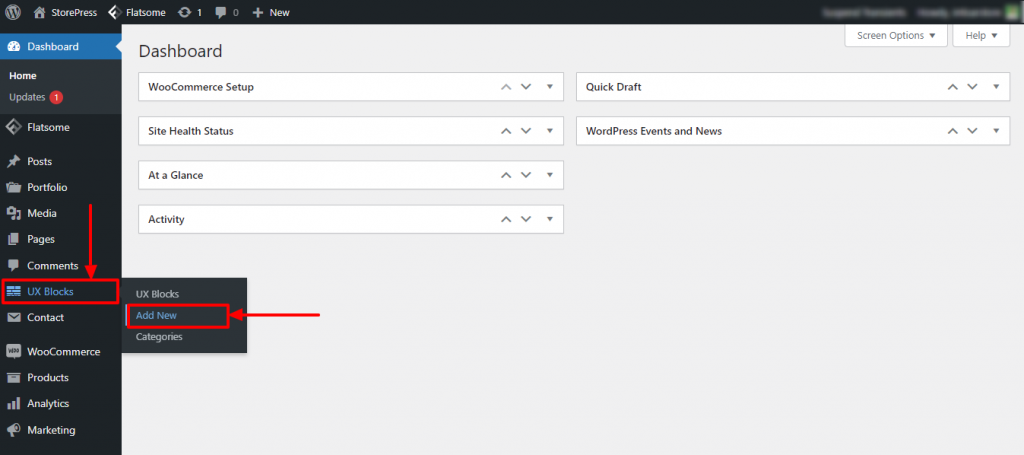
Step 1: To create the Flatsome lightbox, go to the documentation of UXThemes, scroll down, and find the code captioned “Auto open lightbox.” Then copy the whole code of that section.  Step 2: Go to your WordPress Dashboard, and hover the pointer on UX Blocks. Three options will come out from that section, click on the Add New.
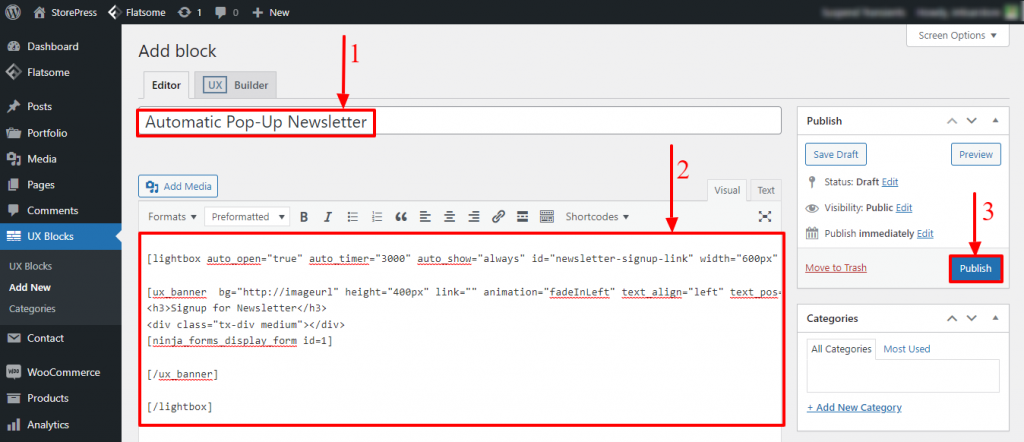
  Step 3: Here you can create a new block. Firstly, type the name of your block. For demonstration, we’re typing Automatic Pop Up Newsletter. You can choose any name you want. Then, paste the code you’ve copied in the first step in the body section. After that, click on the Publish button.
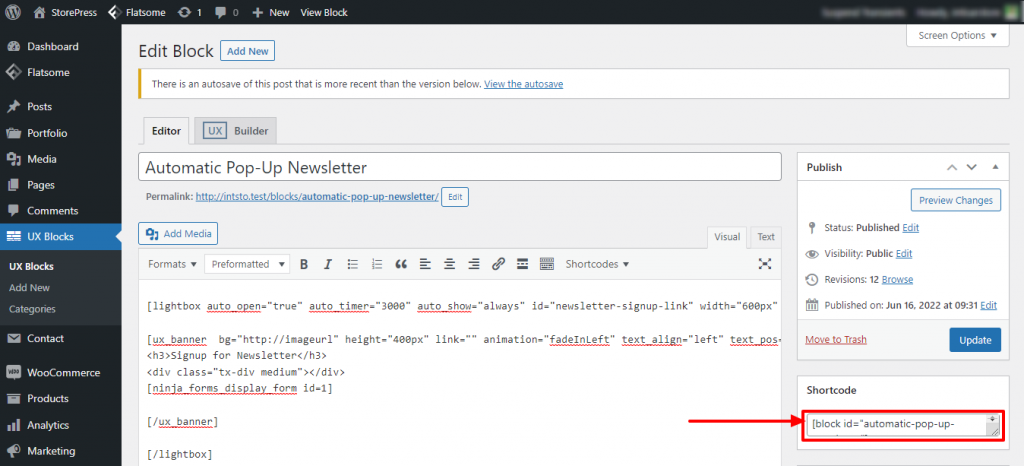
  Step 4: After publishing, you’ll find a Shortcode section on the bottom right of the page, copy the whole code from there.
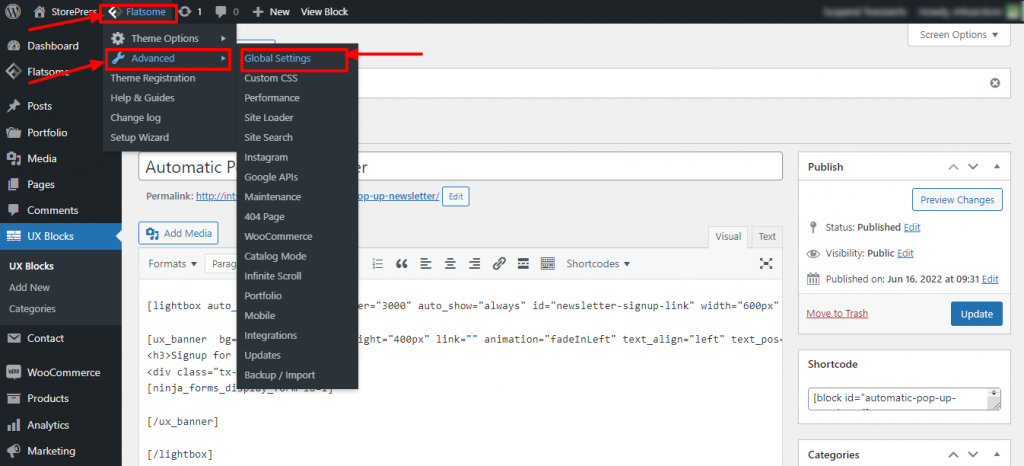
  Step 5: Hover the pointer on Flatsome, then again hover on the Advanced section, then click on the Global Settings
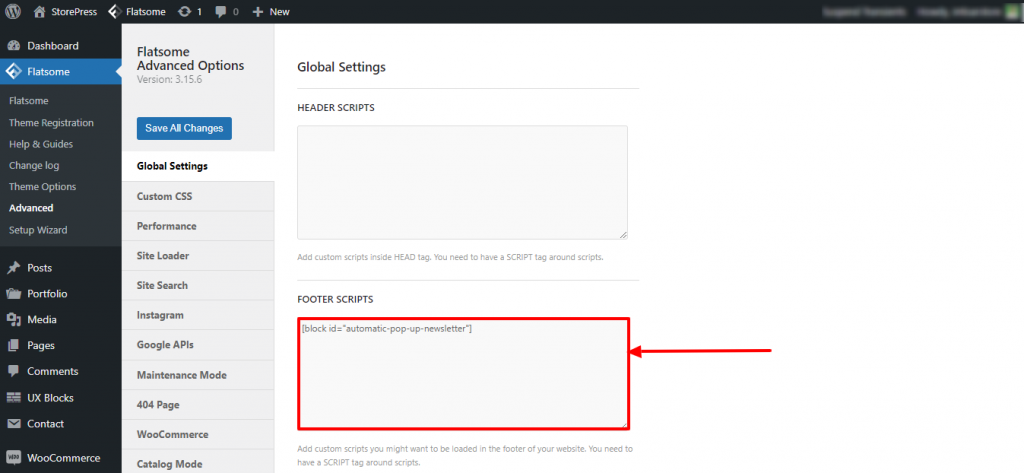
  Step 6: A new page of Global Settings will appear. You’ll find a section of Footer Script, paste the shortcode you’ve copied.
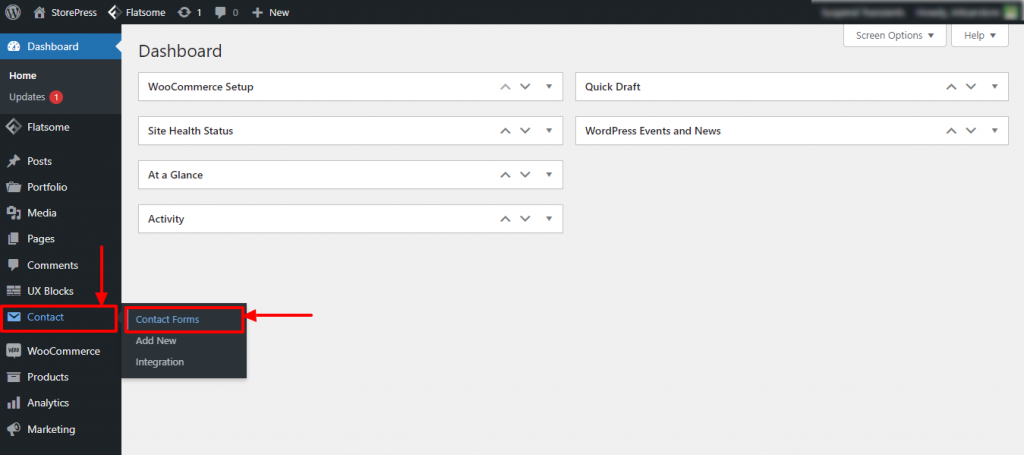
  Step 7: Go to the Dashboard again, hover the contact pointer and click on the first option, Contact Forms.
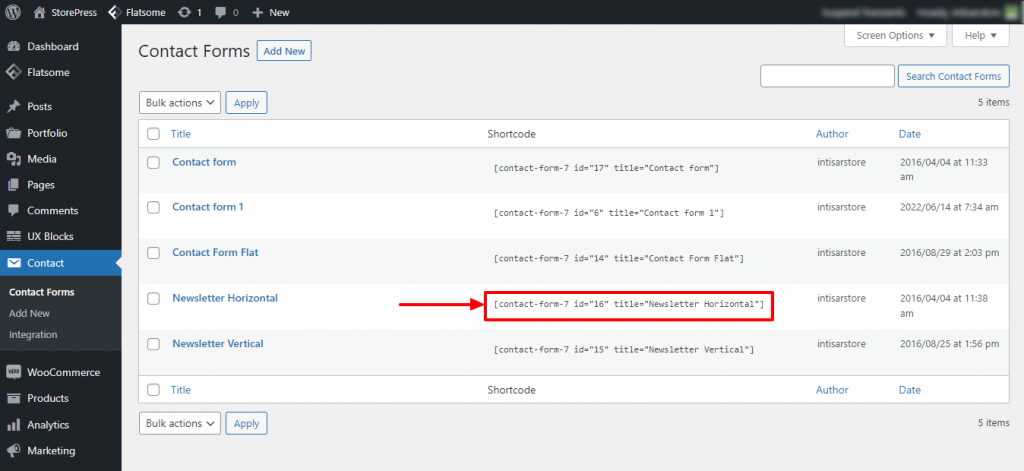
  Step 8: A new page will appear. You’ll find some forms and shortcodes there. To use a horizontal Newsletter, copy the shortcode of it.
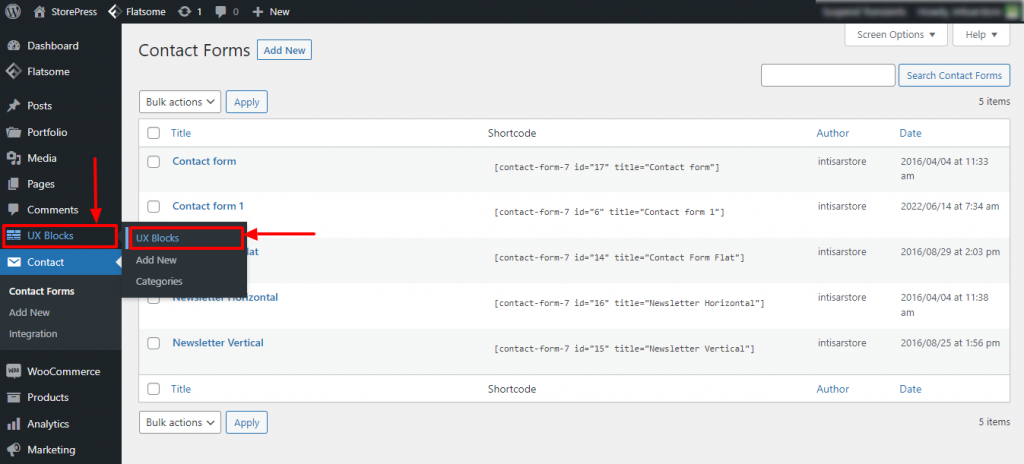
  Step 9: Hover the pointer on UX Blocks, then click on the UX Blocks to see all the blocks.
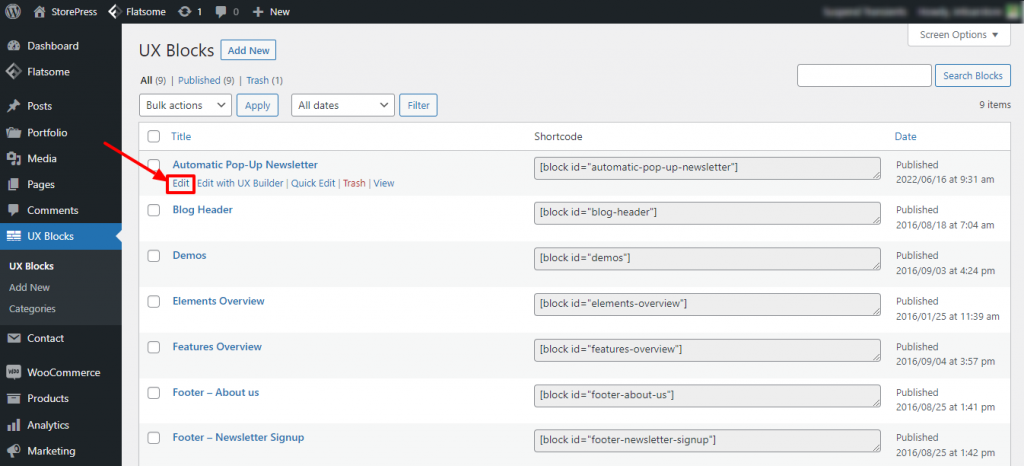
  Step 10: Find the Automatic Pop-Up Newsletter, and click on the Edit under the title of it.
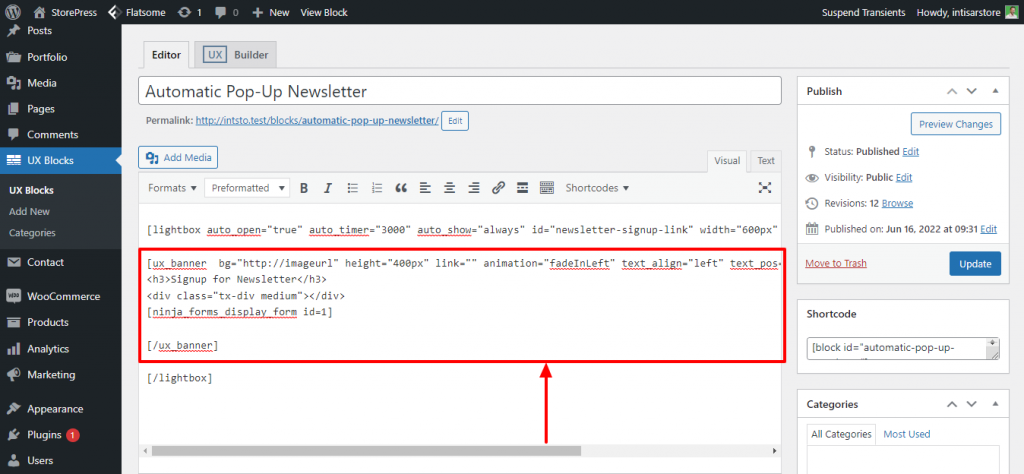
  Step 11: You can customize some of the content of your Automatic Pop-Up Newsletter. Such as the image, header, and other text items. We’re adding a different image and text for demonstration.
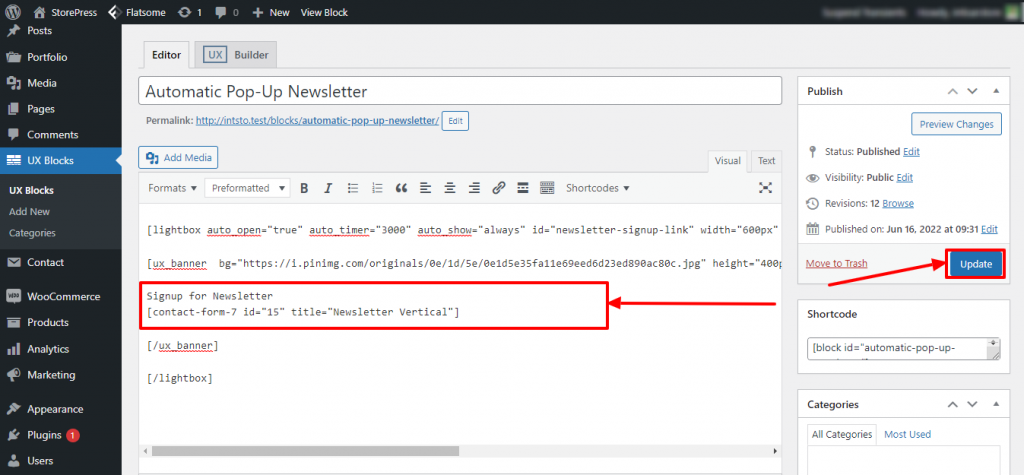
  Step 12: Then, we need to paste the shortcode we copied earlier.
  Final Preview
Conclusion
This is the easiest tutorial to create Flatsome lightbox newsletter sign-up popup. It’ll take around 15 mins to implement it in your Flatsome theme-powered website. If you’re having trouble following this tutorial, start again from scratch. You can surely do it. After applying this to your site, you can do a lot of things following Flatsome tutorials.

