The Flatsome logo will be your default logo whenever you start using the Flatsome WooCommerce theme for the first time. This article is all about how you can upload a logo of your choice instead of the Flatsome logo.
A logo creates a unique identity for an eCommerce store. For this reason, eCommerce site owners focus on the logo first when they build their websites. Among WooCommerce themes, Flatsome is one of the most popular.
Around 590,000+ websites are using this theme because it’s responsive, SEO-friendly, fast, lightweight, and serves most purposes. So, it can be an educated choice for starting any WooCommerce website.
Why Logo Is Important for a WooCommerce Site
A logo is the very first thing you need to add while setting up a WooCommerce site. Because, after the name, a logo is the most important part of any eCommerce site, it’s so important because it’s the face of the company.
So, creating and setting this up properly should be a priority. If you follow the biggest brands, you may notice how much effort they put into their logo.
So, if you’re setting up a WooCommerce store, you need to create a good logo first. If you already have a logo, then you need to put it in the right place. In the Flatsome WooCommerce theme, they’ve set a place for the logo, and you’ll see Flatsome’s logo when you set the theme for the first time.
Now, you need to replace the Flatsome logo and put your site’s logo there. Don’t forget to activate the child theme before starting to customize your site. It’ll help you save the customization while updating the theme.
In this article, we’ll show you how to add a logo to your site while using the Flatsome WooCommerce theme. If you don’t change the default Flatsome logo, visitors can get confused. So, let’s get started setting up your logo on a Flatsome-powered website by following this step-by-step tutorial!
9 Steps To Upload Custom Logo By Replacing Flatsome Logo
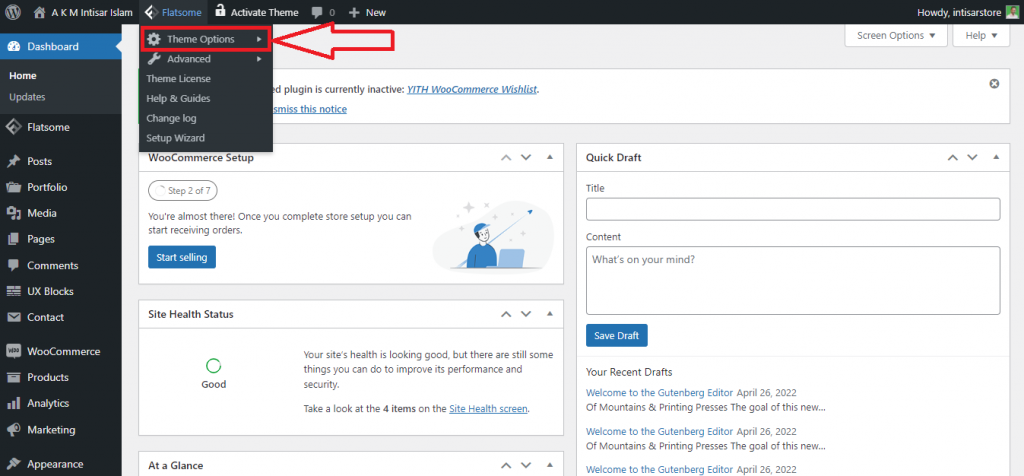
Step 1: Go to your WordPress Dashboard & hover the pointer on the Flatsome

Step 2: A dropdown will appear; hover your pointer on the first option named Theme Options
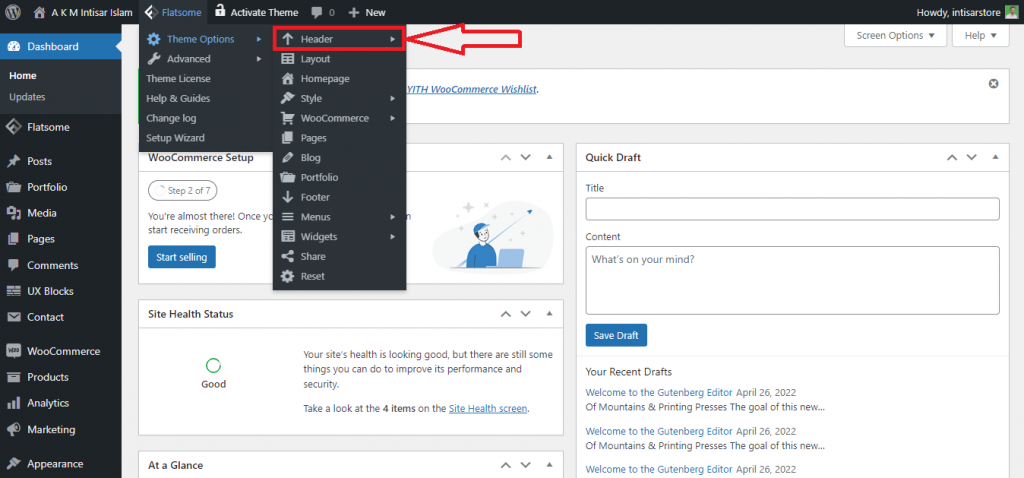
Step 3: After hovering over Theme Options, you’ll find a new set of options. Hover the pointer over the 1st option named “Header.” You can customize the web page header design in this section
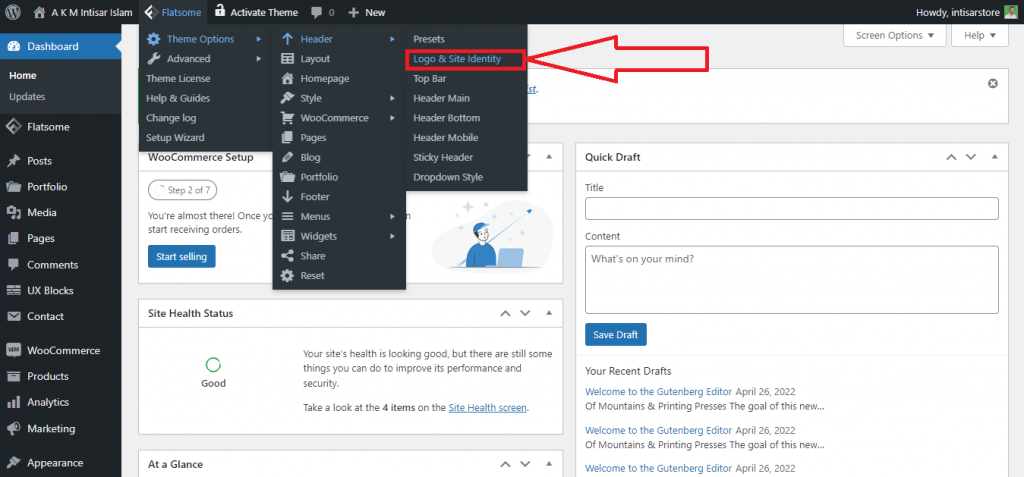
Step 4: Again, a set of options will appear. Click on the option Logo & Site Identity
Step 5: A new window will appear. You’ll find the Flatsome logo on the left side. Click on the Select Image button under it.
You can also keep this part blank if you don’t have the logo right now. To do that, click on the Remove button beside the Select Image button. It will remove the default Flatsome logo.

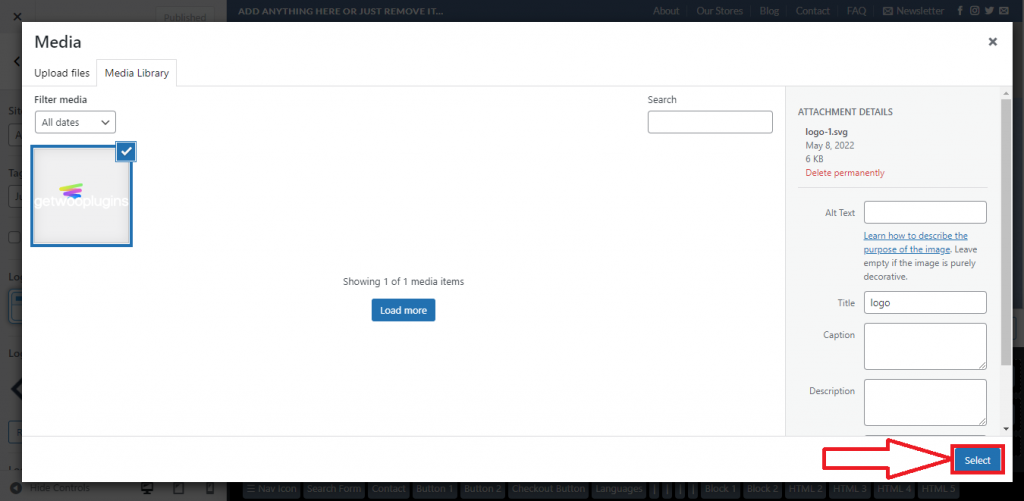
Step 6: Then, a new popup will appear. Click on “Select Files” and select your image from your device.

Step 7: After choosing the image, click on the “Select” button.
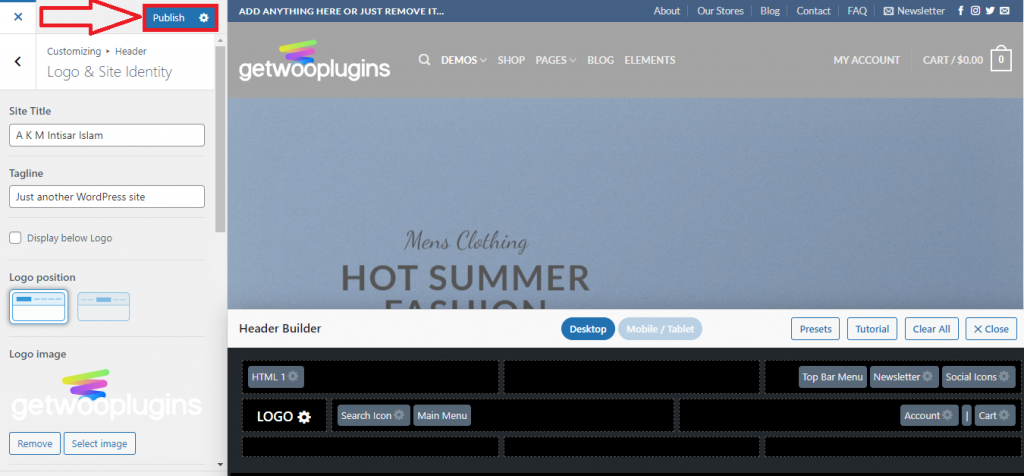
Step 8: Your uploaded logo will appear instead of Flatsome’s default logo. You can view the unpublished version of your site. Click on the Publish button to update your settings.
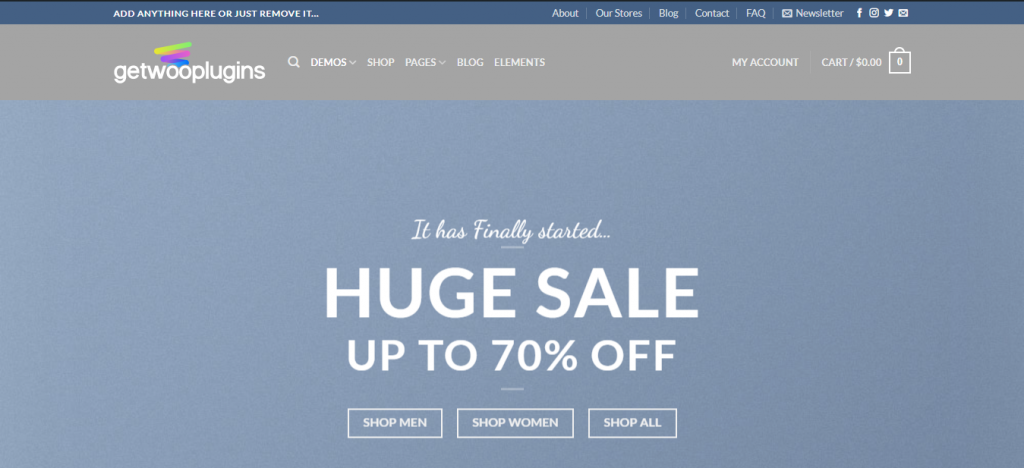
Step 9: The logo you submitted now appears on your site
Conclusion
Removing the default Flatsome logo and adding your logo is essential to increasing your brand’s value. If you didn’t upload your logo yet, it’s the right time to do it. It’ll take minimal effort but will generate a great impact.
The logo used here is the logo of GetWooPlugins. It provides essential plugins for WooCommerce. You need to use your logo there.
Special Tip: Try to use a contrasting background with your logo. It’ll make your logo look more prominent.
