This tutorial will show you how to translate the Flatsome Wooommerce theme with Loco Translate.
The Codestyling Localization plugin was the most popular and convenient plugin to translate WordPress plugins and themes. Since the plugin isn’t available anymore, Loco Translate can be considered the most suitable plugin for translation.
Let’s get into the process of translating…
If you prefer video instructions over the text contents, then we also have a step-by-step video tutorial that you can follow –
1. Change WordPress site language
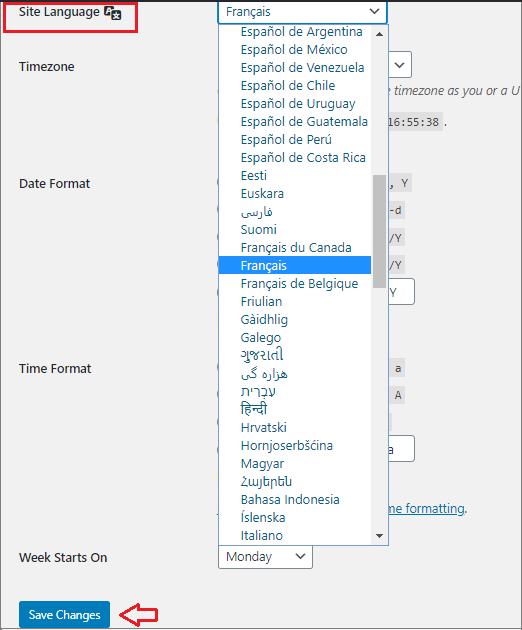
First, change the language of your WordPress installation according to your particular language. To use the new language, navigate to General from the Settings of your admin dashboard.
Switch to your particular language from the drop-down menu and click on the Save Changes button.
2. Install and activate the Loco Translate plugin
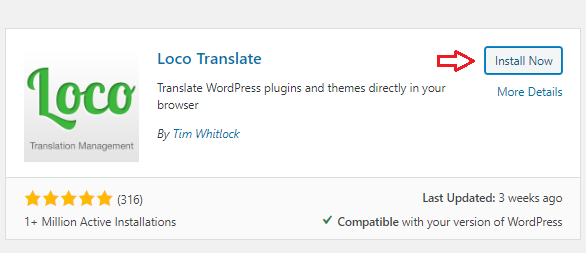
Before you can translate your Flatsome WooCommerce theme, you’ll have to install Loco Translate from your WordPress Dashboard.
Hiring experts to install a plugin might not be an option in all scenarios. That’s why you need to know the steps to install WordPress plugins.
3. Overview of available settings
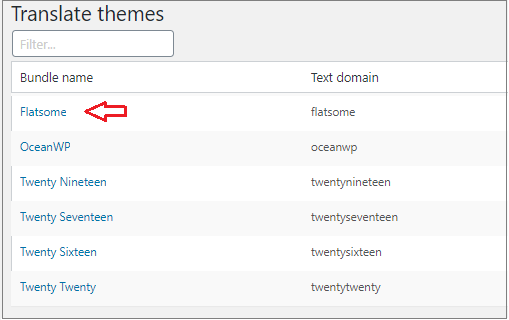
You’ll notice a Loco Translate menu option will be added to your dashboard once you have successfully installed and activated it. Click on Themes under the Loco Translate menu. A list of your installed themes and plugins will be listed there.
As we are going to translate for the Flatsome Theme, click on the Flatsome from the Active Theme section.
4. Choose your language to translate
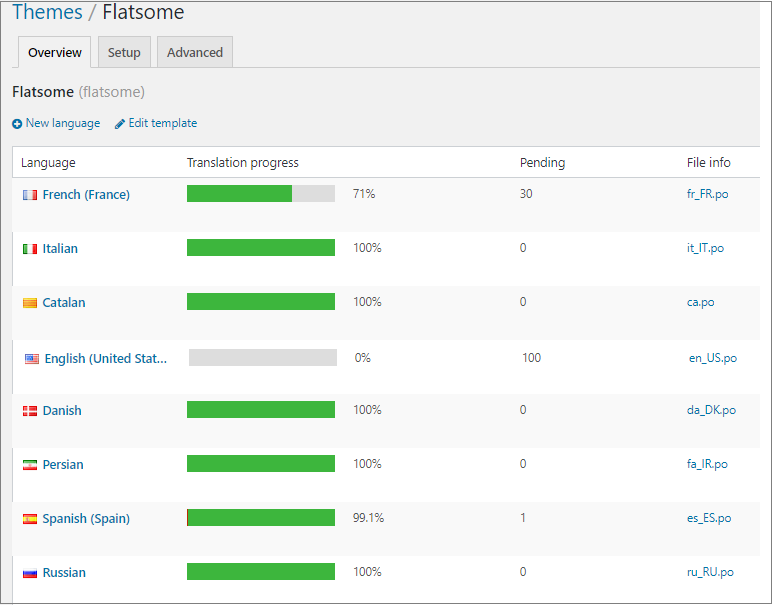
As soon as you choose the Flatsome theme, you can see the list of all available languages already translated. Search for the language you want to translate. The progress of the translation will be visible in numbers and percentages. If your desired language is in that list, click on it.
For example, you want to translate to French. Just click on French from the list.
5. Start your Flatsome theme translation
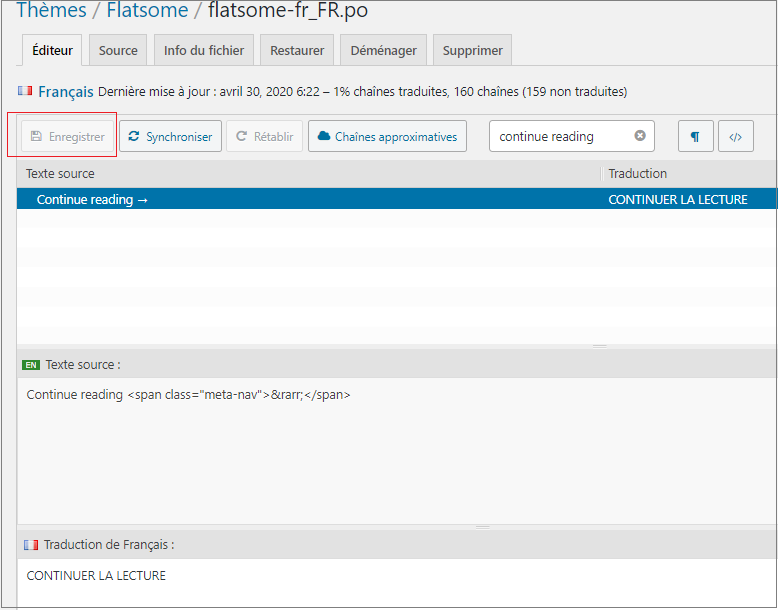
The next step will take you to the translation split sections. For the Flatsome theme, some language is already translated by default. So you don’t have to do it manually. However, it provides the option to change any strings if required.
Here I am showing a translation for a post’s ‘continue reading’ string. When you filter any word, it’ll show the translated language.
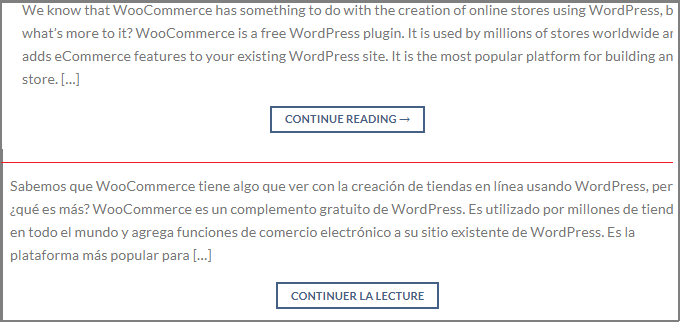
Once you have followed all the instructions properly, view the results in the Flatsome theme. The upper one was without the Loco translation plugin, and the below is after completing the required steps with that plugin.
What if you want to translate a language not already translated on the Flatsome theme? Creating a new language to translate with Loco Translate is also easy. Follow the below steps –
1. Create a translation template and language
Navigate to Themes under the Loco translate menu and choose the Flatsome theme.
Now you need to create a template file for translation. Click on the Create Translate option, and your template file will be created.

Once the template file is created, click on the New language button to set your language.

2. Select your language and location
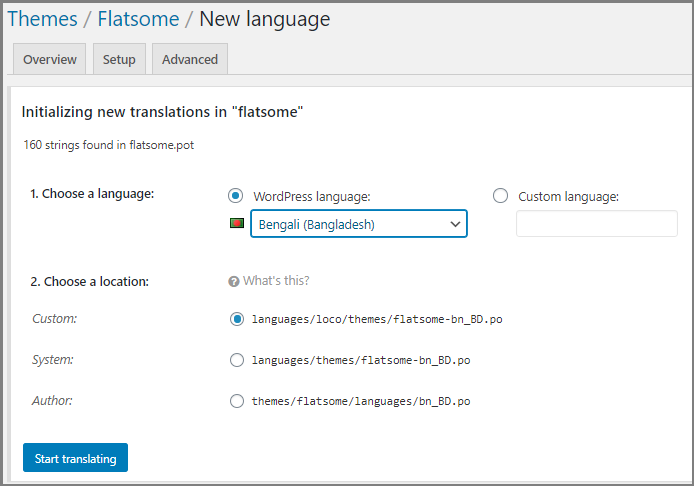
After clicking on the New language button, you’ll get the option to select a language from the dropdown menu.
Once you have selected your desired language, the Start translating button will be visible. There is also an option to choose a location. After that, click on the Start translating button to continue.
For further reference, check the list of languages you can use in WordPress (including the locales for each language).
3. Start your translation for a new language
The next step will show available string options that you can translate. I am offering a translation of Facebook’s social icon for demonstration purposes.
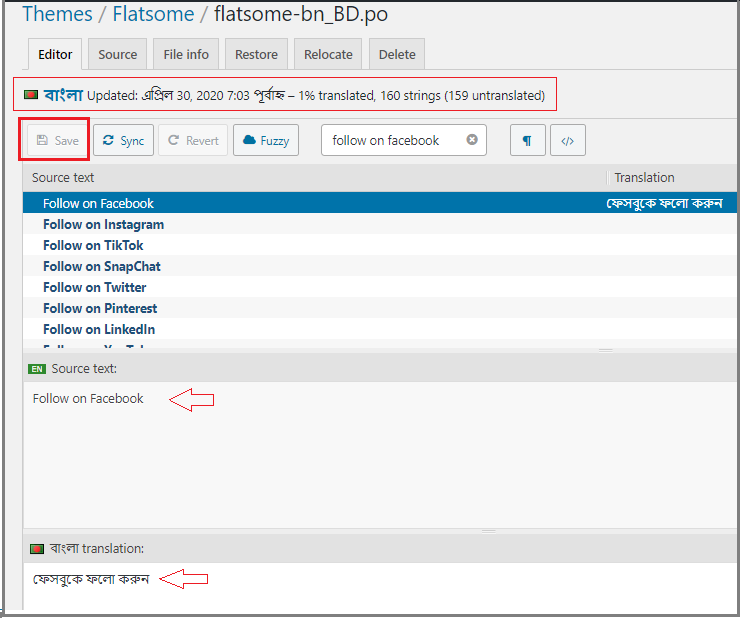
As soon as you are done, click on the Save button. Make sure you have already changed the language of your WordPress installation according to that particular language.
Once you have followed all the instructions correctly, view the results by visiting the Flatsome theme.

Loco Translate plugin to translate Flatsome theme is very convenient as it takes care of all technical aspects, including file creation, synchronization, and many more.
If you have further questions about the handling, settings, or usage of Loco Translate, feel free to ask in the comment section. Also, if you need a Flatsome tutorial or WooCommerce, let me know in the comment section.

