How to Create Shop Page Header with UX Builder in Flatsome Theme
Step 1: For editing the shop header, we need to create a new UX block. In the dashboard, hover on ‘UX Blocks’ and then click on ‘Add New.’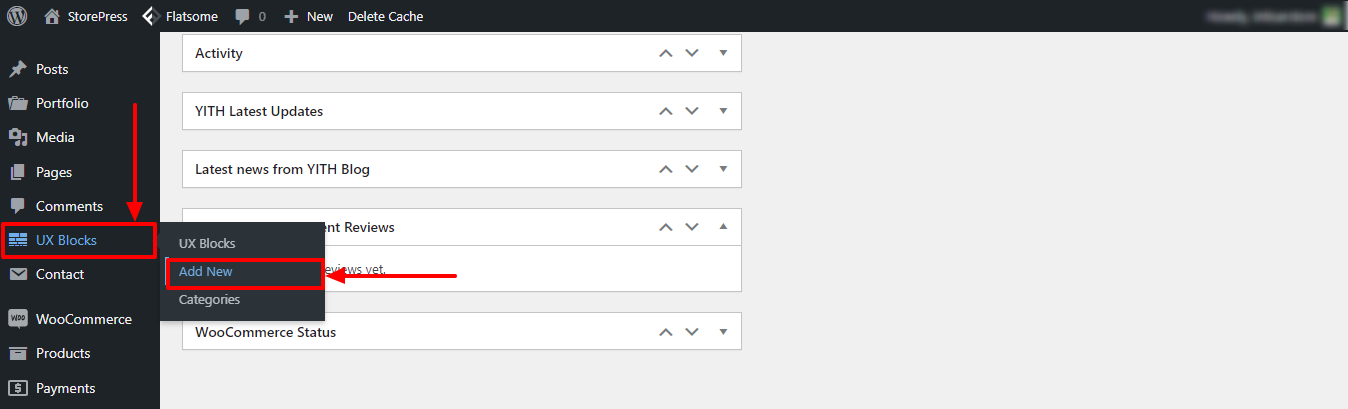 Step 2: Write the name of the UX block in the ‘Title’ field. You can choose any name you like. Inside the body, paste the shortcode given below.
 [ux_banner] Edit me [/ux_banner]
 Step 3: After publishing, you will see a shortcode for the block we just created. Copy the shortcode. You can also find other mobile-friendly WordPress themes that support shortcodes.
  Step 4: In the top admin bar, hover on ‘Flatsome’ and click on ‘Theme Options”. Most of the free simple WordPress themes can be integrated with WooCommerce.
 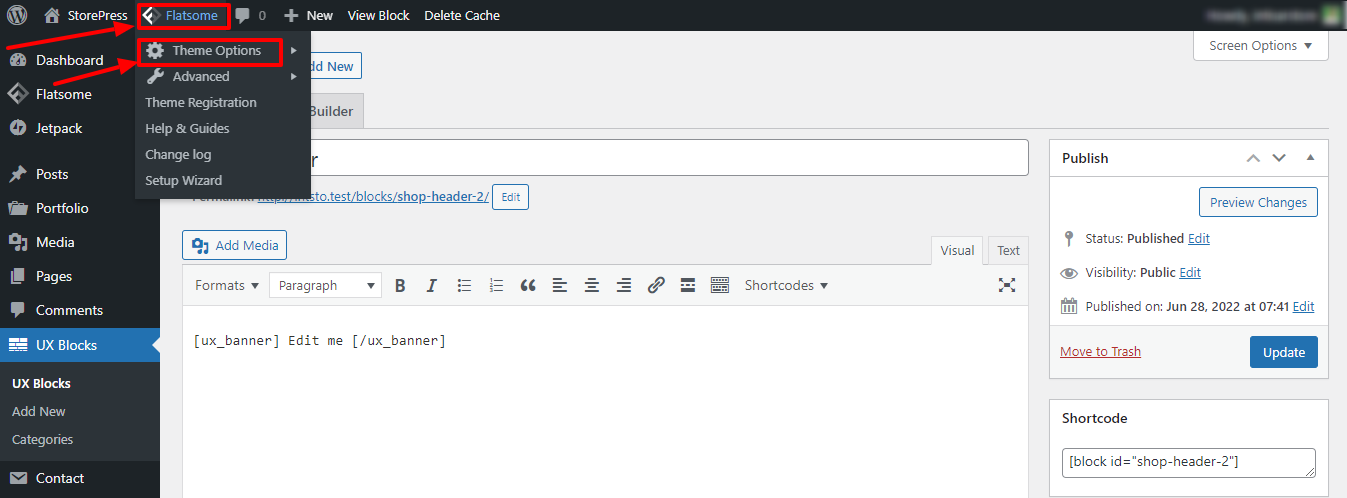 Step 5: You will be taken to the theme customization page. From there, click on ‘WooCommerce.’
 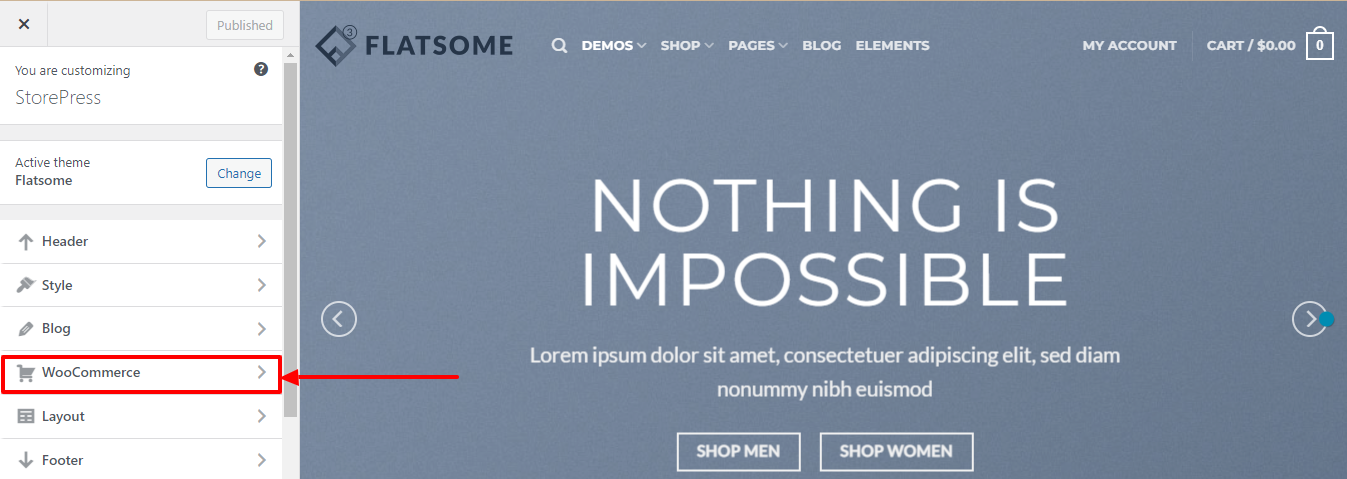 Step 6: Now click on ‘Product Catalog.’
 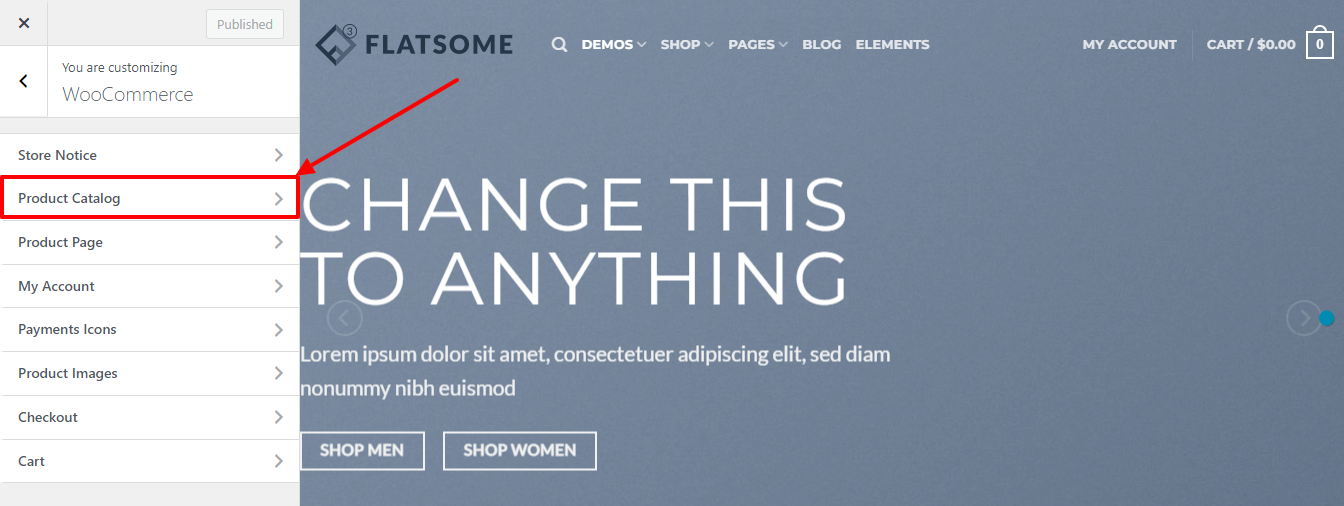 Step 7: Paste the UX Block shortcode we copied earlier into the ‘Shop Page Header’ section. After you pasted the shortcode, the ‘Shop Header’ block will be instantly visible right after the web page header design.
 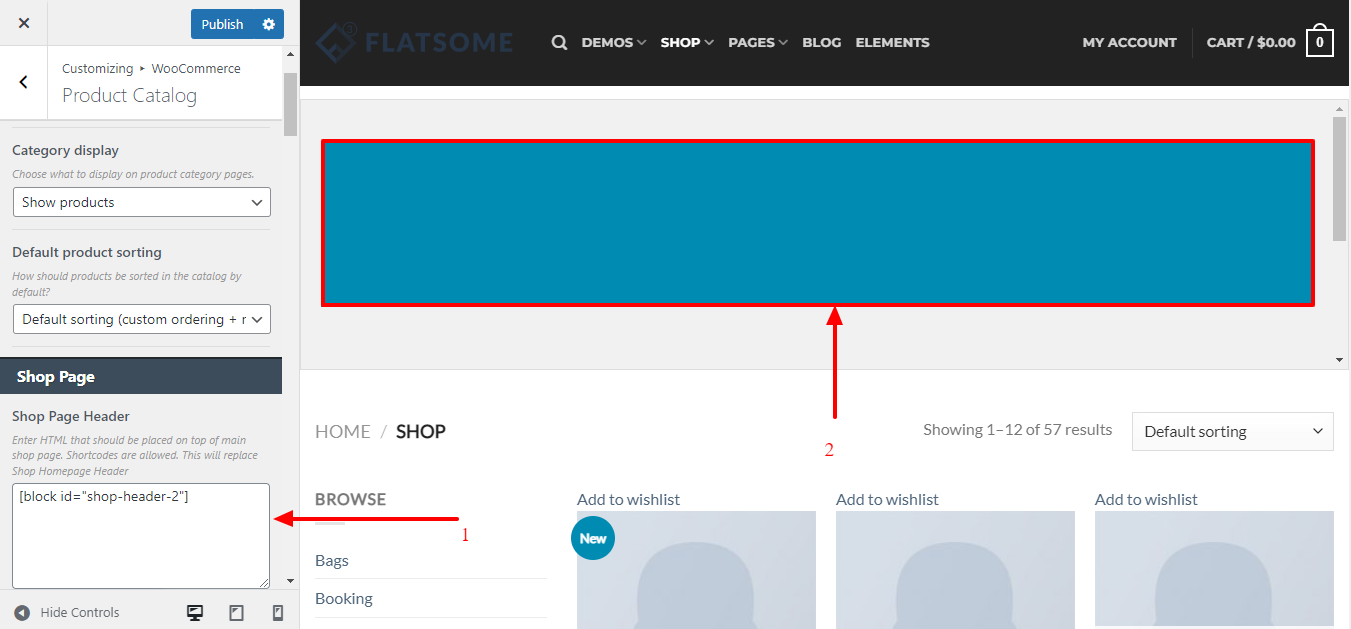 Step 8: Click on ‘Publish’ to save the changes. After that, click on the ‘X’ icon at the top-left corner to exit from the theme customizer.
 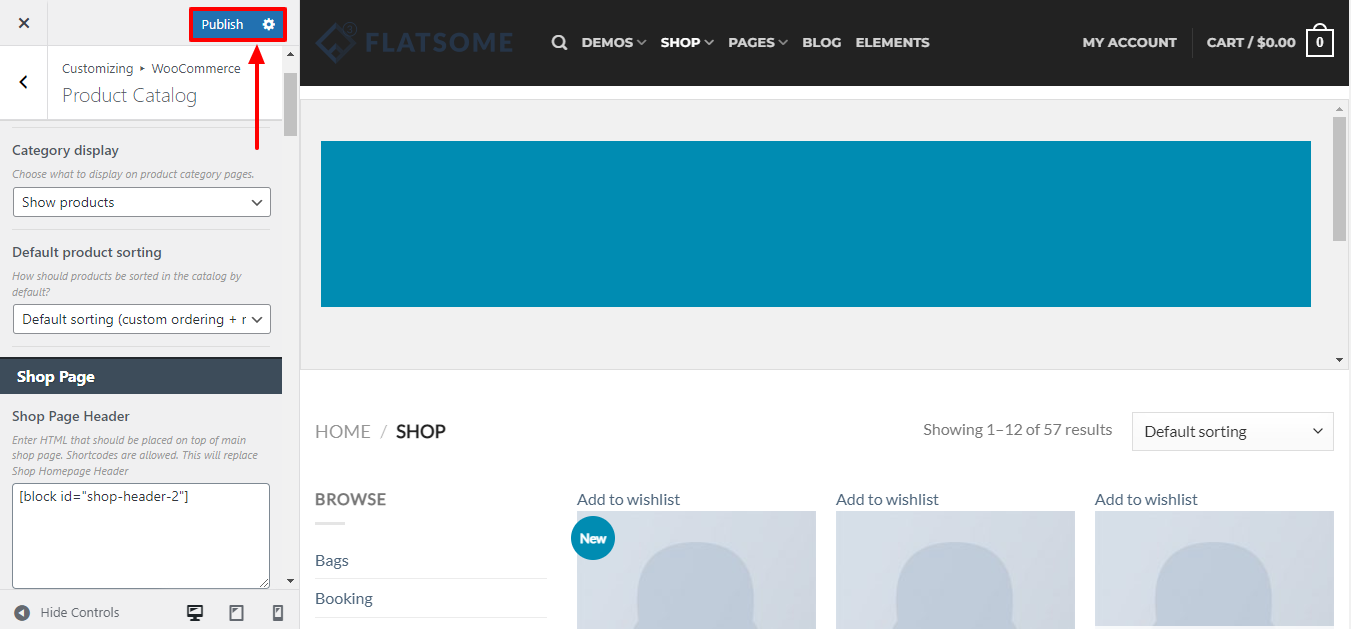 Step 9: Go to the Dashboard, hover the pointer on your store name, and click on ‘Visit Store’ to open your shop page.
 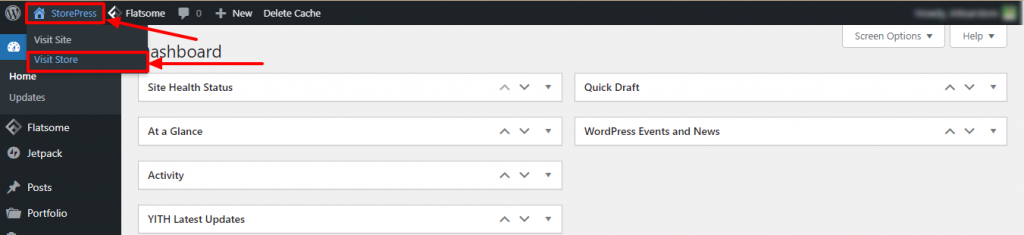 Step 10: Hover on the ‘Shop Header’ section we just created and two options will popup. Click on ‘UX BUILDER’ to edit your shop header.
 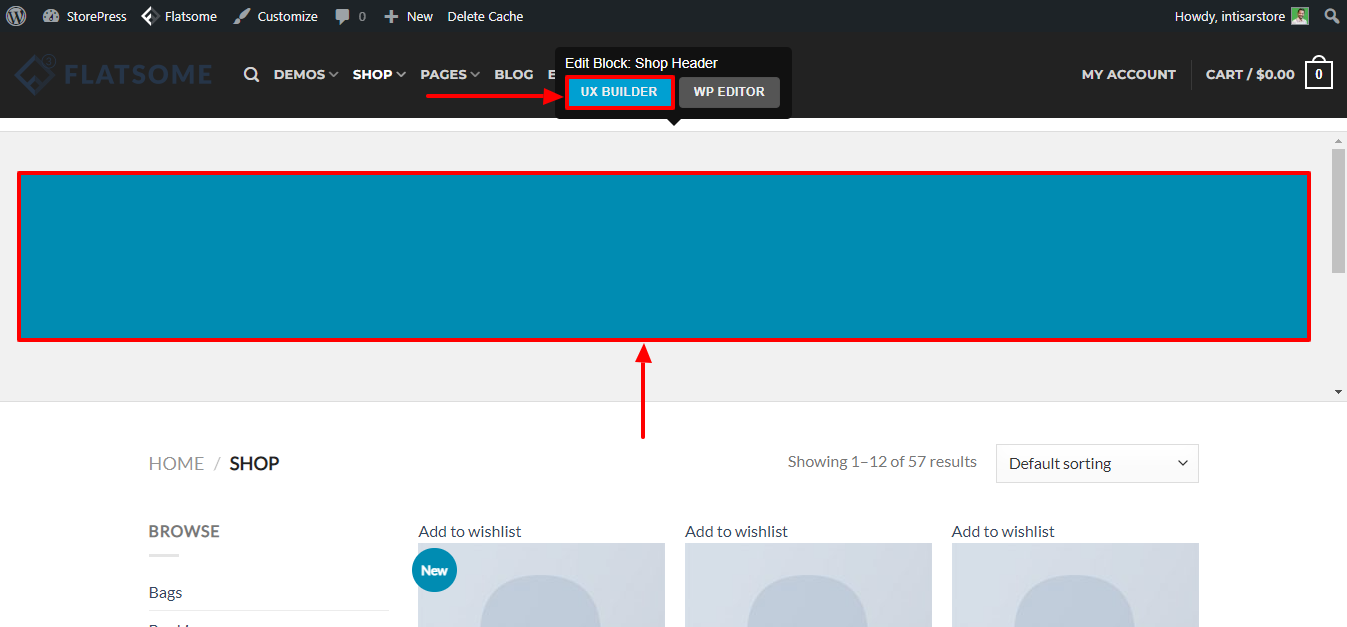 Step 11: The shop header block will open in UX Builder. You can see that the banner we created earlier using shortcode in the shop header block is visible. From here, you can edit the shop header the way you want. For demonstration, we’ll add an image to the header section. To do that, click on the setting icon of the Banner, then click on the Options.
 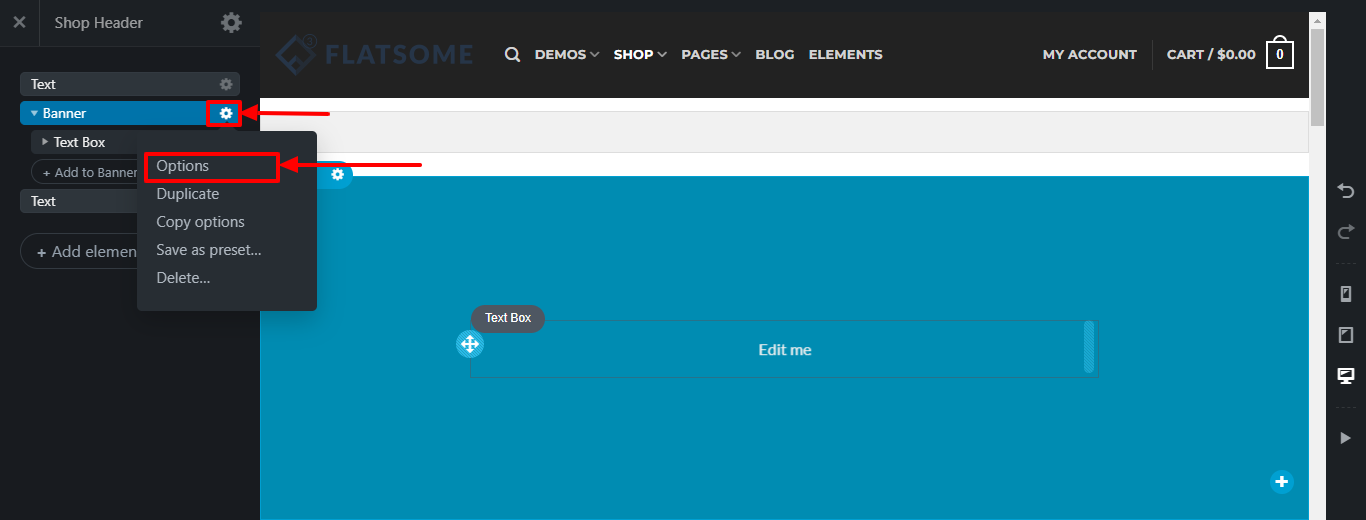 Step 12: A new section will appear on the left. You can custom the Banner from here. Under the title, Background, click on the Select media, and upload the image you want to add.
 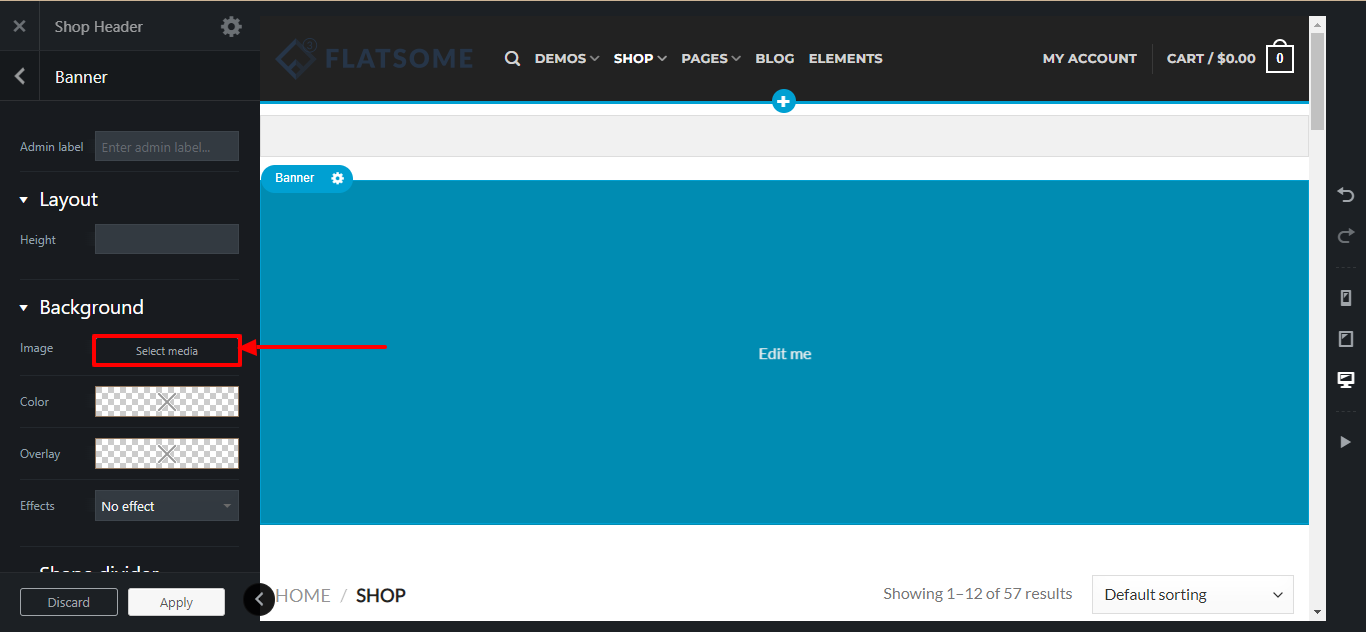 Step 13: After adding the image, click on the Apply button on the left bottom of the page.
  Step 14: Click on the Update button to apply this to your main site. It’ll immediately add the customization you’ve applied.
 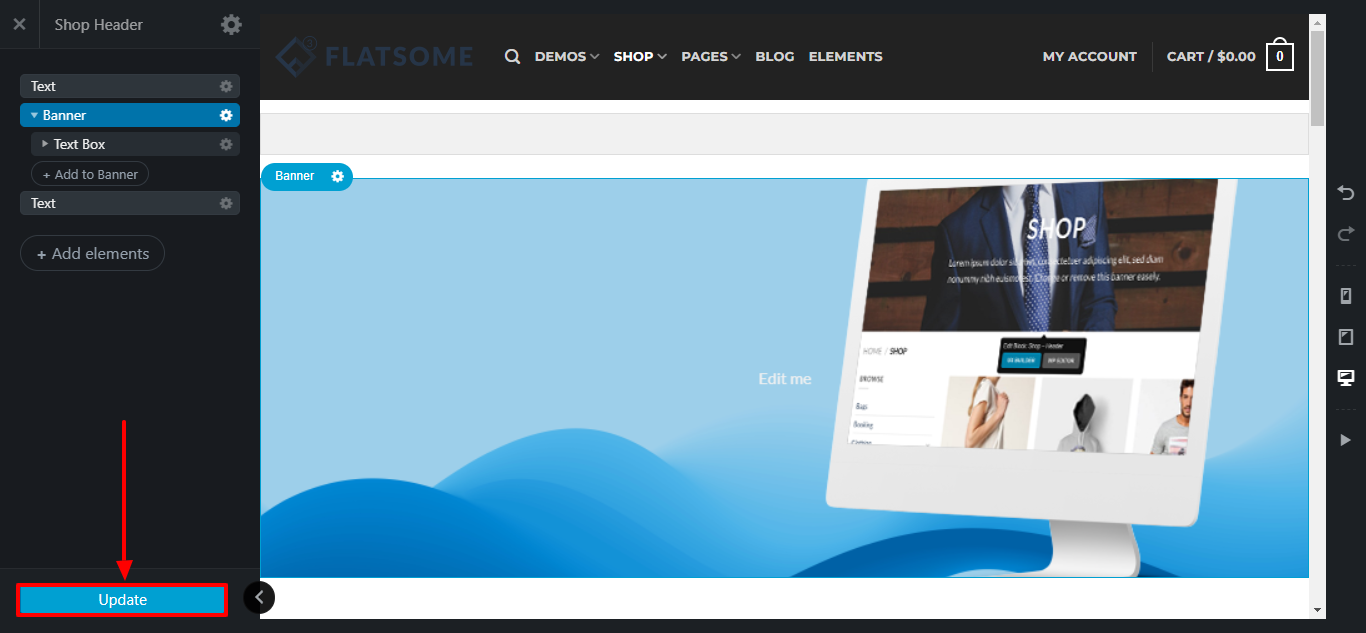 Final Preview: After creating the shop page header, your web page header design will look like this.
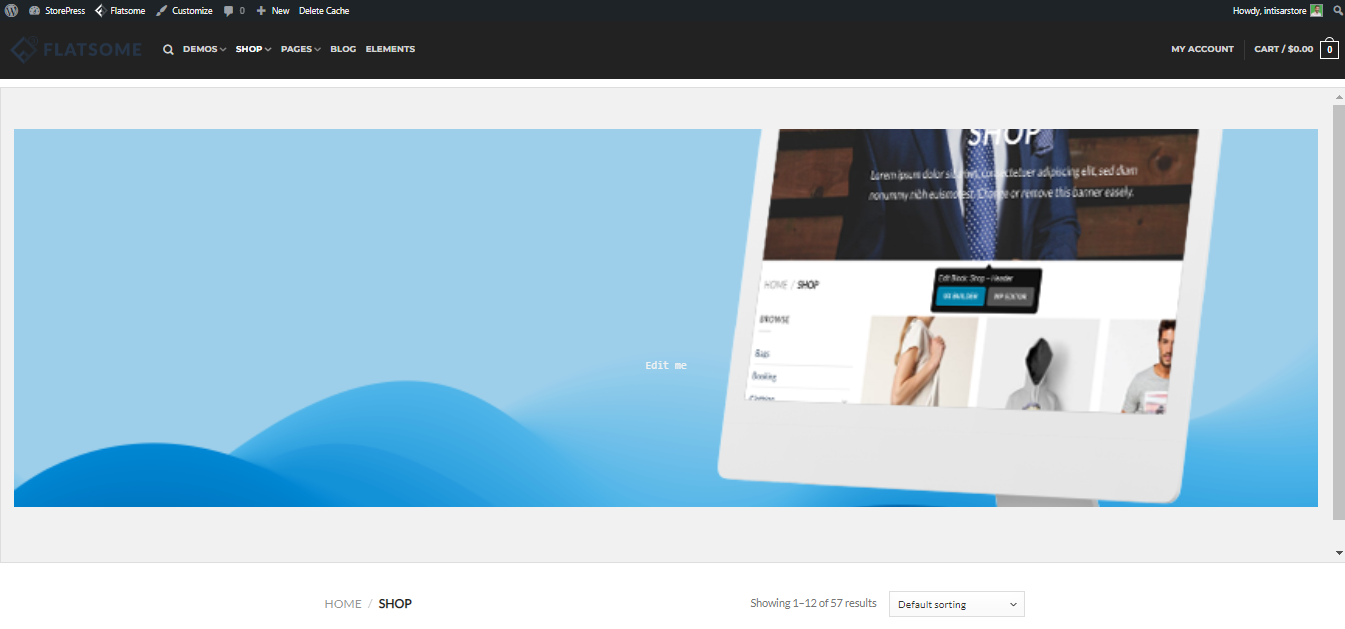
Conclusion
Following the steps shown above, you can create an amazing and functional shop header for your shop page in the Flatsome theme. You can include a nice banner, buttons, breadcrumbs, and many other elements into the shop header to make it look beautiful. We hope this tutorial will guide you well in the process of decorating your shop page. Follow WPCred for more awesome tutorials like this! Feel free to check out our tutorial on how to add payment option icons to the footer in the Flatsome-powered website for more insight about development with the Flatsome theme.