File upload is an important aspect of any website and web application. But there are limitations to a website accepting file upload types. It can often happen that the file you want to upload, the WordPress system, doesn’t allow the file upload types. So, you need WordPress to accept your file upload types to keep your work running. This tutorial will demonstrate how quickly you can add custom file upload types to your WordPress website to upload your preferred file without any restrictions. At the end of this WooCommerce tutorial, you will learn to add more file upload types and make your website user-friendly and user efficient.
File Upload Types Supported in WordPress
WordPress allows you to upload files with commonly used file upload types to protect your website and make it secure although you know how to improve website security, WordPress only wants you to use their platform safely. There are only a handful of file upload types you can use in WordPress, and everything else will get file upload type errors.
WordPress supports these file types by default:
Documents
.pdf
.doc
.docx
.ppt
.pptx
.pps
.ppsx
.odt
.xls
.xlsx
.PSD
Images
.jpg
.jpeg
.png
.gif
.ico
Video
mp4
.m4v
.mov
.wmv
.avi
.mpg
.ogv
.3gp
.3g2
Audio
.mp3
.m4a
.ogg
.wav
Add Additional File Upload Types in WordPress
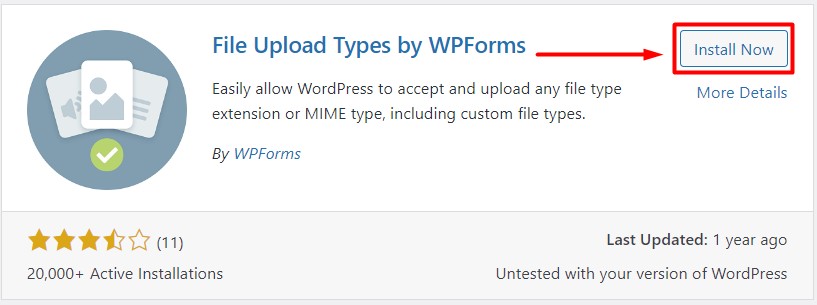
File Upload Type By WordPress is a fantastic plugin that will allow you to quickly add custom file types to your WordPress website. The plugin provides two ways to add additional file upload types in WordPress. You can use the premade file type with the plugin or simply create new ones by yourself to include them in your WordPress website. These can be easily achieved with a few steps.
Step 1:
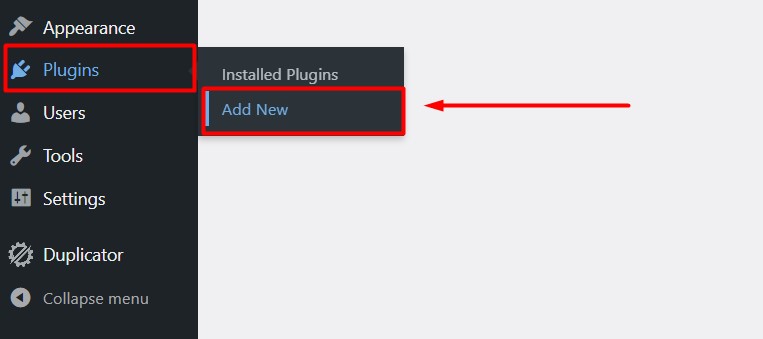
From the WordPress dashboard, hover on ‘Plugins’ and click on ‘Add New.’
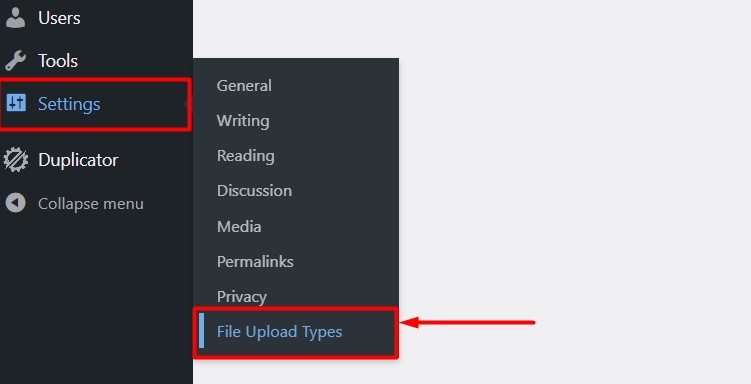
After installing and activating the plugin, hover on ‘Settings’ from the WordPress dashboard and click ‘File Upload Types.’
Step 4:
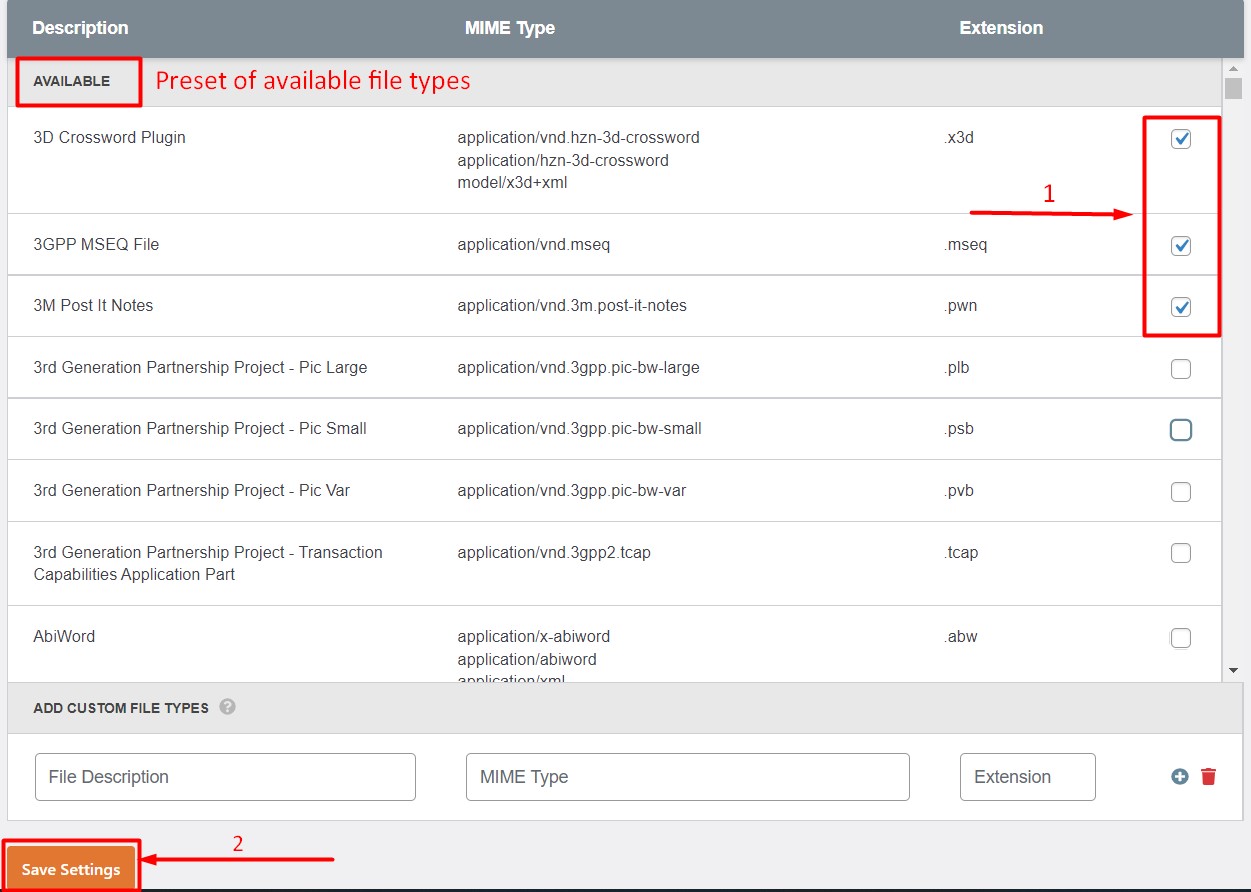
You will be taken to the file upload type customization page. You will be offered a massive list of available file types you can choose from and include in your WordPress website to support the particular file type from then. Simply click on the tick box beside the file type name, choose as many as you like, and click ‘Save Changes.’ That is all you need to do to add additional file types in WordPress using the file types preset. This process is the same for all top free WooCommerce themes in WordPress.
Step 5:
If you can’t find your required file type in the preset by any chance, you can always create additional file types in WordPress using the ‘Add Custom File Types’ section, which is located just below the file types preset. All you will have to do is to input a file description, MIME type, and extension in the respective field and click ‘Save Settings.’
Conclusion
Following the steps mentioned above, you can make your WordPress website accept any file type you want. Using the free plugin, you can choose a file type from the preset or create a new file type and add it to your website. This will increase your website’s user efficiency. We have used the free version of the File Upload Type by WPForms plugin. You can always extend the plugin to its premium version and unlock more powerful features. Feel free to go through our article on Avada vs. Flatsome theme comparison to get insight into the most popular WordPress WooCommerce themes. We hope this article will be helpful for you.