
Google Search Console (formerly Google Webmaster Tools) is an excellent, free service that will help you to keep tables on your website’s SEO performance. Basically, you need the best SEO plugins in WordPress to improve your performance. But all plugins get the information from Google to utilize the platform best.
My previous guide is about the importance, advantages, and reasons you need to add Search Console to WordPress for your Flatsome Powered Website.
In this tutorial, I will show you how to easily add and verify your Flatsome Powered sites in Google Search Console, also known as Webmaster Tools.
Now it’s time to get a little more hands-on. Let’s start with how to set up Google Search Console, start using it and integrate it with your Flatsome-powered website.
Add Google Search Console to WordPress website
As mentioned earlier, all you need is a Google account to access Google Search Console.
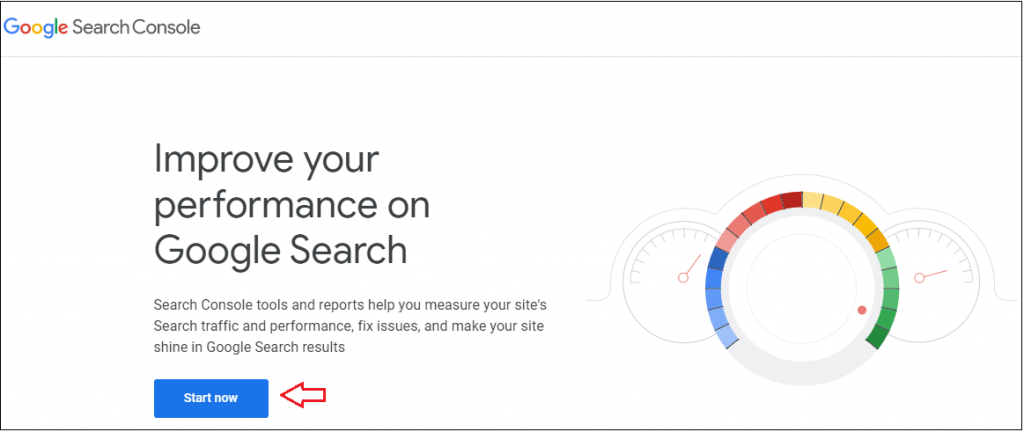
First, head to the Google Search Console website and click on the ‘Start Now button.
Now, you’ll need to login with your Google account. Once signed in, you’ll be asked to provide your website URL.
There are two different methods for website verification. One is a domain name, and another is a URL prefix. The URL prefix method is more flexible, that’s why we recommend the URL prefix method.
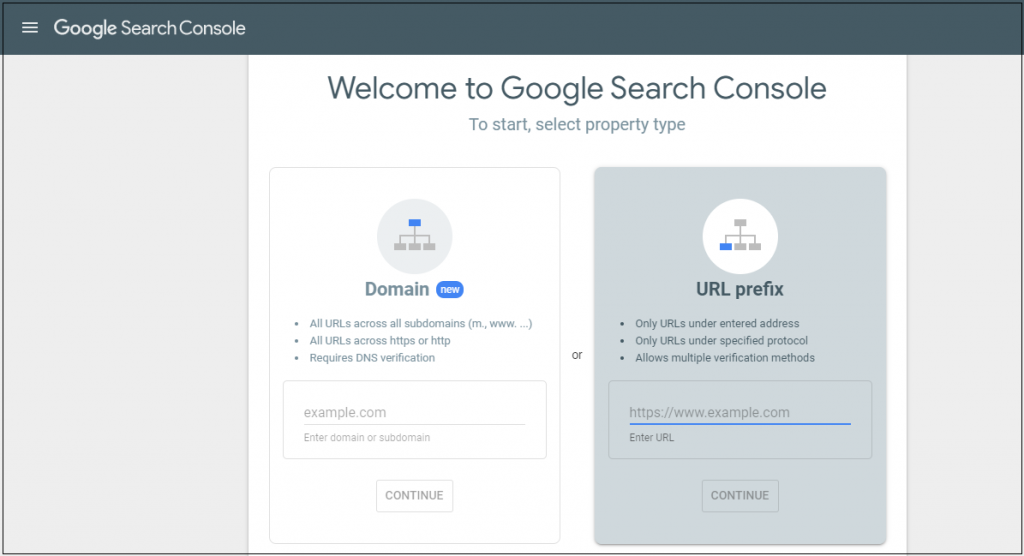
Bear in mind that, Google considers HTTP and HTTPS as two different protocols. It considers http://www.wpcred.com and htttps://wpcred.com as two different websites.
So, it’s required to enter the correct site URL of your Flatsome-powered site. Sometimes you will get HTTP errors but don’t worry you can know easily how to solve HTTP errors from another article.
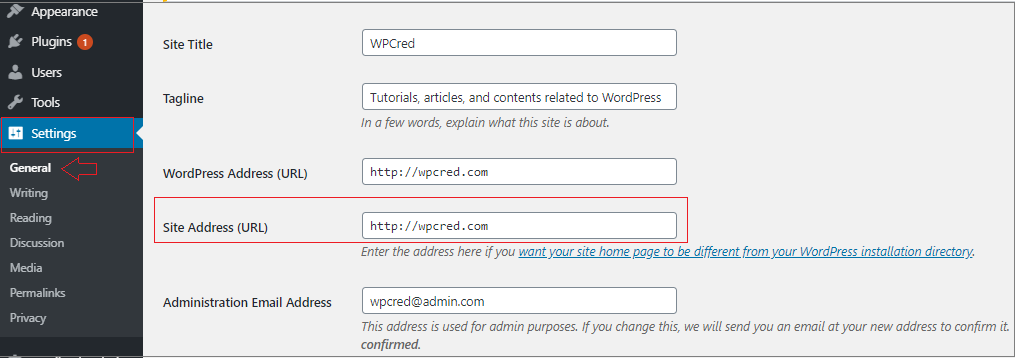
If you are unsure, there is an easy way to find the exact URL you need to enter. Just head to your WordPress admin dashboard and go to General under Settings.
Click on the Continue button once you have entered your correct site address in the Google Webmaster Tool setup wizard to go to the next step.
Now it’s time to verify ownership of your website. You can verify several ways, but the HTML tag method is the easiest one. That’s why I am going to show you the HTML tag method first.
Add verification meta tag in Flatsome theme

Now you have a Google Search Console account ready. Let’s install Google Webmaster Tools in the Flatsome WooCommerce theme.
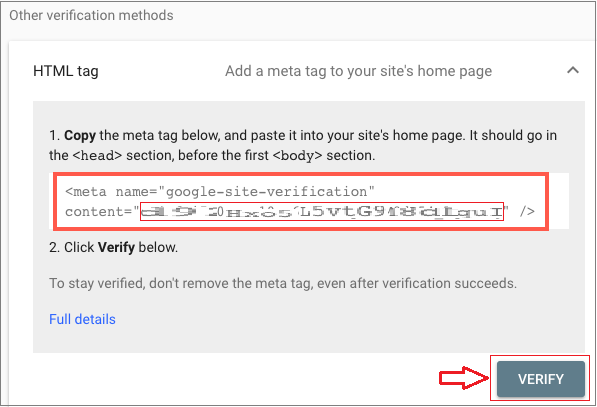
From the options, click on the HTML tag to expand it and copy the code that is inside.
To verify the owner of the website, you need to add this Google site verification Meta tag in WordPress.
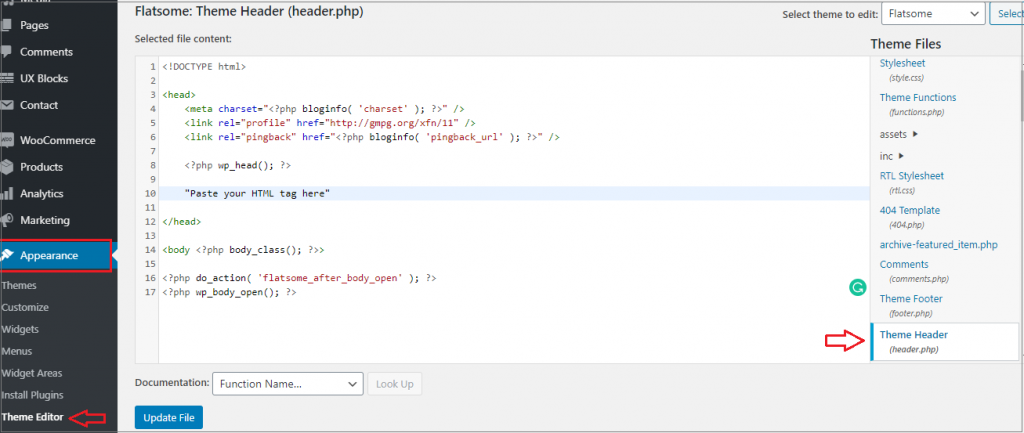
Now edit the header.php file of your Flatsome theme above the (body) tag.
I suggest you create a child theme on your WordPress website if you go the manual route. Otherwise, your tracking code will be overwritten if you switch or update the theme.
Go to Theme Editor under the Appearance menu on your dashboard. Select header.php file. Paste the tracking code right before the </head> tag in the editor.
Make sure to click on the Update File button. The tracking code will be activated successfully.
There is another method you can add Google Analytics to the Flatsome theme.
For that, head to your WordPress admin dashboard. Look for Advanced under Flatsome and click on Global Settings. You’ll find Header Scripts to paste your analytics code. Now go back to Google Search Console settings and click on the ‘Verify’ button.
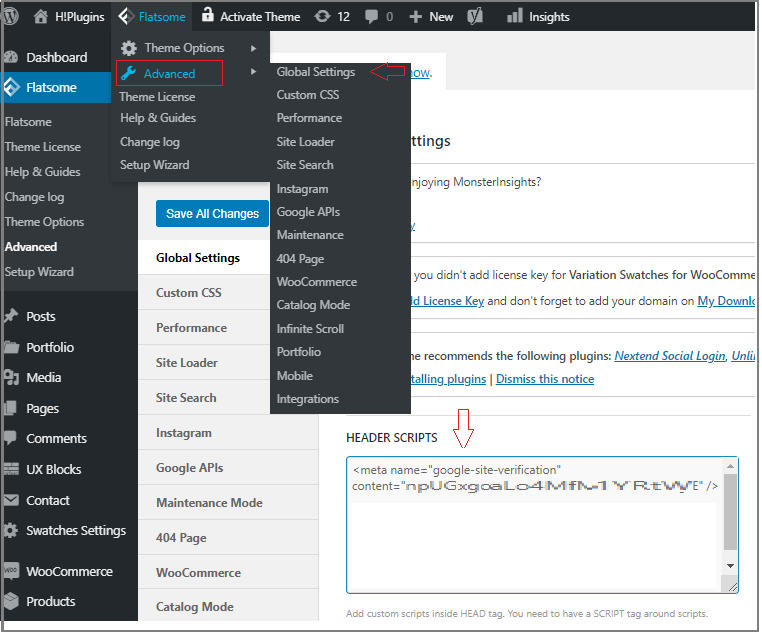
Save All Changes by clicking on the button below on that page.
In most tutorials, you’ll notice that they guide you to follow these methods. However, we don’t recommend this method. The reason is the HTML tag may disappear when you update your theme. In that case, you can know how to update the WordPress theme and then proceed.
That’s why we will also show you how you can take the help of a plugin to insert the Meta tag exactly where it is needed.
Add meta tag using a plugin
For that, you need to install and activate the Insert Headers and Footers plugin. To learn how to install a plugin, we have created a tutorial that explains it step by step.
Upon activation of the plugin, you can head to the Insert Headers and Footers option under the Settings of your WordPress dashboard. After that, paste the Google HTML tag code inside the Scripts in the Header file.
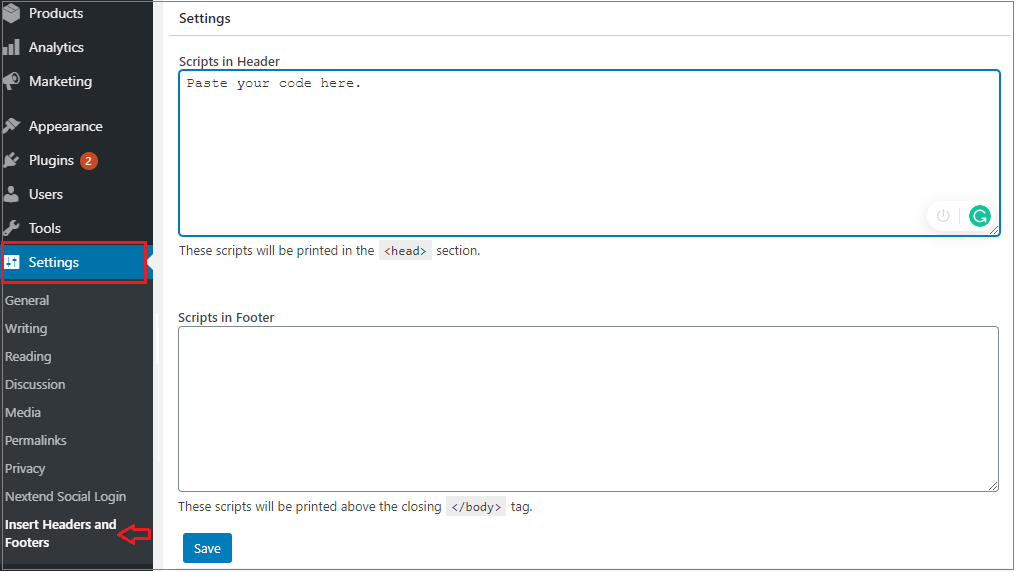
Click on the Save button to store your changes. Now go back to Google Search Console settings and click on the ‘Verify’ button.
It will look for the HTML tag in your site code and will show you an Ownership verified message.
Note: You may need to clear your WordPress cache if you don’t see a successful message. It will ensure that Google can fetch the latest version of your website.
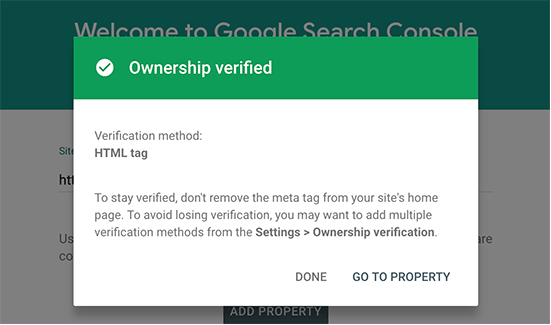
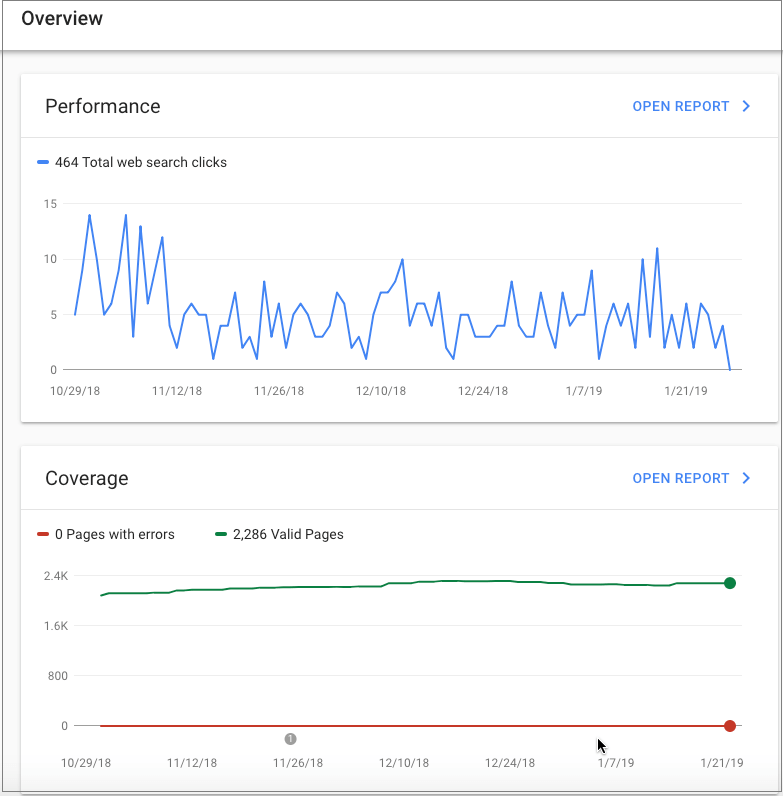
That’s it. You have successfully added your Flatsome theme to the Google Search Console. You can now visit the dashboard by clicking the ‘Go To Property’ link and check reports and insights.
It’s time for you to take advantage of the power of knowledge and insights you will gain to improve your Flatsome-powered site’s performance. If you need more tutorials on Flatsome theme or WooCommerce, let me know in the comment section.
Google Analytics will help you to decrease the bounce rate and increase your pageviews. To know how to add google analytics with WordPress in your Flatsome WooCommerce theme, check the linked article.
