Adding a label to the menu item is effective for online stores. The menu labels allow your customer to get acknowledged quickly about your special items. A custom menu label is a smart way to attract your customer to the highlighted products. We will guide you step-by-step on how you can create and add custom menu labels to the menu items. You will be able to create colorful and eye-catching menu labels for your customers after finishing this tutorial. You can also know how to create a website mega menu in the Flatsome theme.
How to Add a Custom Menu Label in Flatsome Theme Step-by-Step
Step 1:
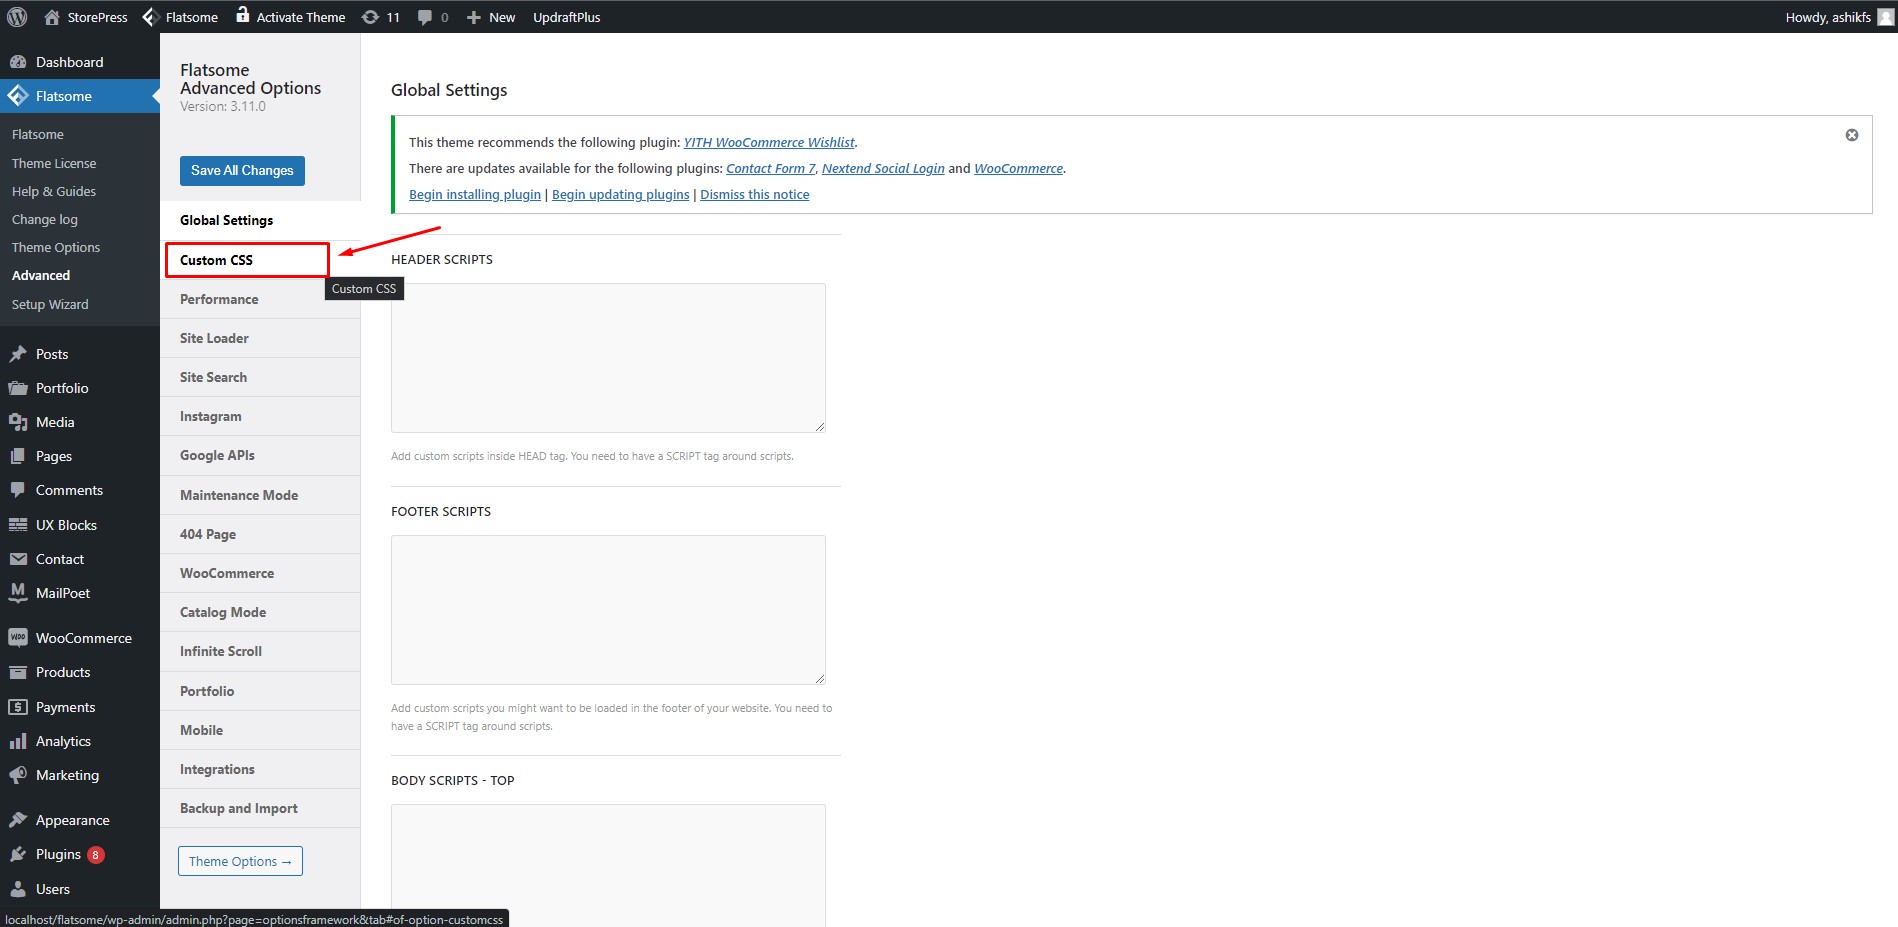
From the admin top bar, hover on ‘Flatsome’ and click on ‘Advanced.’
Step 2:
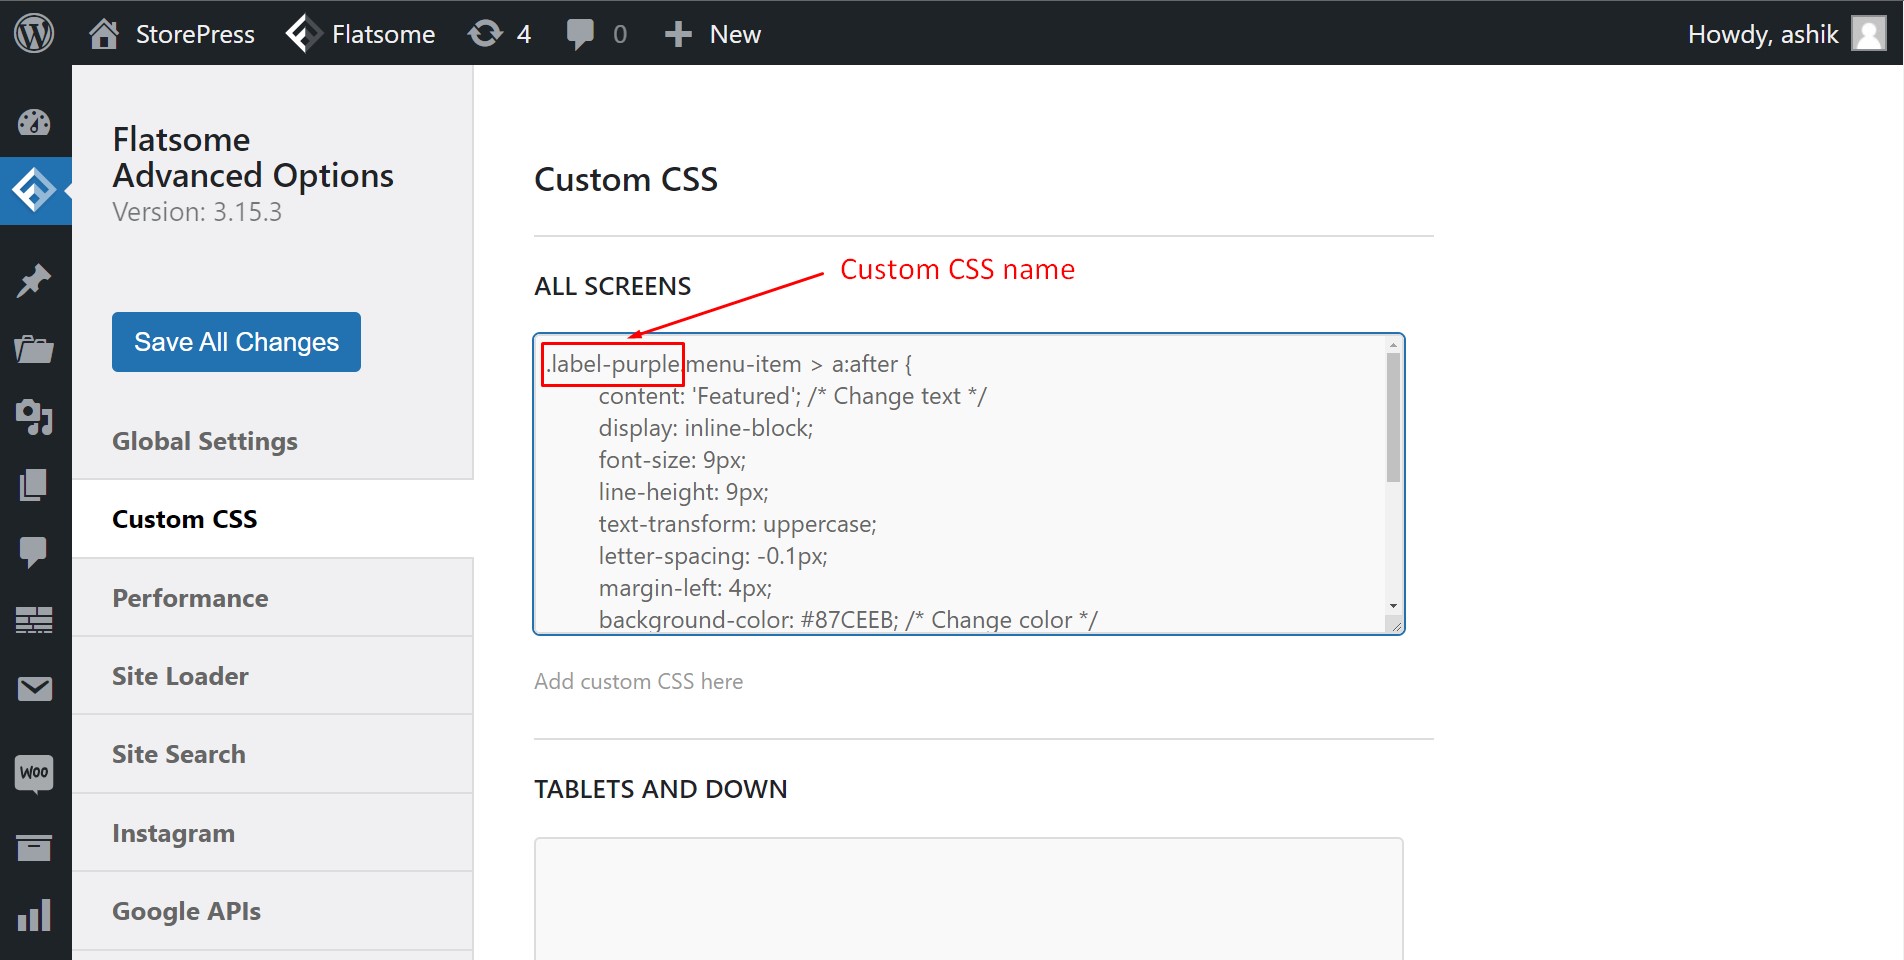
On the ‘Flatsome Advanced Options’ page, click on the ‘Custom CSS’ tab. Most of the top mobile-friendly WordPress themes have custom CSS fields.
Step 3:
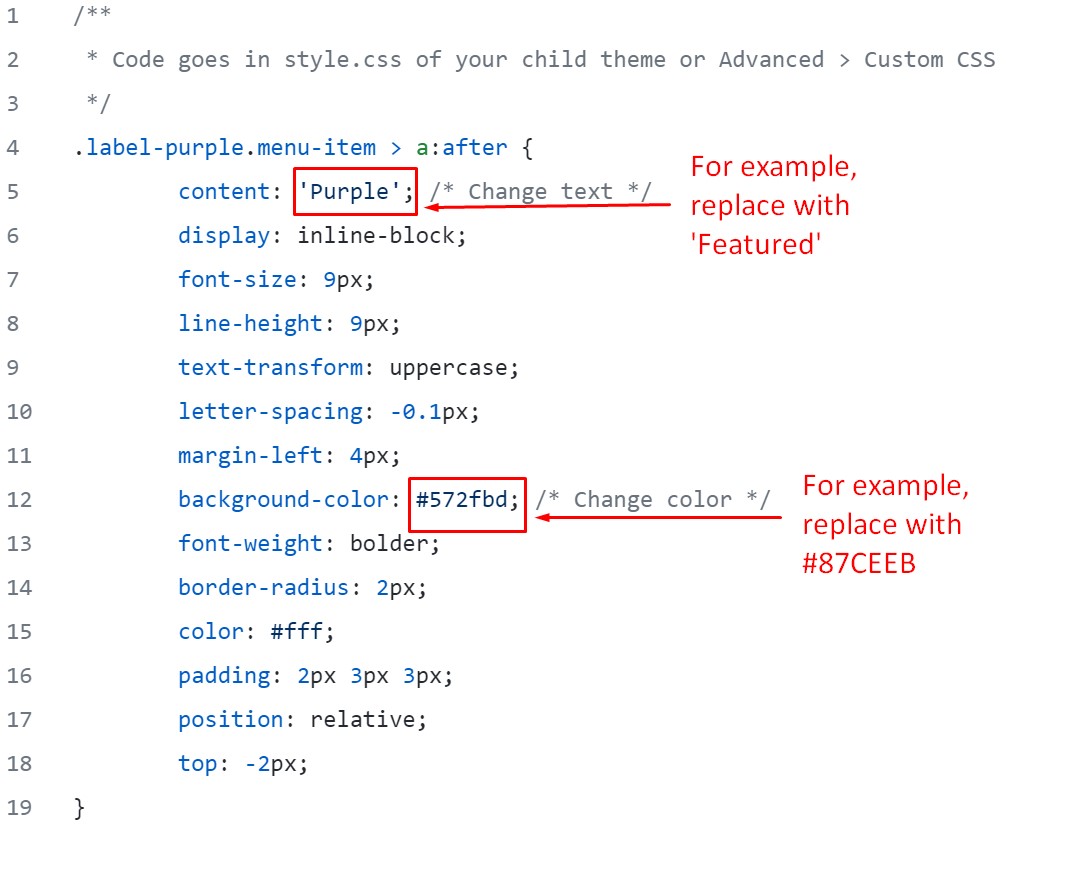
Now we need to add a custom CSS code to the ‘All Screen’ section on the ‘Custom CSS’ tab. You can also paste this CSS code into your child theme’s ‘style.css ‘ file. If you don’t know how to create a child theme WordPress, see another tutorial. ********************************************************************************************/** * Code goes in style.css of your child theme or Advanced > Custom CSS */
********************************************************************************************** You need to customize the code in two places according to your need. Inside the code, write the name of your label in the ‘content’ value; replace ‘Purple’ inside the ‘’(apostrophes) with the name of your choice. Similarly, replace the ‘background-color’ value with the Hexa color code of your choice.
Step 4:
Paste the given code inside the ‘All Screen’ custom code field.
Step 5:
Click on ‘Save All Changes’ to save our custom CSS code in the Advanced Options.
Step 6:
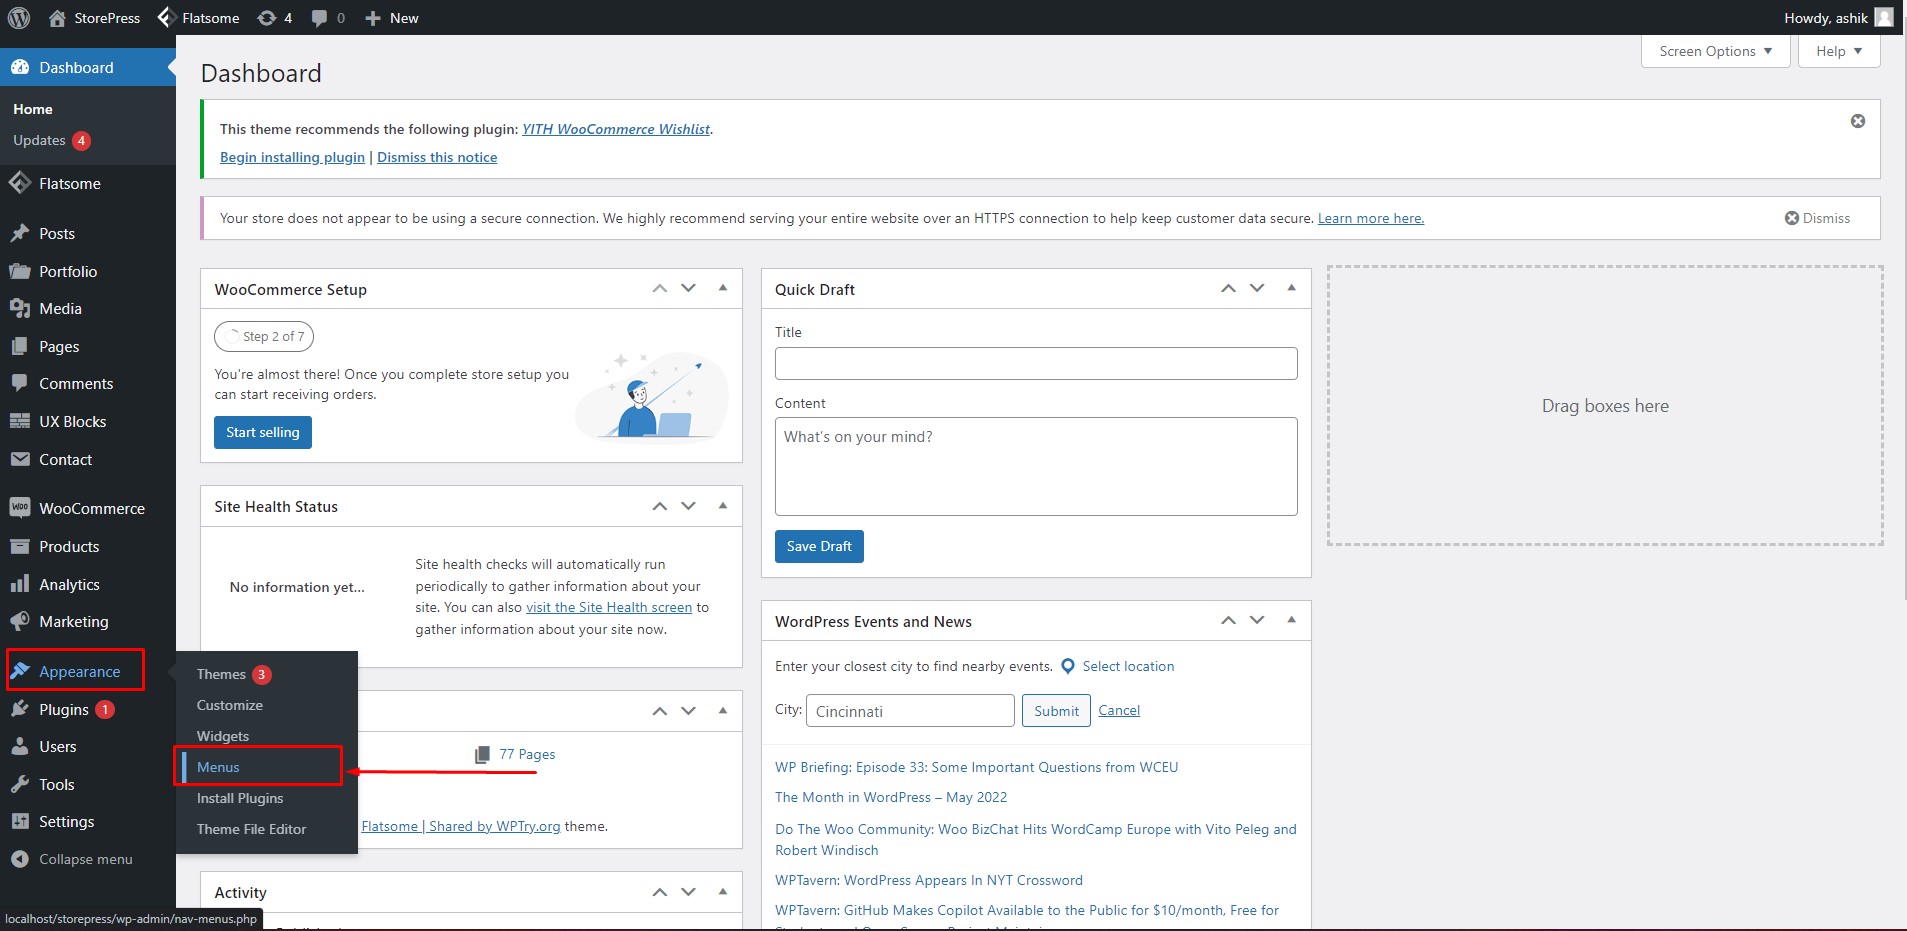
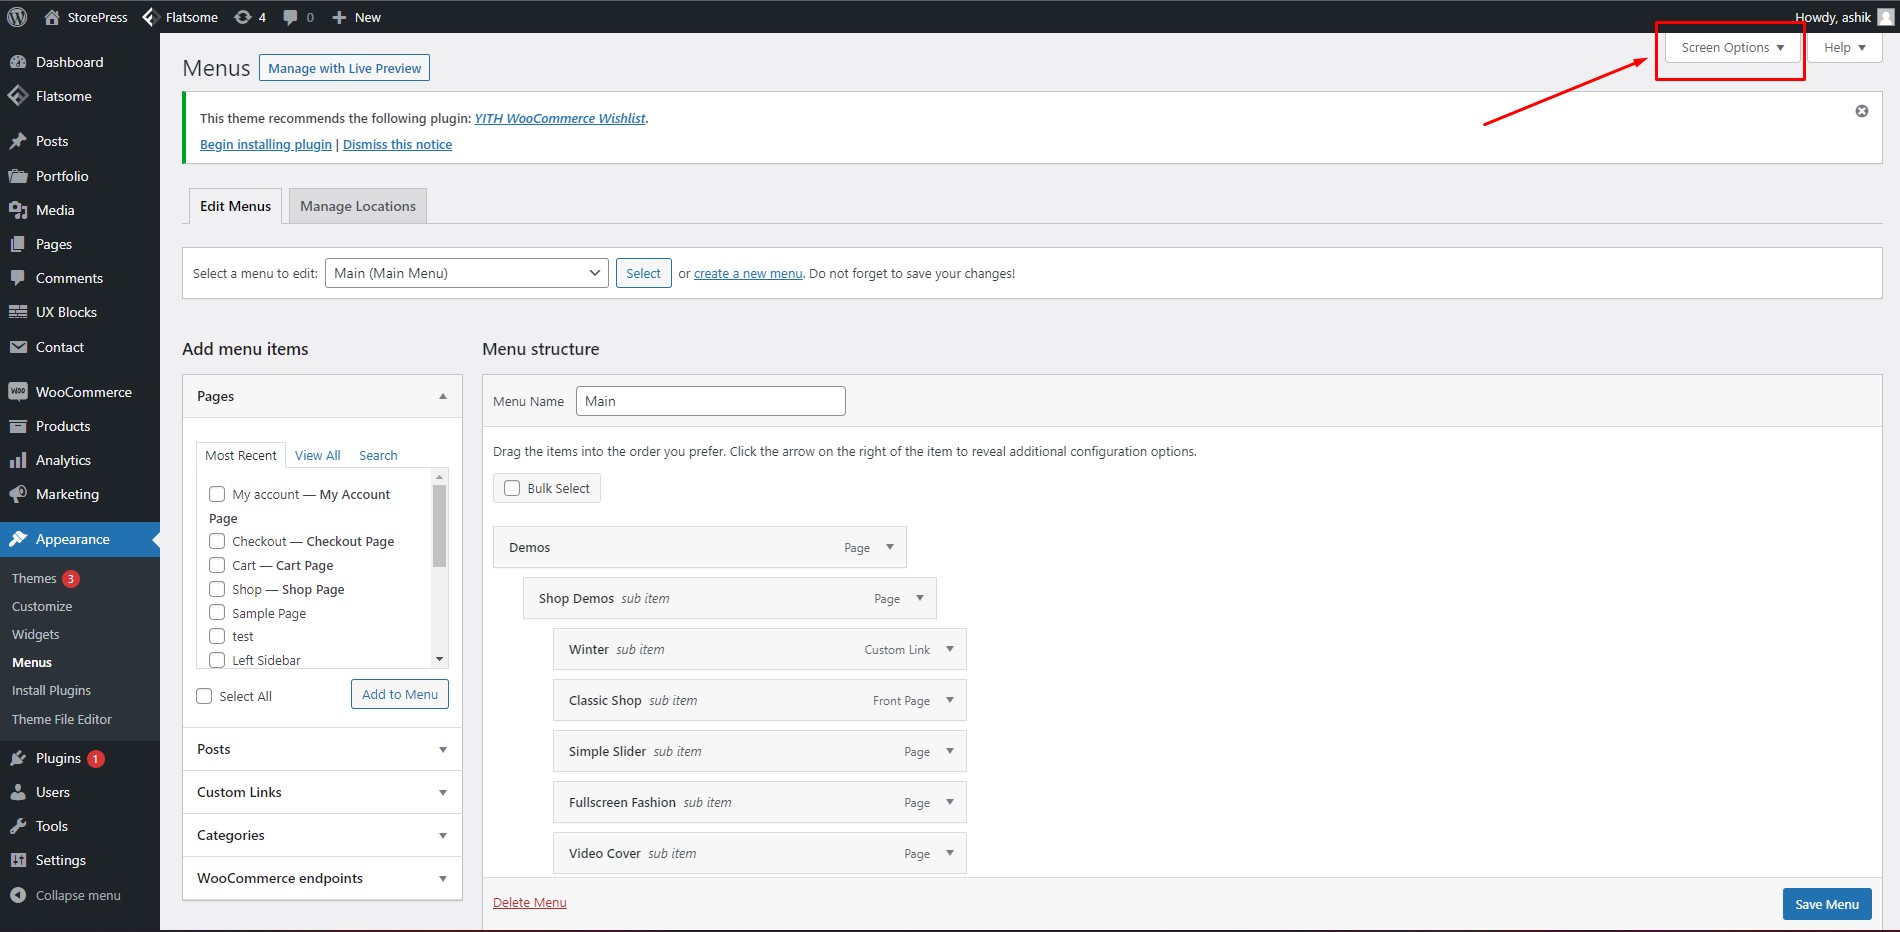
Now on the dashboard, hover on the ‘Appearance’ option and then click on ‘Menus.’ Creating and editing the menu is pretty much the same in all the best premium WordPress themes to build an awesome eStore.
Step 7:
Click on ‘Screen Options’ in the top-left corner.
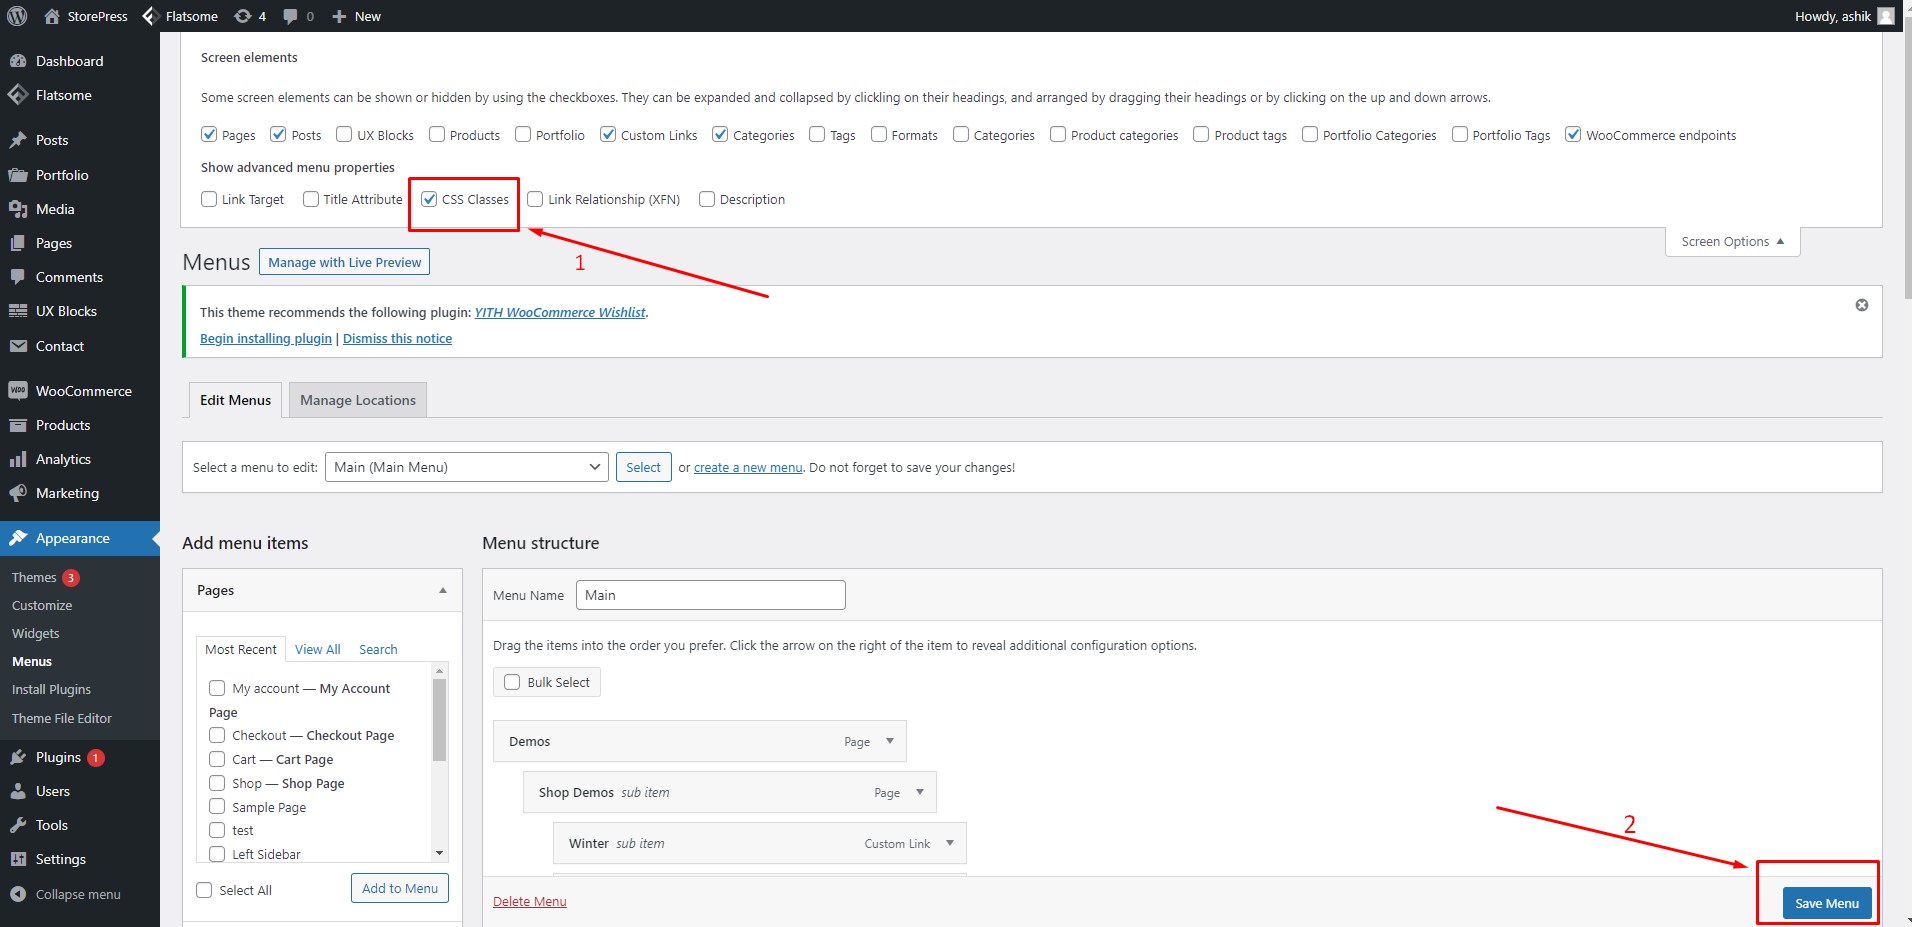
Step 8:
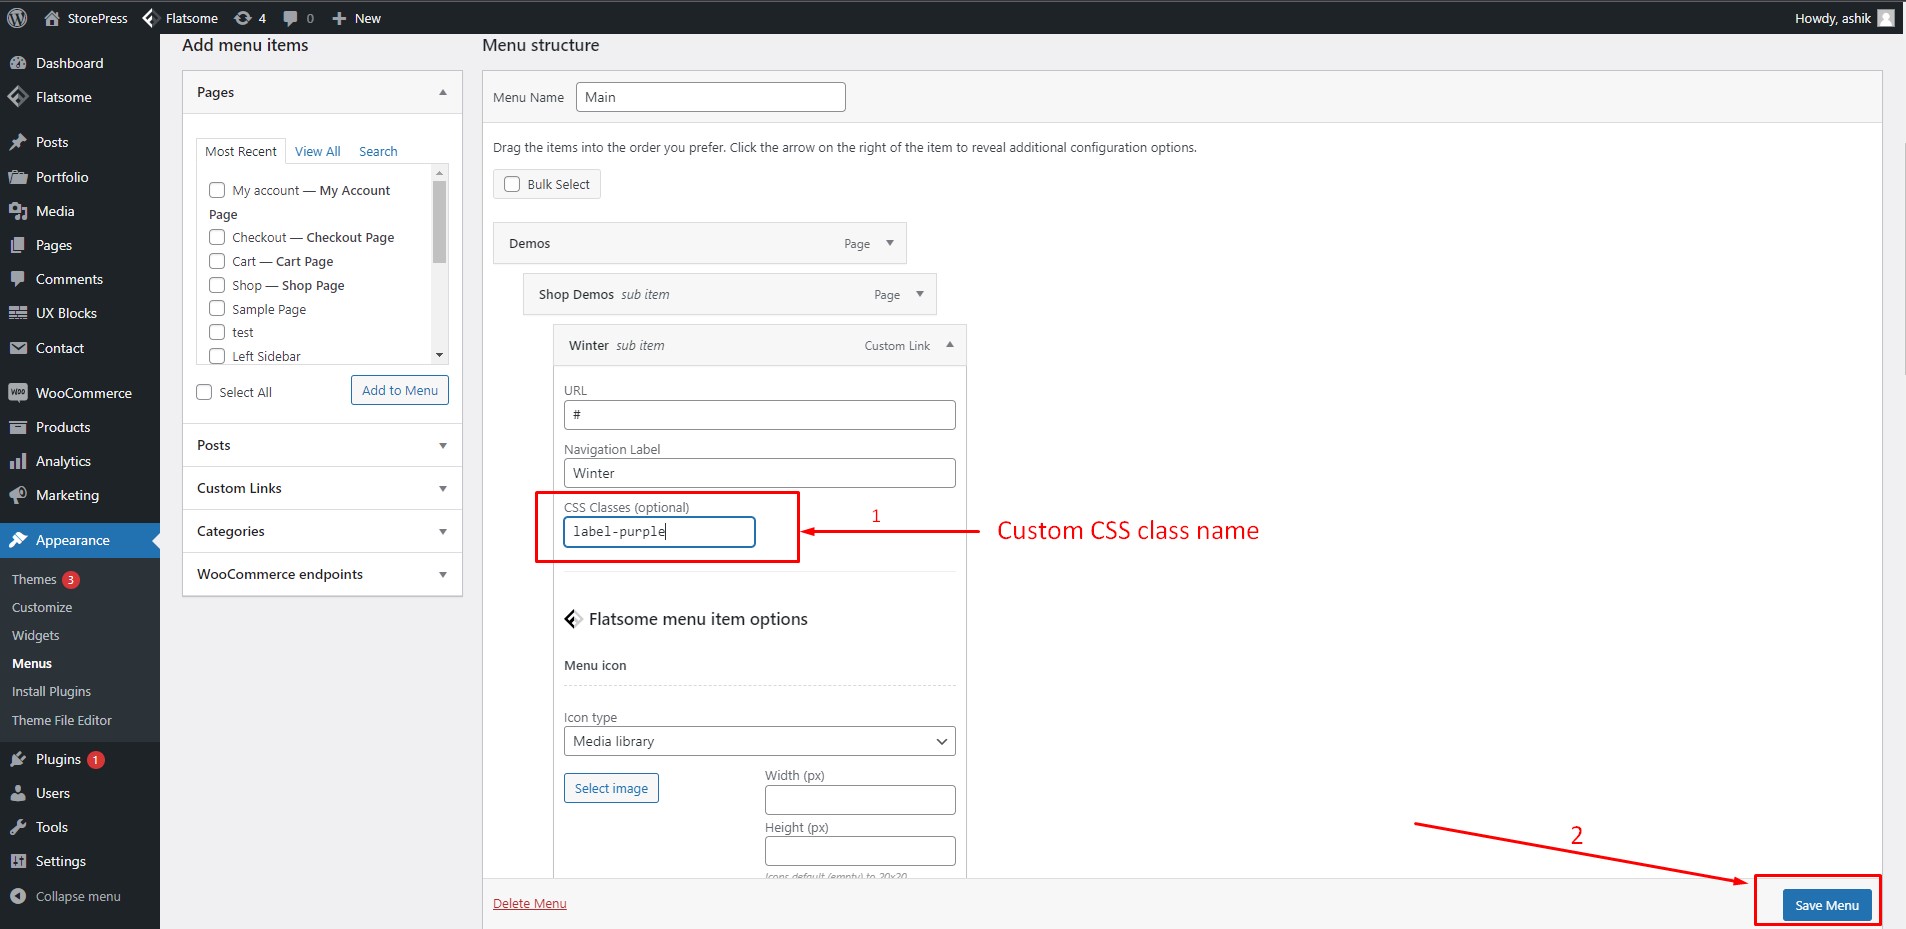
Check the box ‘CSS Classes’ to enable custom CSS for menu items. Then click ‘Save Menu’ to save menu settings.
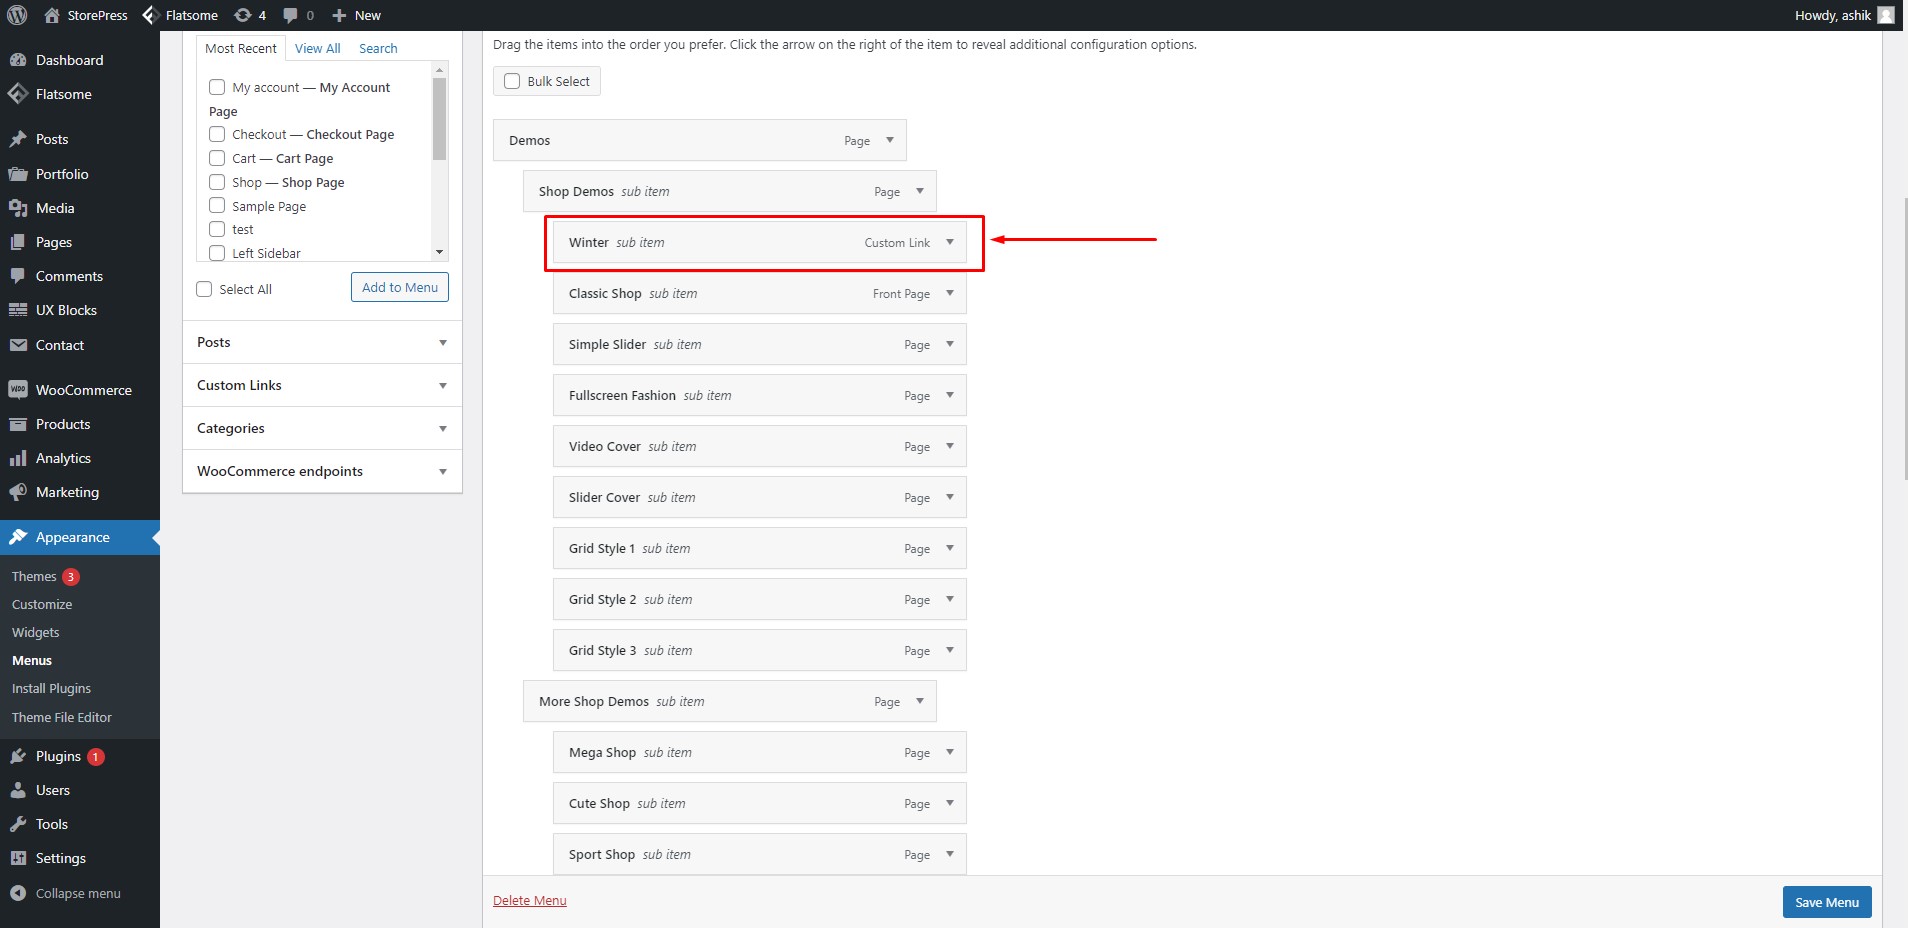
Step 9:
Now click on the menu item you want to show the custom label for. As an example, we will add a custom label to the menu item ‘Winter,’ as shown in the picture. If you want to add custom icons to WordPress you can easily learn with our tutorials.
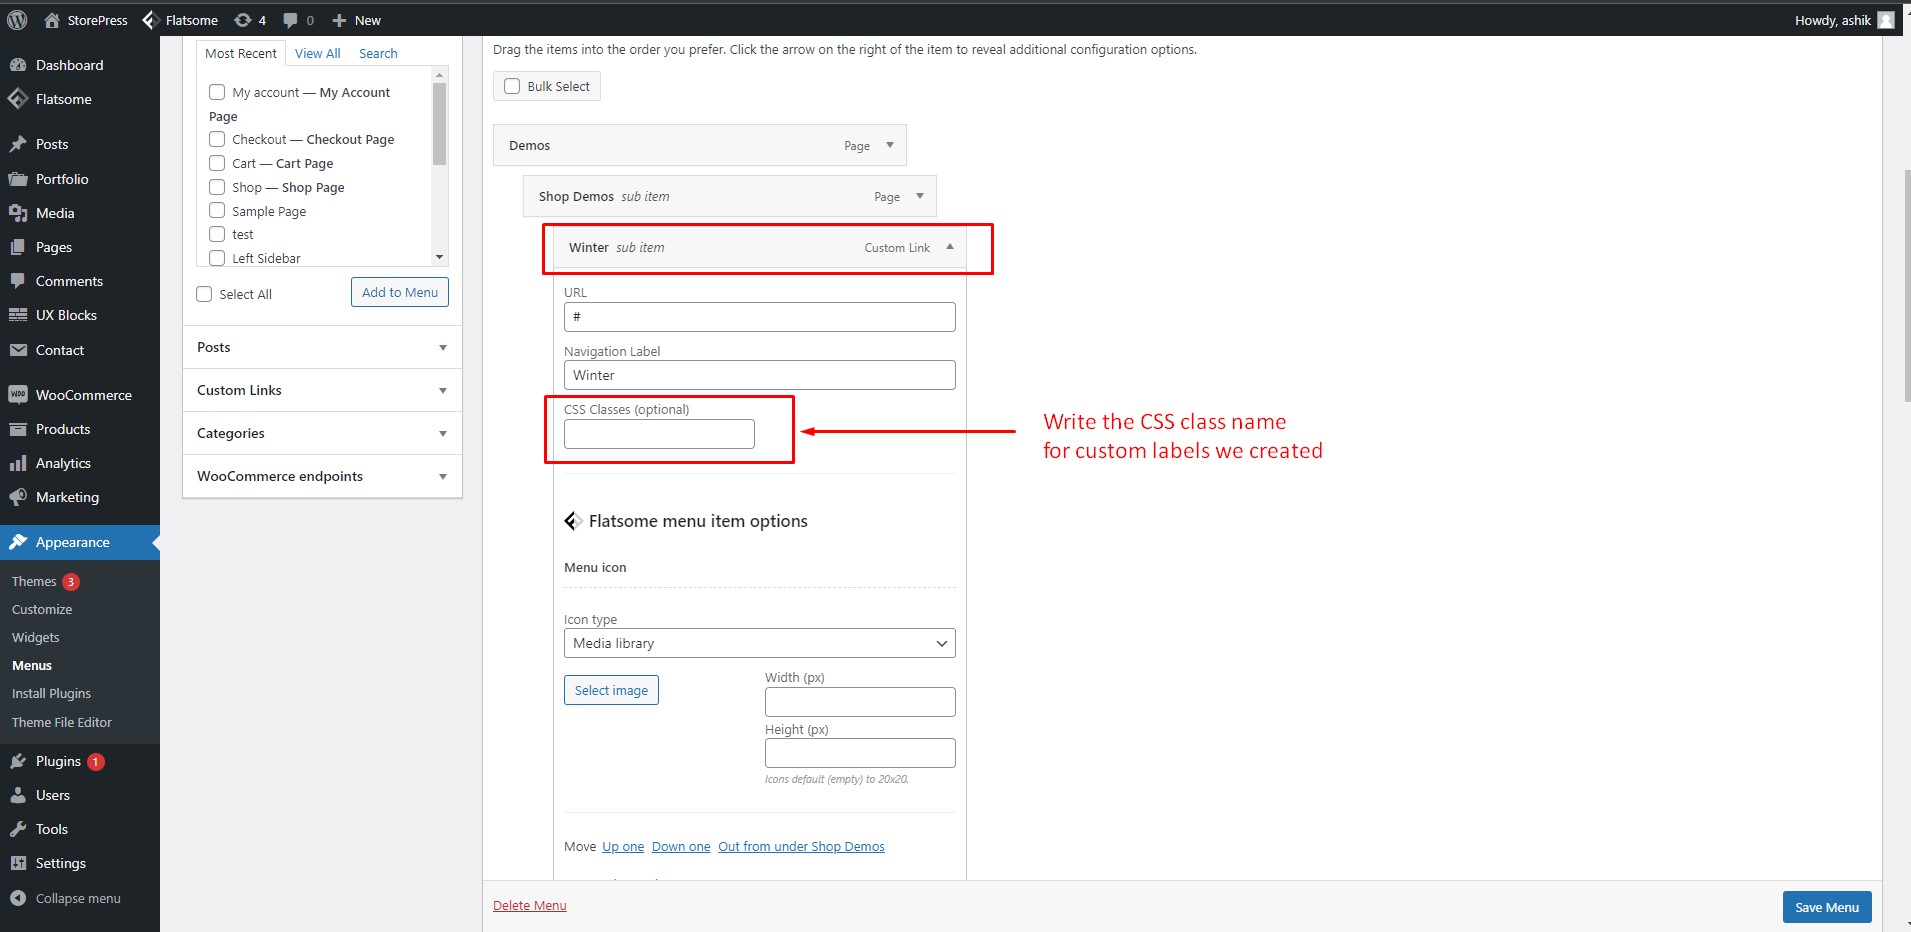
Step 10:
Now, in the CSS Classes field inside the ‘Winter’ menu item, write the class name of the custom label we created before. For us, the custom label CSS name is ‘label-purple’
Step 11:
Write the custom CSS class name as shown in the picture and click ‘Save Menu’ to save your settings.
Step 12:
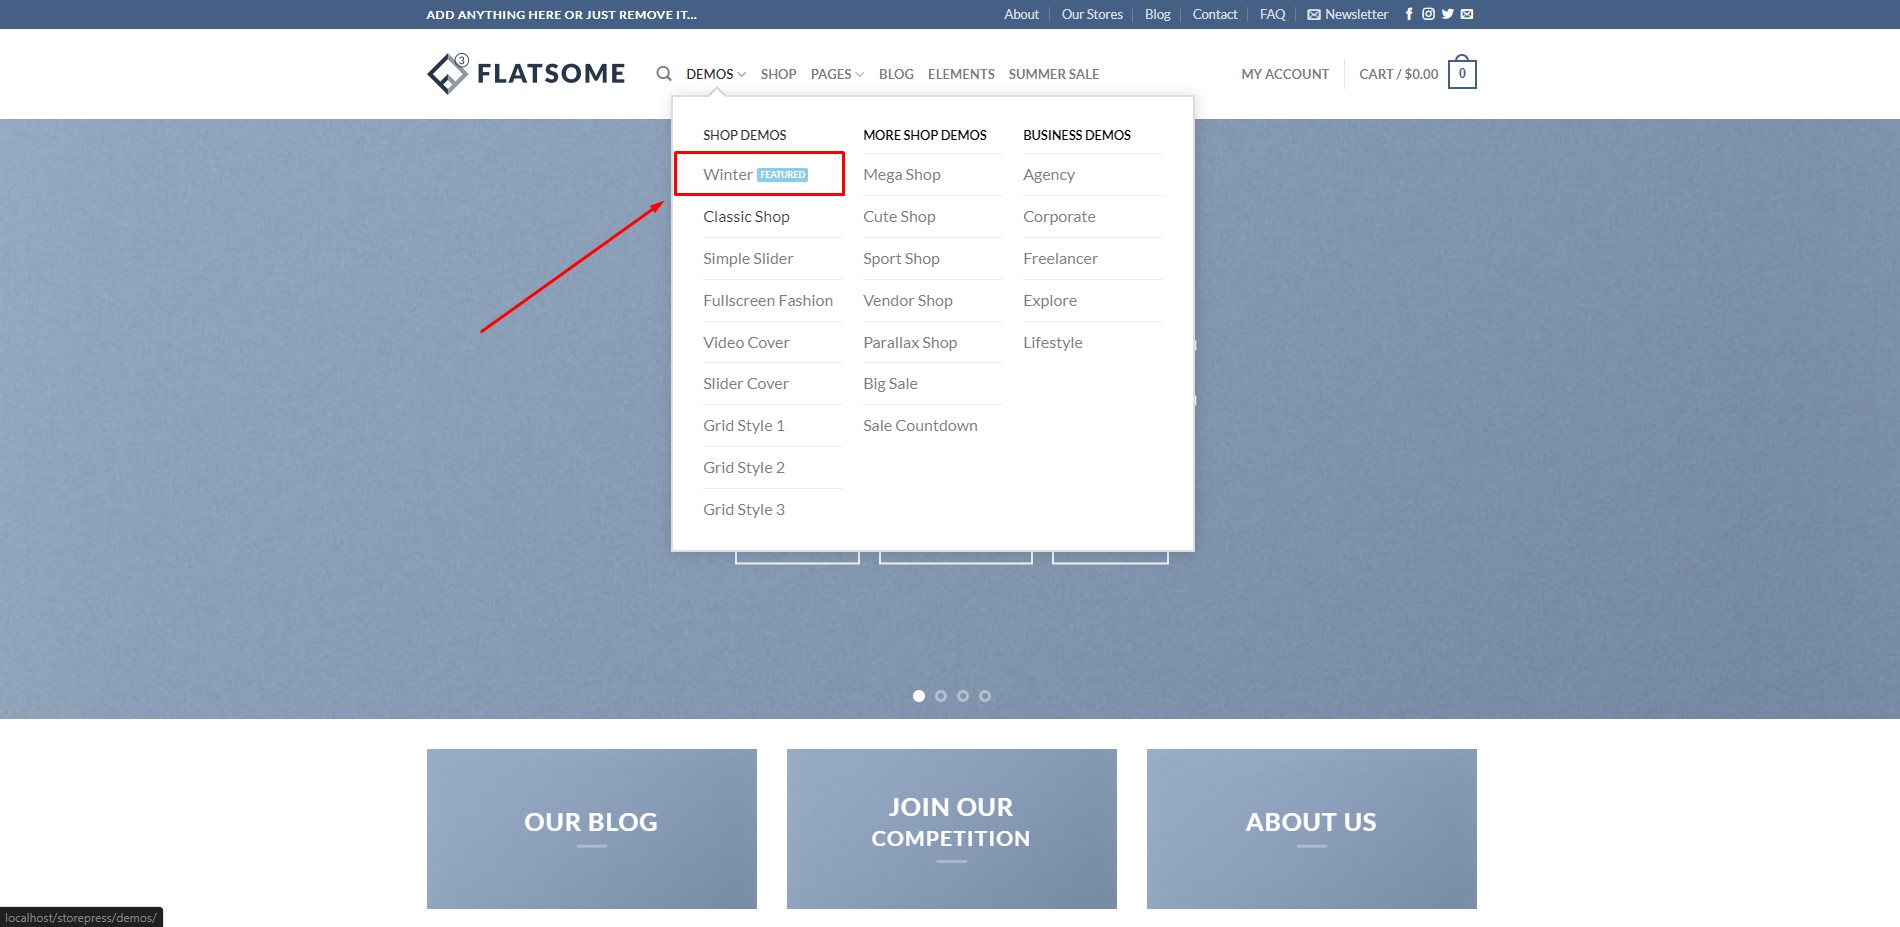
Now visit your website and hover on the menu. You will see that our custom label ‘Featured’ is displayed perfectly beside the menu item ‘Winter.’ If you are dealing with products you can also learn how to add featured products in the WooCommerce theme.
Conclusion
This is how you can create and add beautiful, eye-catching custom labels to your menu item in the Flatsome theme. We intended to be as detailed as possible to show you how you can easily add custom menu labels without much hassle. We hope this tutorial helps you as you need it. Stay tuned with WPCred for more tutorials like this. You can also check out the tutorial on how to create a scroll-to link in the Flatsome theme.