In any WordPress theme, the font size is fixed by default. If you want to customize it, it’ll take some processes. We’ve made this tutorial where we used three methods to do that. So, no matter how much expertise you’ve, you can change font size on WordPress using this tutorial.
Why Changing Font Size Is Important
The importance of the font size depends on the type of website. You need to understand whether you need to change font size. If you’re maintaining a blogging site, font size should be a topmost priority. You need to increase the font size so your visitors can easily read your articles. On the other hand, if you’re running a photograph-based website, you need to decrease the font size of your website. It’ll help your visitors to focus more on images. In both cases, you need to change font size of your website. You don’t need any technical expertise to change font size of your website. Understanding a little CSS can come in handy, but we have you covered. We’ve shown 3 methods to change font size, you can choose whichever you feel comfortable with.
How to Change Font Size on WordPress Using Block Editor
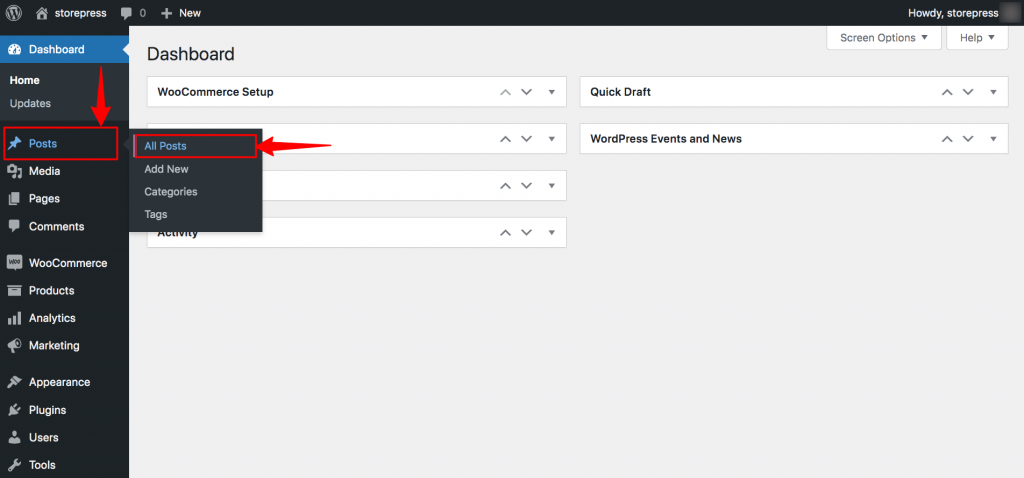
Block editor is the default editor for WordPress right now. So, you’ll be more likely to face this interface while trying to change font size in WordPress. Step 1: Go to the WordPress Dashboard of your site. Then hover on the Posts, and select All Posts. Step 2: Then you’ll see the list of the posts. Choose the post where you want to change the font size, then click on Edit. Step 3: Now, a new page has appeared where you can easily edit the post. Select the text section you want to change the font size of, then you can choose the size from the right sidebar of it. After selecting that, click on the Update button to make that effective. Preview
How to Change Font Size on WordPress Using TinyMCE/Classic Editor
If you’re using the classic editor for your WordPress site, this method can help you to change font size on WordPress. Also, you can install Classic Editor and follow this method. Step 1: Go to the Dashboard, hover on Posts, then click All Posts. Step 2: Then you’ll see the list of the posts. Choose the post where you want to change the font size, then click on Edit. Step 3: Now select the text section you want to change the font of, then click on Text. Step 4: You’ll see the text editor, where you need to add inline CSS for changing the font size. Then click on Visual. Step 5: Then, update the file by clicking the Update button. Preview
How to Change Font Size in WordPress Using CSS
This method is applicable if you want to change the font size of your whole site. Using this, you can control the header text, and paragraph text individually. Step 1: Go to the main site, then click on Customizer. Step 2: Now, a left sidebar will appear. Scroll, and click on Additional CSS. Step 3: Now, write the CSS code as your preference. For demonstration purposes, we’re setting the font size to 22px. Though you can increase or decrease it, we recommend keeping it within 8px to 30px. Moreover, you can change it live to select which size you think is best for your site. Then click on Publish button. Preview
Conclusion
We hope that you’ve changed the font size successfully. The process may feel different using different WordPress themes, but the process is the same as we’ve shown. Some differences may appear due to different interfaces, but hopefully, it won’t change the process. We recommend you use any top WordPress theme to build your site. If you’re facing difficulty adjusting font size, contact us.
 Step 2: Then you’ll see the list of the posts. Choose the post where you want to change the font size, then click on Edit.
 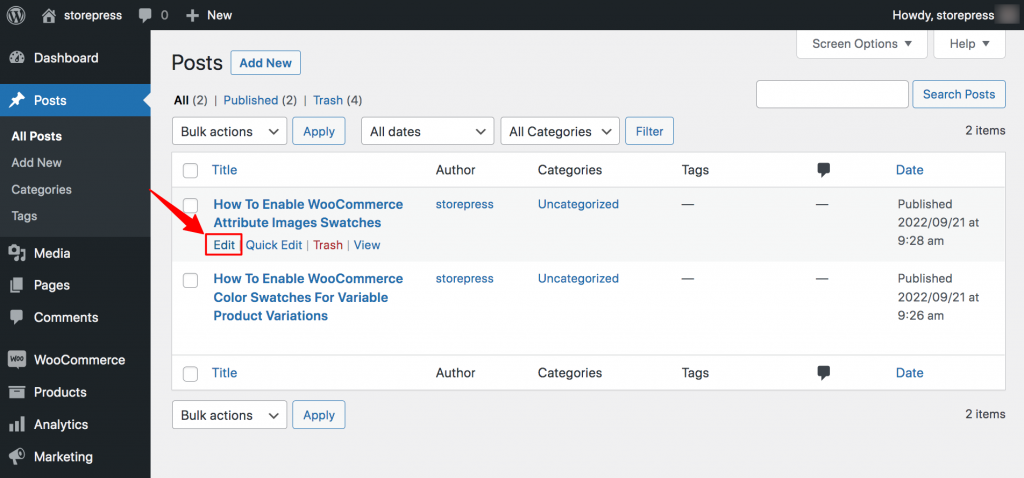 Step 3: Now, a new page has appeared where you can easily edit the post. Select the text section you want to change the font size of, then you can choose the size from the right sidebar of it. After selecting that, click on the Update button to make that effective.
 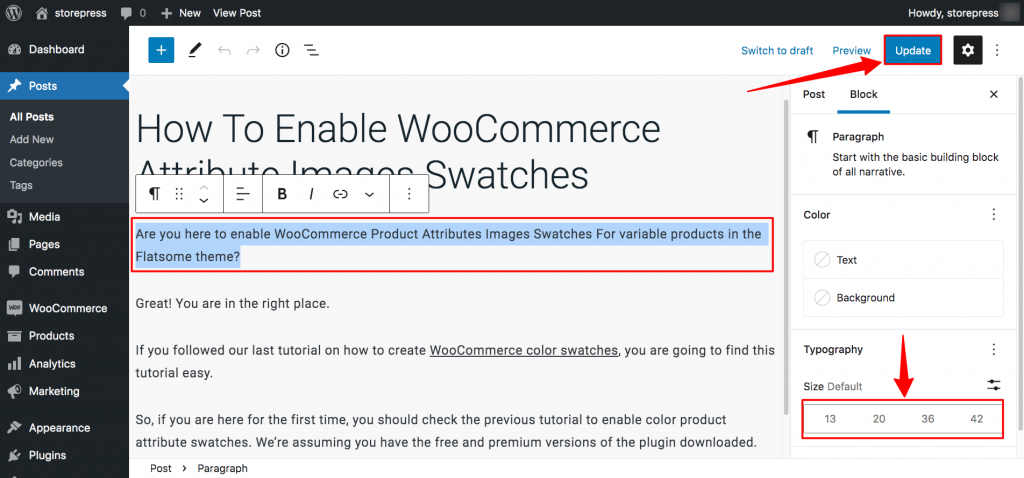 Preview
 How to Change Font Size on WordPress Using TinyMCE/Classic Editor
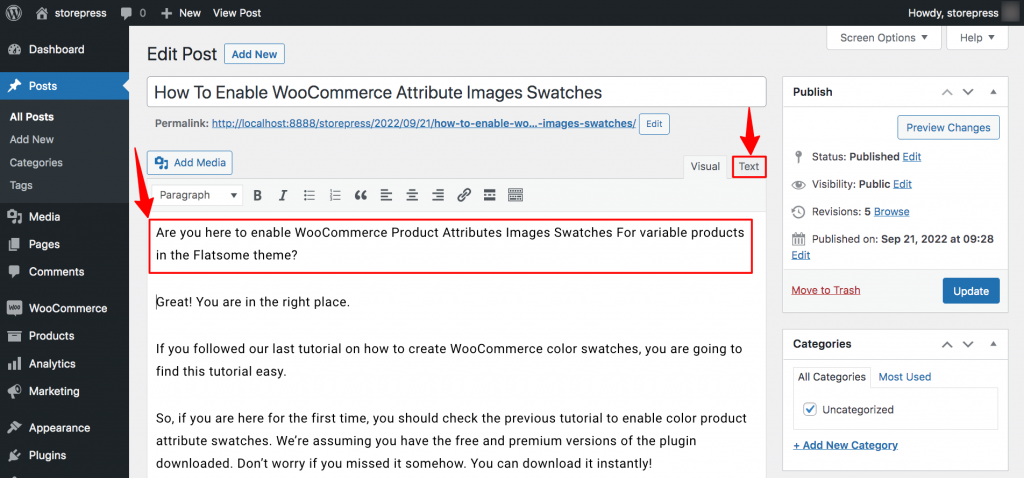 Step 4: You’ll see the text editor, where you need to add inline CSS for changing the font size. Then click on Visual.
 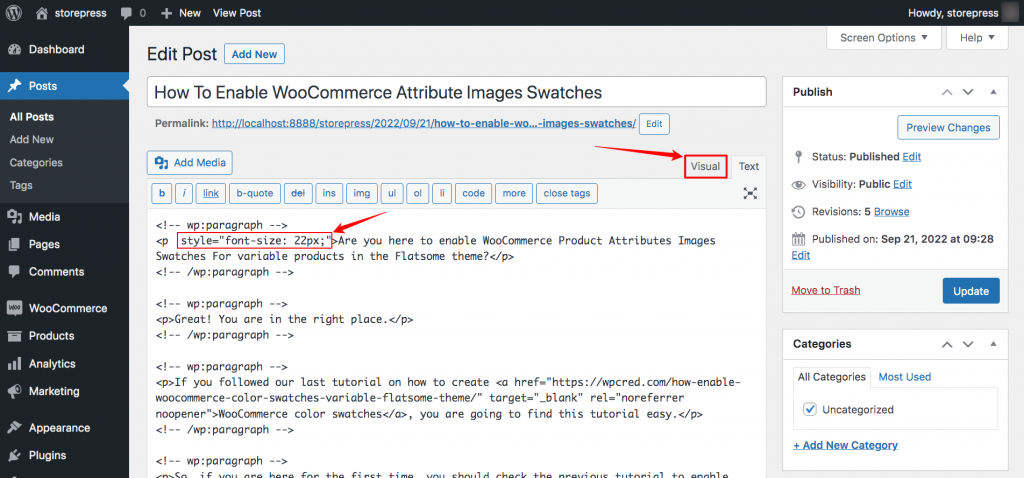 Step 5: Then, update the file by clicking the Update button.
 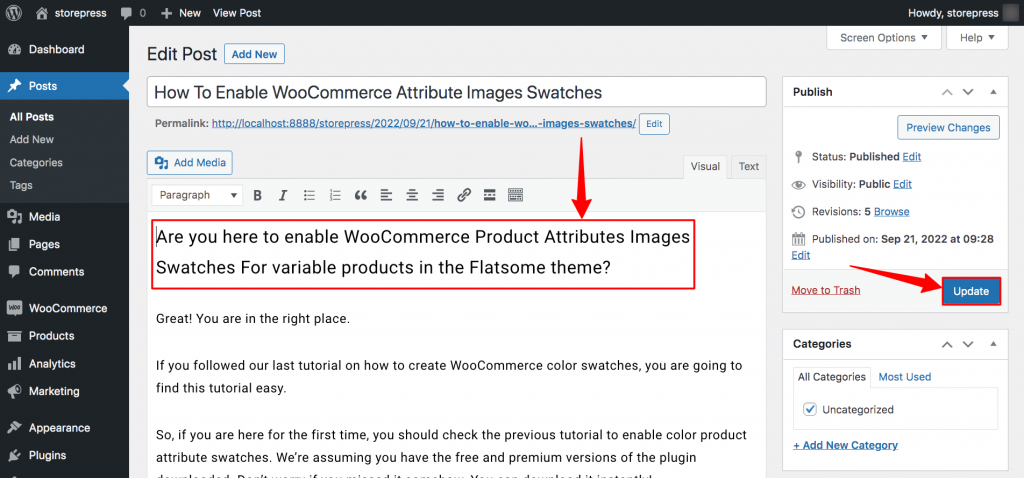 Preview
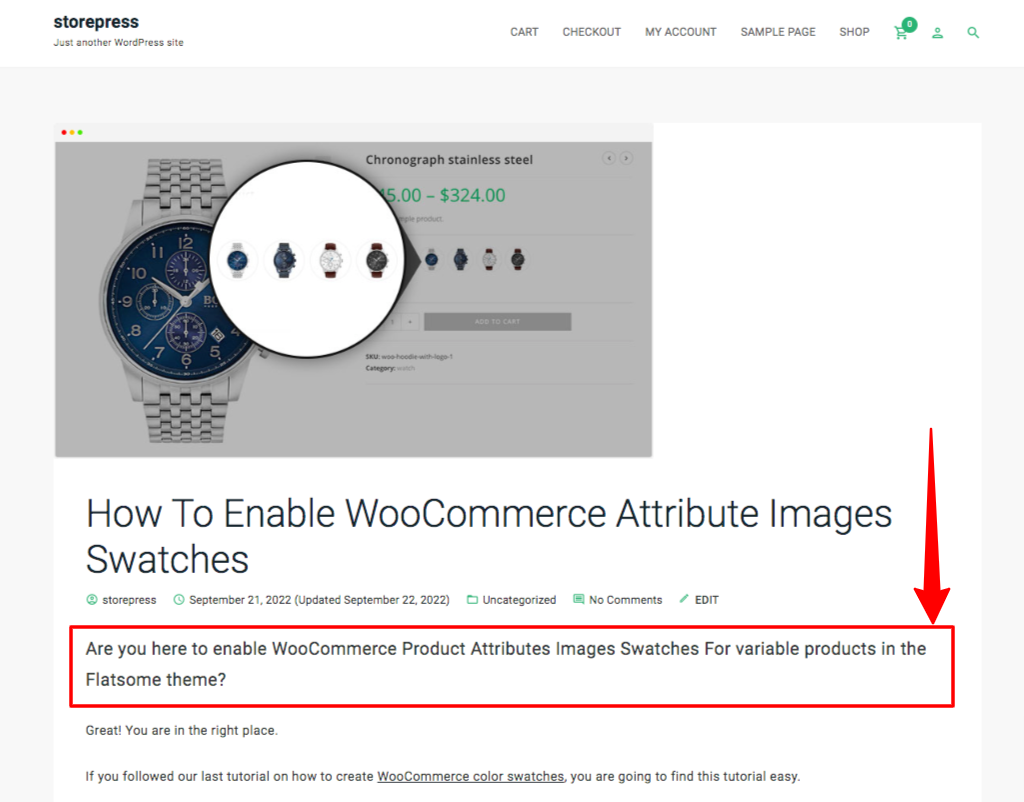
 Step 2: Now, a left sidebar will appear. Scroll, and click on Additional CSS.
 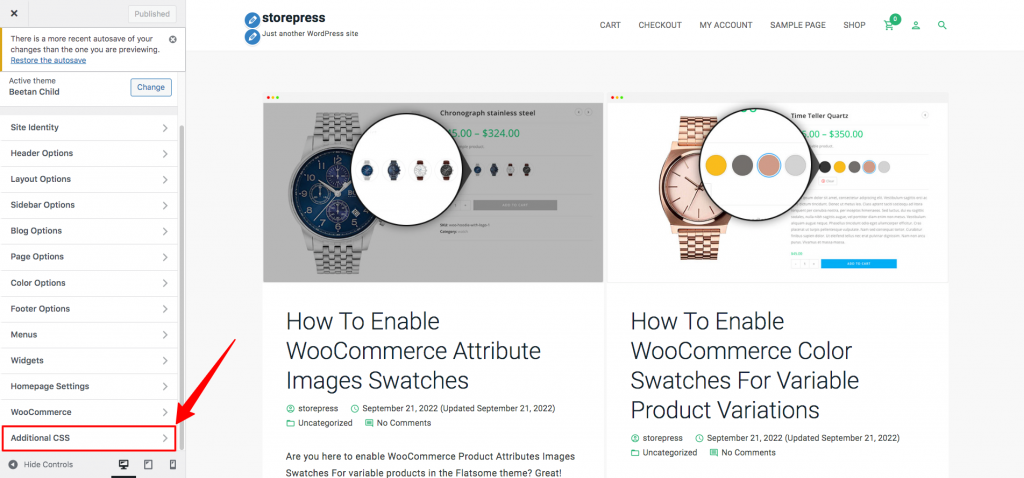 Step 3: Now, write the CSS code as your preference. For demonstration purposes, we’re setting the font size to 22px. Though you can increase or decrease it, we recommend keeping it within 8px to 30px. Moreover, you can change it live to select which size you think is best for your site. Then click on Publish button.
 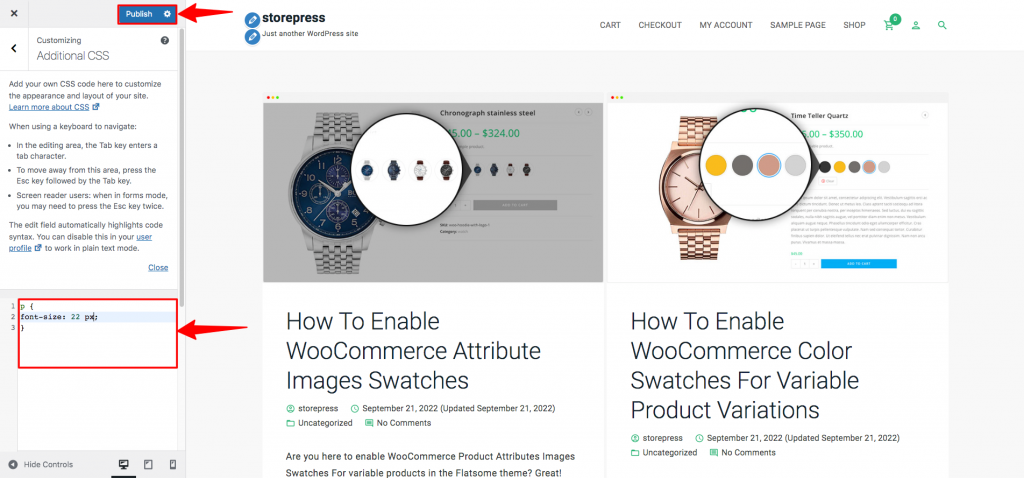 Preview
 Conclusion