A custom 404 error page can be frustrating and confusing for users. 404 errors are not suitable for user experience.
When you click on a link and get a 404 error, it means that your page request to the server was successful, but the server did not find the particular page you were trying to access.
Luckily, you can let your users know they are still on your site and direct them back to your content by creating a custom 404 page.
This article will explain some reasons to have a custom 404 error page and show you to create one in the Flatsome theme.
How do most WordPress 404 pages look like
404 page is often the most neglected page on most sites. Usually, a lot of WooCommerce WordPress free theme 404 pages, look like this:

In Flatsome theme-powered site, a 404 page appears as:

It happens when you move, rename, or delete a page. This message also appears when the URL is mistyped, misspelled, or incomplete.
However, you can change how your WooCommerce site responds to this error by redirecting your visitors to arrive at a custom error page.
You need to make this experience better by properly conveying the error and giving them a proper course of action. It can be done by showing visitors other website sections they can visit, or you need to provide them with a way to contact you, etc.
Why do you need to customize your 404 page?
It confirms to users that they are on the right website. But, a single page they may have been looking for doesn’t exist. This is much better than throwing into question whether or not the website itself exists.
Even the best websites get 404 errors, and this is why you should customize the WooCommerce product page in terms of 404 pages to at least have your site’s navigation available.
When a user gets a browser-based 404-page error, they might think your site is dead, and as a result, won’t bother coming back.
Moreover, a custom 404 page acts as a soft-sell landing page. It serves to increase the brand as well. In comparison, a generic 404 page doesn’t bring any additional benefit to a user.
Create a custom 404 error page in the Flatsome theme
From version 3.6.0, you can create a custom block and assign it to the 404 page to replace its content and edit it with the builder.
We have also created a step-by-step video tutorial on this topic.
If you prefer text over video, follow the below steps –
Step 01: Create a new block:
To begin, you’ll need to create a new block. In your WordPress dashboard –
Navigate to Add New from UX Blocks and create a new block. Use a title and add some content to your liking.
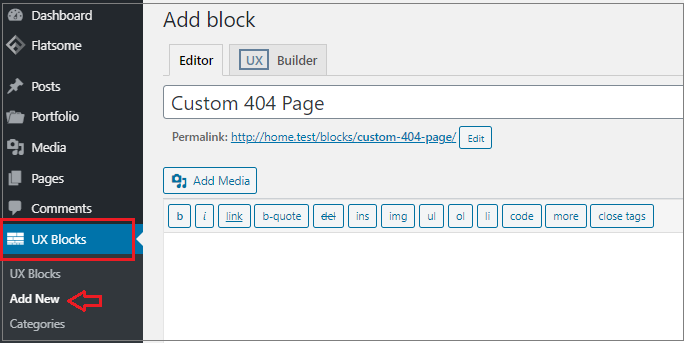
Step 02: Customize your block:
A well-designed 404 page can prevent users from leaving your site when they encounter one.
To design the page, click on the Edit option.

Then click UX builder to customize the page.

Once you click UX Builder, you’ll be redirected to the settings page. Click on the Add elements options.
Step 03: Add elements to the 404 page:
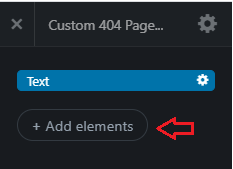
You can set up your custom page here. To use the pre-made layouts option, click on the Flatsome Studio button.
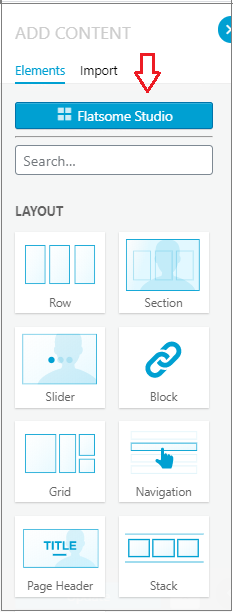
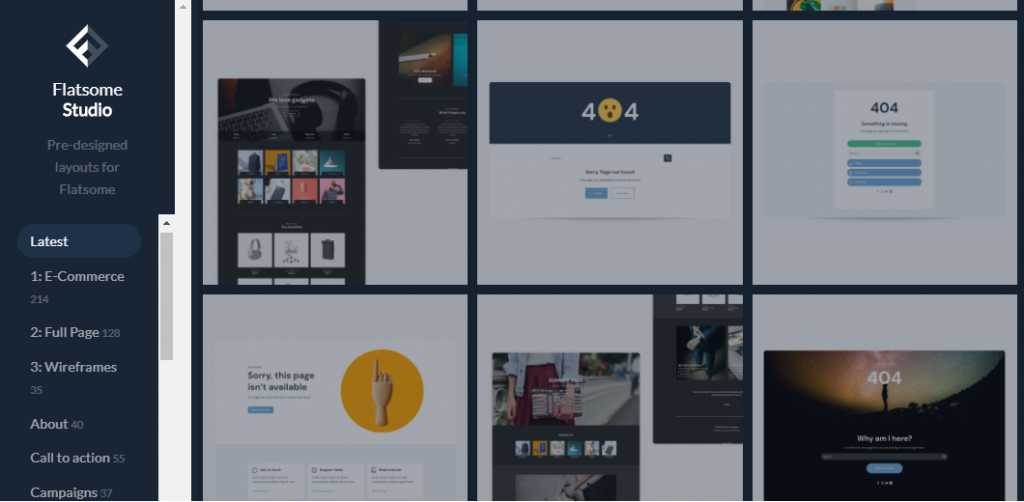
Step 04: Design your page
You can select any pages from here and then change all the links and Flatsome theme icons to your own.
Once done, click on the Update button to save your settings.
After that, navigate to the 404 page from Advanced under the Flatsome tab on the top.
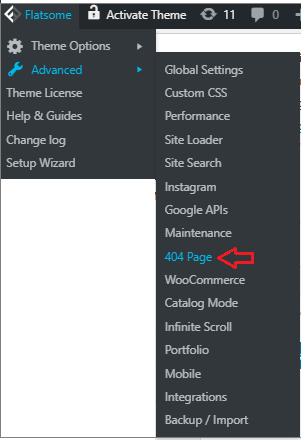
Now, assign the newly created block from this page and Save All Changes.
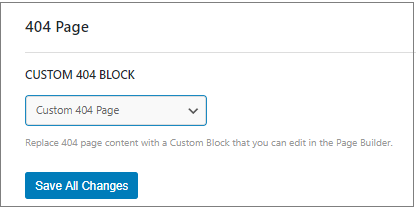
That’s it! You can now hopefully create a custom 404 page with a custom user-friendly UI and message.
Now, whenever someone mistypes a URL or clicks on a broken link instead of being lost, they will find themselves on your custom 404 error page. It will give you a much better chance of keeping users engaged and happy as they navigate your website.
Customizing the product page is an awesome feature of UX Builder. You can customize the WooCommerce product page using UX Builder by Flatsome theme. It will be better to know how to solve HTTP errors if you face any other errors in the future.

