Online stores’ importance is growing fast daily as people depend more on online shopping due to maintaining a busy life. Many people have quality products and want to sell their products online but are unable due to a lack of resources and platforms. If you create a multivendor marketplace WordPress website, it will allow these people easily sell their products online, and you can also earn a reasonable profit from it. You can also create a multi vendor for WooCommerce using the WC vendors easily.This tutorial will demonstrate how to create a multi-vendor WooCommerce website using one of the most popular marketplace plugins Dokan and the powerful Flatsome theme.
The Purpose of a Multivendor Marketplace WordPress Website
You can use a general WooCommerce website to sell your own products online. On the other hand, if you have a multi-vendor WooCommerce website, you can let other people sell their products on your website. So the purpose a multi-vendor WooCommerce website serves is it allows people to use your website as a platform to sell their own products online while sharing a specific amount of profit with you. Many popular online stores like Amazon, Alibaba, etc. act as multi-vendor platforms where anyone can register and sell their products on the website. You can know how to add users to WordPress and then provide them with specific roles so that they can post easily on your website.
Installing Multi-Vendor Functionality to WooCommerce
The WooCommerce platform doesn’t provide the multi-vendor functionality we need. That is why we will need essential plugins for WordPress that will let our WooCommerce website turn into a multi-vendor WooCommerce website along with other important features. You can use several plugins to create a multivendor WooCommerce website. For this tutorial, we will use the Dokan multi-vendor marketplace plugin. This plugin comes in both free and premium versions. We will use the free version available in the WordPress directory to demonstrate how you can use this plugin.
Installing and Setting Up Dokan Plugin with Flatsome WooCommerce theme
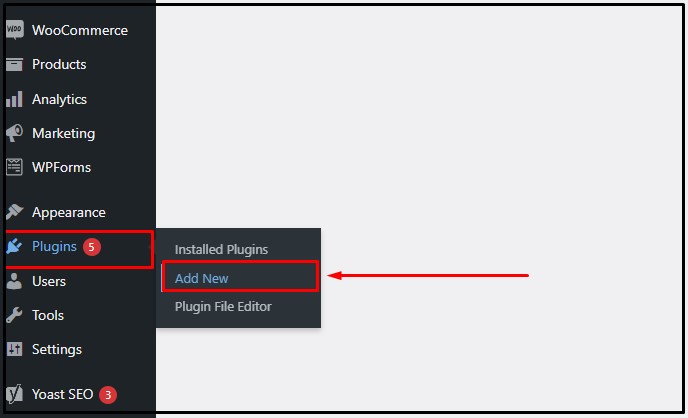
Step 1:
From the WordPress dashboard, hover on ‘Plugins’ and click on ‘Add New.’
Step 2:
In the plugin directory, search for the ‘Dokan’ plugin. Install and activate the plugin to get started creating your multi-vendor WooCommerce website. This process is the same for any most popular themes in WordPress.
Step 3:
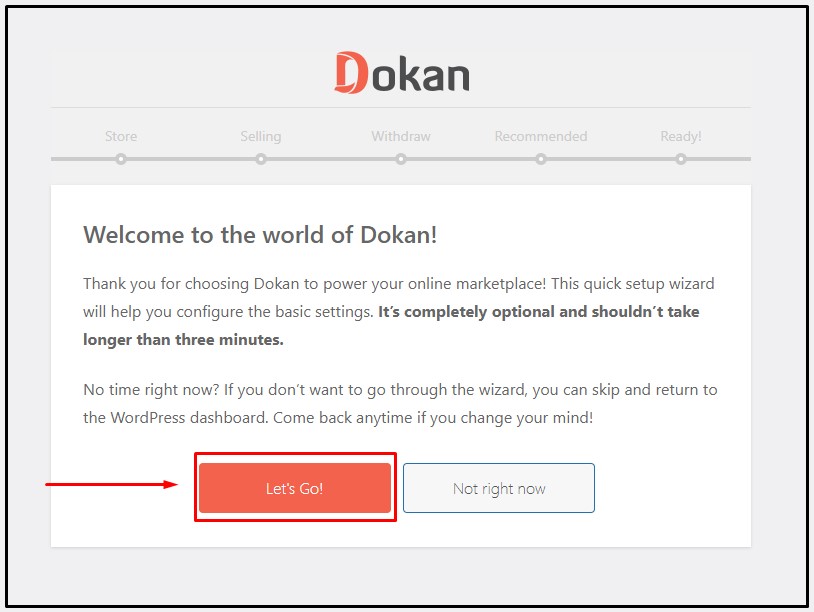
After activating the plugin, you will be redirected to its setup wizard. You can always run the setup wizard from Dokan’s dashboard if you are not automatically redirected. Click on ‘Let’s Go’ to start the setup wizard.
Step 4:
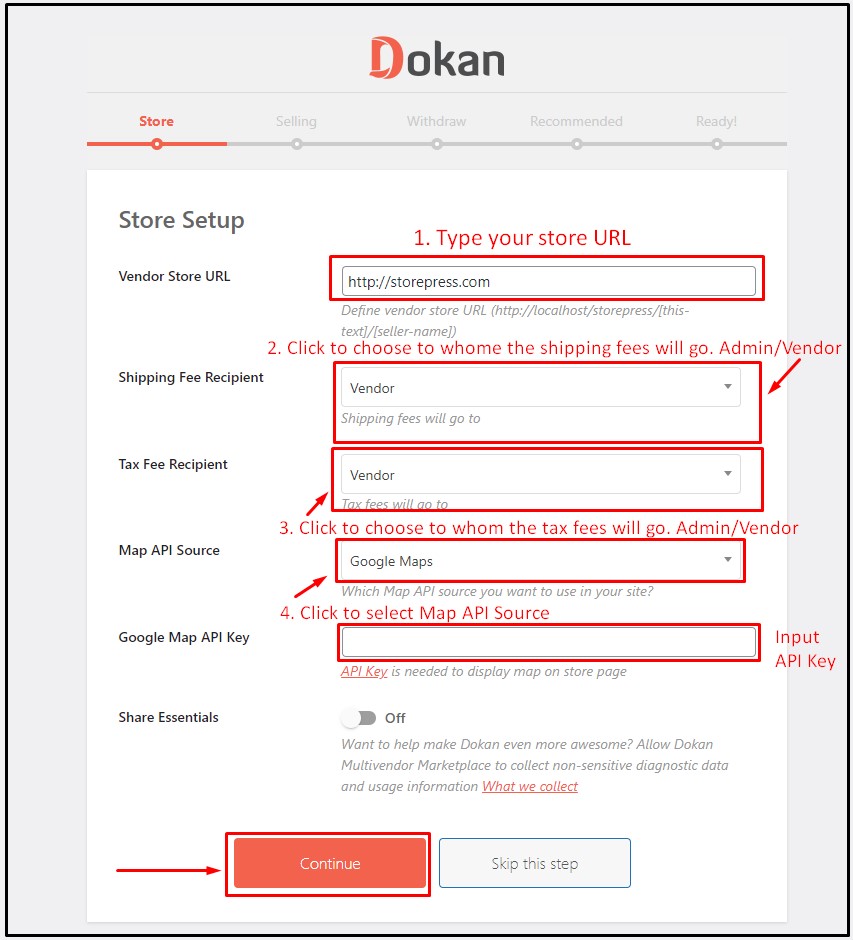
In the Store tab of the setup wizard, you will be asked to provide some information about your store. Type your WooCommerce store URL in the first field. In the second option, you need to choose to whom the shipping fees go, admin or vendor or you can add WooCommerce free shipping if you want. Similarly, in the third option, you will choose to whom the tax fees go, admin or vendor. You can also choose the Map API source if you want to implement your store location on your website or you can learn how to add Google Maps to a website. In order to implement the map, you need the map API key from your Map API source. After making these changes, click ‘Continue’ to proceed to the next tab.
Step 5:
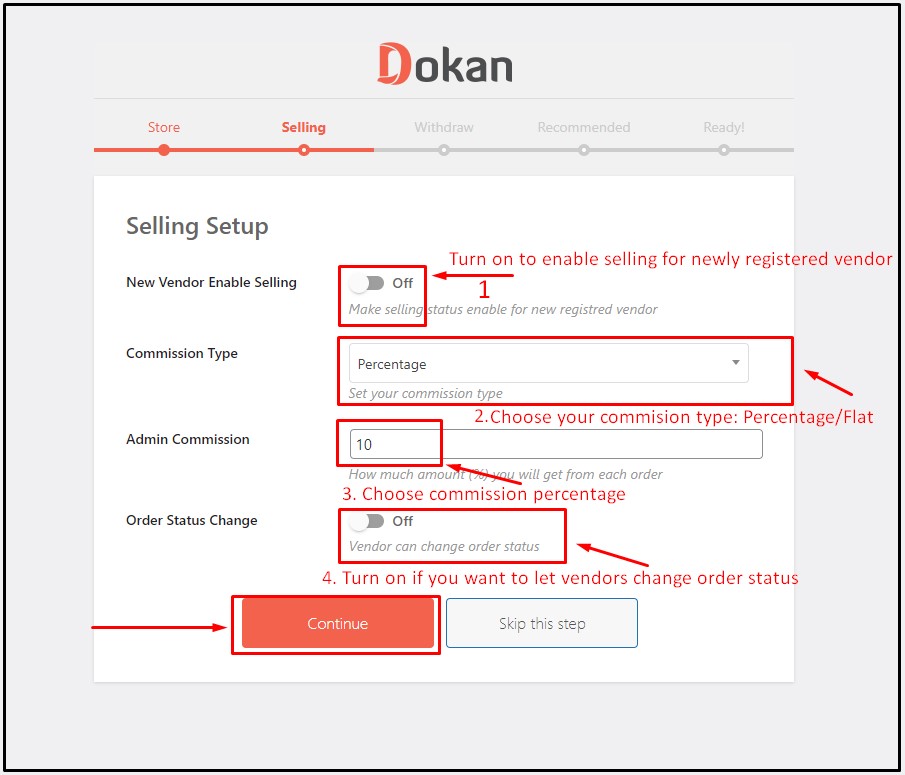
In the Selling tab of the setup wizard, you can enable selling for the new vendors by turning the button on in the first option. In the second option, you can choose if you want your commission from the vendors by percentage or a flat amount. You can keep WooCommerce points and rewards system for your users if you want.The third option lets you the commission percentage you want from your vendors. If you choose flat commission, you will need to set the flat amount instead of the commission percentage. The last option in the Selling tab lets you choose if you want to allow your vendors to change the status of the orders that have been placed. After making the changes, click ‘Continue’ to move to the next step. You can keep the best membership plugin in WordPress for your users as well.
Step 6:
In the Withdraw tab of the setup wizard, you can enable Paypal as a withdrawal method for your vendors. In this case, you can use the PayPal plugin for WooCommerce. You can also enable bank transfer as a withdrawal method for the vendors. The third option allows you to set the minimum balance to make a withdrawal request. You can set the order status for which a vendor can make a withdrawal request. After making the changes, click ‘Continue’ to proceed to the next step.
Step 7:
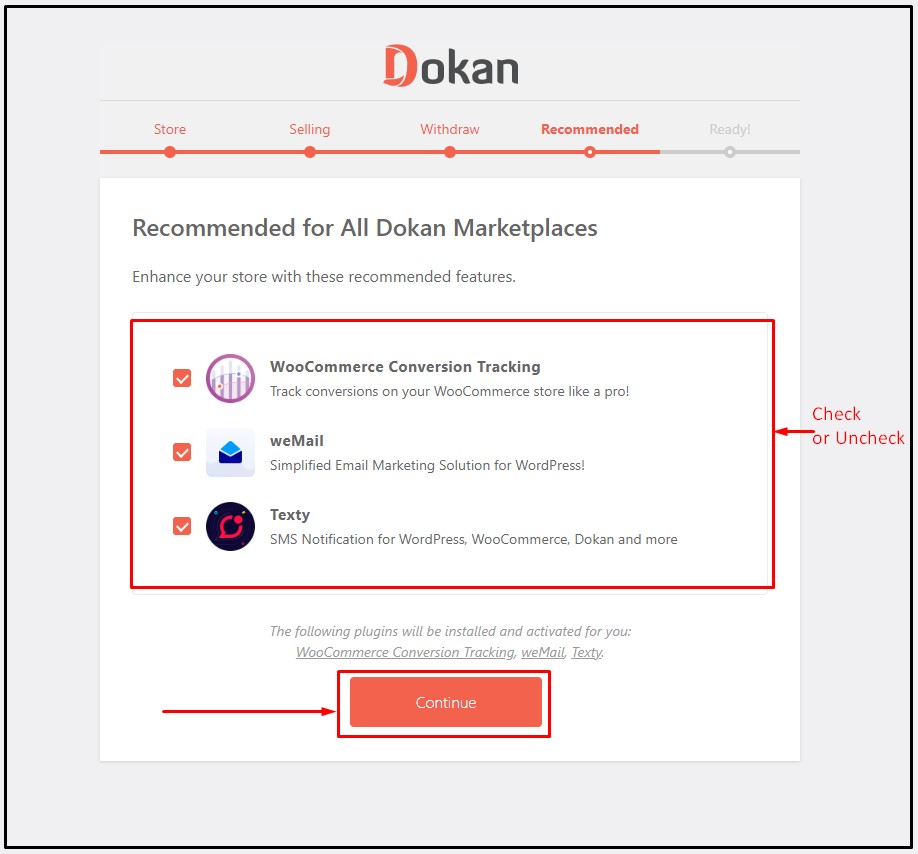
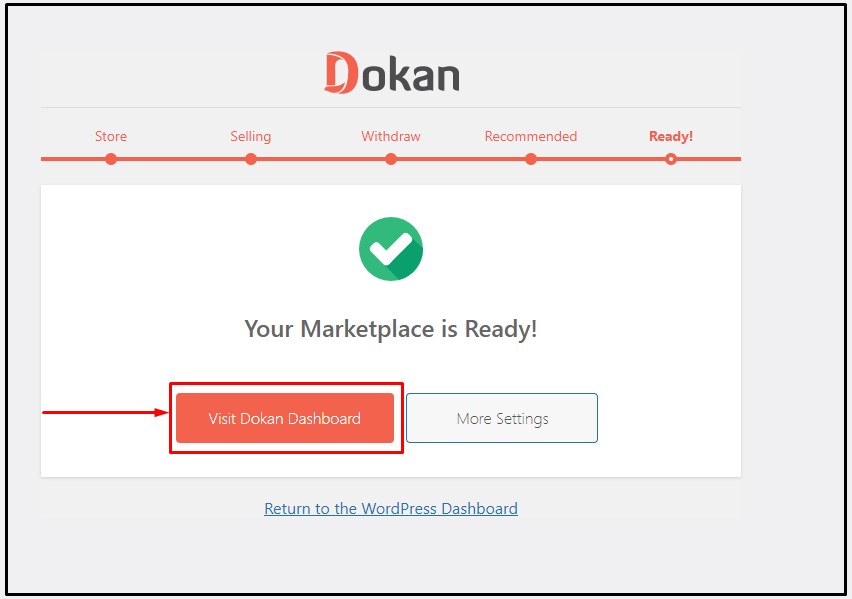
In the Recommended tab of the setup wizard, you will be offered to install a few plugins that can be effective for your multi-vendor WooCommerce website. For this tutorial, We will skip installing this plugin. Click ‘Continue,’ and your plugin is all set to perform! Click on ‘Visit Dokan Dashboard’ to take a look at the overall features. The setup wizard works the same for any top free SEO-friendly WordPress themes.
Creating Vendor Registration and Account Page
Step 1:
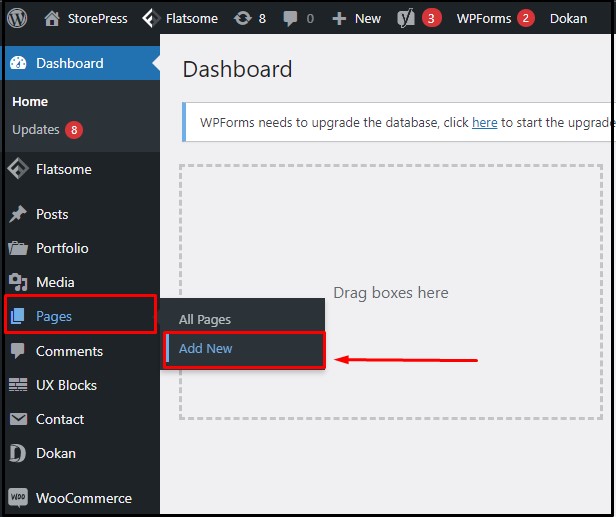
We will create an account page first. From the WordPress dashboard, hover on ‘Pages’ and click on ‘Add New.’
Step 2:
As shown in the image below, write the title of your account page in the title section. Copy and paste the shortcode into the editor as shown and click on ‘Publish.’
Step 3:
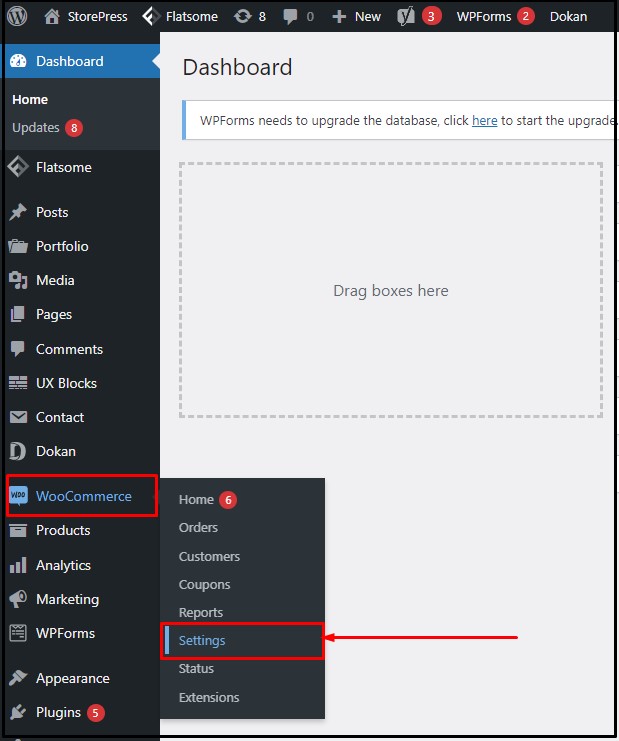
It is time to set the page we just created as an account page in WooCommerce settings. From the WordPress dashboard, hover on ‘WooCommerce’ and click on ‘Settings.’
Step 4:
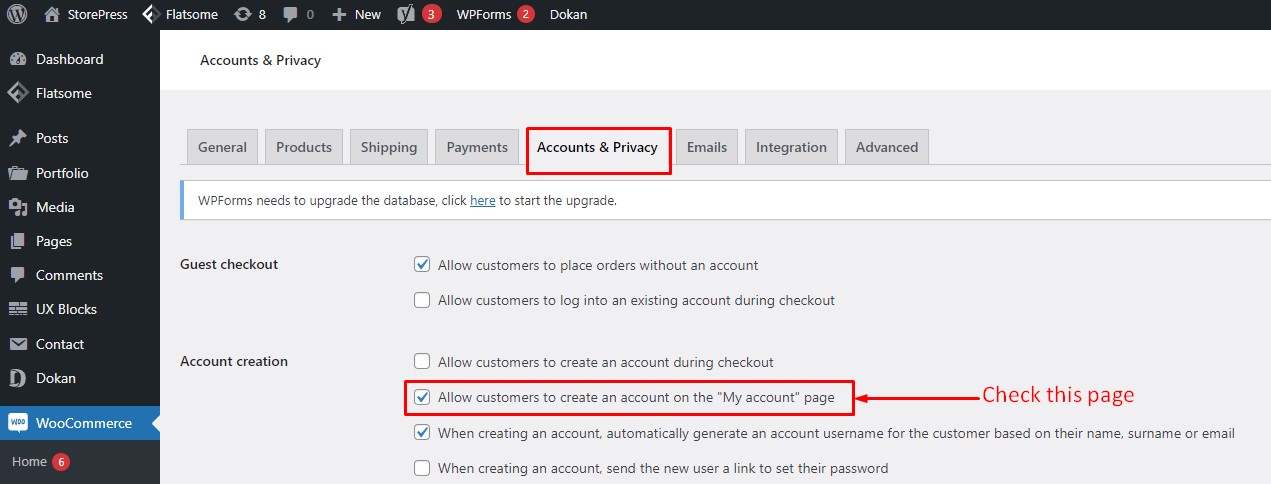
On the WooCommerce settings page, click on the ‘Accounts & Privacy’ tab. Check the box ‘Allow customers to create an account on the ‘My Account page’ and click on ‘Save Changes’ at the bottom.
Step 5:
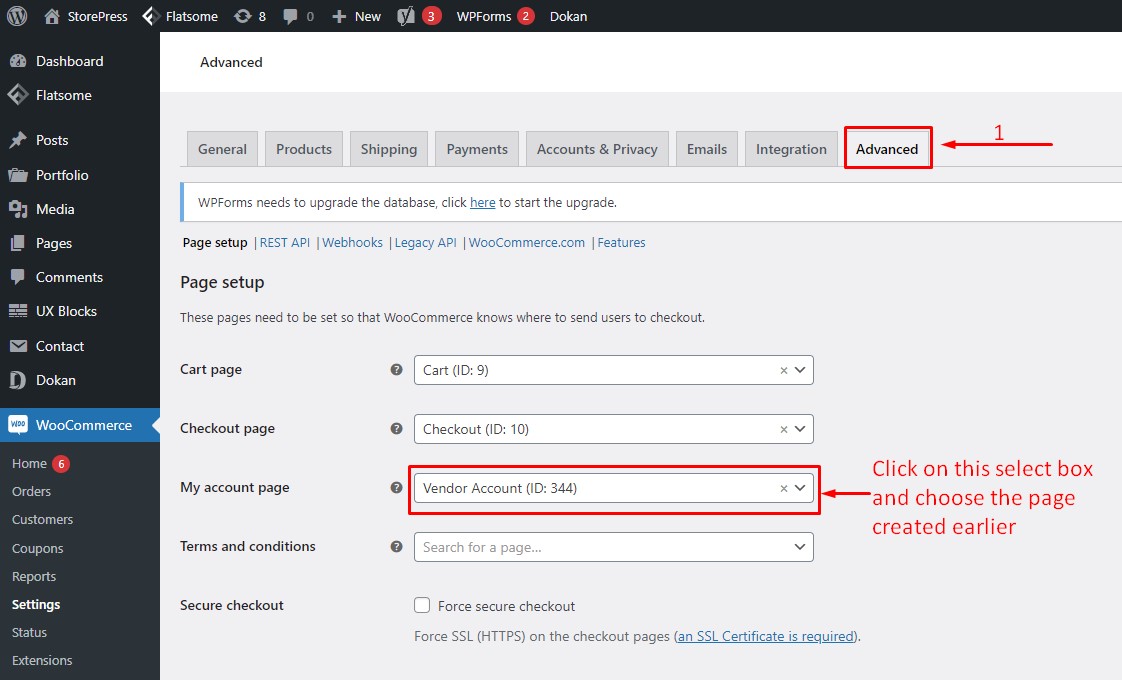
Now click on the ‘Advanced’ tab on the WooCommerce settings page. Click the select box for ‘My Account Page’ option and choose the Vendor Account page we created earlier. Click on ‘Save Changes’ at the bottom. These settings are similar in all top free WooCommerce wp themes.
Step 6:
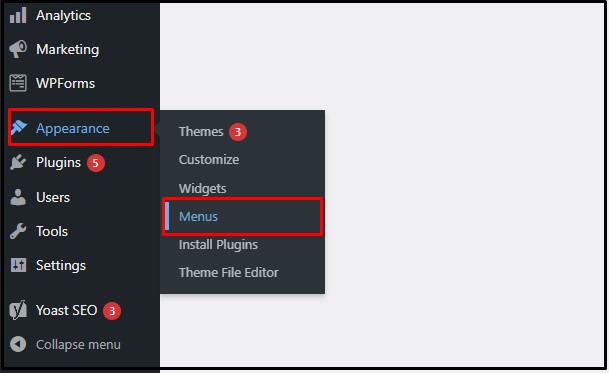
Now we will add a link to the account page to the navigation menu so that new users can easily access the page and register for a vendor account and we don’t have to worry about user management in WordPress. From the WordPress dashboard, hover on ‘Appearance’ and click on ‘Menus.’
Step 7:
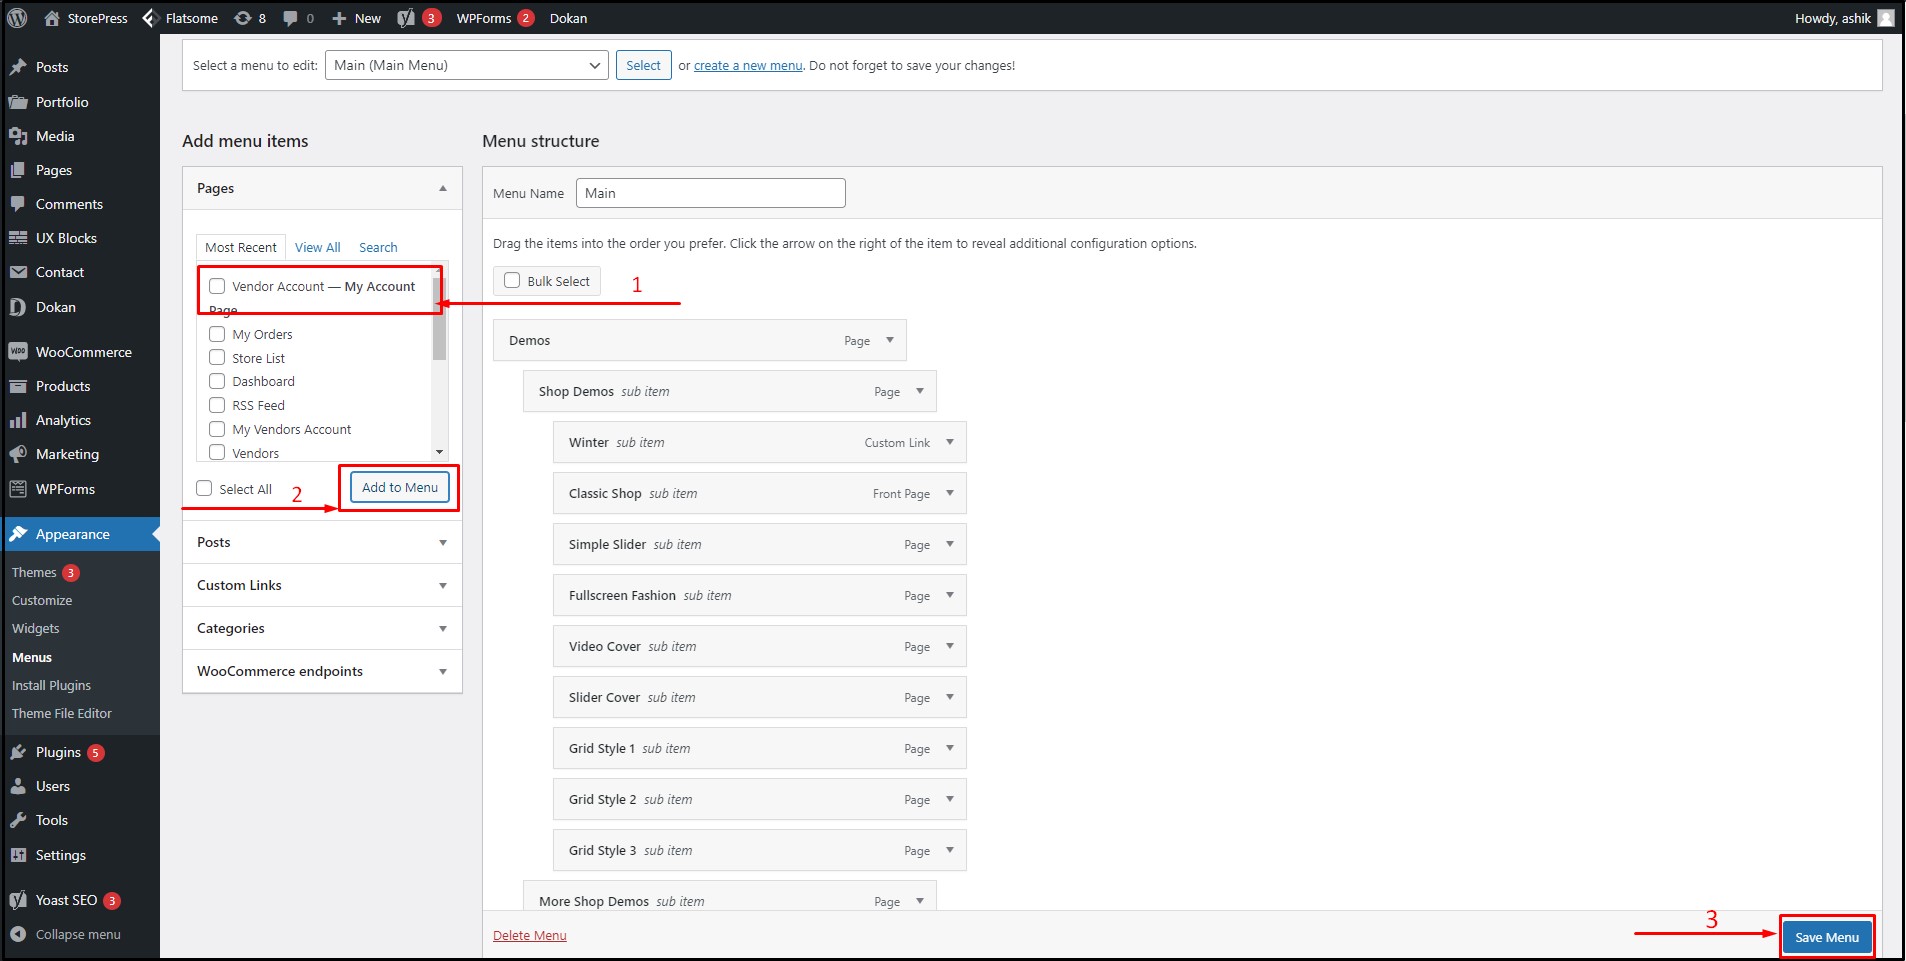
On the menu settings page, select the Vendor Account page from the page list and click ‘Add to Menu.’. Now click on ‘Save Menu’ to save changes. Let’s visit the website to see if the link is working properly
Step 8:
As we can see, the account page link we just implemented is successfully displayed on the web page header design.Upon clicking the menu, the vendors will be taken to the account page, where they can log in to their dashboard or register for an account.
Managing Multi-Vendor WooCommerce Store
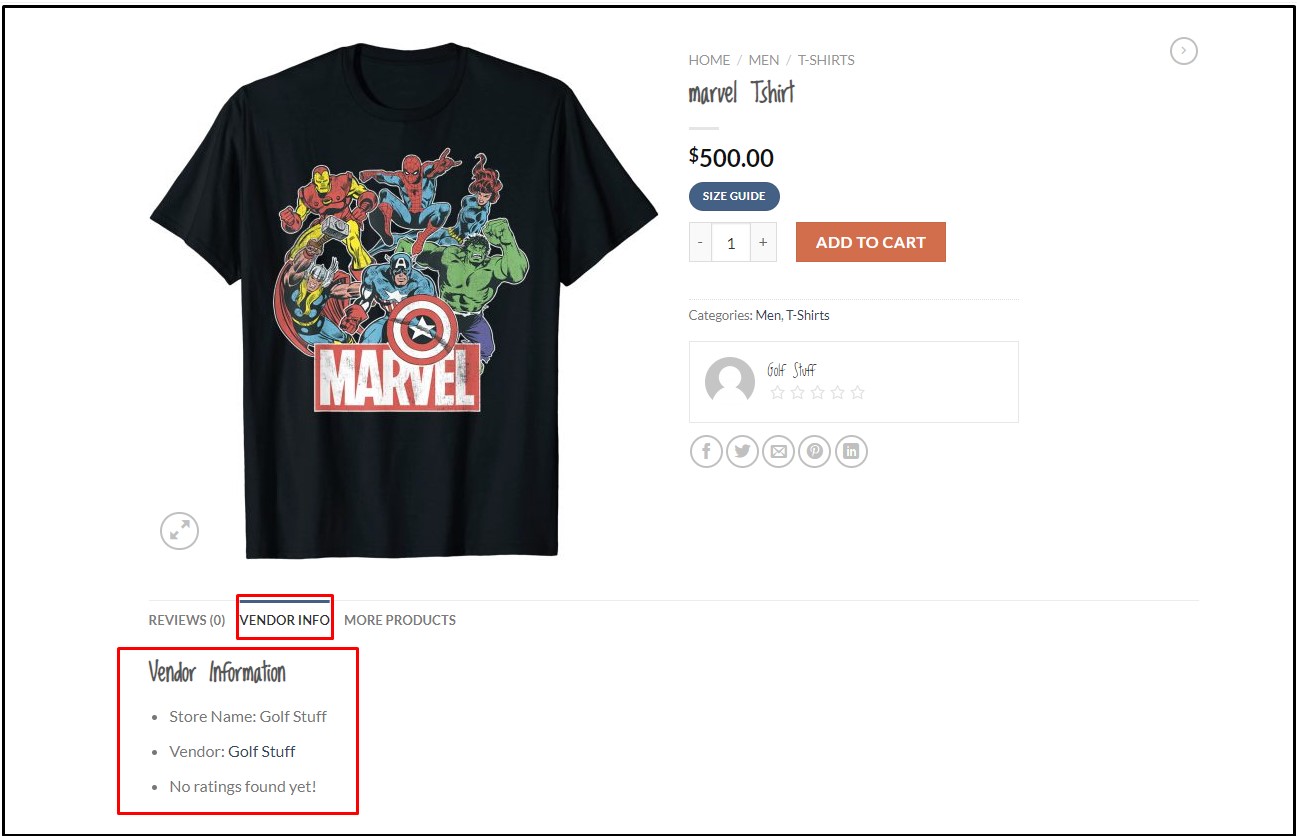
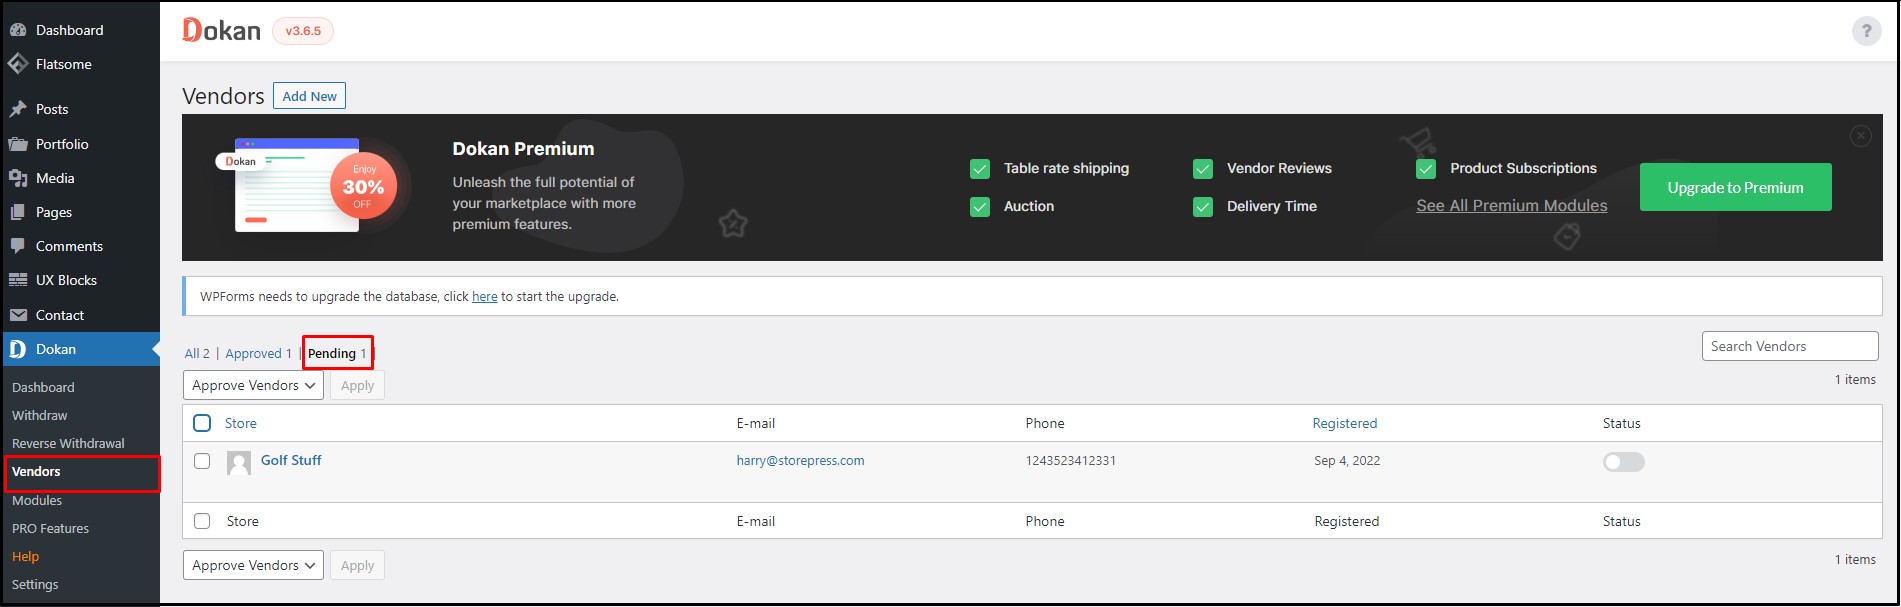
After someone registers to be a vendor on your website, you will see the vendor request in Dashboard>Dokan>Vendors. Hover over the user request, and you will find options like edit, products, order, etc. You can approve the user by selecting the tick mark beside it and choosing ‘Approve Vendor’ from ‘Bulk Actions’ as a vendor on your website or denying them. After a vendor is approved and logged in, they will be taken to the vendor dashboard, where they can see the overall stats of products, orders, sales, earnings, etc. From the Product section of the dashboard, vendors can easily add new products to their marketplace. A nice popup box appears with all the necessary fields and options when you click on the ‘Add New Product’ option. From the Order section of the vendor dashboard, a vendor can easily find all the orders placed for their products. You can also sort and look at these orders using different filters, making it easier for you to go through your orders. On the Withdraw section of the vendor dashboard, you can check your balance and payment details and make requests for withdrawals. After the vendor uploads their product and the product is approved by the administrator, customers will be able to see the product on the website. Customers will also find the vendor information on the product page. This plugin is supported by the best premium WordPress theme.
Customizing Multivendor WooCommerce Website with Flatsome Theme
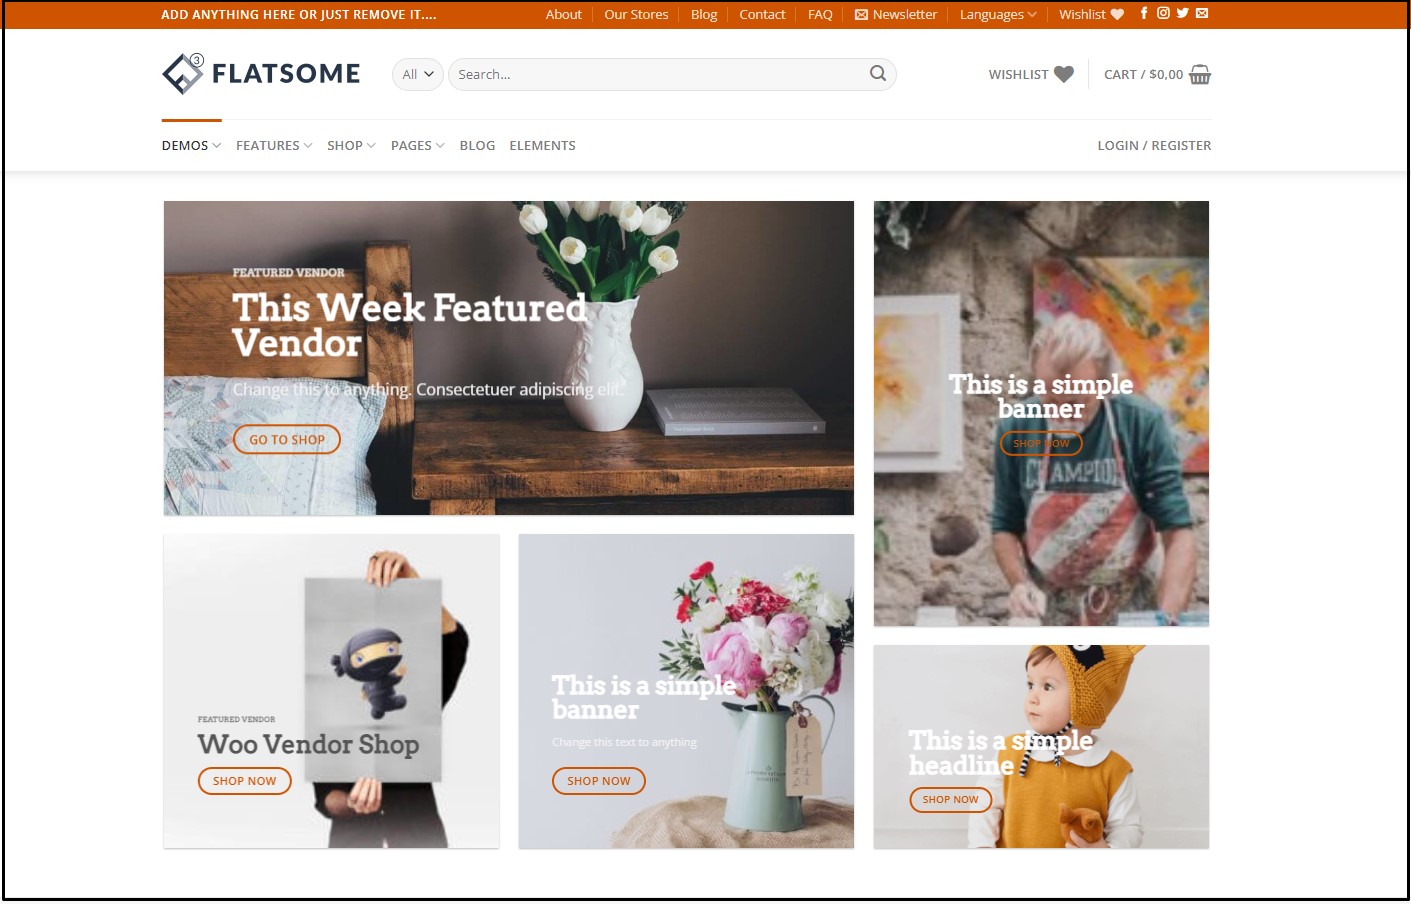
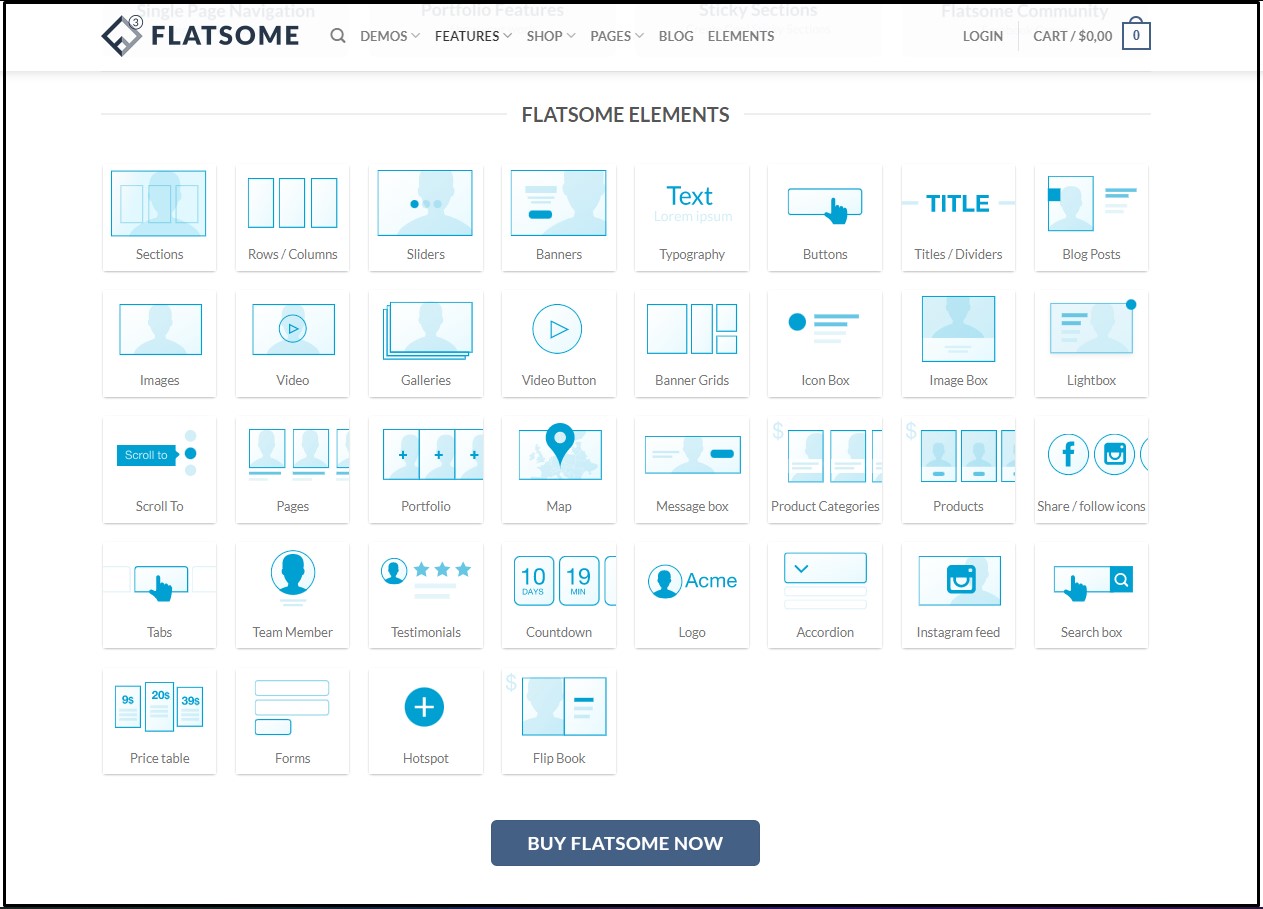
Flatsome is one of the top WordPress WooCommerce themes that let you customize your website in any way you like. As for our tutorial, we have also used the most popular WooCommerce theme Flatsome, for its numerous design modules and features. That is why it will be the right choice to create a multivendor WooCommerce website.Combining the Flatsome theme’s premade layout, design modules, and features with the Dokan marketplace plugin, you can create a robust and powerful multi-vendor WooCommerce website in no time!
Conclusion
Following the steps mentioned above, you will be able to create a multivendor WooCommerce website that will be highly featured and functional. The Dokan plugin we used comes with tons of features and superior functionalities, letting you create a lightweight multi-vendor WooCommerce store without any prior coding knowledge! We recommend you use the Dokan multivendor marketplace WordPress plugin with the most popular Flatsome theme for best performance if you want to build a dynamic and powerful multi-vendor WooCommerce website. Feel free to check out our article on OceanWP vs Flatsome theme comparison to get insight into the top WordPress WooCommerce theme.


 Upon clicking the menu, the vendors will be taken to the account page, where they can log in to their dashboard or register for an account.
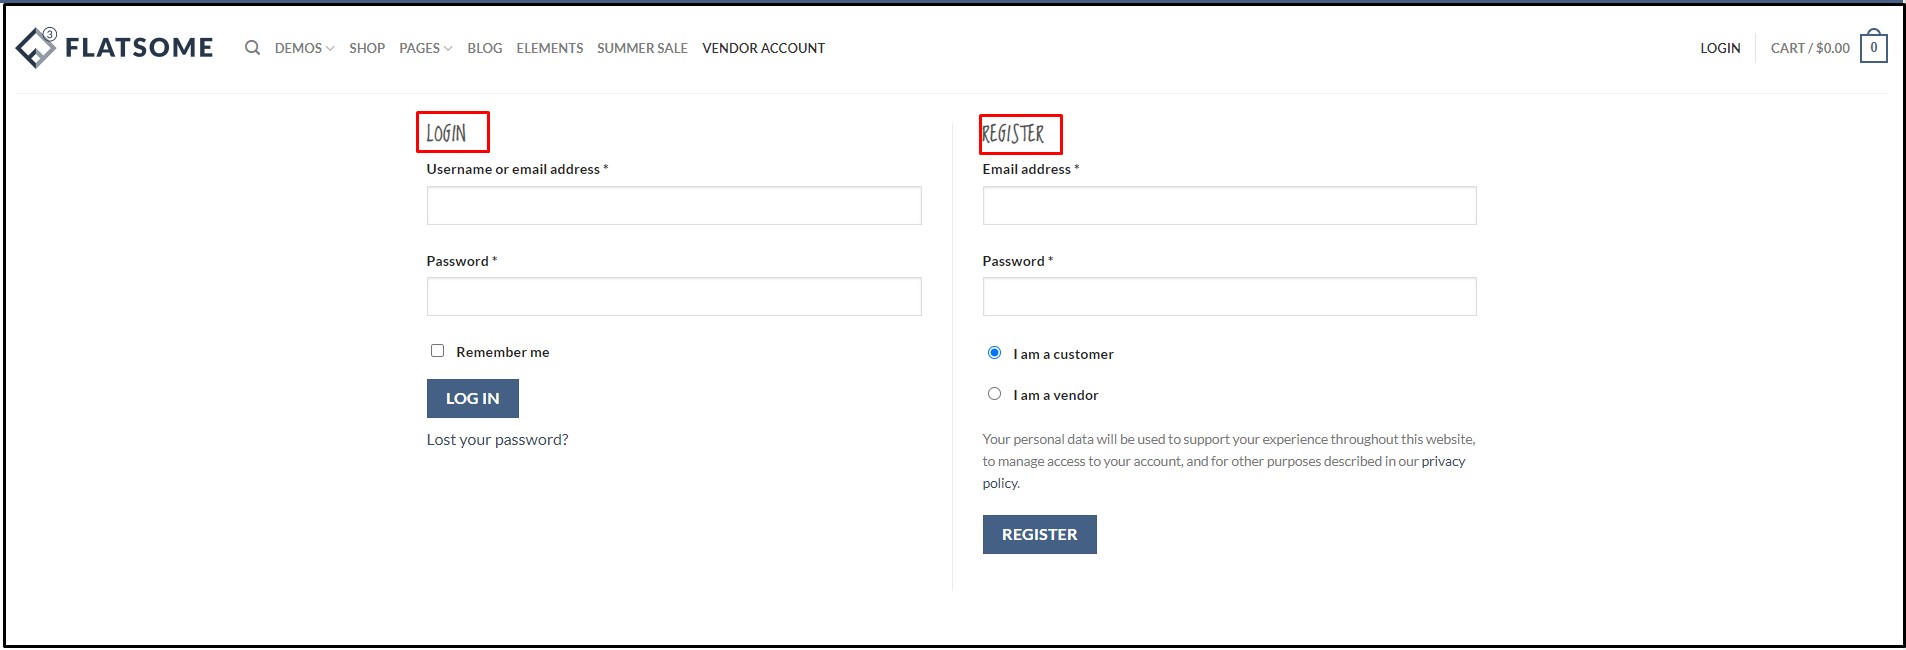
 After a vendor is approved and logged in, they will be taken to the vendor dashboard, where they can see the overall stats of products, orders, sales, earnings, etc.
 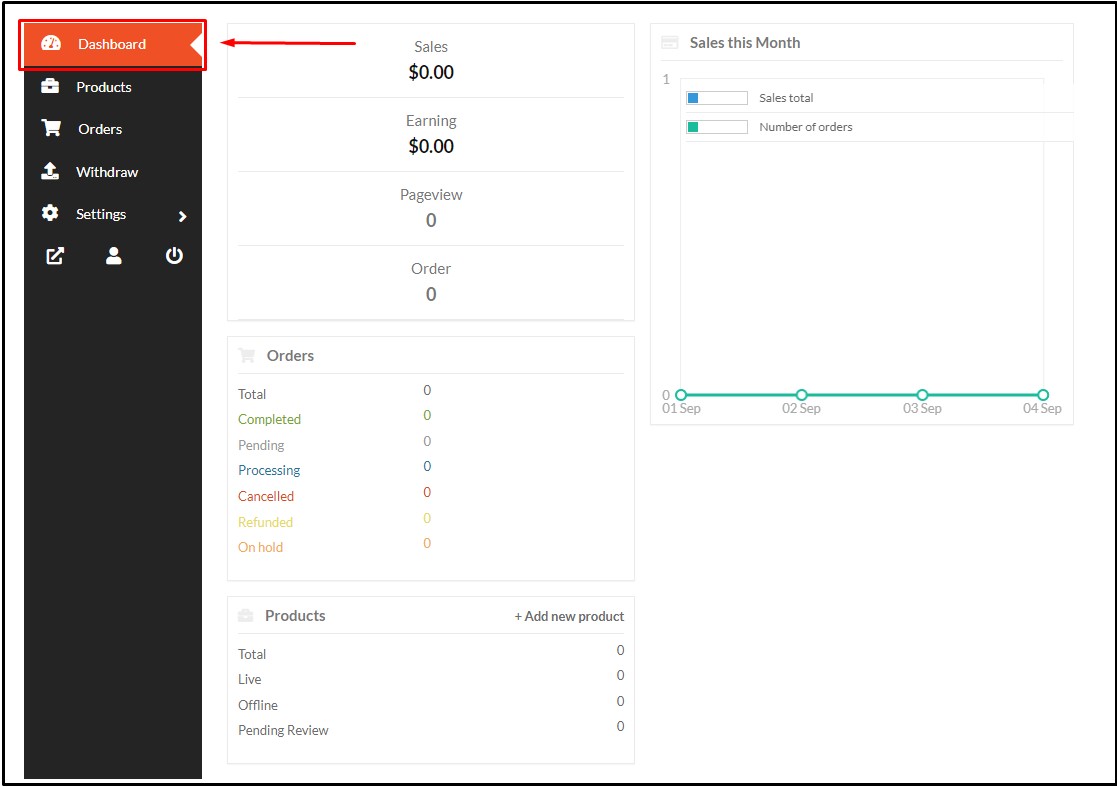 From the Product section of the dashboard, vendors can easily add new products to their marketplace. A nice popup box appears with all the necessary fields and options when you click on the ‘Add New Product’ option.
 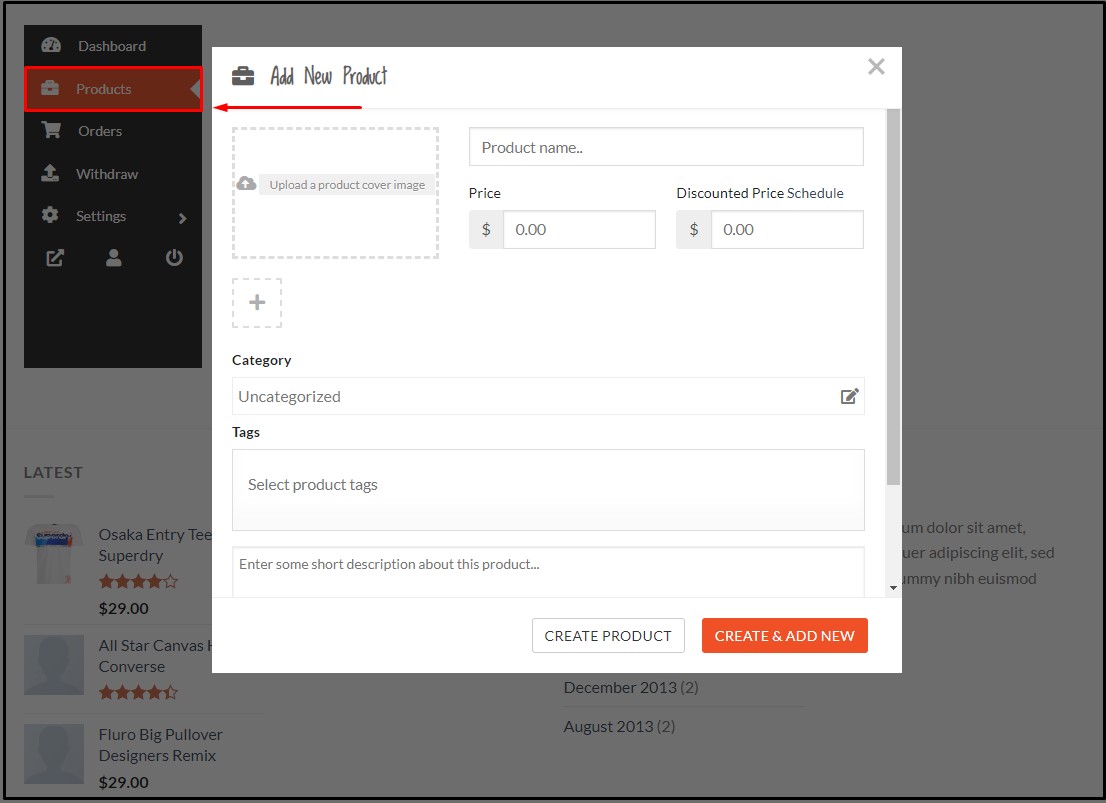 From the Order section of the vendor dashboard, a vendor can easily find all the orders placed for their products. You can also sort and look at these orders using different filters, making it easier for you to go through your orders.
 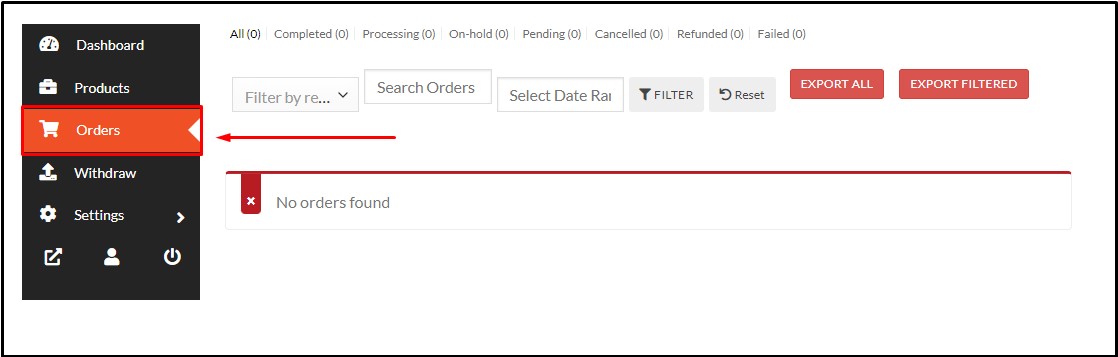 On the Withdraw section of the vendor dashboard, you can check your balance and payment details and make requests for withdrawals.
 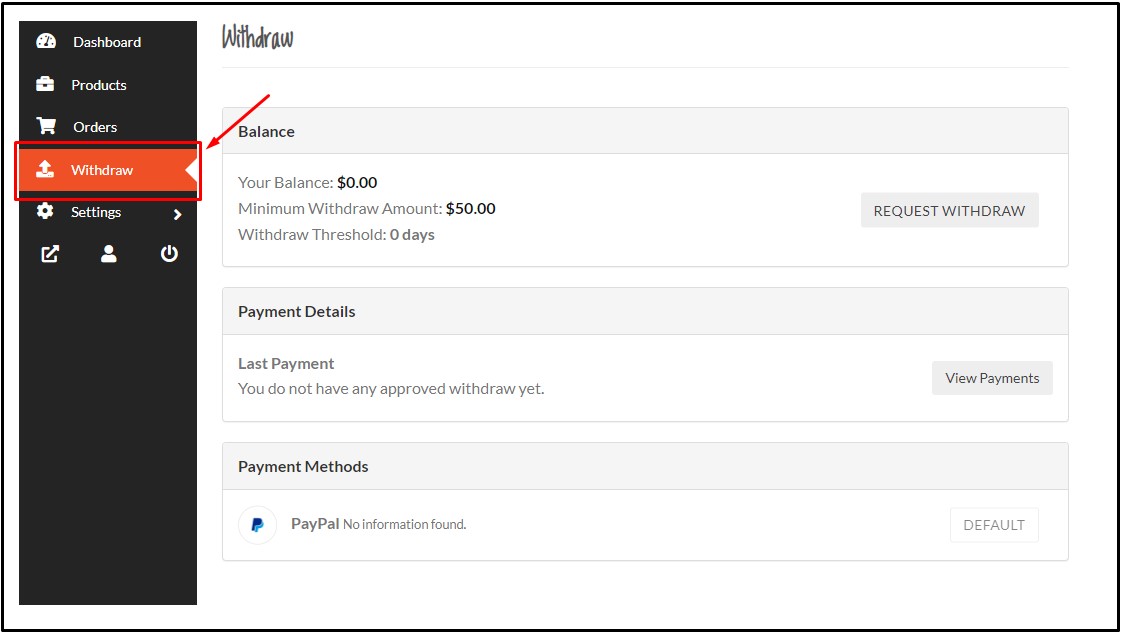 After the vendor uploads their product and the product is approved by the administrator, customers will be able to see the product on the website. Customers will also find the vendor information on the product page. This plugin is supported by the best premium WordPress theme.