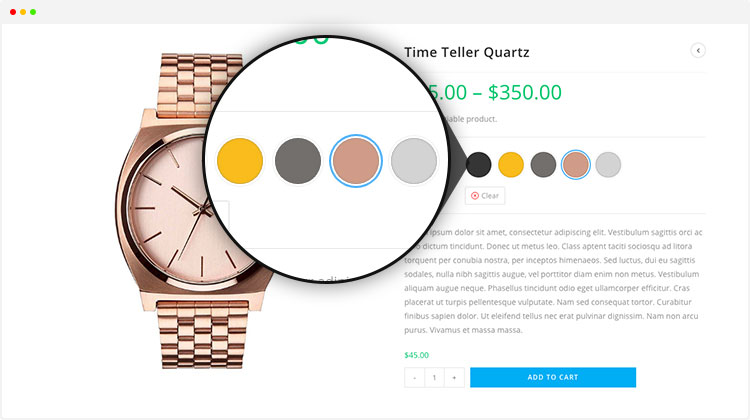
Having product variation is a common fact for eCommerce. If you’ve got an eCommerce, it’s pretty sure that you need to set up your store for the variation of your products. WooCommerce Color Swatches can help you to do that.
In WooCommerce, you are given a dropdown by default to handle WooCommerce product variation.
I know what are you thinking right now! You’re thinking, “so what! Why these guys are making a fuss?”
Let us clear our point of view. We believe every eCommerce owner’s target is to increase sales and keep visitors to their site. To keep them longer, you need to give them a seamless experience so that they feel comfortable staying at your site for a long time.
The dropdown to see variations of the products is an old-school process, also it requires more clicks to view a variation. This is not a comforting experience for the visitors, that’s why you should use something that can smoothen the experience of viewing different variations. Here comes variation swatches for WooCommerce to make things easy and seamless.
Though Variation Swatches offers color, image, and button swatches, in this article, we’ll only focus on Color Swatches. You’ll be more than happy to show color variations on shop page with this plugin to engage your customers deeply.
There are several direct and indirect benefits of using WooCommerce Color Swatches for product variations. Let’s find out some!
- It gives your visitors a smooth experience
- Exploring color variations can increase the sales
- Visitors need fewer clicks to view a product’s variation
- A better user experience sends search engines a positive signal so that they can promote this content
Excited to enable WooCommerce color swatches in your store, right? Let’s get started with the whole process!
How To Enable WooCommerce Color Swatches Plugin in eStore
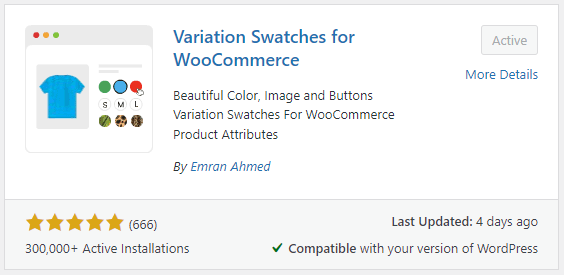
Before getting started, we want to inform you about some prerequisites. The first one is a WooCommerce theme. You need a WooCommerce theme to get started with the WooCommerce variation swatches free plugin. You can choose any free or premium theme for your store. We would suggest you use a high-quality theme like Flatsome, storefront, etc. Then you need to install the plugin Variation Swatches.
Step 1: Go to the Dashboard.
Step 2: Hover the cursor on the Plugins, then click Add New.
Step 3: A search page will appear. On the top right, you’ll find a search box. Type WooCommerce Variation Swatches, then install and activate the plugin.
So, the prerequisites are prepared. Now, we can move forward to use Variation Swatches to enable color swatches for variable product variations.
After successfully installing, and activating the WooCommerce Variation Swatches plugin, it’s time to create color swatches.
Let’s start the process!
Step 01: Create Variable Product Attribute
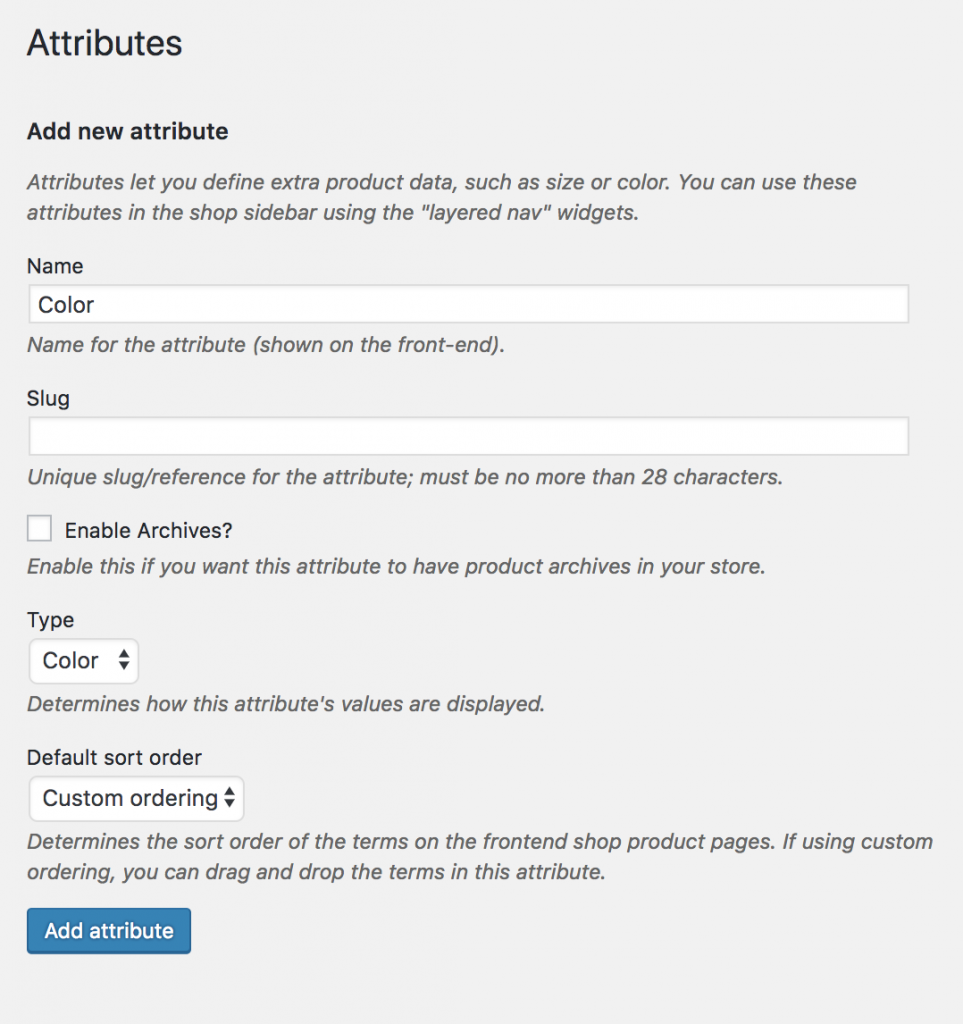
At first, we need to create a color attribute and variations globally. To create it, go to the Dashboard, click on the Products, then go to the Attributes. You’ll find an Attributes box. Fill in the required fields as your requirement. For demonstration purposes, we’re naming the attribute as Color. We’re leaving the slug empty because it automatically generates a slug for the WooCommerce product attribute. We’re selecting Type as Color.
You can choose the options, and name as your preference. If you don’t have any, follow ours. After completing the required fields, click on the Add Attribute button.
After that, a list will be created on the right side like the following screenshot.
Step 02: Create Attribute Variations
You can add more attributes to the list using the same process. After creating an attribute, you need to create attribute variation. For creating product variations for attributes, go through the list and click on the Configure terms of the attribute.
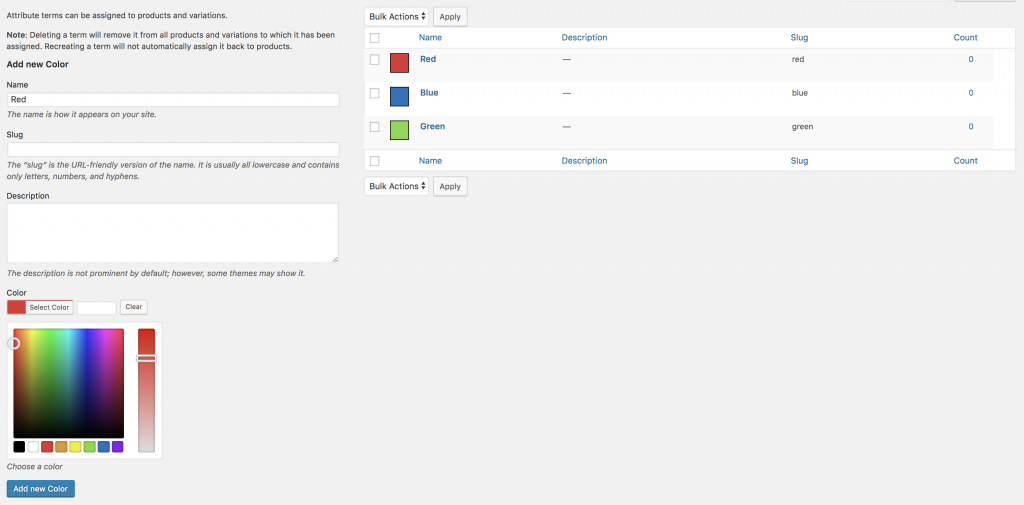
We’ve created Color attribute for example. Inside the color attribute, you can add colors as variations inside the attribute. You can also choose any color you want, but for demonstration purposes, we’ll add Red, Green, and Blue. In short, to create a variation, fill the name field, leave the slug empty, and select color.
Step 03: Enable Attribute Variation in Variable Product
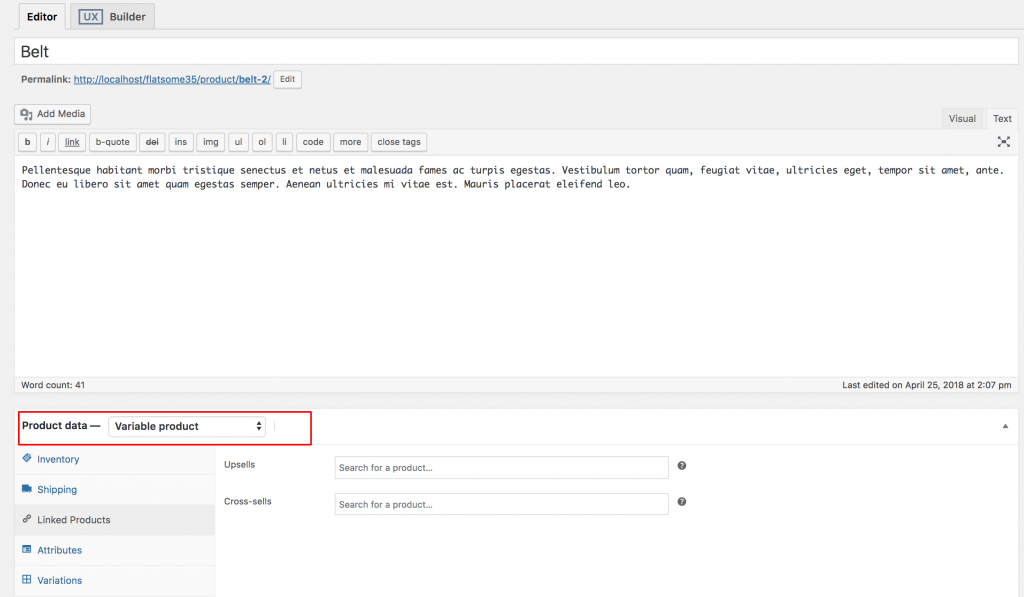
Now, we need to link a globally created color swatch with a variable product. For enabling attribute variation products, go to the products, and edit them. Be conscious about selecting a variable product from Product Data.
After that, click on the Attributes on the left. A new page will be opened. There is a dropdown named Custom product attribute where you can find all globally created attributes. Here, you’ll see the only Color attribute, because you just created only the Color attribute.
Select the attribute you want to select, for demonstration purposes, select Color. After selecting, this page will come up.
To select all available variations, click on the Select all button. You can also deselect the all button by clicking Select none. Then tick the Used for variations, and click Save attributes.
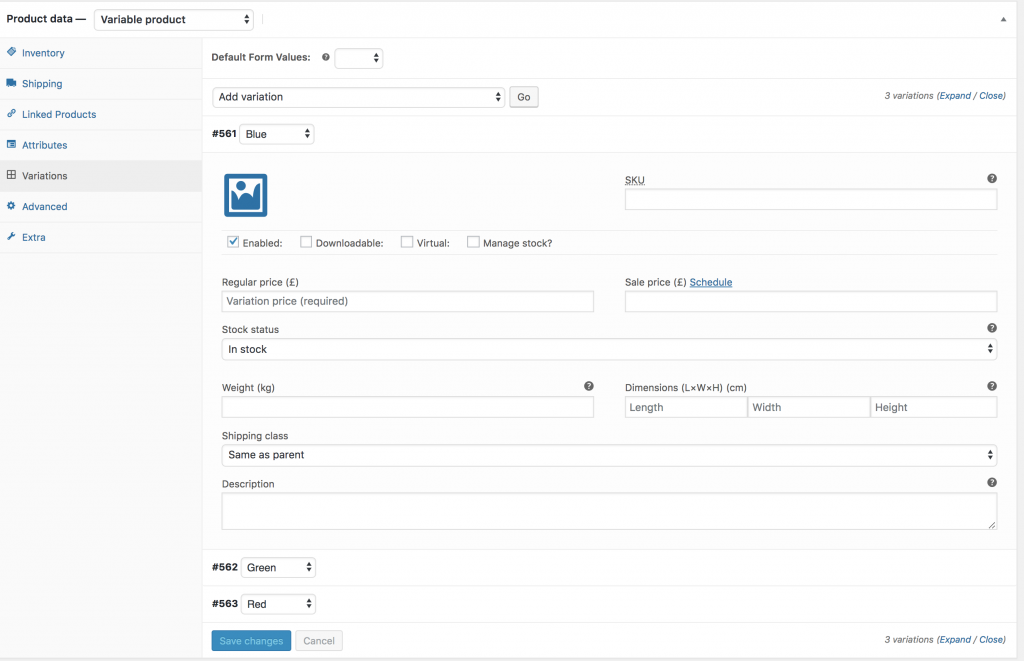
Click on the Variations Tab, then a new page will appear. There you’ll notice two options, one is Add Variation, and another is Create Variations from all attributes.
Select any option from these two options. For demonstration purposes, we’re going to select Create variation from all attributes.
Now, the color variations are visible with the products. You also add more variation-specific details here such as variation images, variation prices, and other variation specific. After doing all of that, click the Save Changes button.
P.S: Add prices in each variation, otherwise, variations won’t be visible on the product frontend.
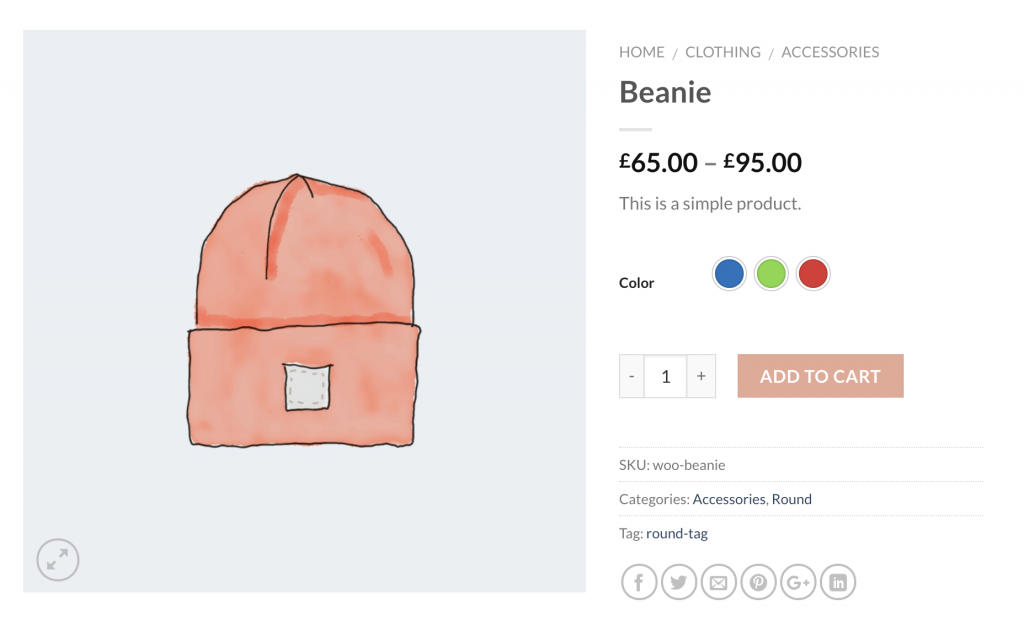
After successfully adding variation swatches, the individual product page will look like that. You can customize the product page WooCommerce by following some steps.
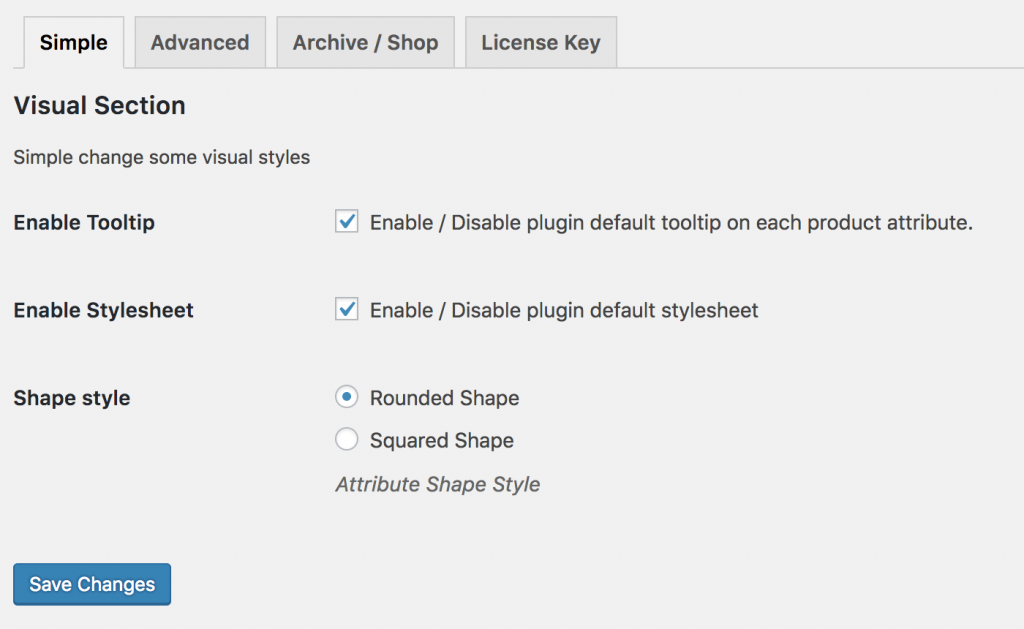
Simple Settings
Variation Swatches is an essential plugin for WooCommerce sites. More than 300K+ WooCommerce sites are using this plugin. It helps you to active Tooltip, disable plugin default stylesheet, and switch between round and square shapes.
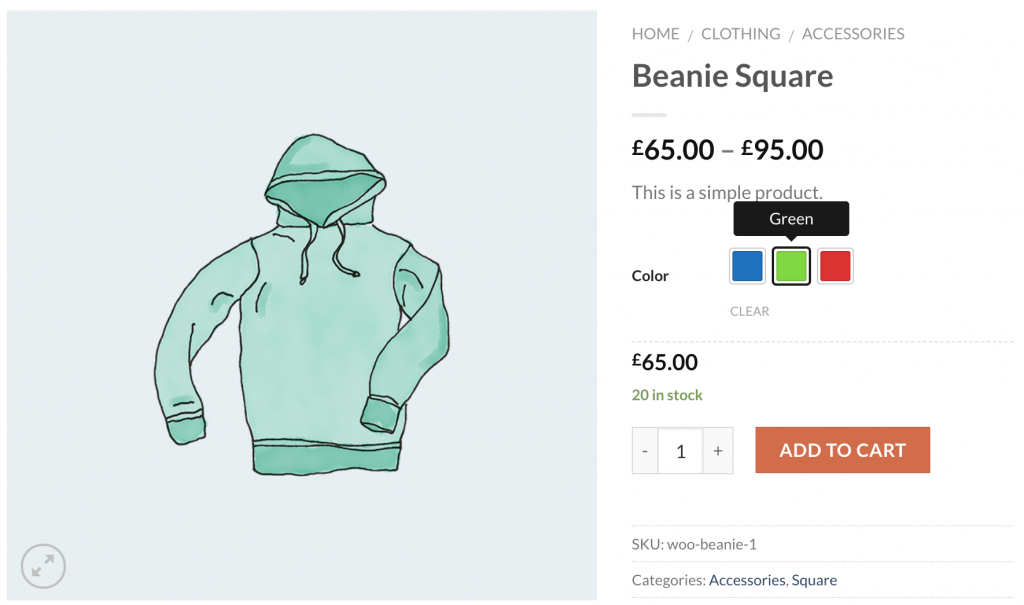
Change the Shape style from Round to Square, and enable Tooltip. After that, the product page’s front end will look like that.
Advanced Settings
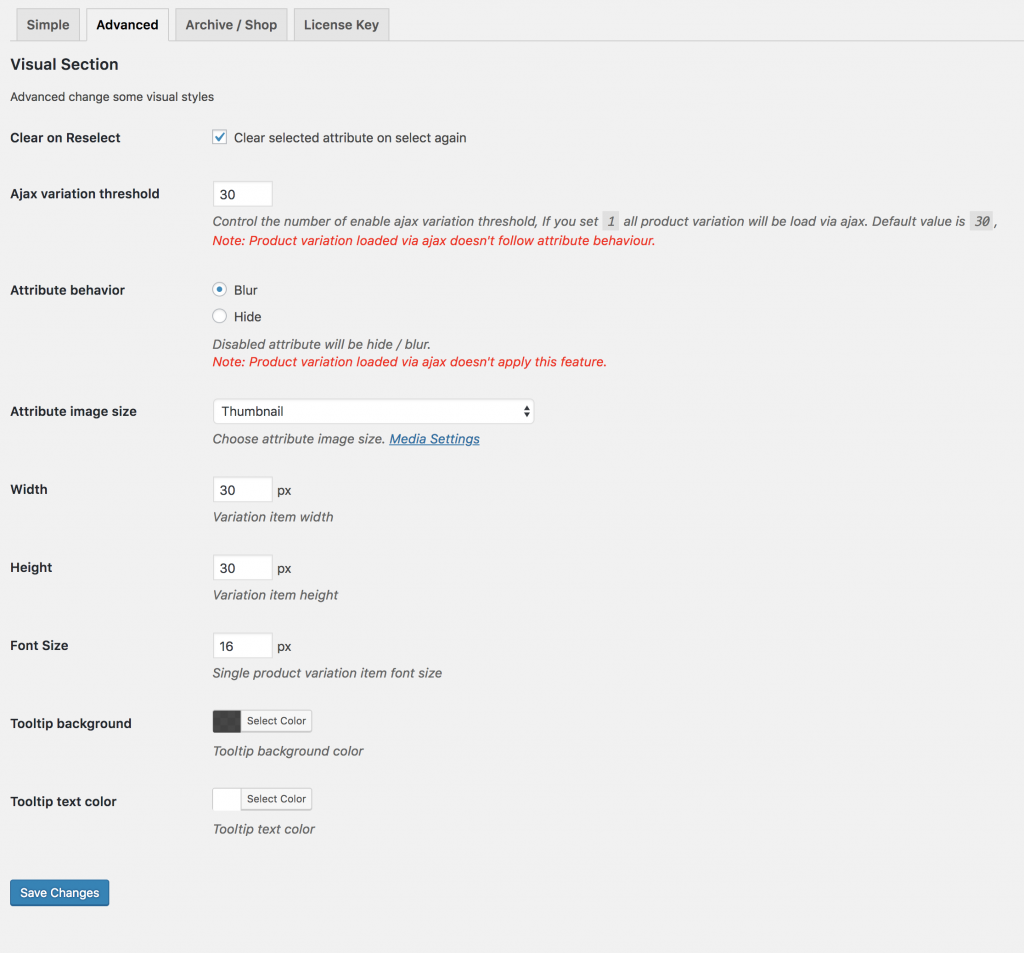
Variation Swatches also have some advanced features that can give you more. You can control Variation Swatch’s width, height, and font size. It also offers to display out-of-stock smartly.
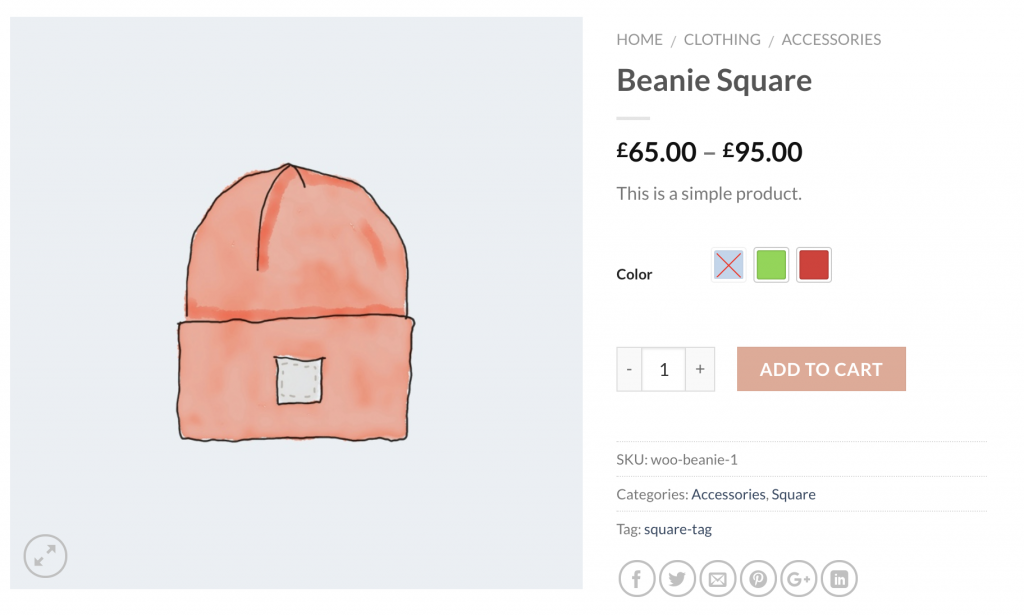
To display out-of-stock, you need to select the Blur option of Attribute Behavior. After selecting that, your product will respond as the following.
Enable Color Swatches on Store Pages of Flatsome Theme
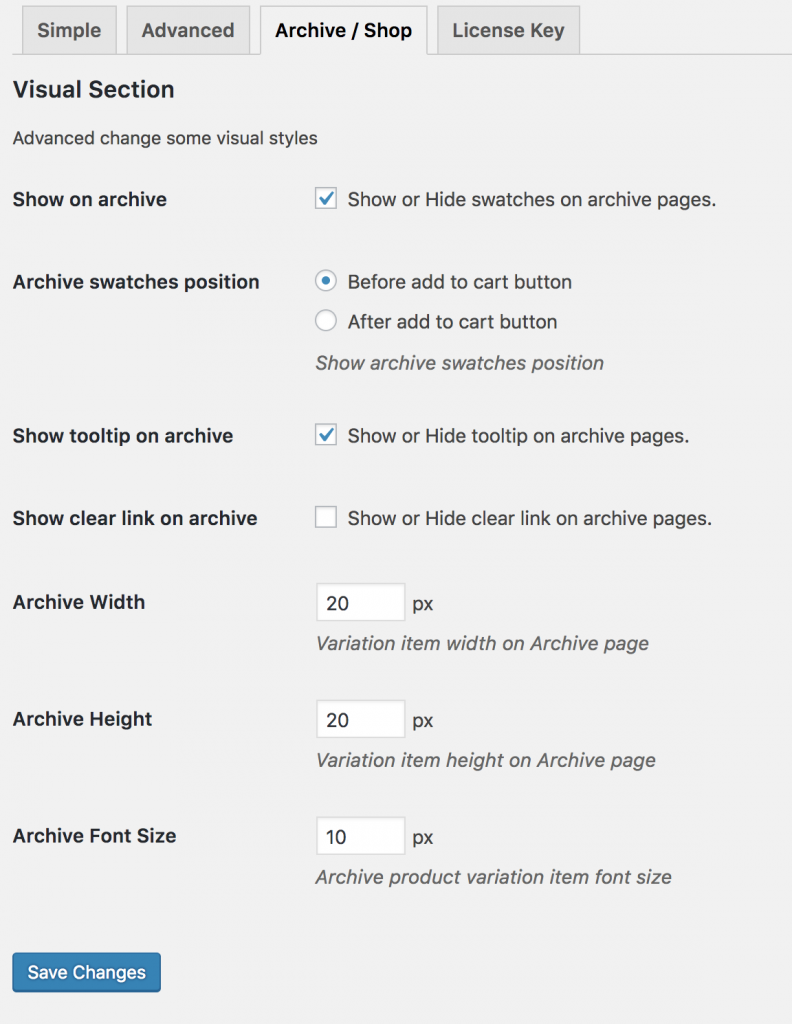
Along with adding color swatches to the product pages, you can also add the WooCommerce Color Swatches on the product archive pages. To use this feature, you need to upgrade your version to the pro. If you haven’t the pro version yet, get it to use the full power of Variation Swatches.
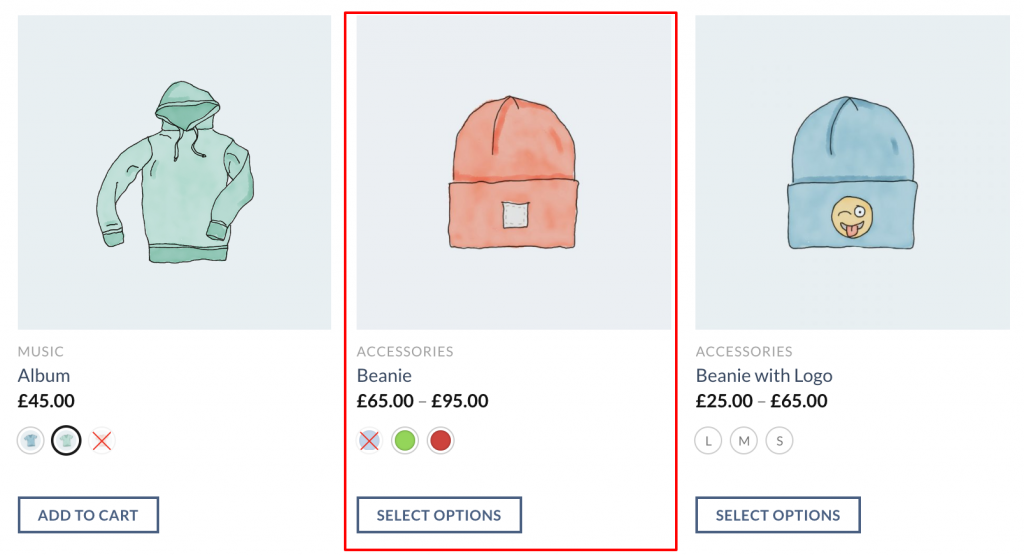
For enabling color swatches on the archive/shop page, check the settings Show on the archive to show color swatches on the store/archive page. If you’re using the Flatsome theme, you can enable swatches before and after adding to the cart button in the store from the Archive Swatches Position settings. You can also control the size of the color variation swatches from those settings.
When you enable swatches on the store page, it’ll look like this.
Customize Tooltip and Swatch On the Store/Archive Pages
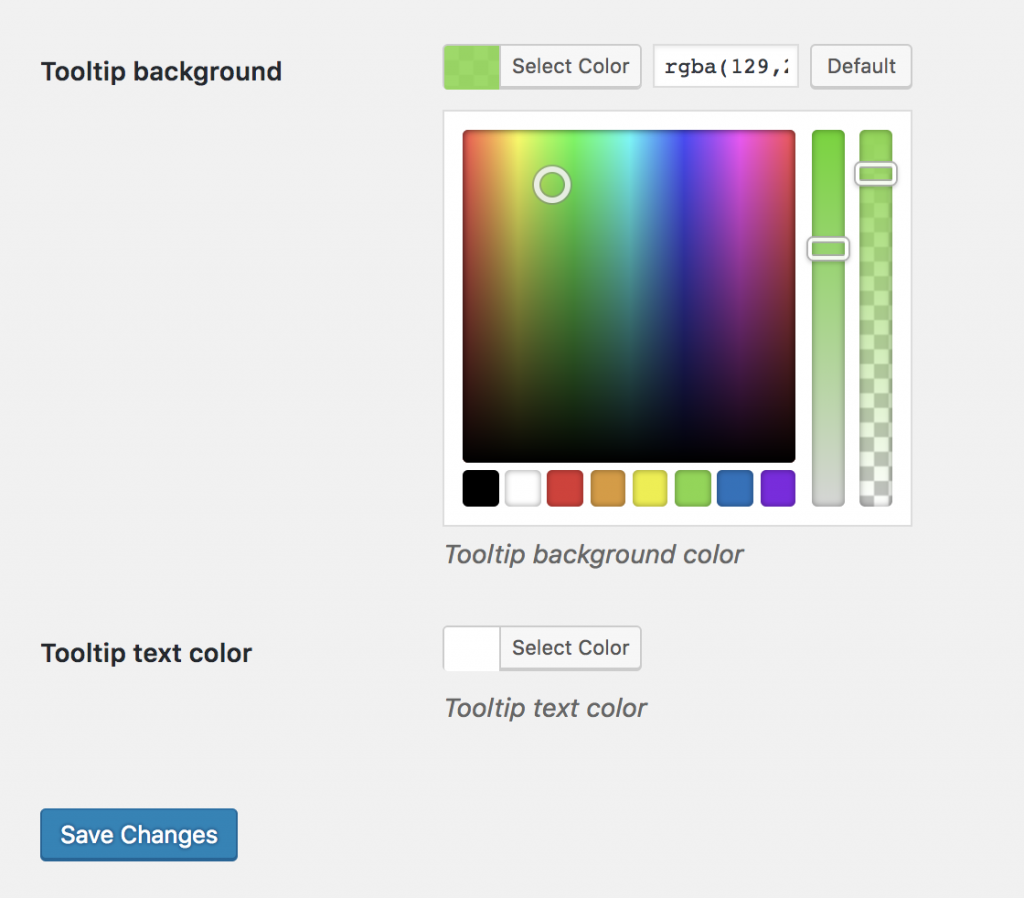
If you want to customize the tooltip color and enable variation swatches in the store, you need to use the premium version of the variation swatches.
Enable Tooltip
Using Advanced settings, you can customize the tooltip background and text color. To customize the tooltip, check below.
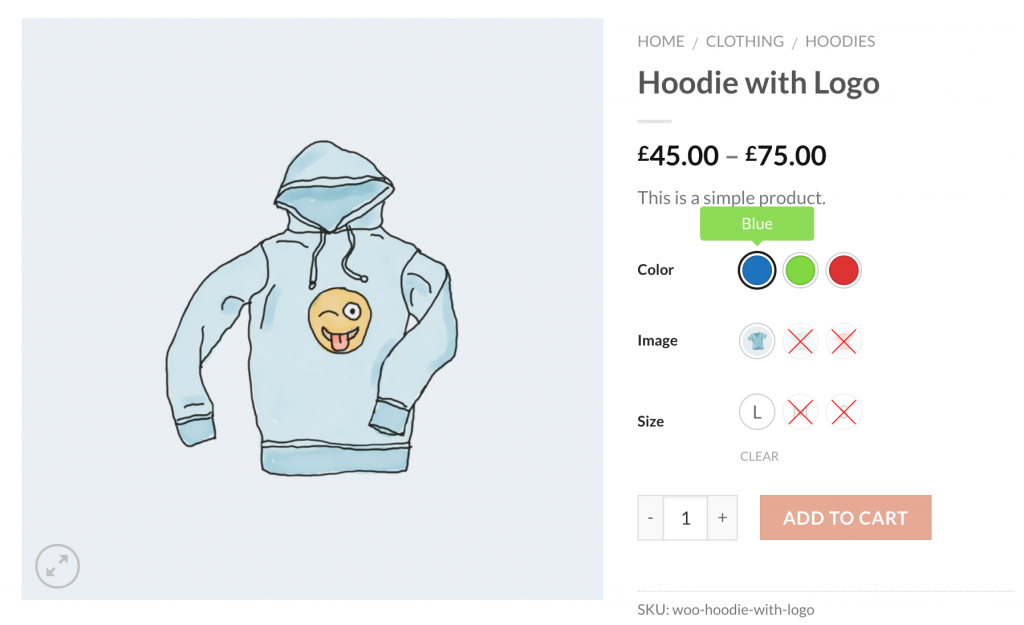
The final preview of the tooltip frontend.
Conclusion
This technology will boost your site’s usability and conversion. It also ensures that your customers get a seamless experience while visiting your site. Moreover, indirectly it can improve your sales, and help you to grow your WooCommerece store.
If you face any issues while installing this plugin in the Flatsome theme, let us know in the comment section. We’ll try to respond ASAP!

