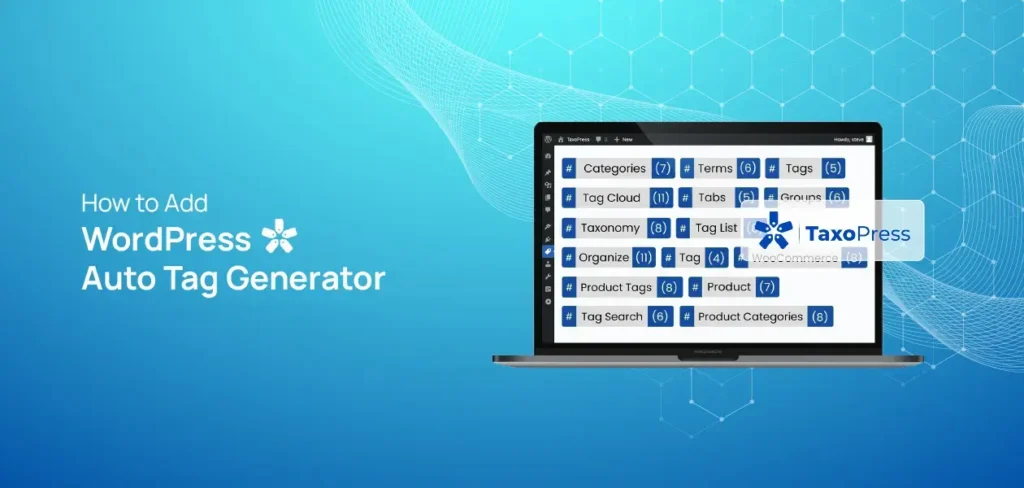
WordPress auto tag generator is a tool for automating the tagging of WordPress posts. It saves an enormous amount of time and effort for a WordPress website owner. In this article, we’ll discuss the ins & outs of WordPress auto tag generator and show you how & when to use it for your website.
You can skip the intro part and start from the tutorial section if you already know about automatic tags. Otherwise, we recommend you read the full article for in-depth information.
What is Tag in WordPress
WordPress tags bear the identity of the posts. Generally, it’s related to the post title and content so that you can identify it fast. You can find published posts in the All Posts section, and for unpublished posts, you’ll find them on the right side of the editor. Such as, for a WooCommerce-related post, tags can be “eCommerce, best WooCommerce theme, etc.”. Generally, you need to add tags manually in your content which is a daunting task. Using a WordPress auto tag generator, you can easily add tags to your content automatically.
Tag vs Category
Tag and category are similar terms that confuse visitors very often. A category can have other child categories. But tags operate individually, and it’s more specific than a category.
Such as, on a blogging site, you can create a category of food under which you can create subcategories, such as Italian Food, Chinese Food, Korean Food, Indian Food, etc. But when using a tag, you need to be specific. For example, in a blog about the recipe of pizza, your tags will be “Pizza Recipe, How to cook Pizza.” These will directly indicate what your post is all about.
Why Is WordPress Auto Tag Generator Needed?
You need a WordPress auto tag generator to add tags to your posts effortlessly. It also offers to go through your content and put tags within a time interval. When you’re maintaining a site with too many posts or regularly publishing posts, it’s very time-consuming to review each post and find tags for them. So, to save time and be efficient, you need to use an automatic tag manager.
Here, TaxoPress has come up with a solution. They offer to generate automated tags and add them to your website’s posts. No matter how many posts you’ve or how long these posts are, Taxopress can do that quickly. You can also schedule for rechecking your content for any change and set tags in a time interval.
Benefits of Using Automatic Tag Manager
- It saves you valuable time and energy
- The automation process helps to find the proper tags quickly
- 24/7 adding tags in new posts automatically
- Automatically updates tags when posts are published
How to Add WordPress Auto Tag Generator
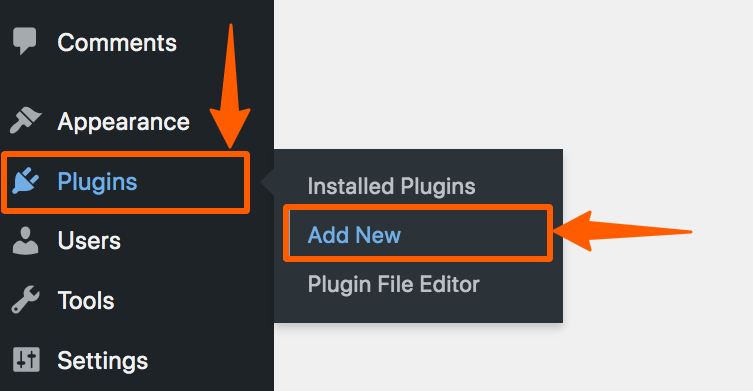
Step 1: Go to the WordPress Dashboard, then hover on the Plugins, then click on Add New.
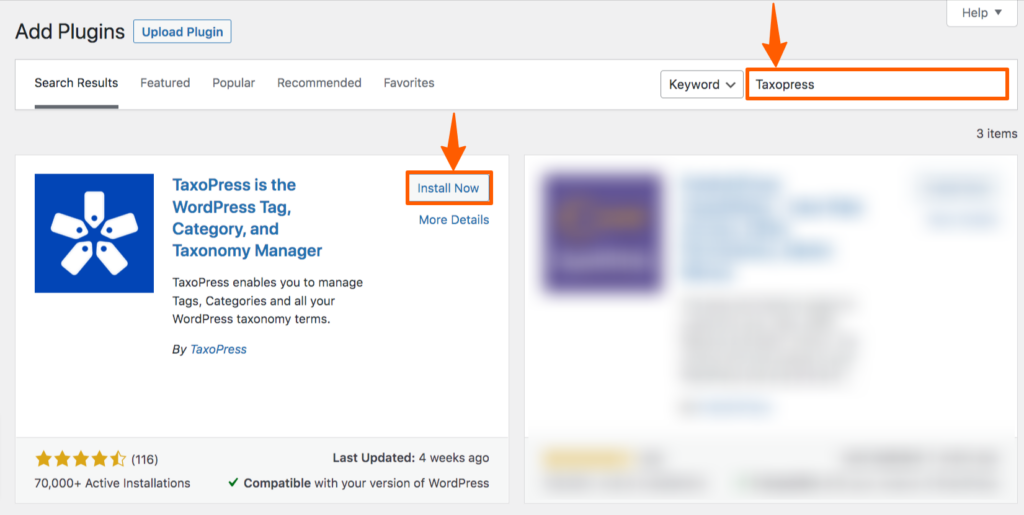
Step 2: In the Plugin repository, search for TaxoPress, then install and activate it. If you face any trouble while installing, follow the WordPress plugin installation guideline.
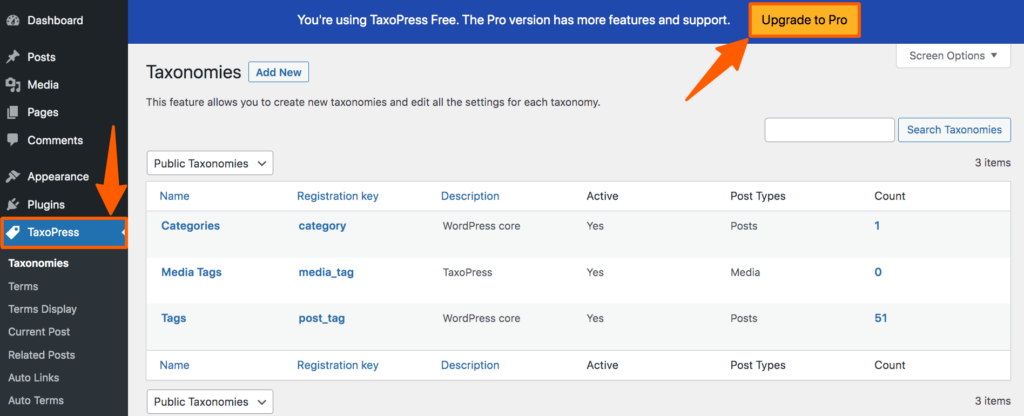
Step 3: After activation, a new menu named TaxoPress will be added to the WordPress Dashboard, click on that. A page of Taxonomies will appear. On the top of the page, you’ll notice the Upgrade to Pro option, click on that to upgrade this plugin. Without the pro version, you can’t automate the tags.
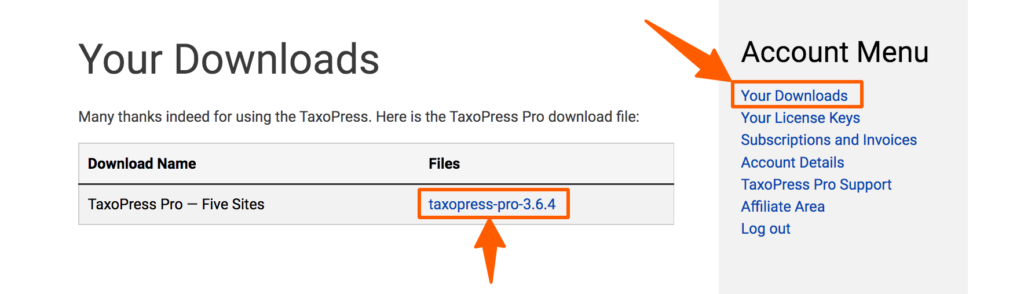
Step 4: After purchasing, go to the account, and click on Your Downloads. Then Download the pro version file.
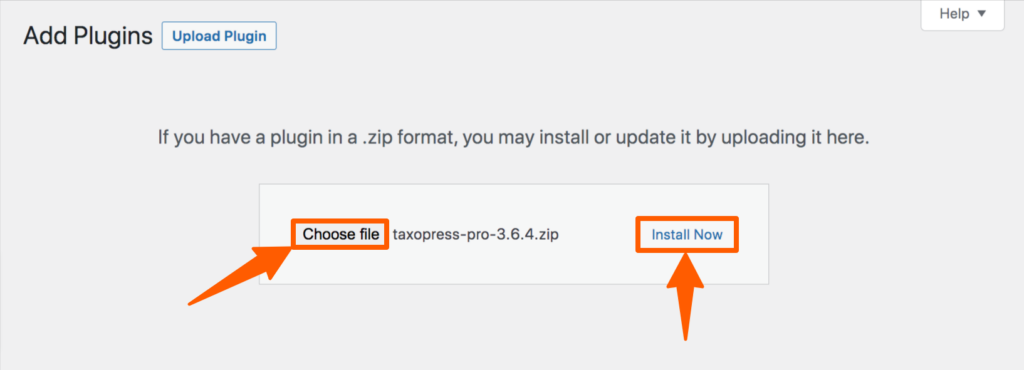
Step 5: After downloading it, again go to the WordPress Dashboard>>Plugins>>Add New. Then on the top left, you’ll find an option named “Upload Plugin”, click on that. Then an option will appear, using it, upload the zipped file you’ve downloaded, install, and activate it.
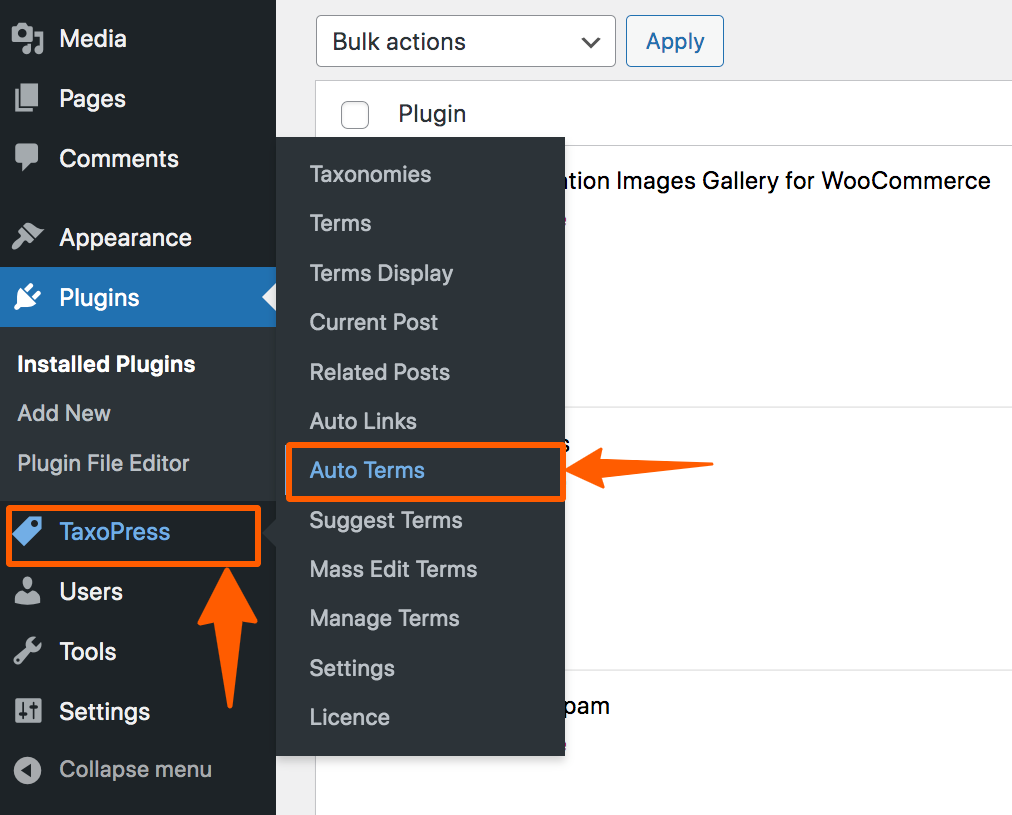
Step 6: After activating it, in the WordPress Dashboard menu, hover on the TaxoPress, then click Auto Terms.
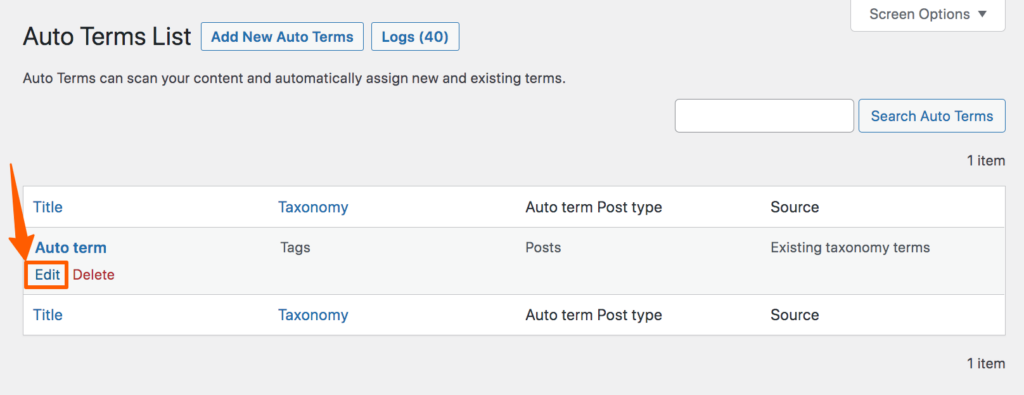
Step 7: You’ll find an Auto term named post that you need to edit. Hover on it, then click Edit.
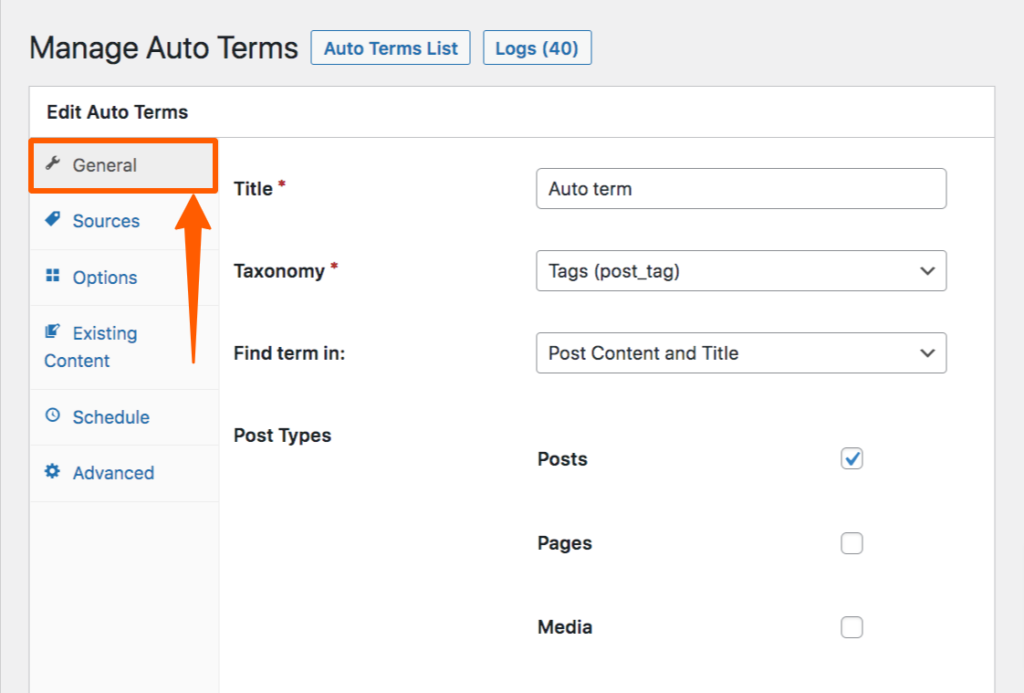
Step 8: Then you’ll find a page called Manage Auto Terms. On that page, many options that will help you to customize how you want to set automatic tags. At first, you’ll find General, click on that and set the title, taxonomy, from where tag terms will come, and post types. After selecting all of these, click Save Auto Terms.
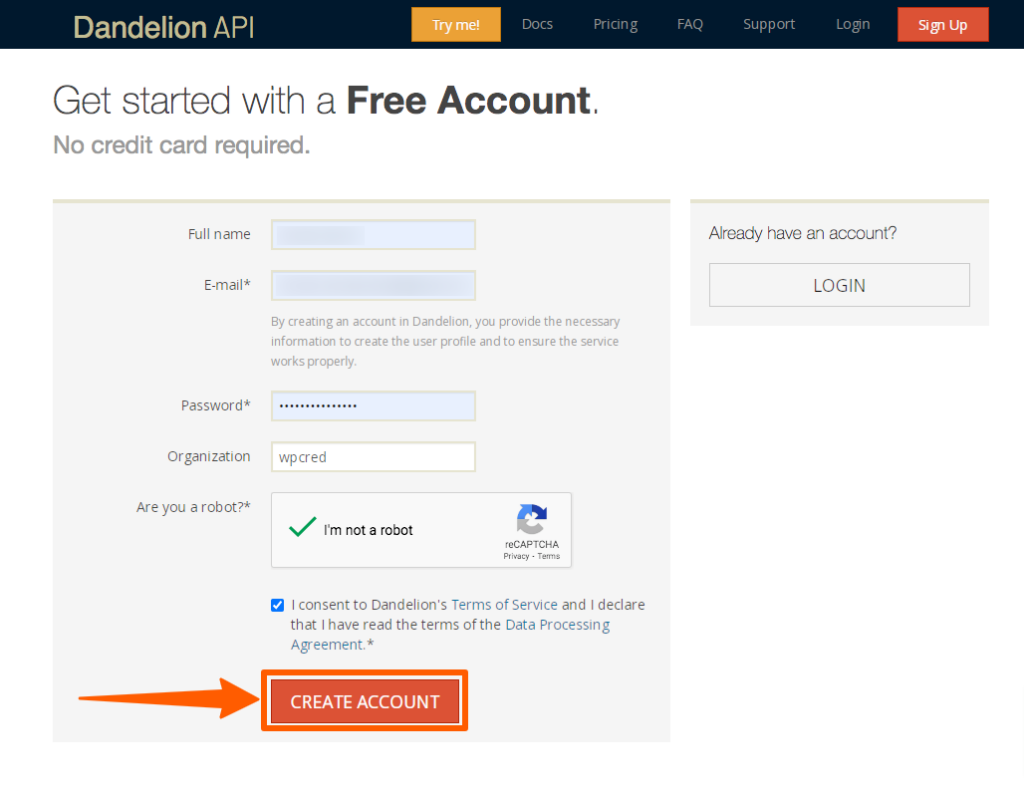
Step 9: Now, before going to the next option, we need to get an API key from Dandelion or Open Calais. For demonstration purposes, we’re creating an account on Dandelion. To do that, go to the Dandelion, then create an account.
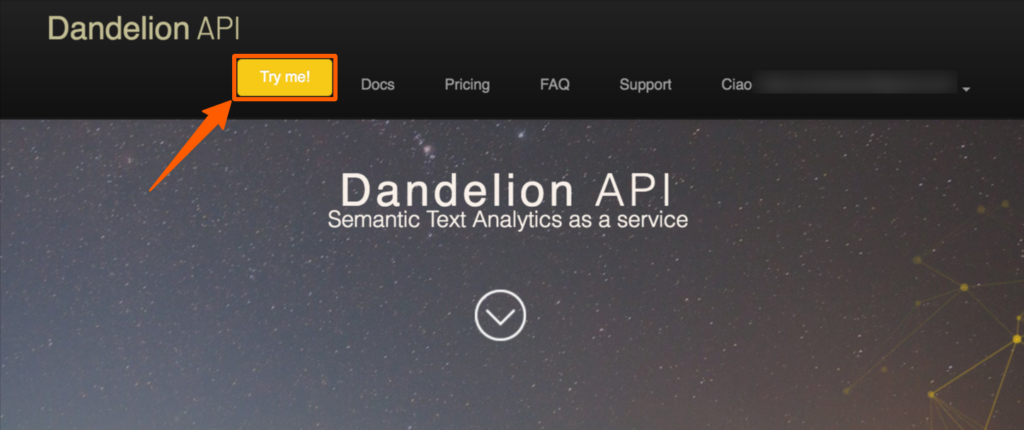
Step 10: Login, then click on Try me!
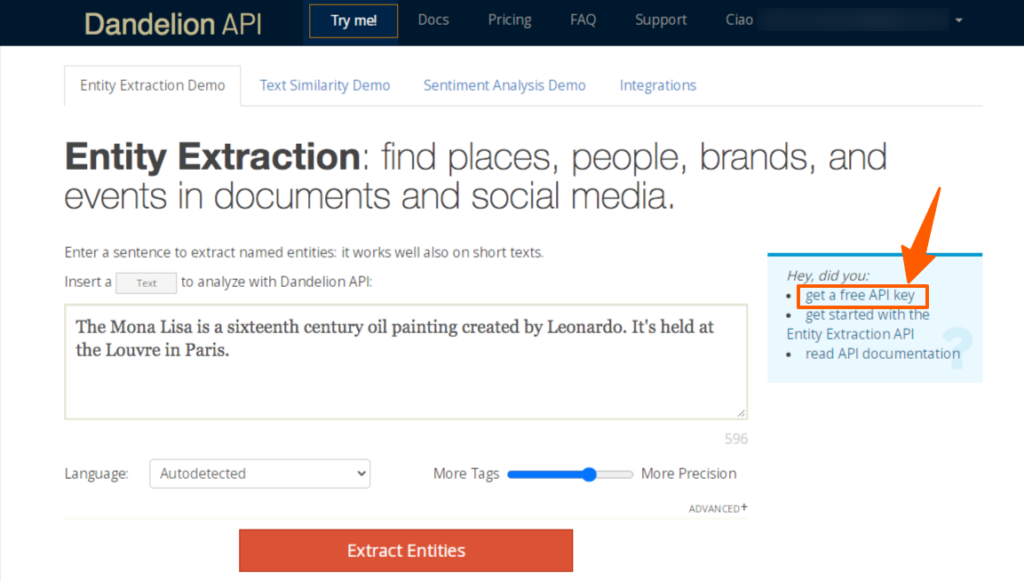
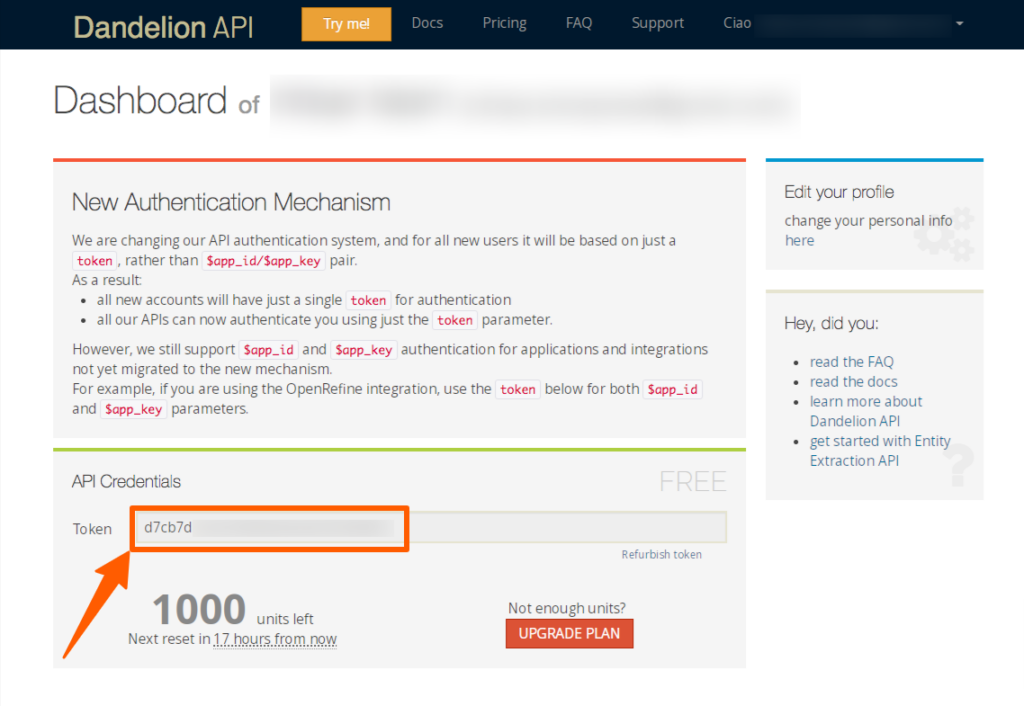
Step 11: Then you’ll find a sample page, on the right side, you’ll find an option for “get a free API key”. Click on that.
Step 12: Then, you’ll find a Token. Copy that token.
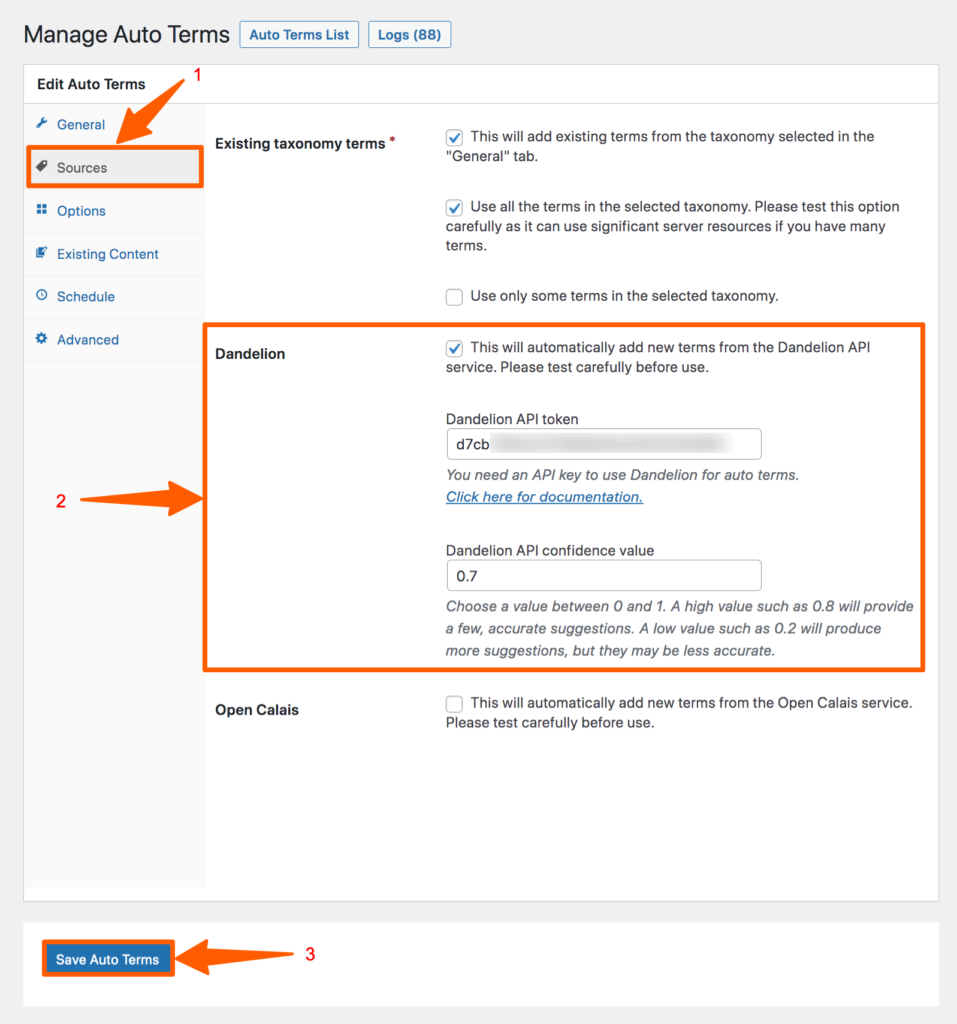
Step 13: Now, go back to the WordPress where we’ve left. Click on Sources, then select Dandelion, paste the token, and put a confidence value. After that, click on Save Auto Terms.
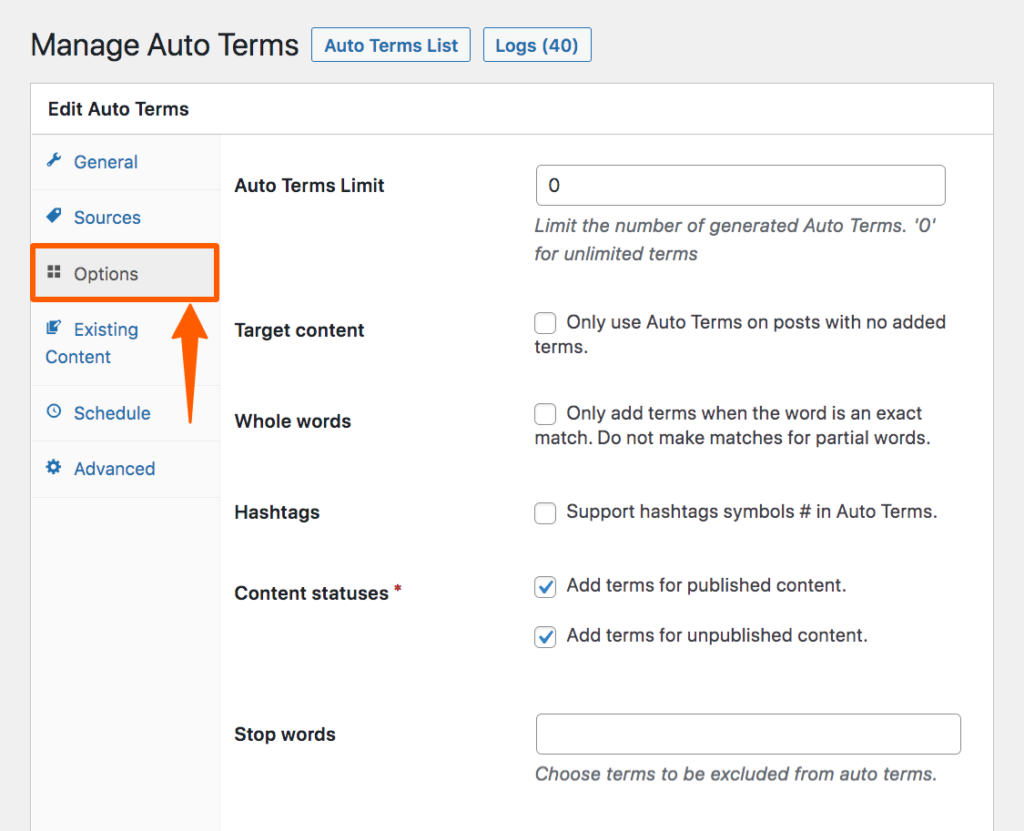
Step 14: Then go to the next option called Options. There you can limit the number of terms, control where terms will be added, and restrict words from being added as tags.
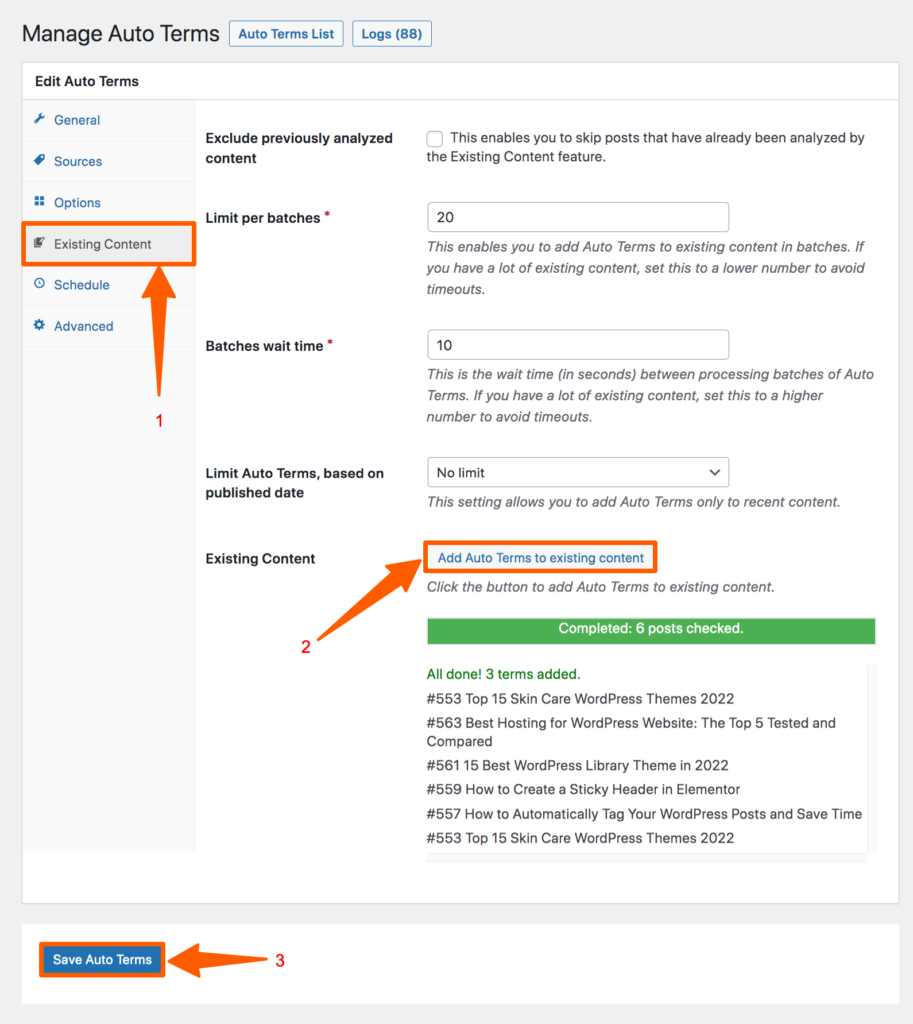
Step 15: After that, click on the Existing Content, then click Add Auto Terms to existing content and wait for some time. After completion of post-checking and terms adding, click on Save Auto Terms to make it effective.
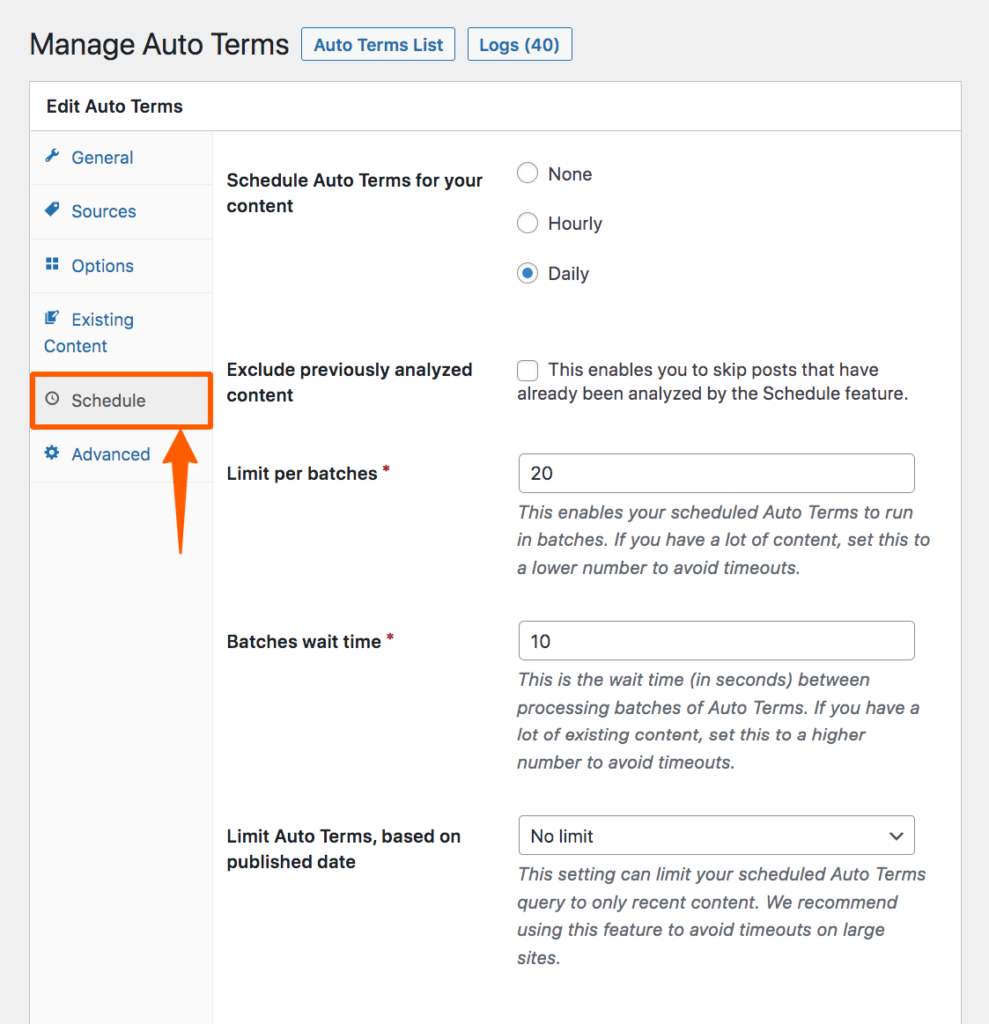
Step 16: Using Schedule, you can choose the schedule of auto terms, set the limit, and batch wait time.
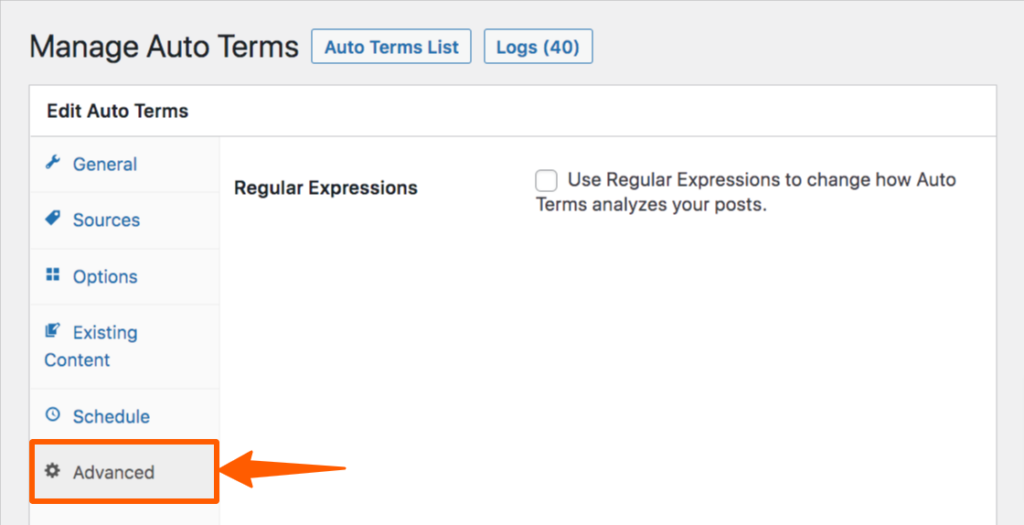
Step 17: After scheduling, you’ll find an Advanced option where you can set the usage of regular expressions. When all of the customizations are complete, click Save Auto Terms to save the customizations.
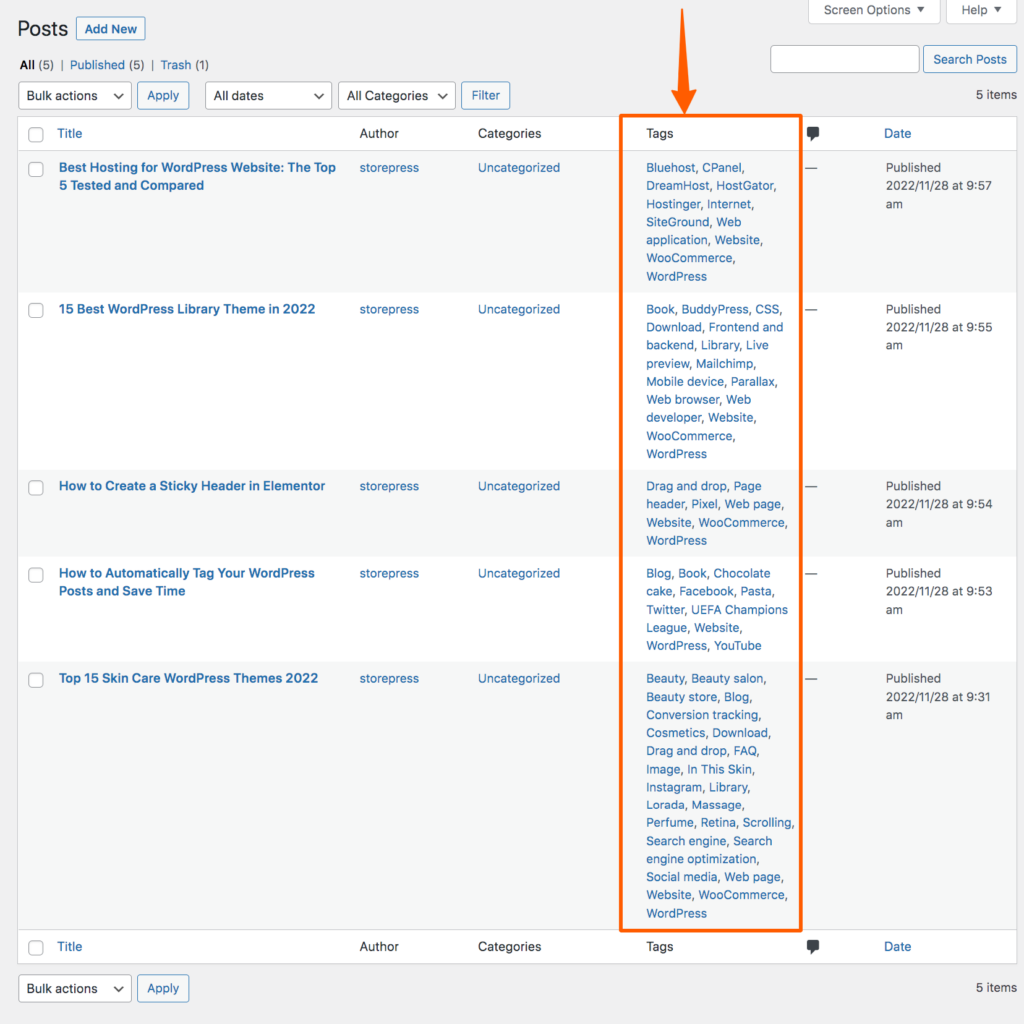
Preview
Conclusion
We hope you’ve successfully added a WordPress auto tag generator to your website. Though we’ve used TaxoPress, you can use any WordPress auto tag generator plugin for your site you find preferable.
While using it, you may find it complex due to its too many functions. We assure you that the functions are simple; it just has too many functionalities that are offering heavy customization. Go through every function and choose the options according to your need.