Online business is becoming more popular day by day as anyone can purchase products or services from home with a few taps on their smart devices. While people are interacting on your website to purchase a service or product, they may need to ask about certain things before purchasing. That is why it is important to add live chat to WordPress.
Customers don’t like to wait for long while purchasing products or services, so they need instant contact while shopping online. The live chat system fulfills the criteria of instant communication for your customers and visitors. Integrating live chat into WordPress is one of the best ways to make your business more professional to your visitors and boost your website with more engagement.
We will use a free WordPress plugin to add live chat to WordPress. You may use any live chat plugin of your choice. We will guide you step by step through the whole process to show you how easily and flexibly we can implement the live chat feature in your WordPress website.
Why You Should Add Live Chat to WordPress
The most crucial factor of live chat is that it enables the users to communicate with the shop or company instantly. It increases the engagement rate of your visitors with your products and service.
For example, someone visits your website and intends to purchase a service or product from you. But, they have some confusion needed to be cleared before purchasing. If they are unable to communicate with you when they are trying to decide what to do, the chance of your visitors making the purchase reduces to zero.
When you add live chat to WordPress, it increases the chance of your audience engaging more with you and making fruitful purchases of your products and services. Also, if you add live chat to WordPress, it will enable people to know about your company or shop directly from you whether they purchase or not.
How to Add Live Chat to WordPress
To add live chat to WordPress, we will use the free version of the plugin Hubspot CRM. This plugin is available to download for free, and you can also use its live chat feature without upgrading to the premium version.
This plugin is a CRM and contact management platform. You can use it for many of your managerial tasks, like lead generation and lead management, pipeline management, email marketing, contact management, and prospect tracking. Hubspot CRM will help you to manage everything from top to bottom of your daily projects, and employee management will be much easier than ever. For this tutorial, we will use the free version of the Hubspot CRM and will only use its live chat feature.
Upgrading to its premium version will allow you to unlock more exciting features for live chat, but you can try and experience live chat in WordPress using just the free version.
Step 1: From the WordPress dashboard, go to Plugin > Add New. Inside the WordPress plugin directory, search for Hubspot CRM. Install and activate the plugin.

Step 2: After activating the plugin, you will be redirected to the setup wizard. Create a free account using your email.

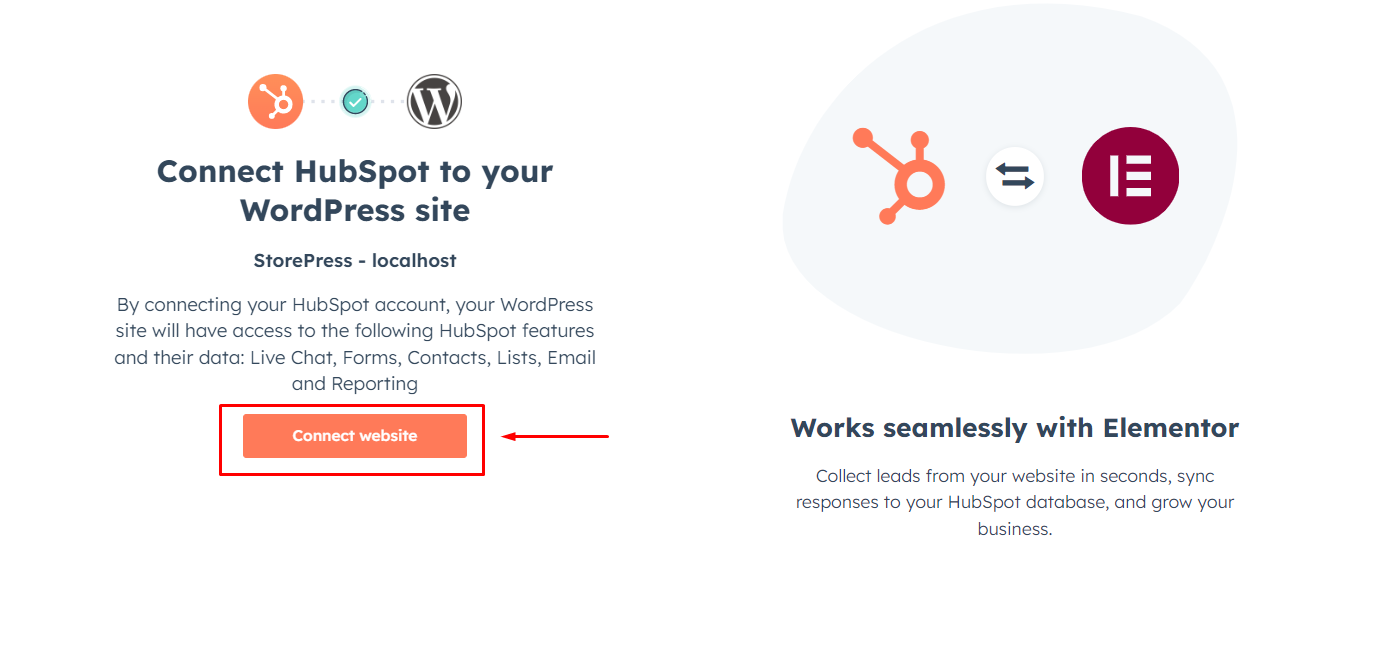
Then proceed with giving some basic information about you and your company and connect your website with Hubspot.
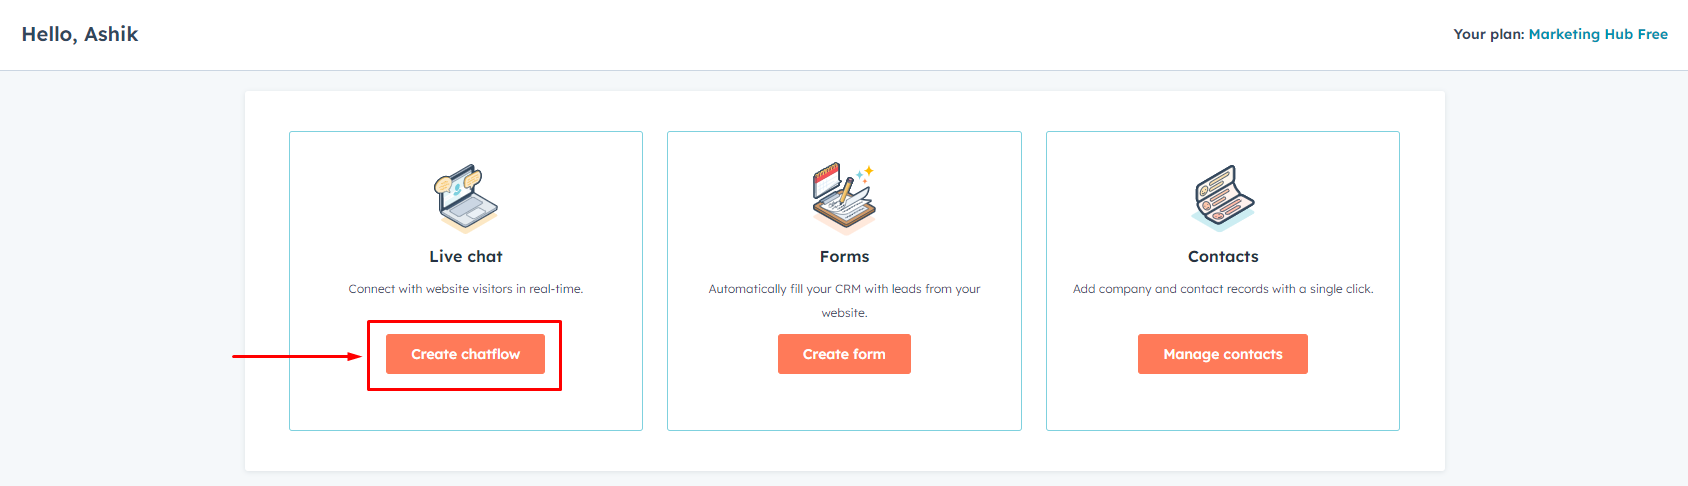
Step 3: After connecting your website with Hubspot, you will be able to use the plugin’s free features. Go to WordPress dashboard > Hubspot > Users Guide. You will see different features of Hubspot CRM you can use on your website.
Click on ‘Create Chatflow’ to configure and add the live chat to the WordPress website.
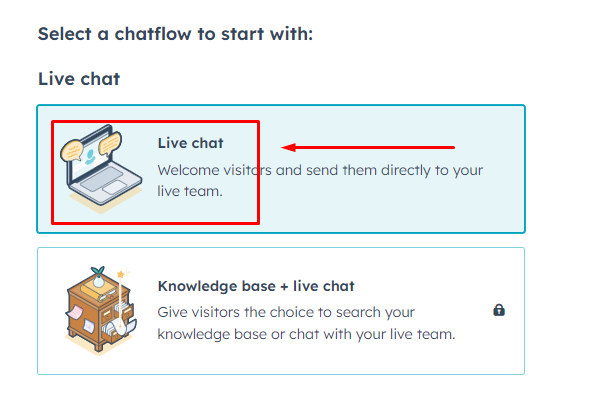
Step 4: Select the Live Chat workflow and click ‘Next’ at the bottom right corner of the page to proceed further.
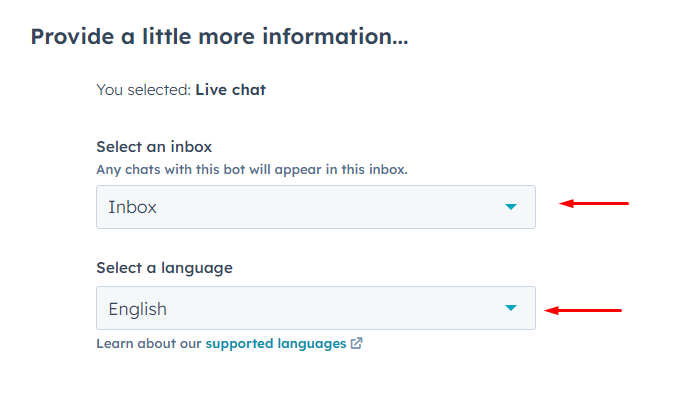
Step 5: On the next page, you can choose the language you prefer for the live chat. An inbox will also be selected by default to receive your messages there. Click on the ‘Create’ button on the bottom right corner of the page to create your first live chat.
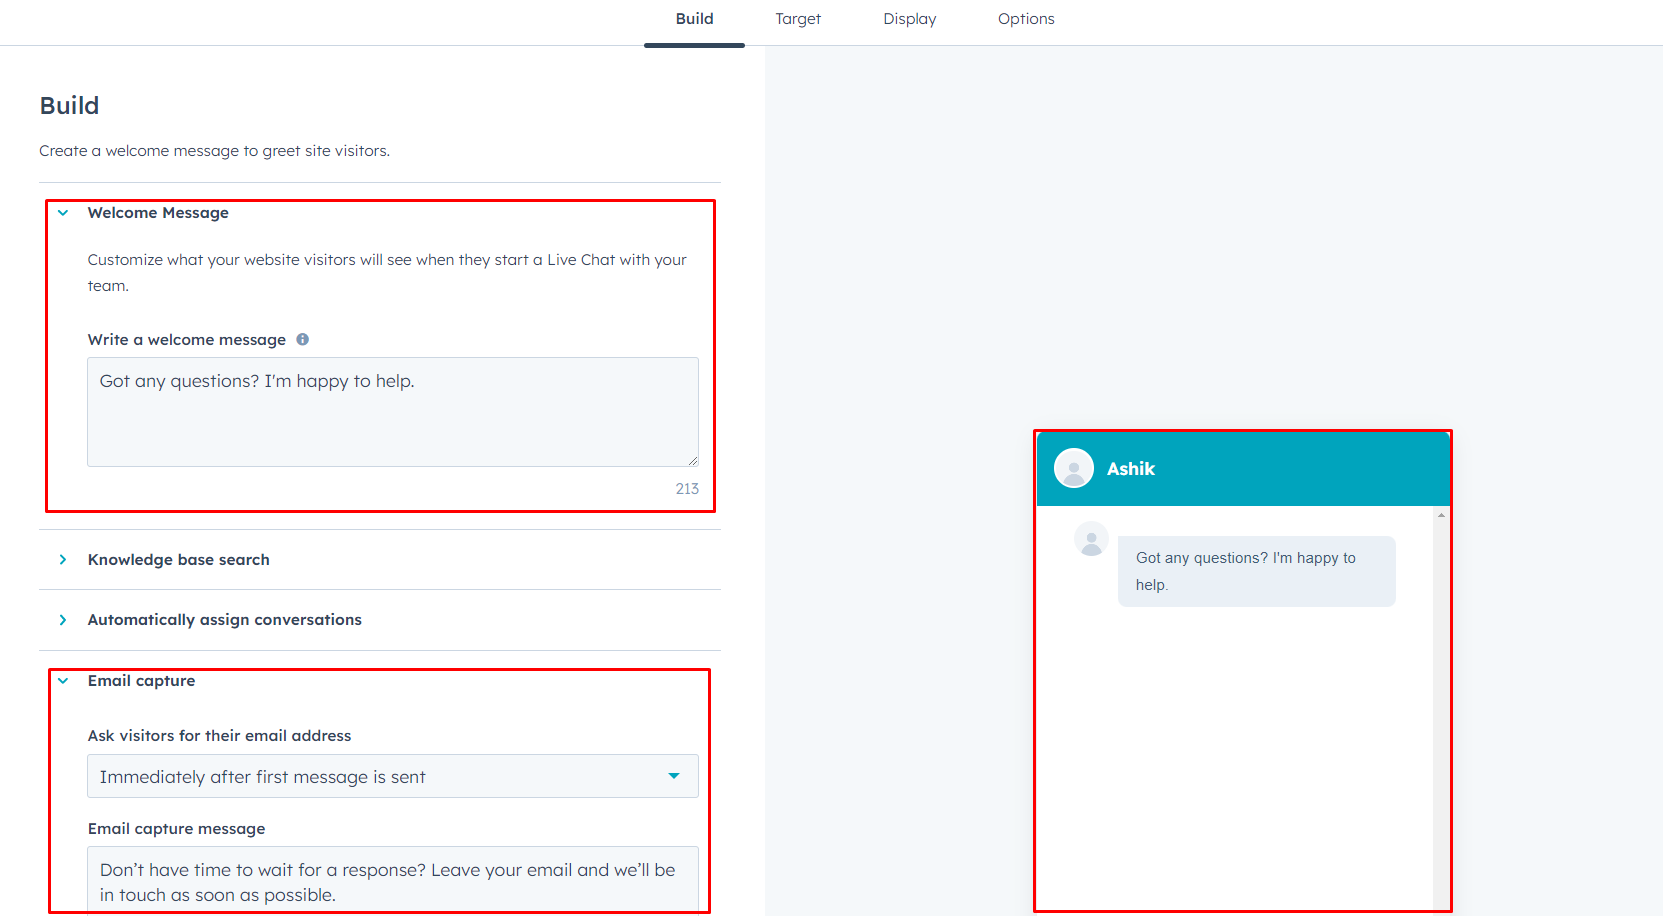
Step 6: Your live chat option is created, and now you can customize the welcome messages and email capture from the Build option of the live chat section. There are other features available that you may use upon upgrading to the premium version.
Step 7: From the target section, you can choose on which page your live chat will appear. You can also choose who can see the chat flow by adding rules based on the behavior of your audience.

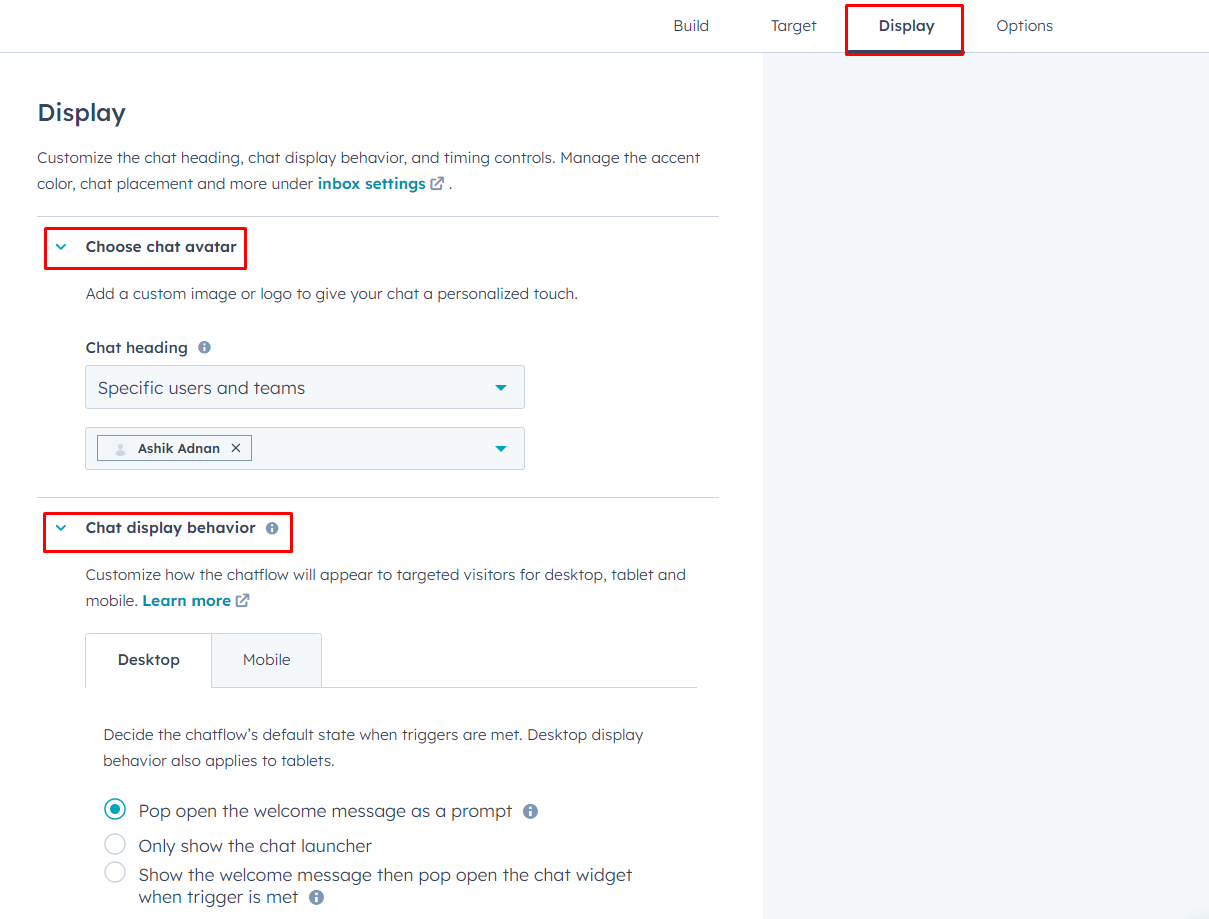
Step 8: From the Display section, you can choose any avatar you want to display in your live chat. You can also choose one of the few options to decide the chat display behavior.
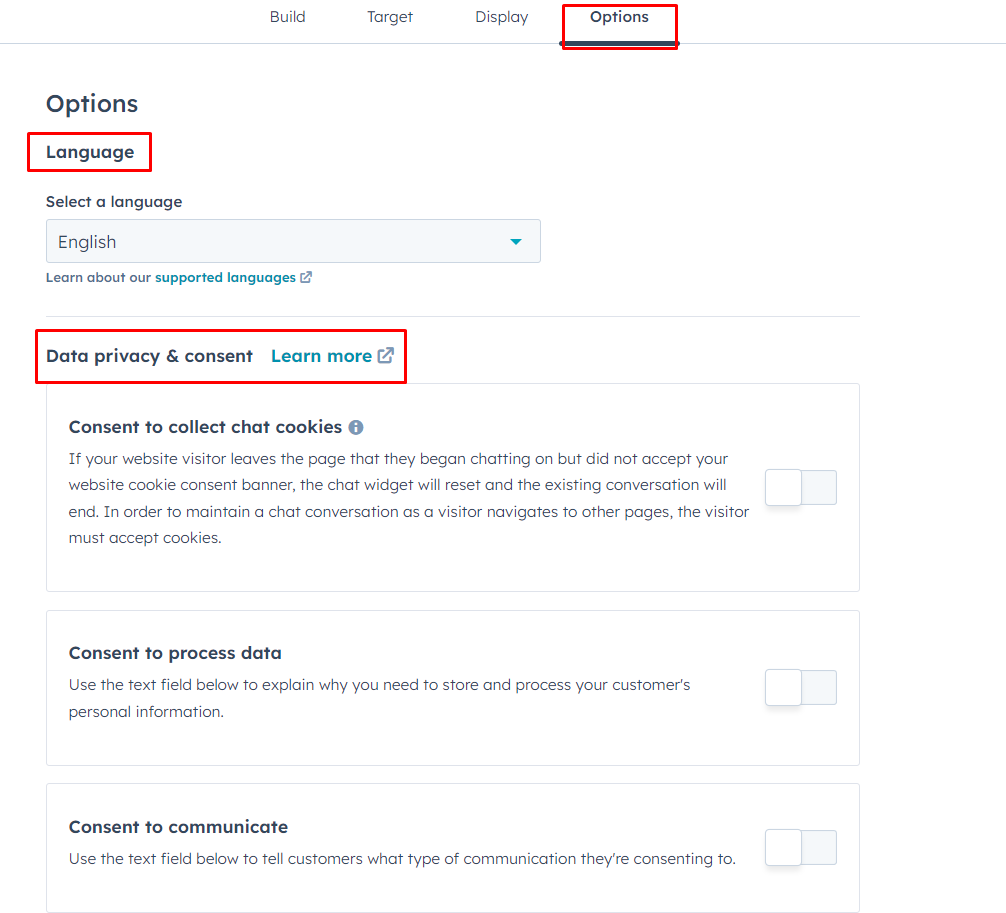
Step 9: From the options section, you can choose the language preference and also the data privacy and consent.
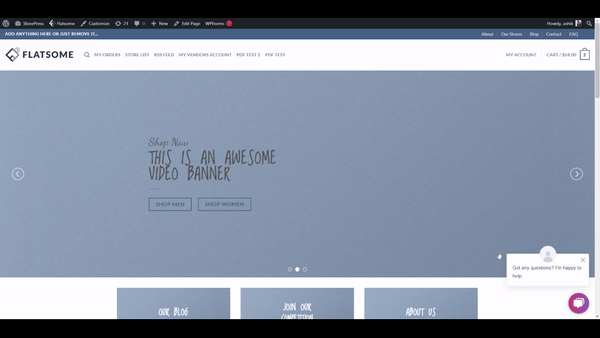
As you have successfully created and configured the live chat, it’s time to test it and see how it works. The Hubspot CRM is compatible with the amazing Elementor and works seamlessly with WordPress.
Conclusion
You can use the steps mentioned above to quickly and effectively add live chat to WordPress. This plugin is one of the best and will allow you to unlock more potential of your website just by using the free version of it.
If you are satisfied with the services you get and need more functionalities, you can upgrade this plugin to its premium version anytime. The Hubspot CRM has a reasonable pricing plan you can choose from. They have the Starter plan starting from $18/mo, the Professional plan starting from $800/mo, and the Enterprise plan starting from $3600/mo.
Choose any of these packages that suit your business. Adding live chat to WordPress will add extra dynamic functionality and make you look more professional in what you do.