Before Install a WordPress Plugin: What Is A WordPress Plugin
A plugin is a ready-made reusable program that can easily be integrated with a WordPress- powered website. It helps to add functionalities to your site. Moreover, it reduces the complexity of writing codes which makes it easier for non-technical persons.
No matter you’re a technical or non-technical person, if you’re using WordPress to build a website, you must be familiar with WordPress plugin lists to build it properly.
Why Should You Use A Plugin
- You can add various functionality easily
- Plugins help to add new features without writing any code
- It makes it effortless to add complex functionalities
- Plugins help to manage the functionalities seamlessly
In this article, we’re using “Variation Swatches for WooCommerce” for demonstration purposes which is an essential plugin for WooCommerce sites. If you’re not setting up a WooCommerce site, you won’t need this plugin. In that case, you can use any other plugin instead of it.
How to Install a WordPress Plugin Using Dashboard
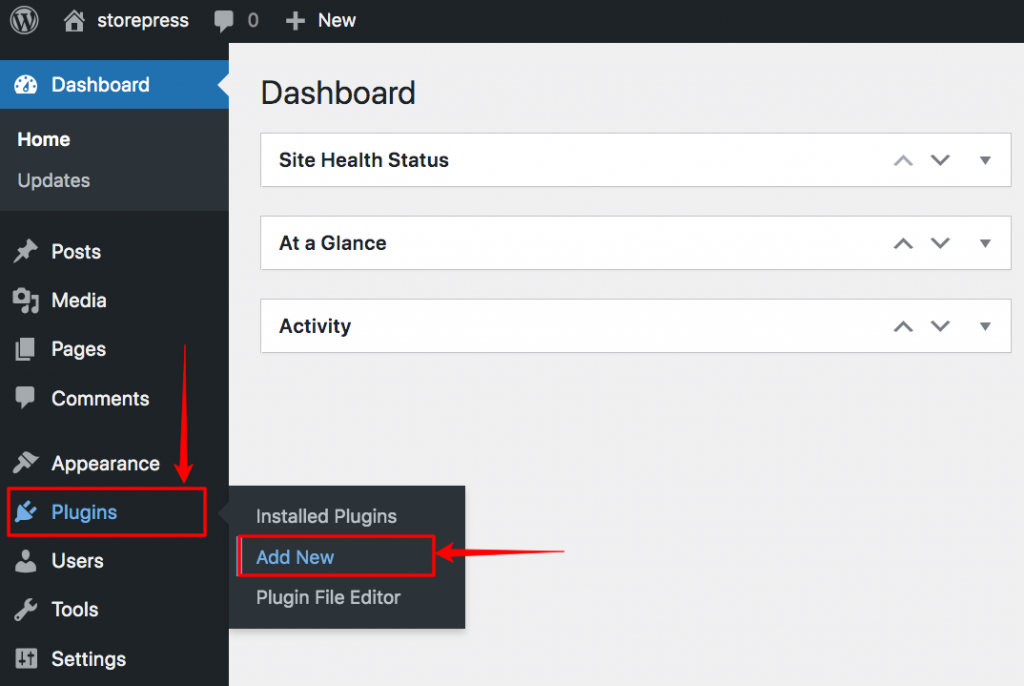
Step 1: Go to the WordPress Dashboard. Hover the cursor on the Plugins, then click on Add New.
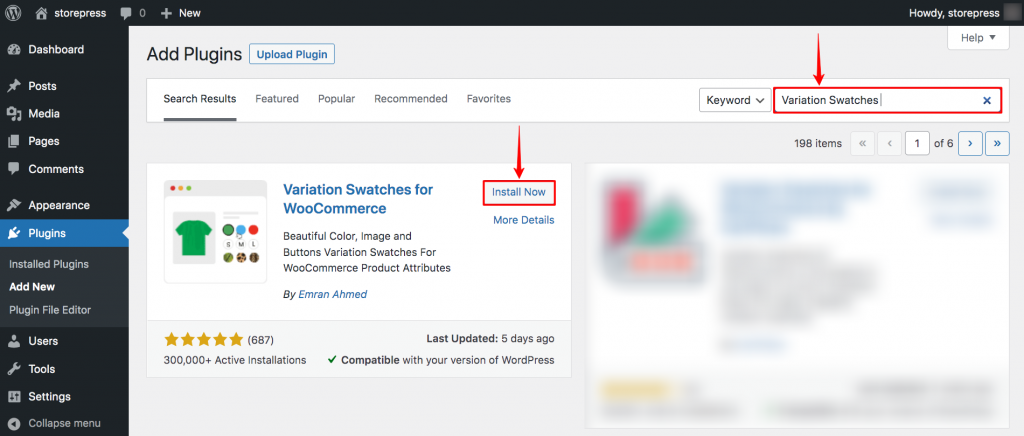
Step 2: The WordPress plugin repository will appear. We need to search for our desired plugin from here. For demonstration purposes, we’ll install Variation Swatches for WooCommerce, an essential plugin for any WooCommerce store.
On the top right is a search box, type the plugin name, and you’ll find the result in the Search Result section. Click on the Install Now button to install it.
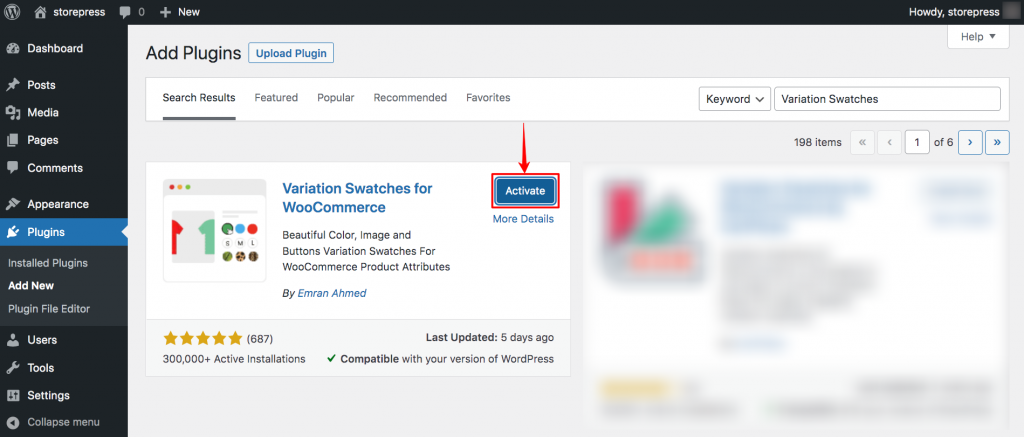
Step 3: After installation, you can start using this plugin by activating it. To activate it, click on the Activate button right after installing it. You can also activate it later. You need to go to the list of installed plugins and activate it from there.
How to Install Plugins in WordPress Manually
(If you’re facing any issues while installing a plugin using WordPress Dashboard, you can install it manually. Following this tutorial, you can do this effortlessly)
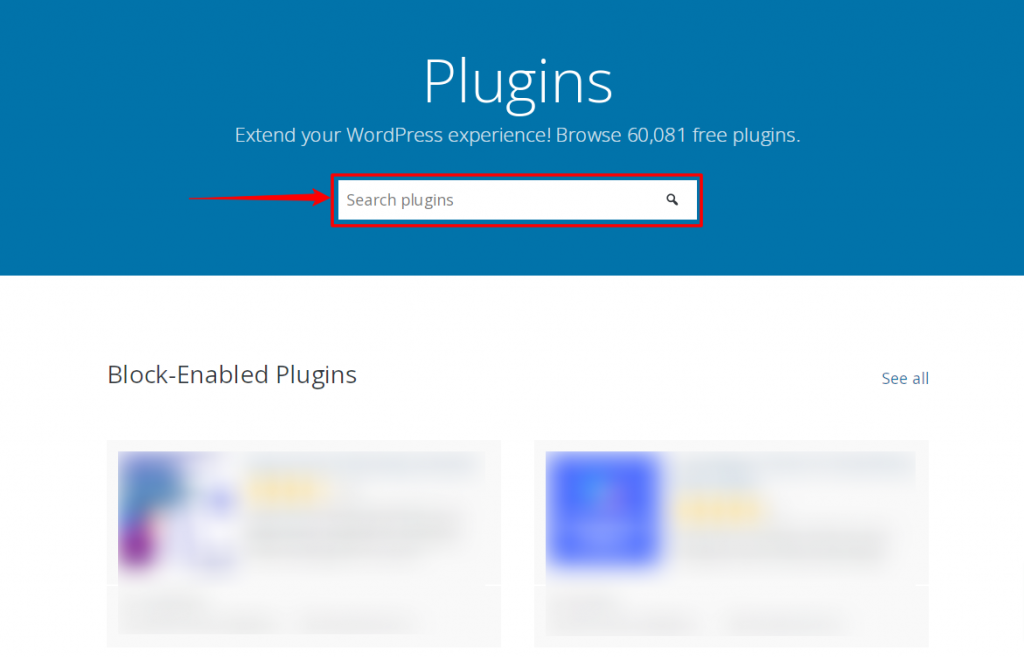
Step 1: Go to the official website of WordPress and find the plugin section. There type the plugin’s name in the search box and enter.
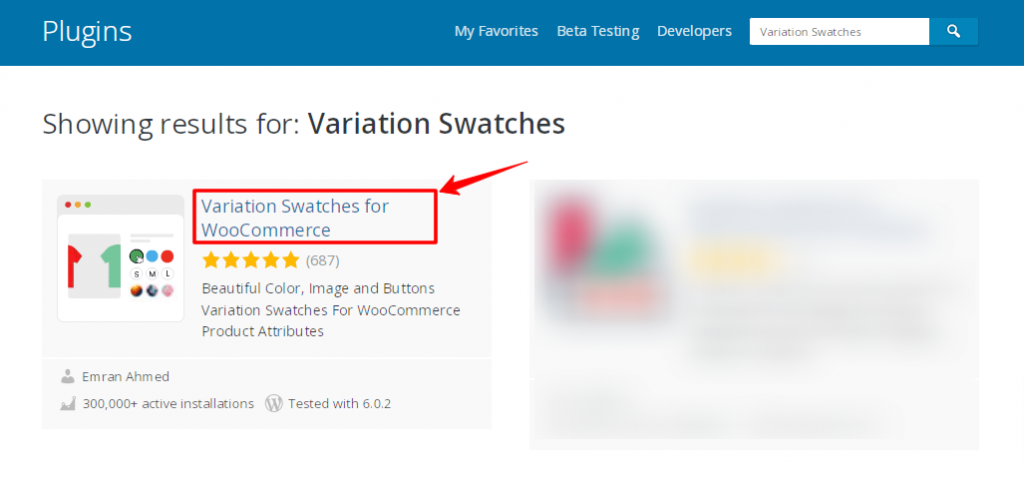
Step 2: Find your desired plugin from the search result, and click on that.
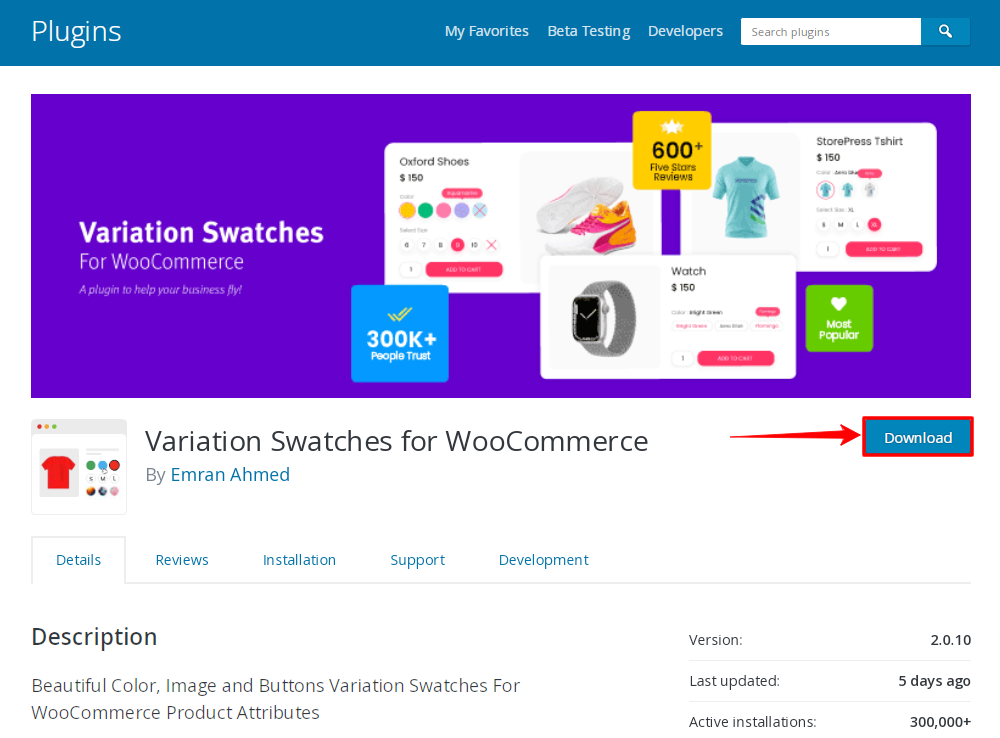
Step 3: Then, the main page of that plugin will appear. You’ll find a Download button on the right side. Click on that to download the plugin to your device. A zip file will be downloaded. Unzip it, and copy the folder.
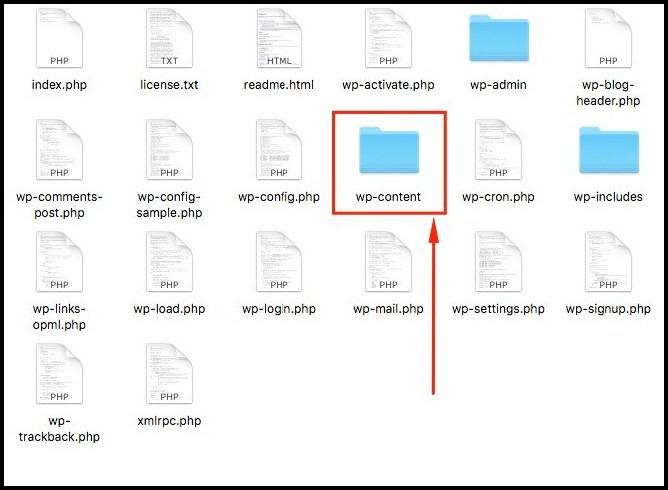
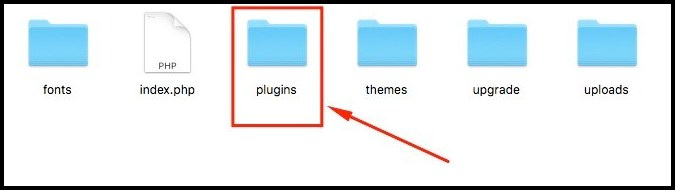
Step 4: Go to the files of your website from the Cpanel of your hosting provider. You’ll find a folder named ‘wp-content’ in the main folder.
Step 5: You’ll find another folder named ‘plugins‘ in that folder. Enter the folder.
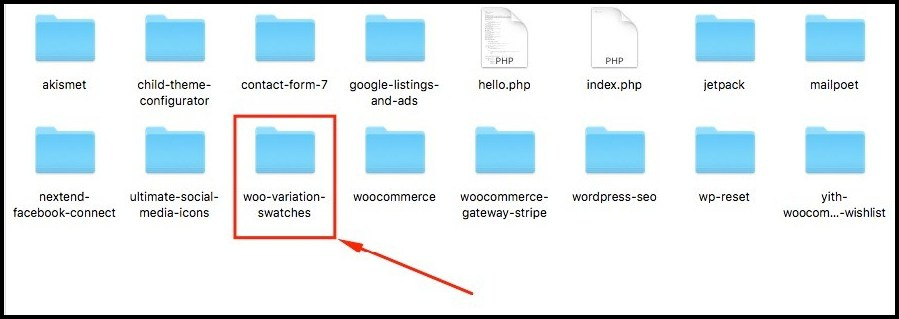
Step 6: Now, paste the folder you copied earlier. After that, it’ll be automatically installed on your WordPress site. You’ll find it in the installed plugins section.
How to Delete A Plugin
If you’ve installed a plugin you didn’t want to or no longer required; you can easily remove it from your site. It’s recommended to remove unnecessary plugins from the site for the sake of the weight of your site.
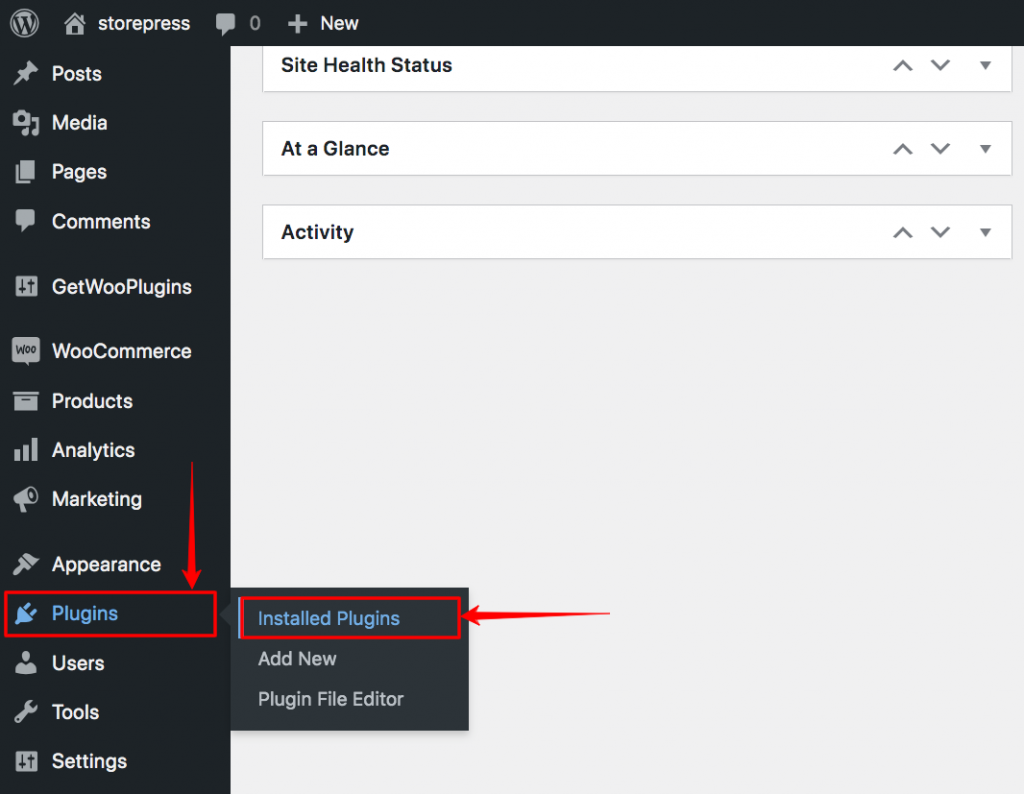
Step 1: Go to the Dashboard, hover the cursor on the Plugins, and click on the Installed plugins.
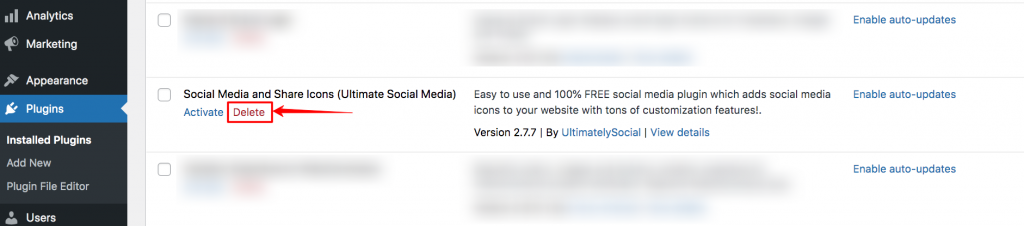
Step 2: Now, the installed plugins will be displayed. If you’re going to delete a currently active plugin, you need to deactivate it first and then delete it. Otherwise, you can directly delete it. Find the plugin you want to delete, and click on Deactivate under its name.
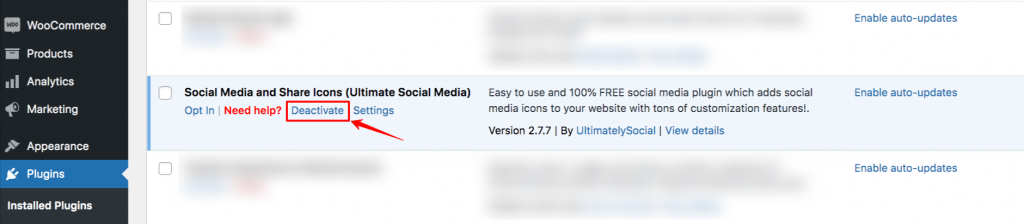
Step 3: The plugin will stay on your site but won’t be active. If you want o delete it permanently, click on Delete under it.
How To Enable Auto Update Plugin in WordPress
Plugins update very frequently for better user experience and for adding new features. You should take advantage of such opportunities. So, all you need is to enable auto-update of the plugin to have the latest version as soon as possible. Following this tutorial, you can easily enable the auto-update plugin in WordPress.
Step 1: Go to the Dashboard, hover the pointer on Plugins, and click on Installed Plugins.
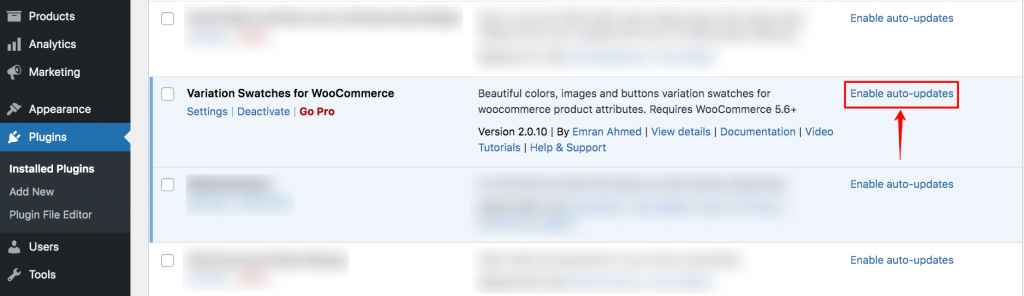
Step 2: A page of the installed plugin list will appear. Besides every plugin, you’ll find the button named Enable auto-updates. Click on that, and it’ll automatically enable auto-updates of that plugin.
How to Find Plugin Settings
Step 1: Go to the Dashboard, hover the cursor on the Plugins, then click on Installed plugins.
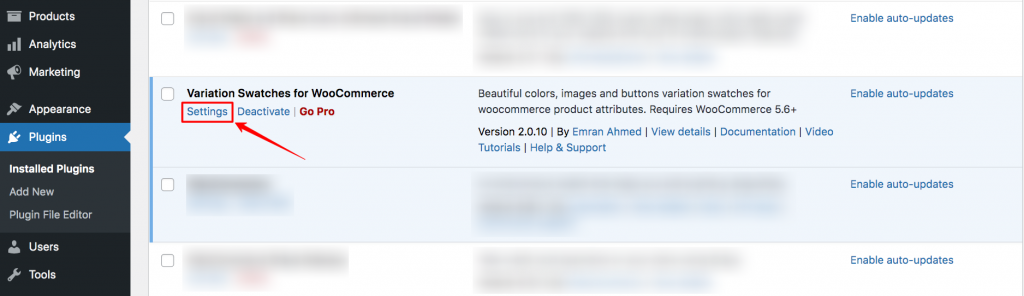
Step 2: You’ll find the list of installed plugins. Under the plugin name, you’ll find the Settings option. Click on that, and you’ll find the details settings of that plugin.
How to Buy WordPress Premium Plugin
Sometimes you’ll need the premium version of the plugin to do the required job. In that case, it’s recommended to use the free version first, then buy the premium version. Purchasing a premium plugin is a seamless process if you follow this tutorial.
Step 1: Go to WordPress Dashboard and click on the Installed Plugins to find the plugins.
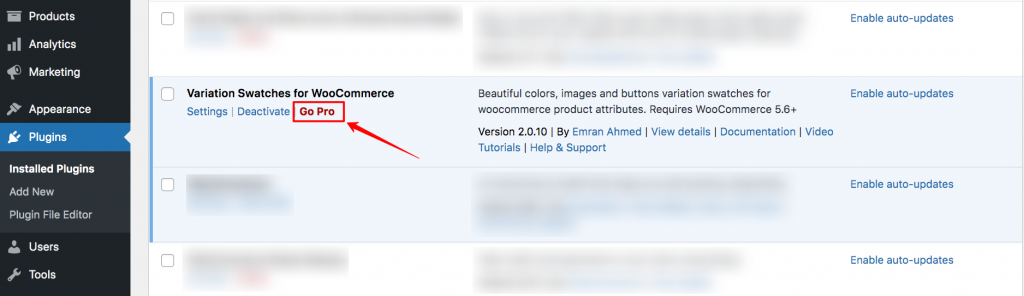
Step 2: On the plugin lists, find your plugin, and under that, you’ll find the Go Pro option. Click on that, and it’ll take you to the page of the Pro version.
Step 3: Now, in the pro version, you’ll find the details pricing of the plugin. There will be different plans. Choose any according to your need. Then Buy it.
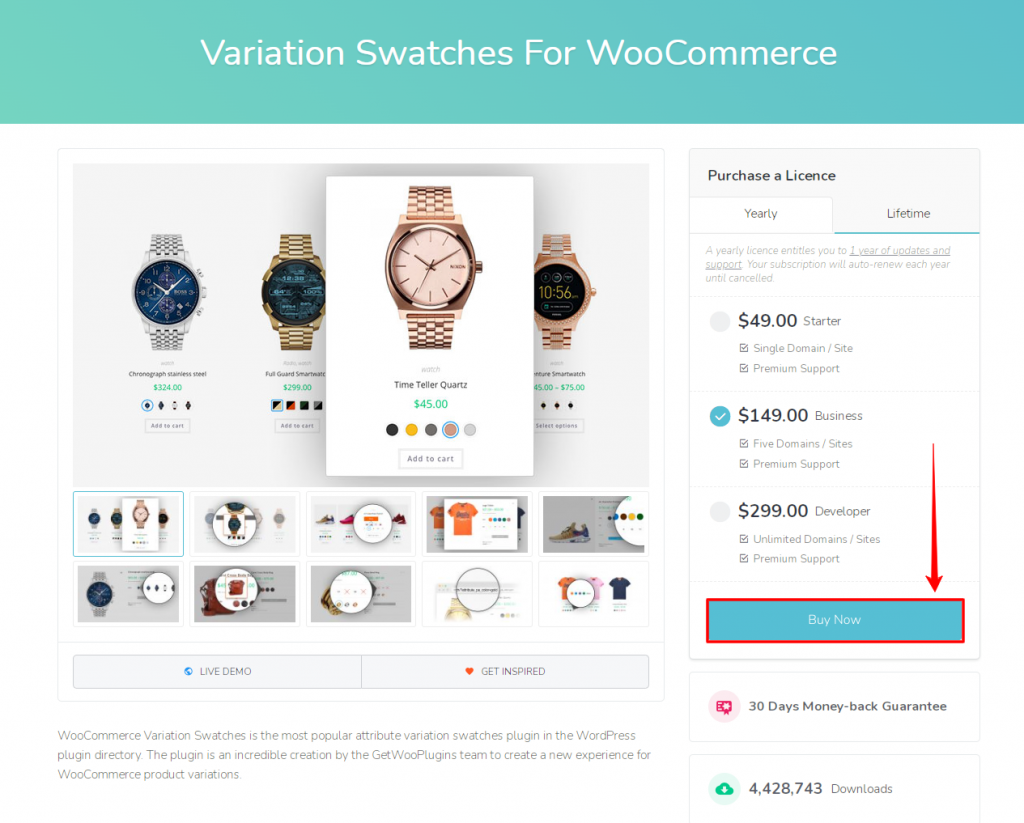
After purchasing a plugin, you’ll be given a zipped file of the pro version. You need to manually install it.
How Many Plugins Should I’ve – WordPress Plugin Management
Plugins are essential for any WordPress website. But using plugins can impact your site’s performance sometimes. Fortunately, instead of the number of plugins, it’s about the plugin’s code complexity. If you’re using plugins that do complex operations and occupy too much memory, it’ll make your site slower.
On the other hand, multiple plugins with simple code cannot harm your site. So, despite counting the number of plugins, you need to focus on the quality of it.
How to Get Plugin Support in WordPress
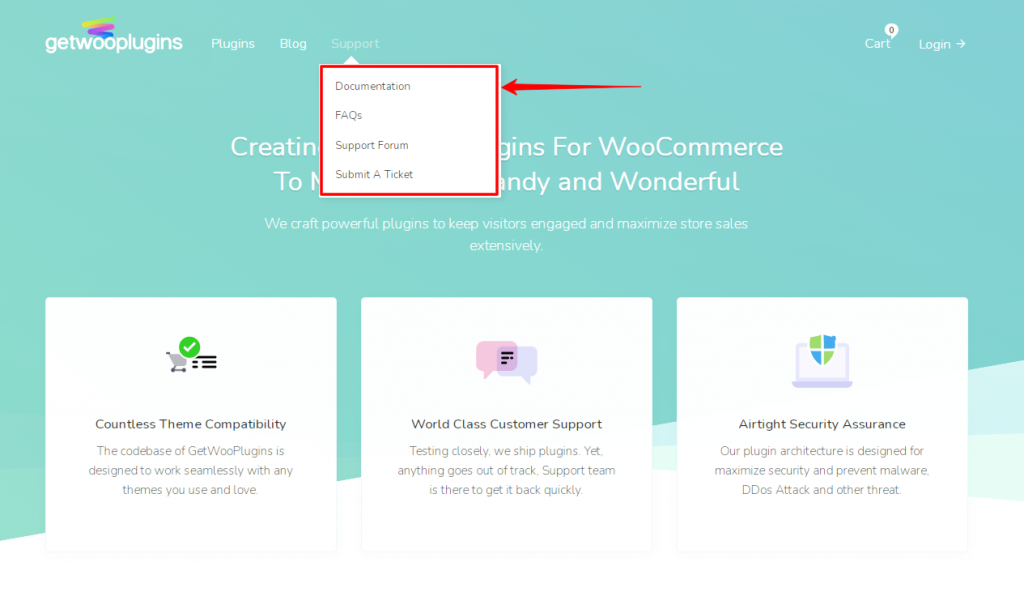
Most WordPress plugins provide support for their users. Whenever you face any issue regarding any plugin, visit their website first. You’ll find a Support section on the homepage.
Before asking for in-person support, it’s suggested to go through the documentation to find the solution.
If not found, try to search for it on the support forum. It’ll solve your problem. If something else works better for you, Submit a ticket. After that, a technical support executive will contact you and ensure your problem is solved.
Conclusion
Installing the WordPress plugin is a straightforward process. In this article, we’ve tried to show every installation-related tutorial. If you’ve found anything new, or face any new installation-related problems, feel free to let us know.
We’ll try our best to add that to our article. After learning to install a plugin, you can also try useful plugins and the best WordPress themes for your website.