
Google Search Console, formerly known as Webmaster, is one of the most popular, impactful, and essential tools for website owners. That’s why, after publishing a website, the first task is connecting it with Google Search Console. It can be tricky, but it’s super easy using WordPress.
There are multiple ways to connect to Google Search Console with your WordPress-powered site. We’ll demonstrate 10 of them in this article. After connecting your site with Google Search Console, you will be able to understand the strength and weaknesses of your site, and you can work on them. Overall, it’s an essential tool if you’re serious about your website.
Benefits of Using Google Search Console
- Google Search Console helps to optimize your content so that you can get more visitors to your site.
- Using this tool, you can also check the impression of your website, individual pages, clicks, position in search results, etc.
- It allows you to add sitemaps of your site so that Google bots can easily crawl your site without any issues.
- Using Google Search Console, you can check whether your page is on Google. Also, you can index your content manually.
- Google Search Console informs whenever it finds anything unusual on the site. It also gives suggestions on how you can solve that issue.
- It has dedicated training on Google Search Console for newcomers to understand it properly.
How to Verify Google Search Console WordPress
Here we’ve got 10 methods to integrate Google Search Console with your WordPress-powered website. You need to choose which one you need to follow first.
If you’re using Rank Math SEO, Yoast SEO, or AIOSEO, we recommend following the 5th, 6th, or 7th number method. People, who are comfortable with setting domain, can try the first, second, third, or fourth number method.
Moreover, if you’ve already connected your site to Google Tag Manager, Google Analytics, or Google Site Kit, we recommend you follow the 8th, 9th, or 10th method. Here is the list of methods to follow.
- How to Verify Google Search Console WordPress Using DNS TXT Record
- How to Verify Google Search Console WordPress Via FTP
- How to Verify Google Search Console WordPress by Adding HTML Tag
- How to Verify Google Search Console WordPress Using WPCode
- How to Verify Google Search Console WordPress Using Rank Math SEO
- How to Verify Google Search Console WordPress Using Yoast SEO
- How to Verify Google Search Console WordPress Using AIOSEO
- How to Verify Google Search Console WordPress Using Google Tag Manager
- How to Verify Google Search Console WordPress Using Google Analytics
- How to Verify Google Search Console WordPress Using Google Site Kit
For all of these methods, you need to go to Google Search Console first, then click on the Start Now button to get started with Google Search Console. After that, you can follow any of these methods according to your choice.
We’ve used some plugins to show you different methods. For those methods, you need to install WordPress plugin first. Then
Method 1: How to Verify Google Search Console WordPress Using DNS TXT Record
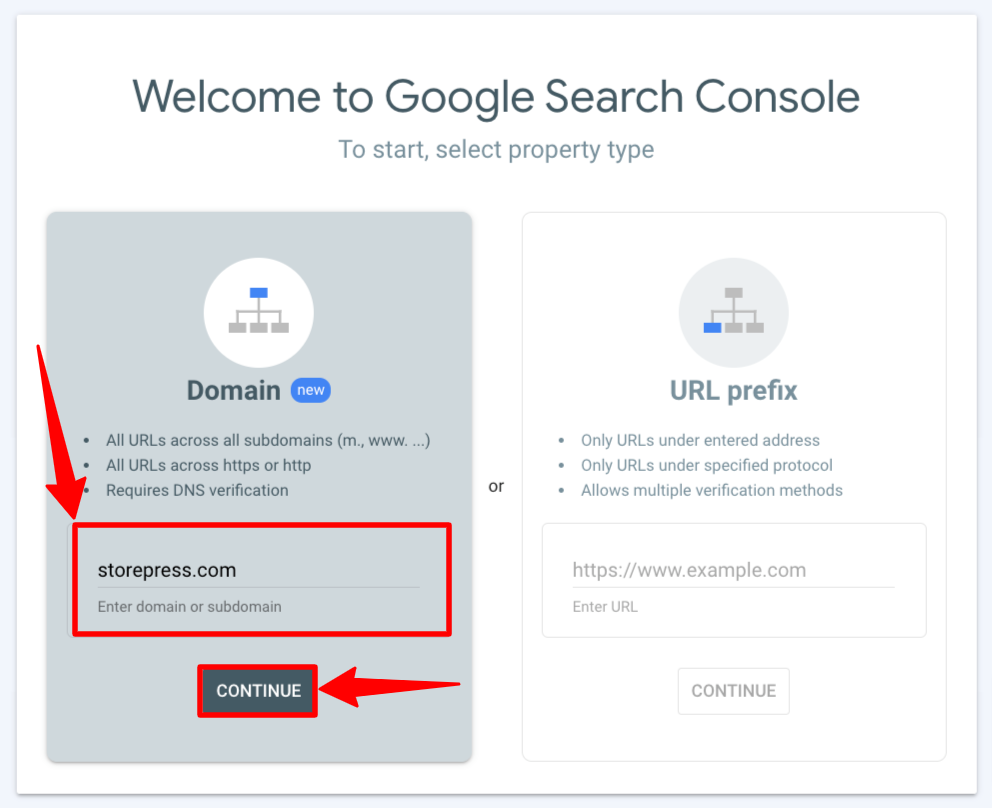
Step 1: If you don’t have any site connected to your account, you’ll find a pop-up like this. Type your domain name, and click CONTINUE.
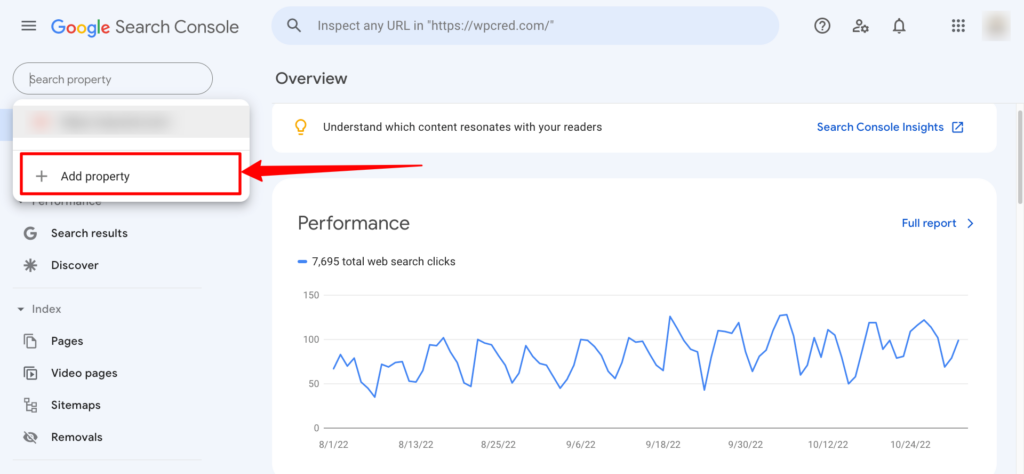
If you’ve already added a domain to your account, you’ll see a dashboard like this. Click Add Property to add a new domain to your account.
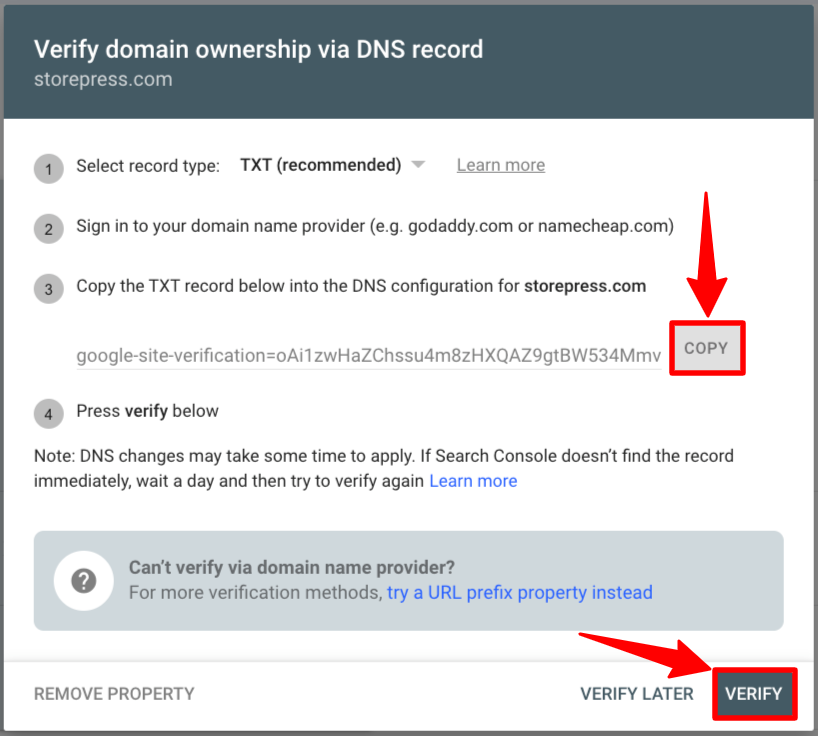
Step 2: A pop-up will appear with the TXT record. Copy the TXT record and paste it into the domain provider’s dashboard. After doing that, come back to the pop-up and click on VERIFY. After some time, your site will be verified and connected to the Google Search Console.
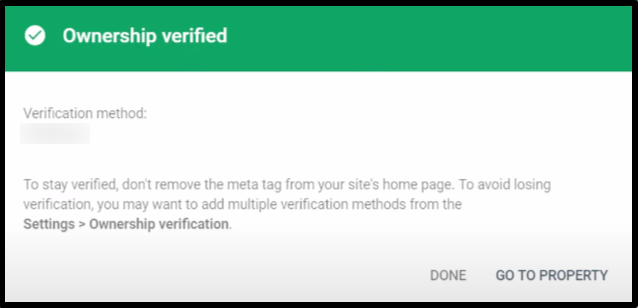
After clicking on VERIFY, a confirmation message like this will appear.
Method 2: How to Verify Google Search Console WordPress Via FTP
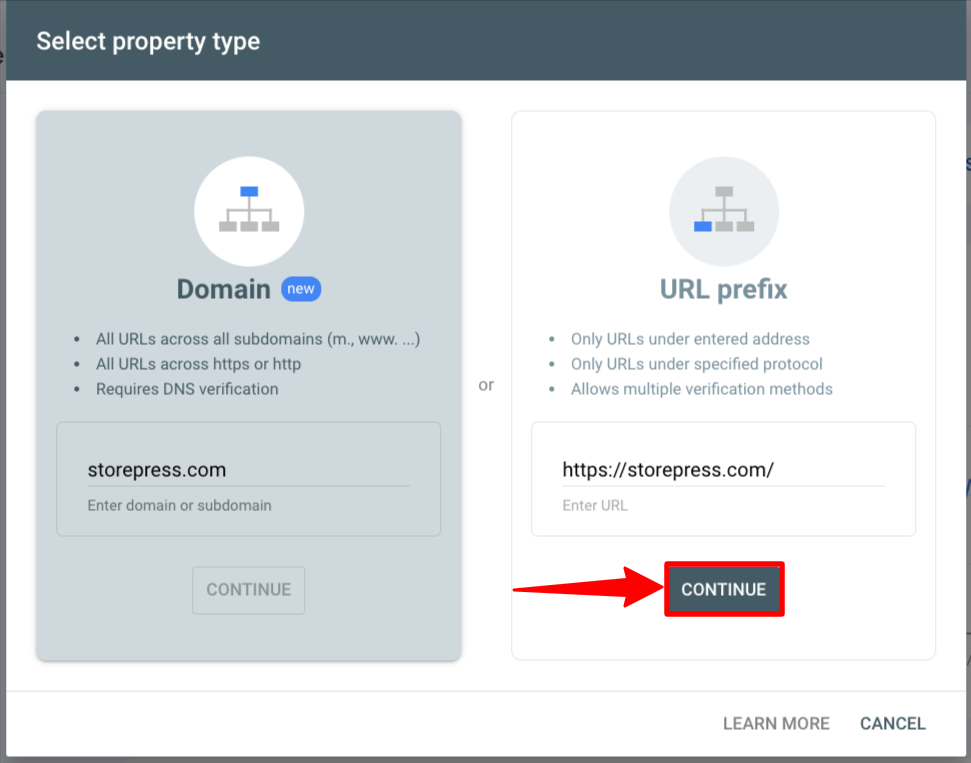
Step 1: Type your website’s URL in the URL prefix section, then click CONTINUE.
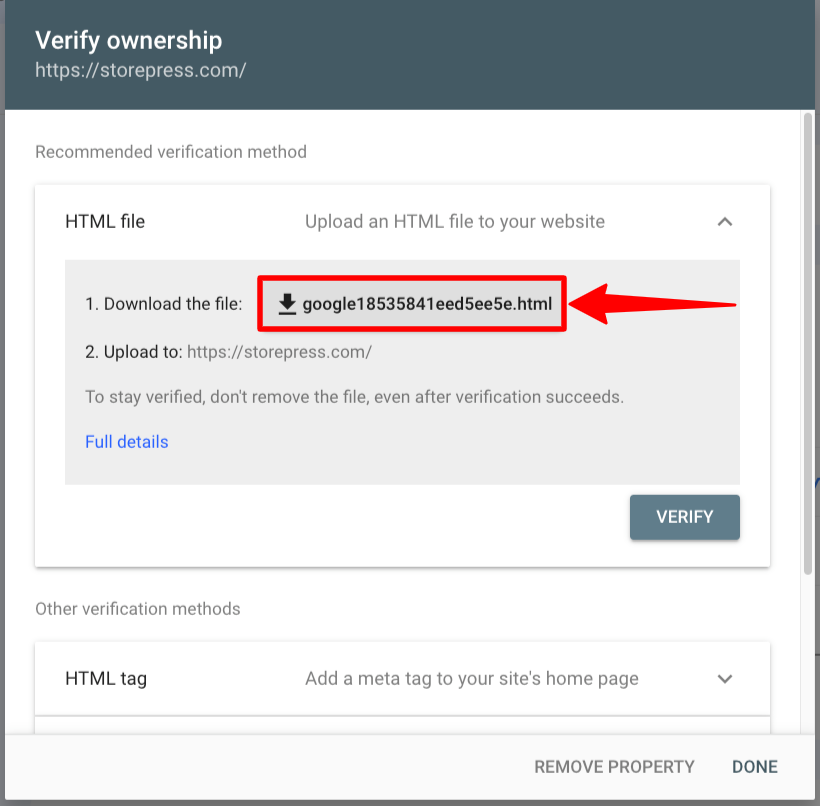
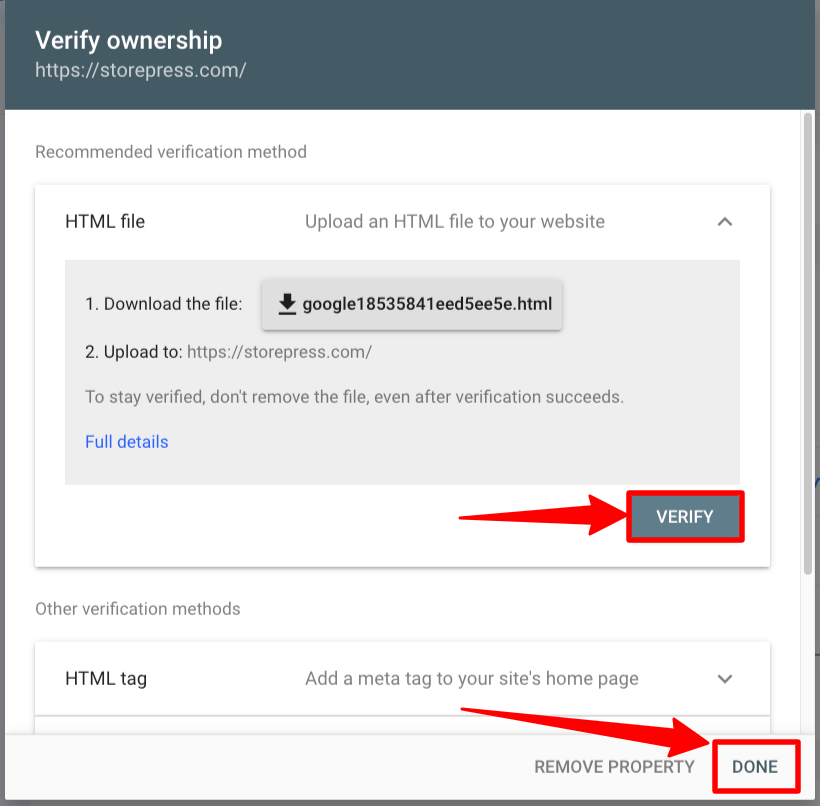
Step 2: After that, a new pop-up will appear. In that pop-up, you’ll find some verification methods. Find the HTML file section, expand that section, and download the HTML file to your device. Now, you need to put this file inside the root of your website.
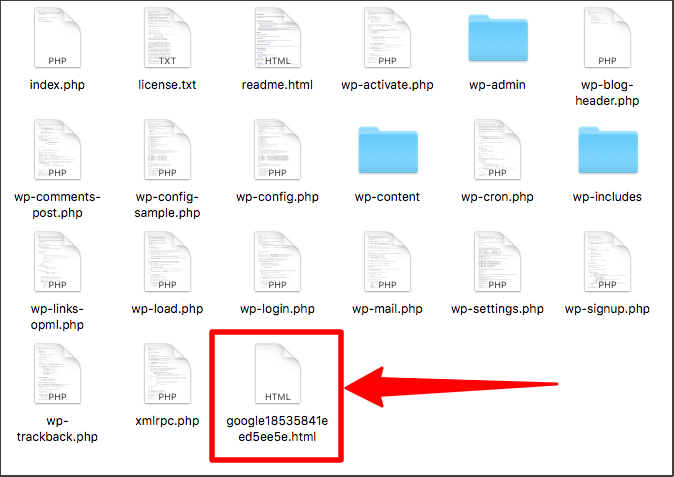
Step 3: Then copy that HTML file, and paste it into the root folder of your WordPress site.
Step 4: After putting that into the root of your website, on that pop-up, click VERIFY, then click DONE to complete the process.
After clicking on VERIFY, a confirmation message like this will appear.
Method 3: How to Verify Google Search Console WordPress by Adding HTML Tag
In this method, we’ll customize the main theme file. So, to save the customization, we need to create a child theme first, then use that to do the customization.
In case, you’re wondering why we need to create a child theme for customization–
If you customize the main theme file, all customization will be lost when you update your theme. So, to prevent losing customization, you need to create a child theme and do all the customization there. Then updating the theme won’t affect your customization.
Step 1: Type your site’s URL in the URL prefix section, then click CONTINUE.
Step 2: After clicking that, a new pop-up will appear. In that pop-up, find the HTML tag section and expand that section. Then copy the code.

Now, we need to put this code into the website’s header. Then come back to this pop-up. So, don’t close this pop-up or its tab.
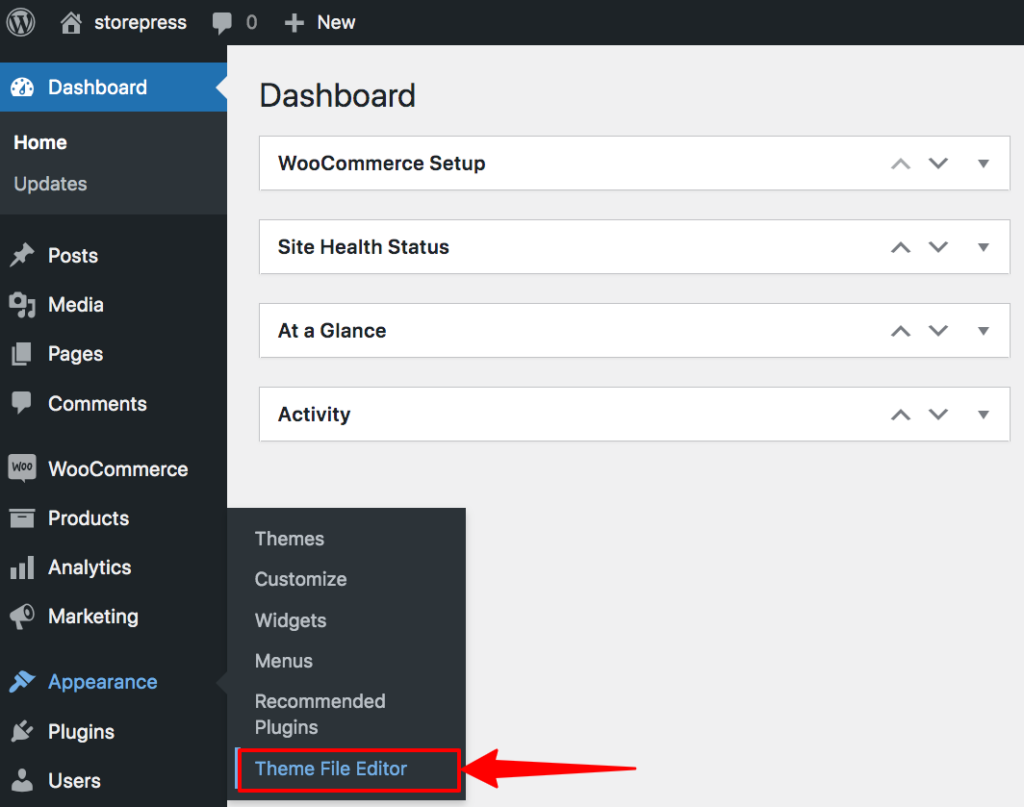
Step 3: Go to your WordPress Dashboard. Hover the pointer on Appearance, then click on the Theme File Editor.
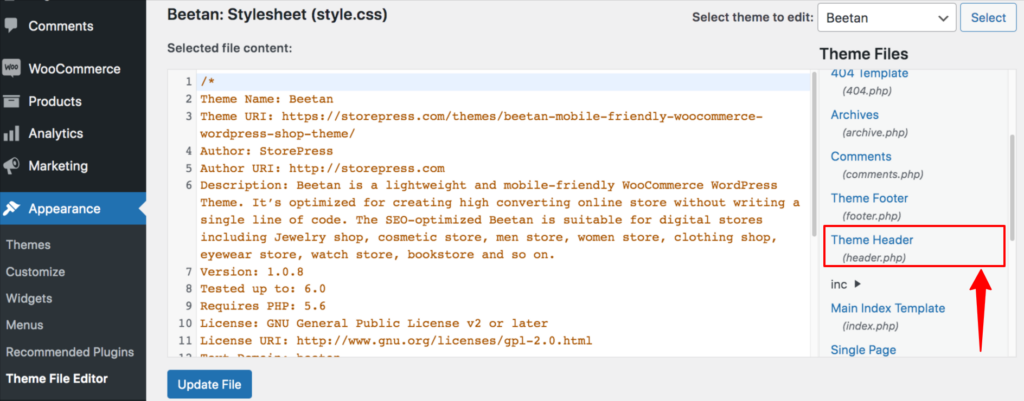
Step 4: The theme files will appear. Click on the Theme Header to access the header file.
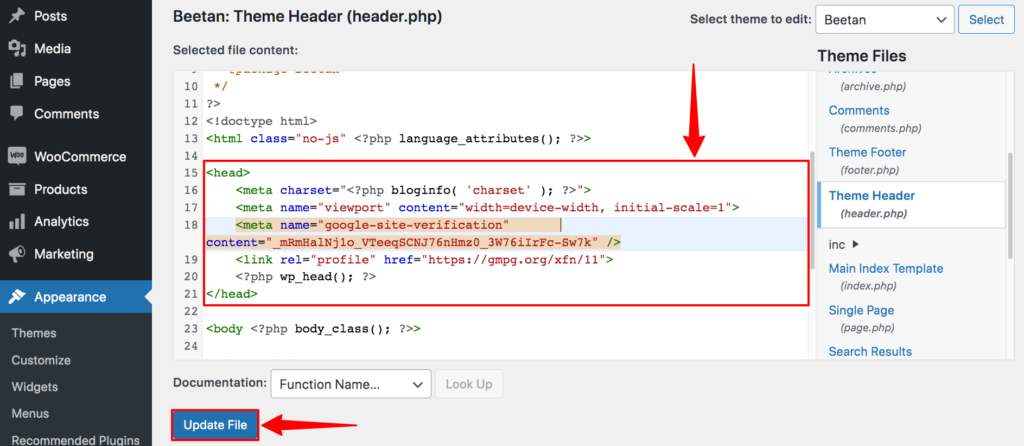
Step 5: Now, we’ve found the header file. In this file, we need to paste the code inside the <head></head> section, then click on Update File to save it.
Step 6: After doing that, go to that pop-up again, and click on VERIFY and DONE.
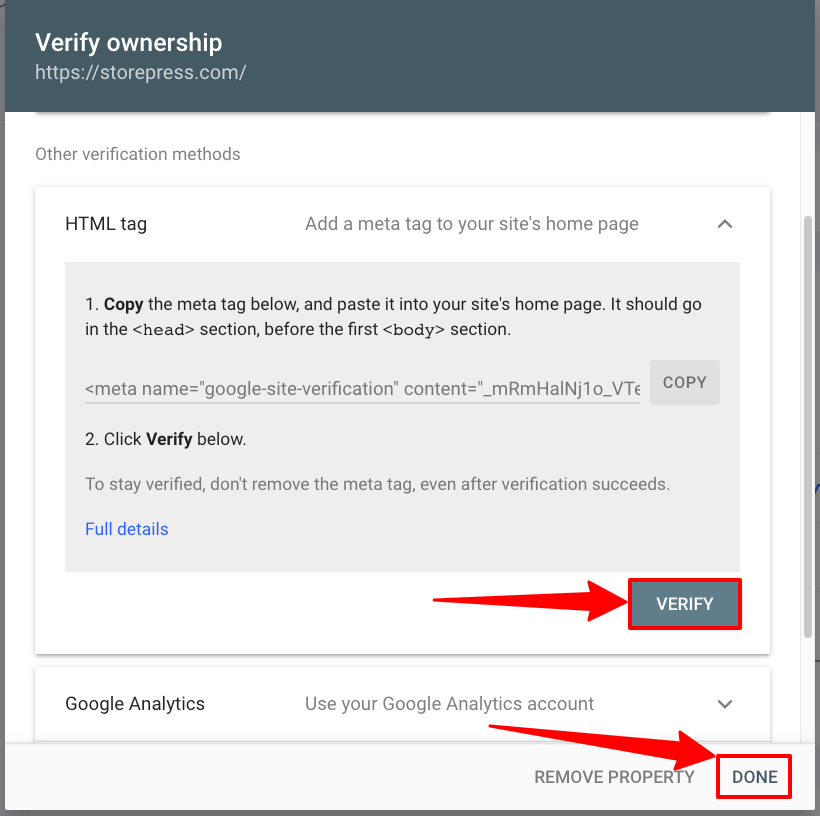
After clicking on VERIFY, a confirmation message like this will appear.
Method 4: How to Verify Google Search Console WordPress Using WPCode
Step 1: Type your website URL in the URL prefix section, then click CONTINUE.
Step 2: After clicking that, a new pop-up will appear. In that pop-up, find the HTML tag section and expand that section. Then copy the code.
Now, we’ll put that code inside the header using a plugin. After that, we’ll come back to this page to click VERIFY.
If you need help installing a WordPress plugin, the linked content has different ways of adding a plugin to your site.
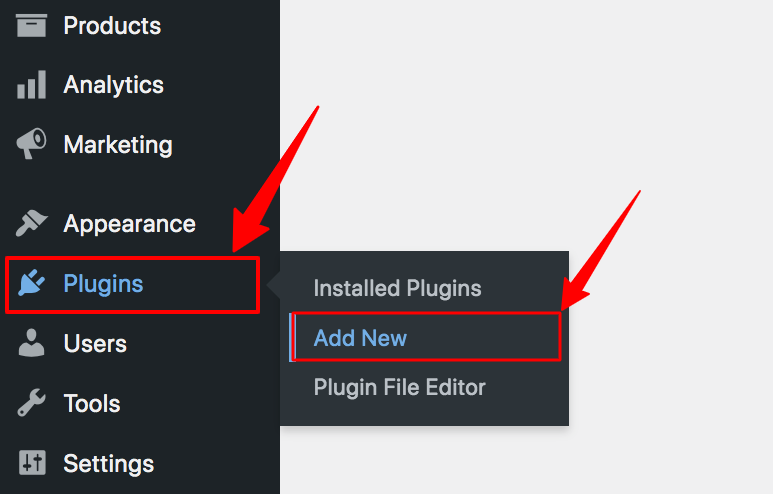
Step 3: Go to the WordPress Dashboard, then hover on Plugins, and click on Add New to install a new plugin.
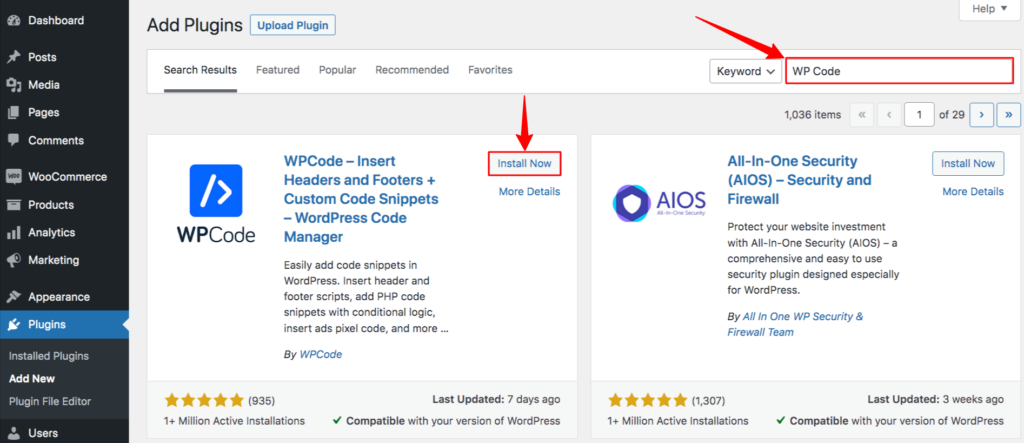
Step 4: Search for the WP Code plugin. Then install and activate that plugin.
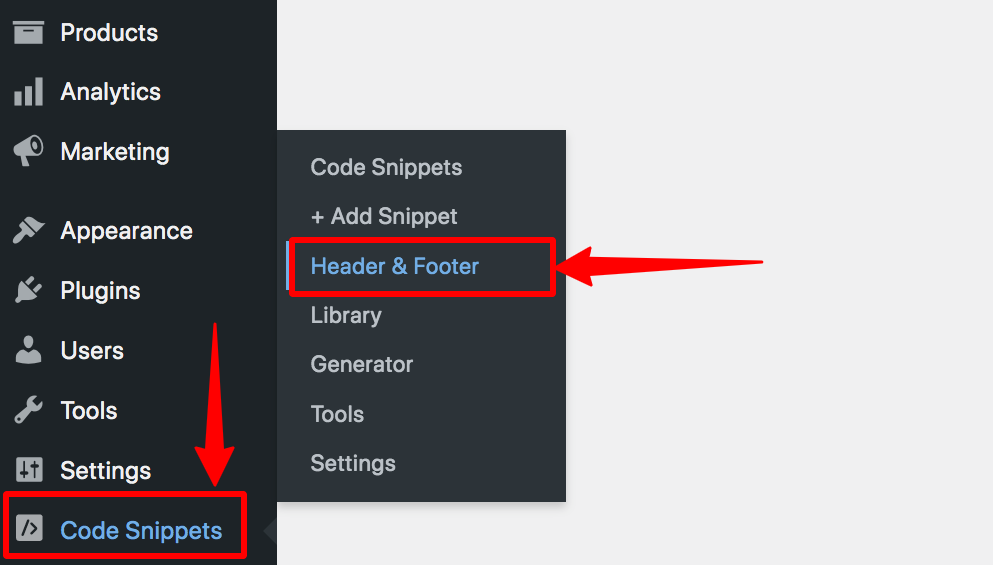
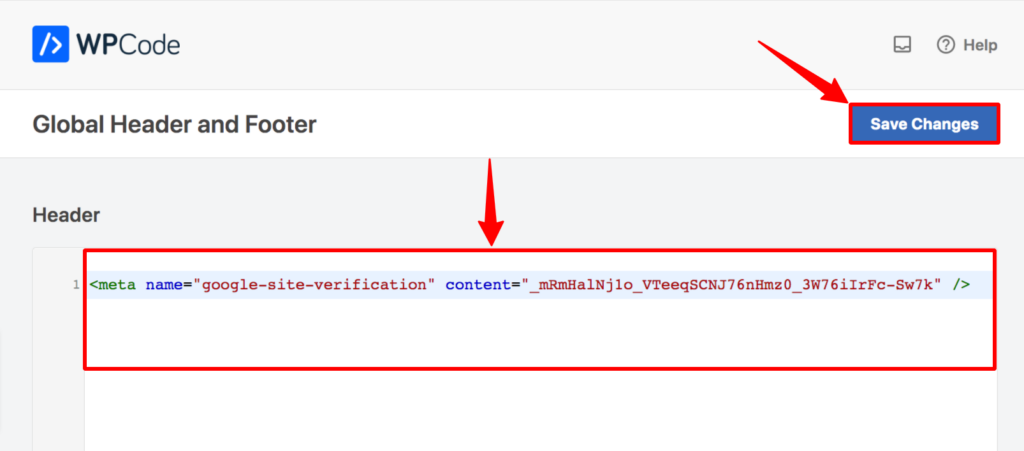
Step 5: After activating it, you’ll find a section named Code Snippet in your Dashboard. Hover on that and then click on Header & Footer.
Step 6: Now, a new page will appear. On that page, you’ll find a Header section, paste the code there, and click on Save Changes to save it. After that, the code will be automatically added to the main header file.
Step 7: After saving it, go to that pop-up again, and click on VERIFY.

After clicking on VERIFY, a confirmation message like this will appear.
Method 5: How to Verify Google Search Console WordPress Using Rank Math SEO
Step 1: Type the site’s URL in the URL prefix section, then click CONTINUE.
Step 2: After clicking that, a new pop-up will appear. In that pop-up, find the HTML tag section and expand that section. Then copy the code.
Don’t close this pop-up or its tab. After putting the code in the right place, we need to click VERIFY to let Google know that we’re trying to connect.
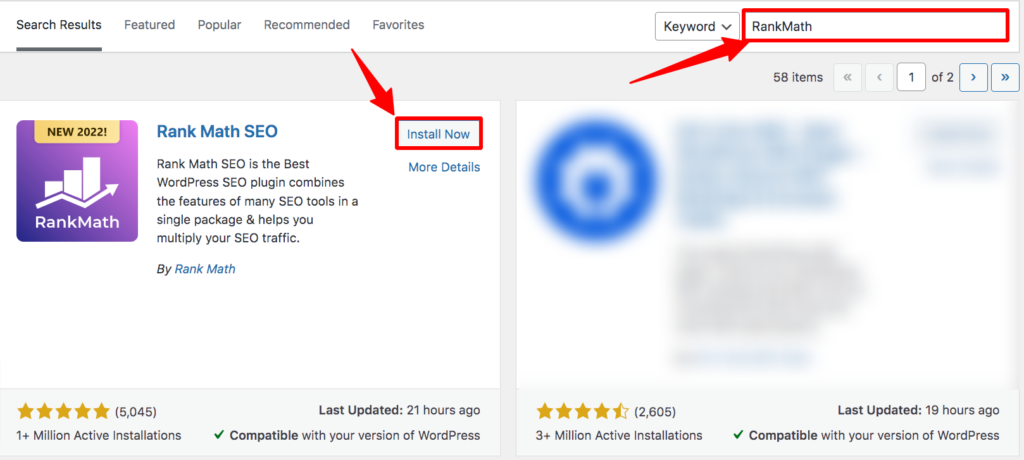
Step 3: Go to the WordPress Dashboard, then hover on Plugins, and click on Add New.
Step 4: Search for the Rank Math SEO plugin. Then install and activate it.
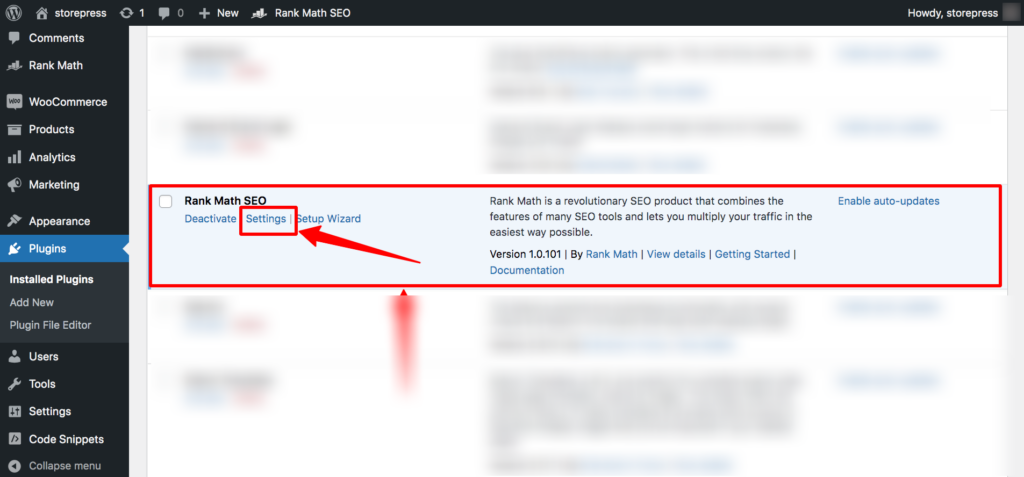
Step 5: After activating it, you’ll be redirected to the All Plugins page, then click on the Settings of Rank Math SEO.
Step 7: Then, a new page will appear. Click on the Webmaster Tools on the left side, and paste the code in the Google Search Console section. Then scroll down, and click on Save Changes.
![]()
Step 8: After saving that, go to the Google Search Console page from where you copied the code, and click on the VERIFY of that pop-up.
After clicking on VERIFY, a confirmation message like this will appear.
Method 6: How to Verify Google Search Console WordPress Using Yoast SEO
Step 1: In the URL prefix section, type your website’s URL then click CONTINUE.
Step 2: After clicking that, a new pop-up will appear. In that pop-up, find the HTML tag section and expand that section. Then copy the code.
We need to come back to this page to click VERIFY and let Google know that we’re trying to connect.
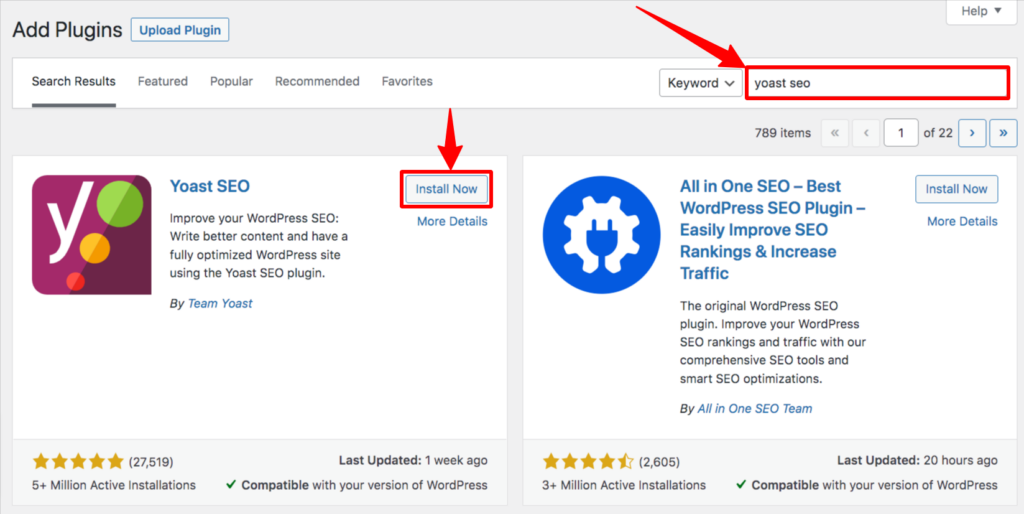
Step 3: Go to the WordPress Dashboard, then hover on Plugins, and click on Add New.
Step 4: Search for the Yoast SEO plugin. Then install and activate that plugin.
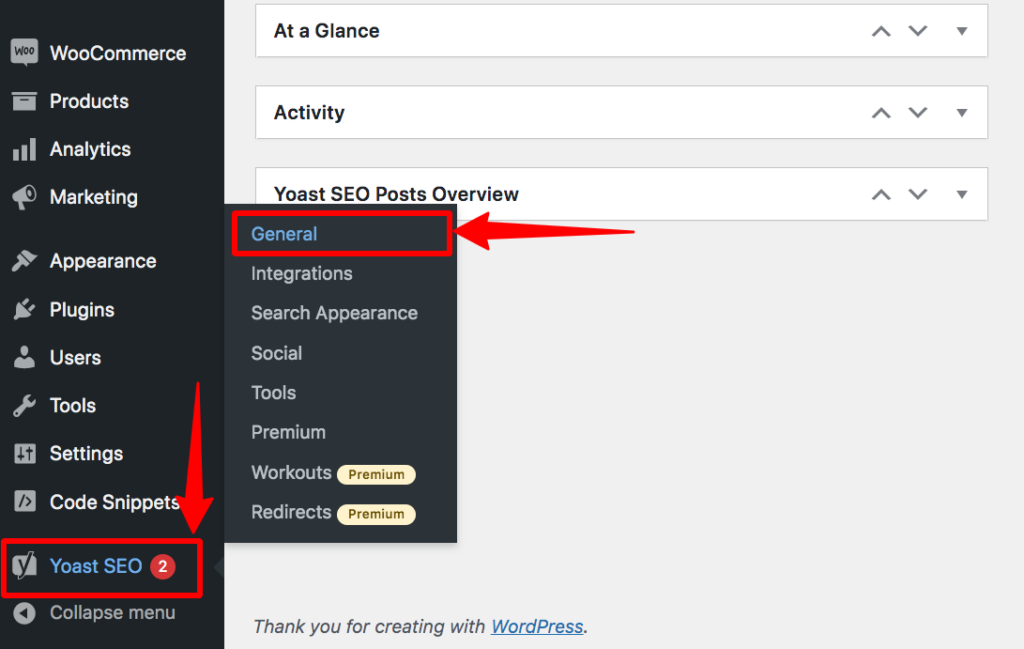
Step 5: After the activation, go to the Dashboard, then hover on Yoast SEO, and click on General.
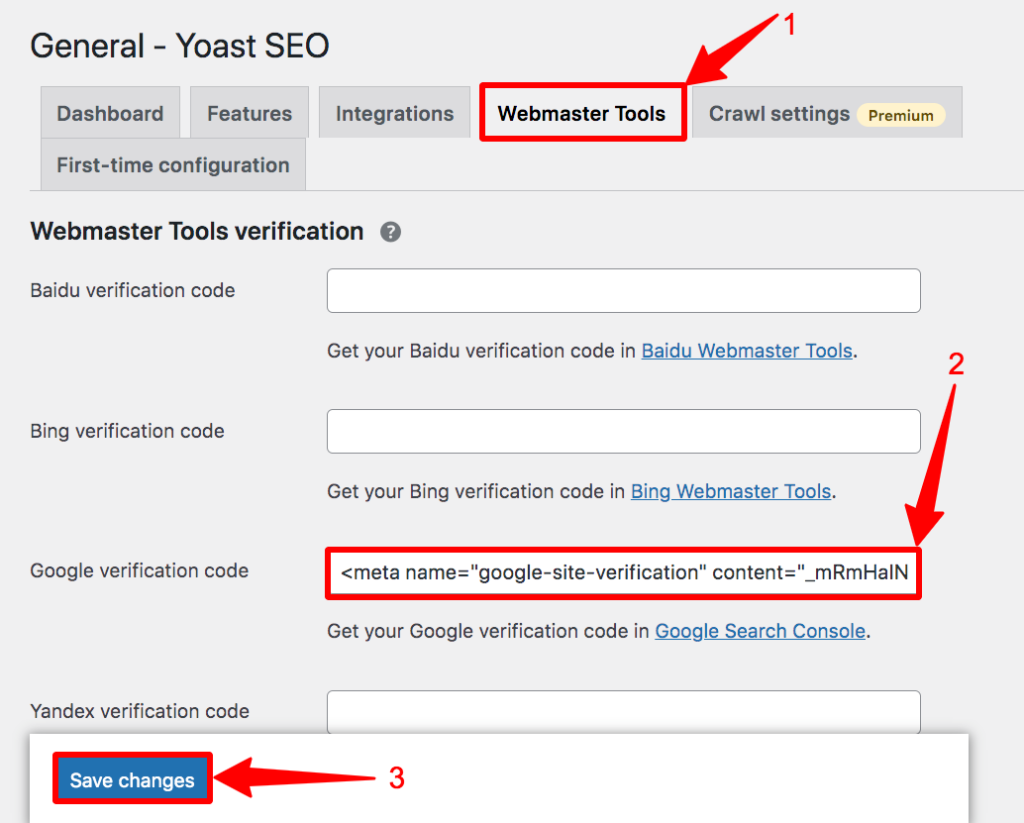
Step 6: Then, General-Yoast SEO will appear. Click on the Webmaster Tool. Then find the Google Verification code and paste the code there and click on Save Changes.
Step 7: After that, go to that pop-up, and click on VERIFY.
After clicking on VERIFY, a confirmation message like this will appear.
Method 7: How to Verify Google Search Console WordPress Using AIOSEO
Step 1: Type your website URL in the URL prefix section, then click CONTINUE.
Step 2: A new pop-up will appear. In that pop-up, find the HTML tag section and expand that section. Then click the COPY button to copy the code.
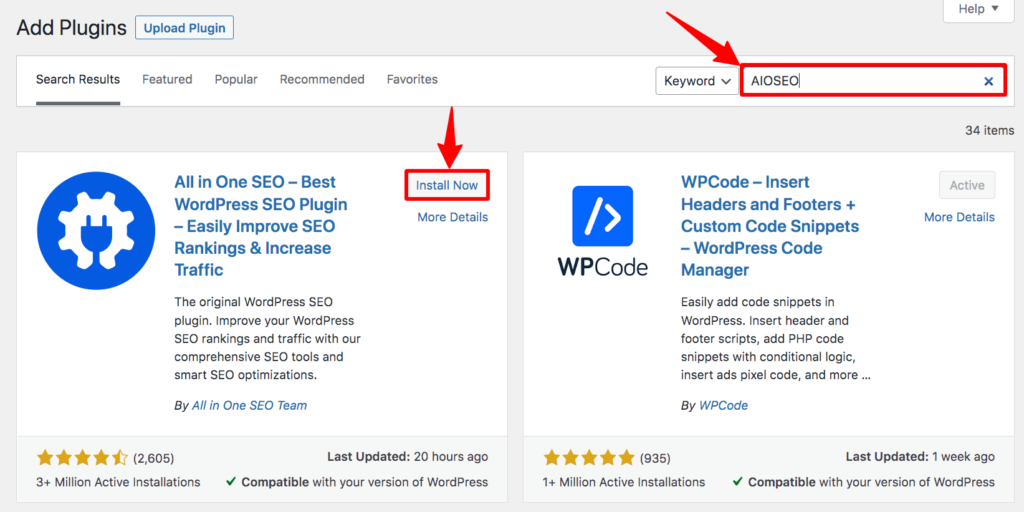
Step 3: Go to the WordPress Dashboard, then hover on Plugins, and click on Add New.
Step 4: Search for the AIOSEO plugin. Then install and activate that plugin.
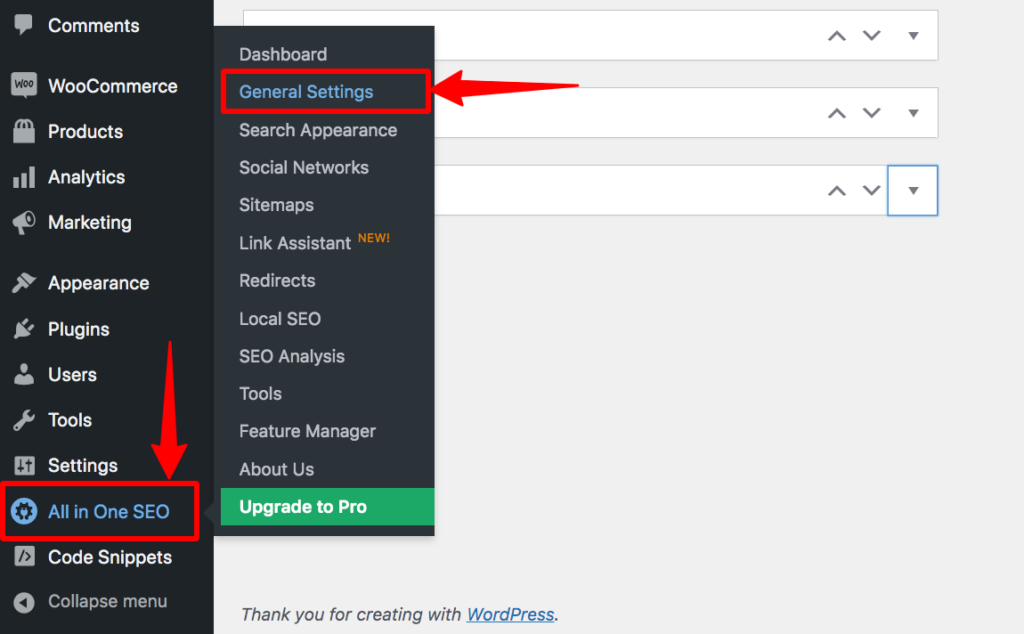
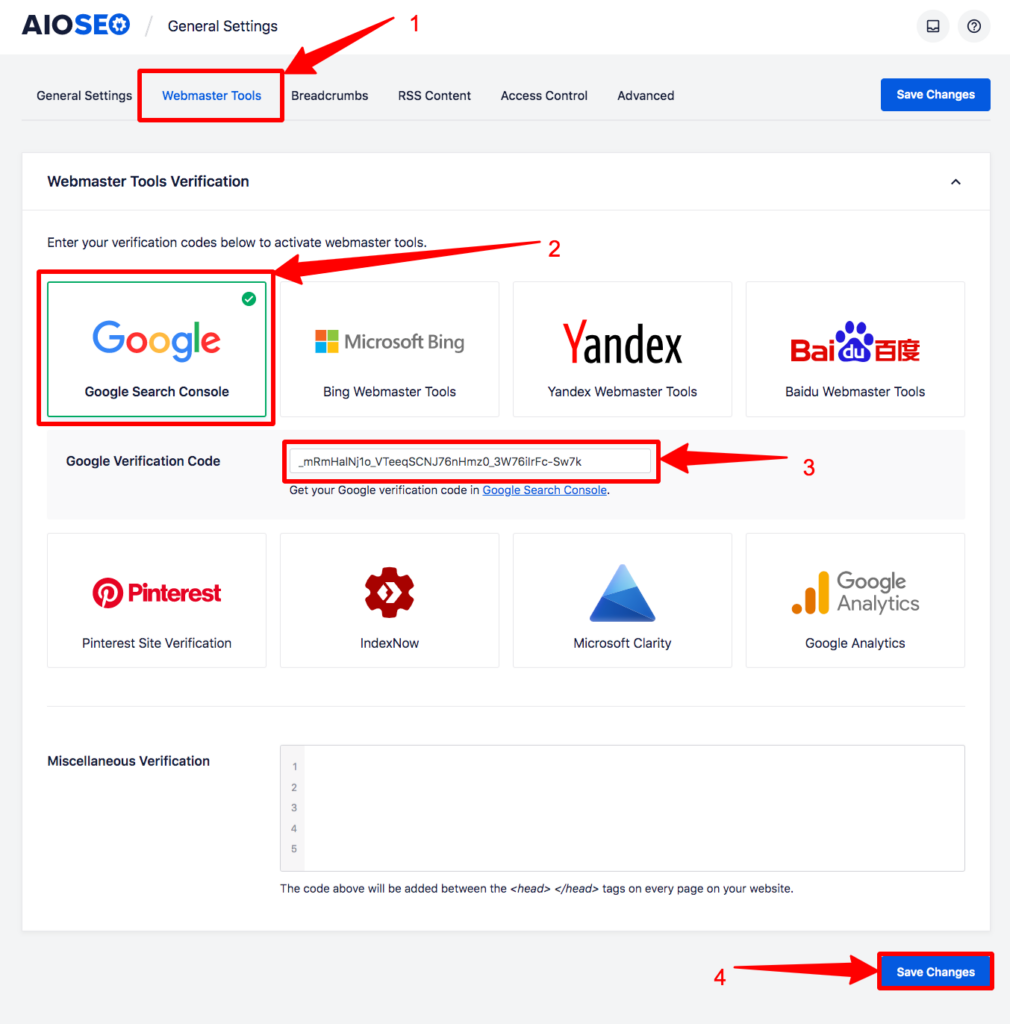
Step 5: From Dashboard, hover on the All in One SEO, then click on General Settings.
Step 6: A new page will appear. Click on the Webmaster Tools, then click on Google. After clicking that, you’ll find a section named Google Verification Code. Copy that code, and click on Save Changes to save it.
Step 7: After saving that, go to that pop-up again and click VERIFY.
After clicking on VERIFY, a confirmation message like this will appear.
Method 8: How to Verify Google Search Console WordPress Using Google Tag Manager
To verify Google Search Console with your site using this method, you need to make sure that your Google Tag Manager is connected to your domain. Without it, this method won’t work.
Step 1: Type the website URL in the URL prefix section, then click CONTINUE.
Step 2: Scroll down, find Google Tag Manager, and click VERIFY.

After clicking on VERIFY, a confirmation message like this will appear.
Method 9: How to Verify Google Search Console WordPress Using Google Analytics
First, make sure that your site is connected to your Google Analytics account. Then you can add Google SearchConsole very easily.
Step 1: Type your site’s URL in the URL prefix section, then click CONTINUE.
Step 2: Scroll down, find Google Analytics, and click VERIFY.
After clicking on VERIFY, a confirmation message like this will appear.
Method 10: How to Verify Google Search Console WordPress Using Google Site Kit
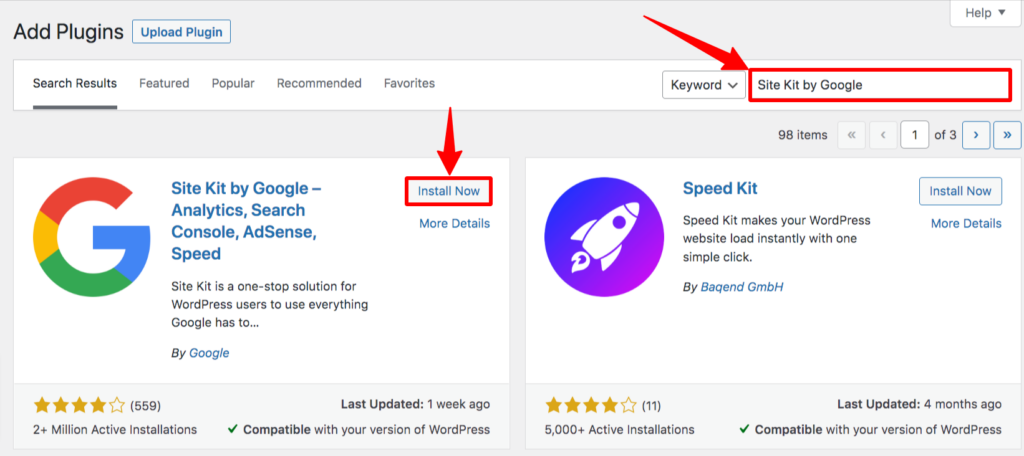
Step 1: Go to the WordPress Dashboard, then hover on Plugins, and click on Add New.
Step 2: Search for the Site Kit by Google plugin. Then install and activate that plugin.
Step 3: Now, hover on the Site Kit and click on Dashboard.
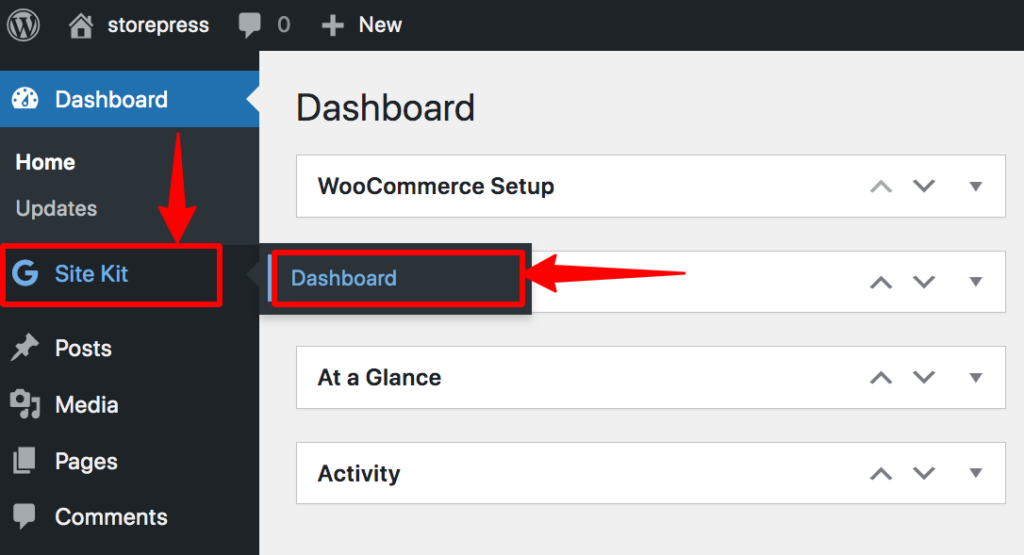
After that, you can connect your Google products with your site via this plugin. Also, you can control Google Products using a single dashboard using it. Logging In with your Gmail account will be enough to connect your site with Google Search Console.
Conclusion
We hope you’ve successfully added your WordPress-powered site to Google Search Console successfully. If you’re facing an error after clicking VERIFY, you need to give it some time.
Sometimes, Google requires some time to validate your request. So, you may need to wait 5-30 minutes for the verification.
Google updates its UI often, so if you’re facing something different from our tutorial, don’t worry. The process is the same; just some functions maybe change their placement. You can easily find it. Also, let us know about the change, and we’ll update this tutorial asap.