WooCommerce Free Shipping is a catchy option that offers customers to buy specific products without shipping charges. Also, it helps to drive more traffic, increase sales, and attract new customers. You can also use any free shipping plugin for WooCommerce easily to get the best feature of it.
Why You Need WooCommerce Free Shipping for Specific Products
Attract potential customers for specific products
To outrun your competitors in case of selling a specific product
On special occasions, offering WooCommerce free shipping is a trendy thing to do
Sometimes, products are left in the cart for a long time. To clear the cart, offering WooCommerce free shipping is very effective.
Using this tutorial, you can add free shipping to a single product or category-wise products on the Flatsome theme-powered website.
How to Apply WooCommerce Free Shipping for Specific Products in Flatsome
Step 1: Go to the Dashboard, hover the pointer on WooCommerce, then click on Settings.Step 2: A new page will appear. Click on the Shipping button on that page.Step 3: A new section will come up. Click on the Shipping classes to go to the Shipping classes page. Step 4: On the right bottom, you’ll find a button named Add shipping class, click on that to add a shipping class.Step 5: Now, you can create a class by giving the information it requires. After filling up the form, click on the Save shipping class button to save it. After saving it, click on the Shipping zones. Step 6: After clicking the Shipping zones, the page of shipping zones will come up. Hover the pointer on your desired zone, and click on the Edit button. Step 7: A new page will appear. Click on the Add shipping method to add a shipping method. Step 9: A pop-up will appear. Click the drop-down, select Free shipping, then click on the Add shipping method. Step 10: After adding this method, click on the Save changes to make it effective. Step 11: Again go to the Dashboard, hover the pointer on Products, and click on Add Products. Now, you can use this class to make a single product with free shipping or multiple products with free shipping. We’ll demonstrate both ways.
For Multiple Product
Step 12: It’ll take you to the product page, where you can see all your products. If you want you can easily create variable products WooCommerce programmatically so that you can understand the category of variable products. For demonstration, we’ll add free shipping to all women-related products. To do that, click on the Select a category, select Women, then click on the Apply button. Step 13: Now, you can find all the women-related products here. Select all of them, then click on Bulk Actions and select Edit. After that click the Apply button. Step 14: A new page will appear after that. Here, click on the dropdown of the option Shipping. Then select free-shipping, and click the Update button to activate it. Final PreviewNow, add any women-related product to your cart, and you’ll notice that there is no option for shipping charge. Free shipping has been applied to all of them.
For Single Product
Step 12: Hover the pointer on the product you want to add, then click on the Quick Edit.Step 13: A new page will appear. Scroll down, and select the Shipping class“free-shipping”. Then click on the Update button. Final Preview: Now, if you add this to your cart, and try to checkout, you’ll see that the shipping charge is free for this product.
Conclusion
Though this tutorial is made for the Flatsome theme-powered website, it can be helpful for other WooCommerce sites similarly. If you’re looking for Flatsome-focused tutorials, you can find many Flatsome tutorials on WPCred. Besides creating free shipping for specific products, you can also make a custom class-based shipping charge for specific products. Also, you can withdraw it whenever you want to. If following this tutorial doesn’t solve your problem, try again from scratch and make sure to follow every single step. Drop a comment if nothing solves your error.
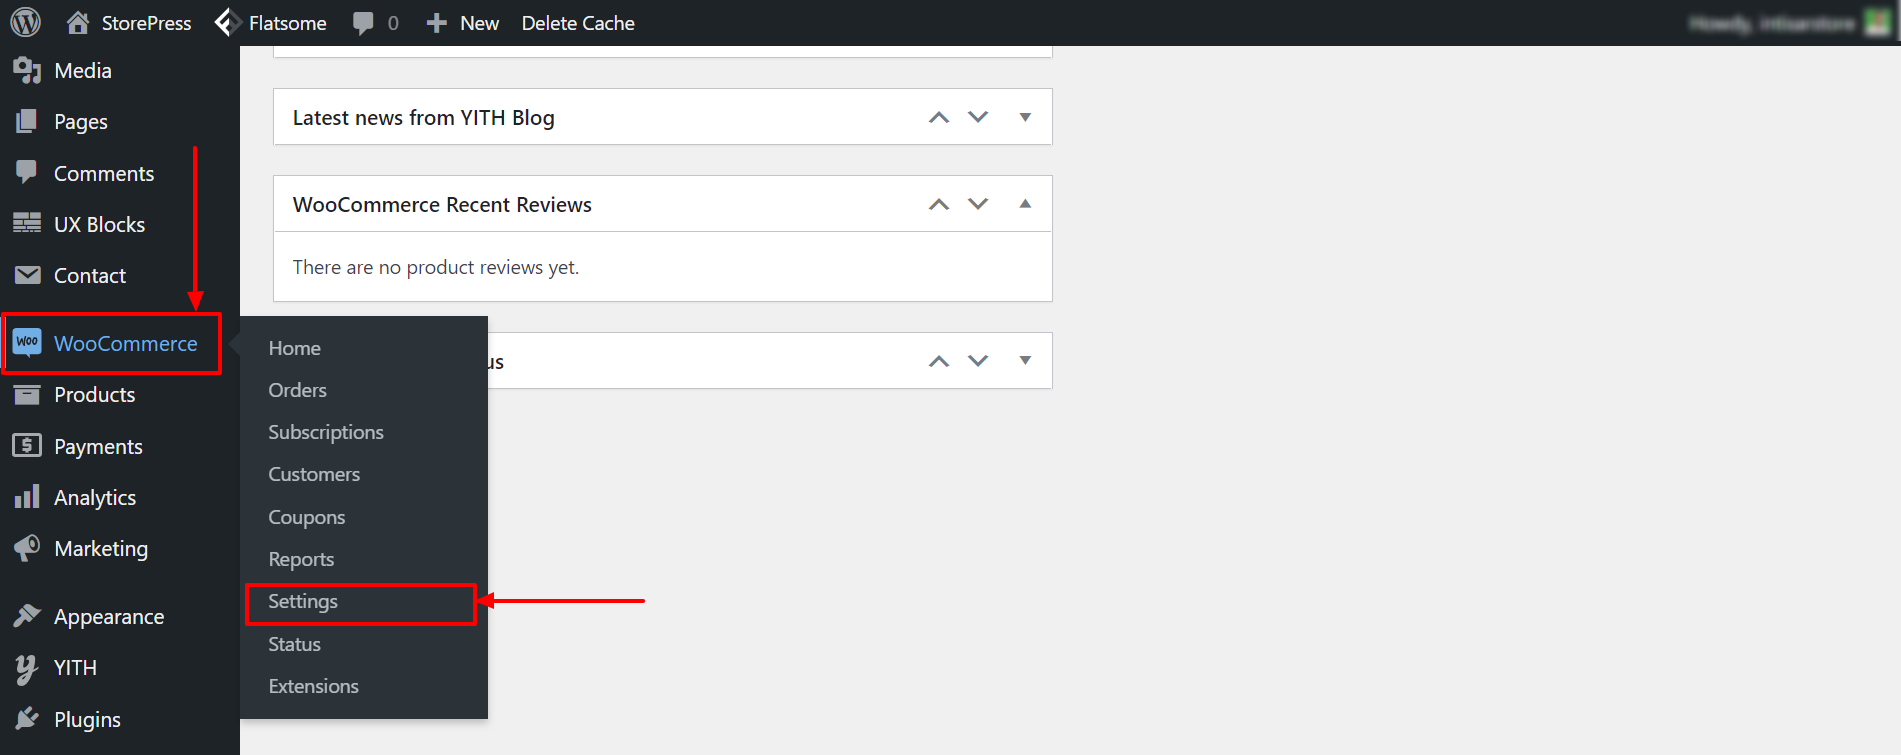 Step 2: A new page will appear. Click on the Shipping button on that page.
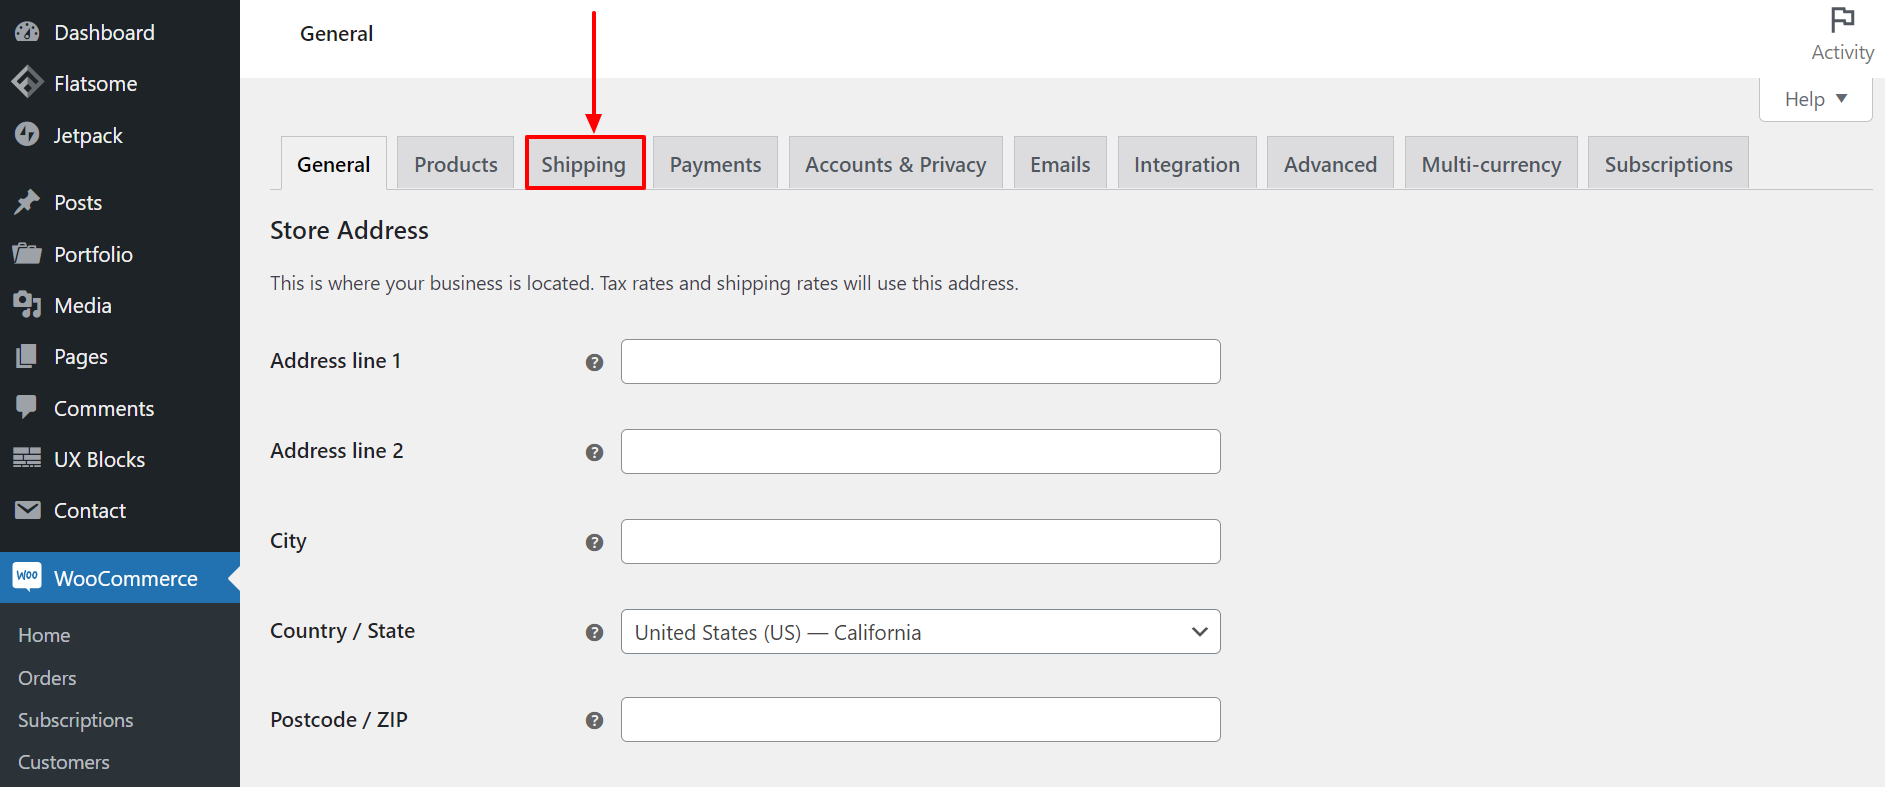 Step 3: A new section will come up. Click on the Shipping classes to go to the Shipping classes page.
 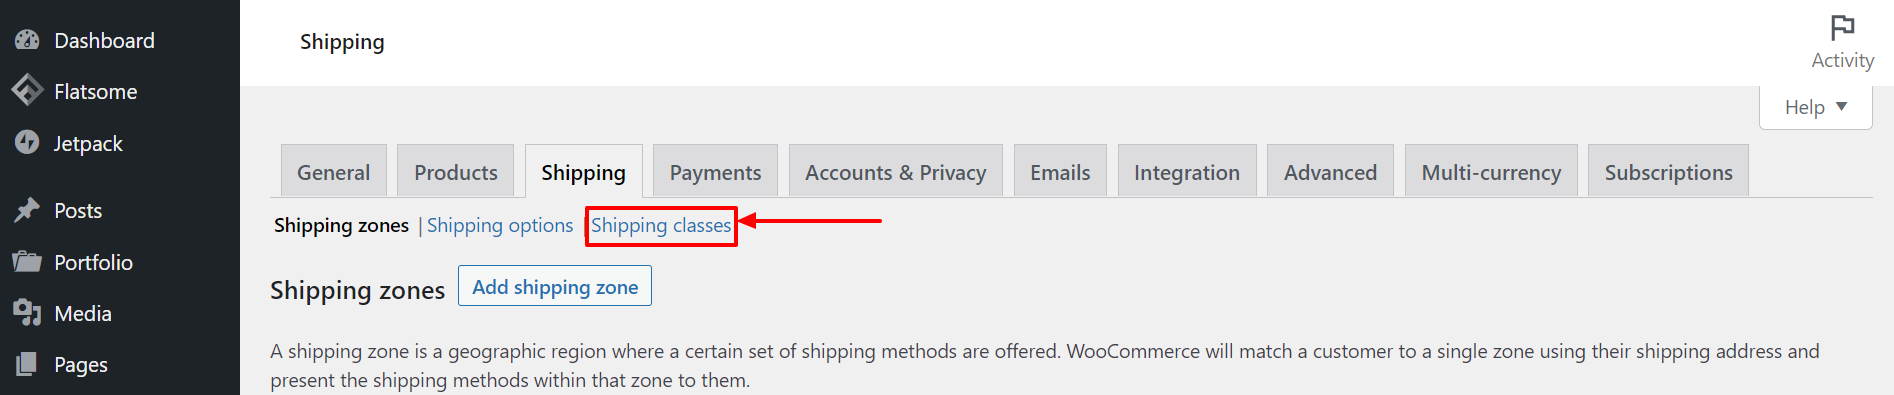 Step 4: On the right bottom, you’ll find a button named Add shipping class, click on that to add a shipping class.
 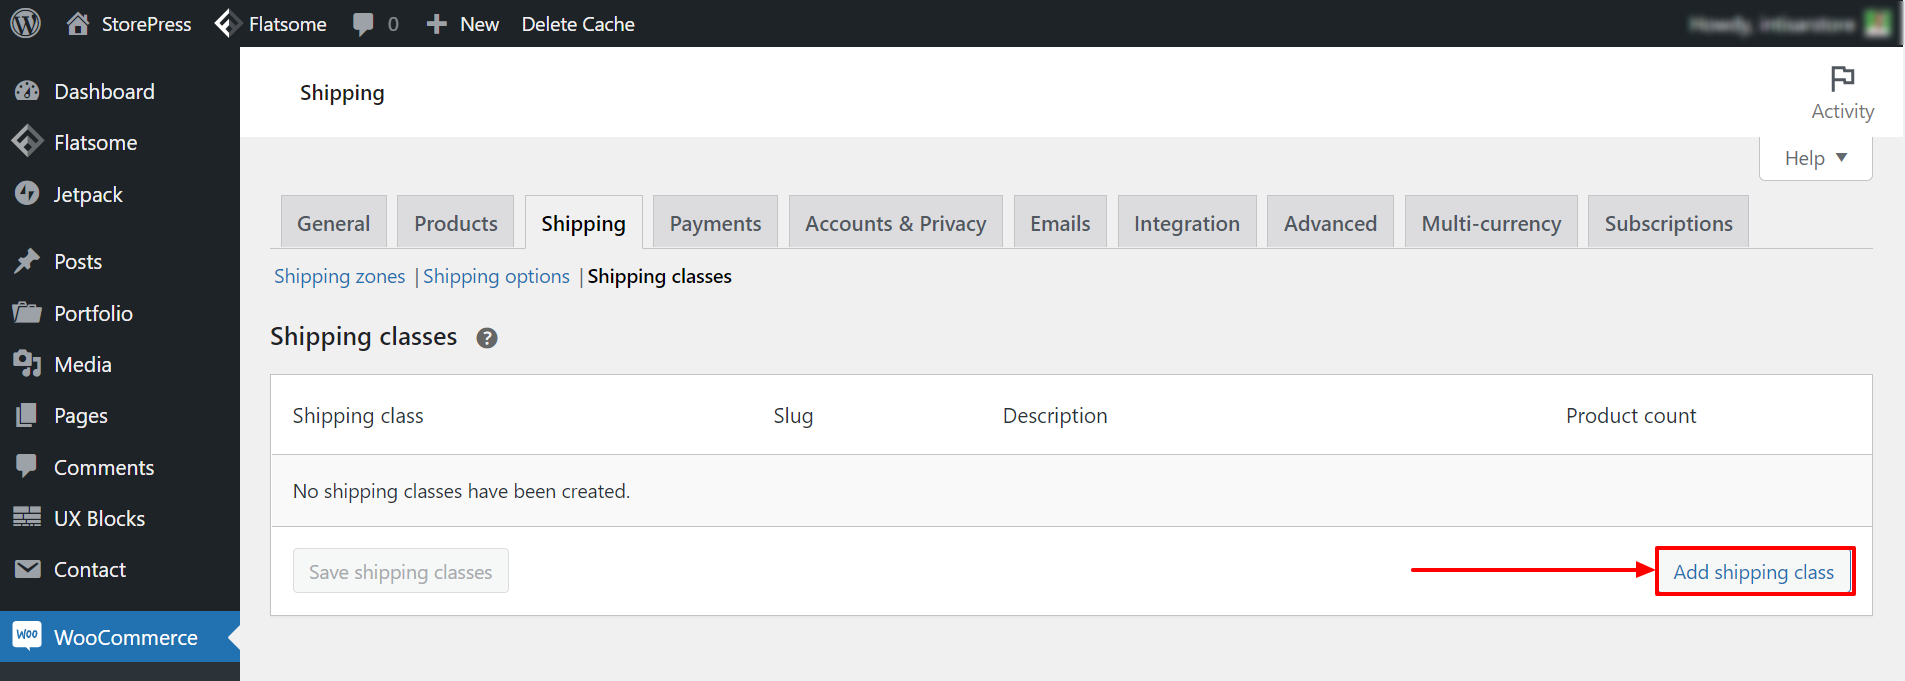 Step 5: Now, you can create a class by giving the information it requires. After filling up the form, click on the Save shipping class button to save it. After saving it, click on the Shipping zones.
 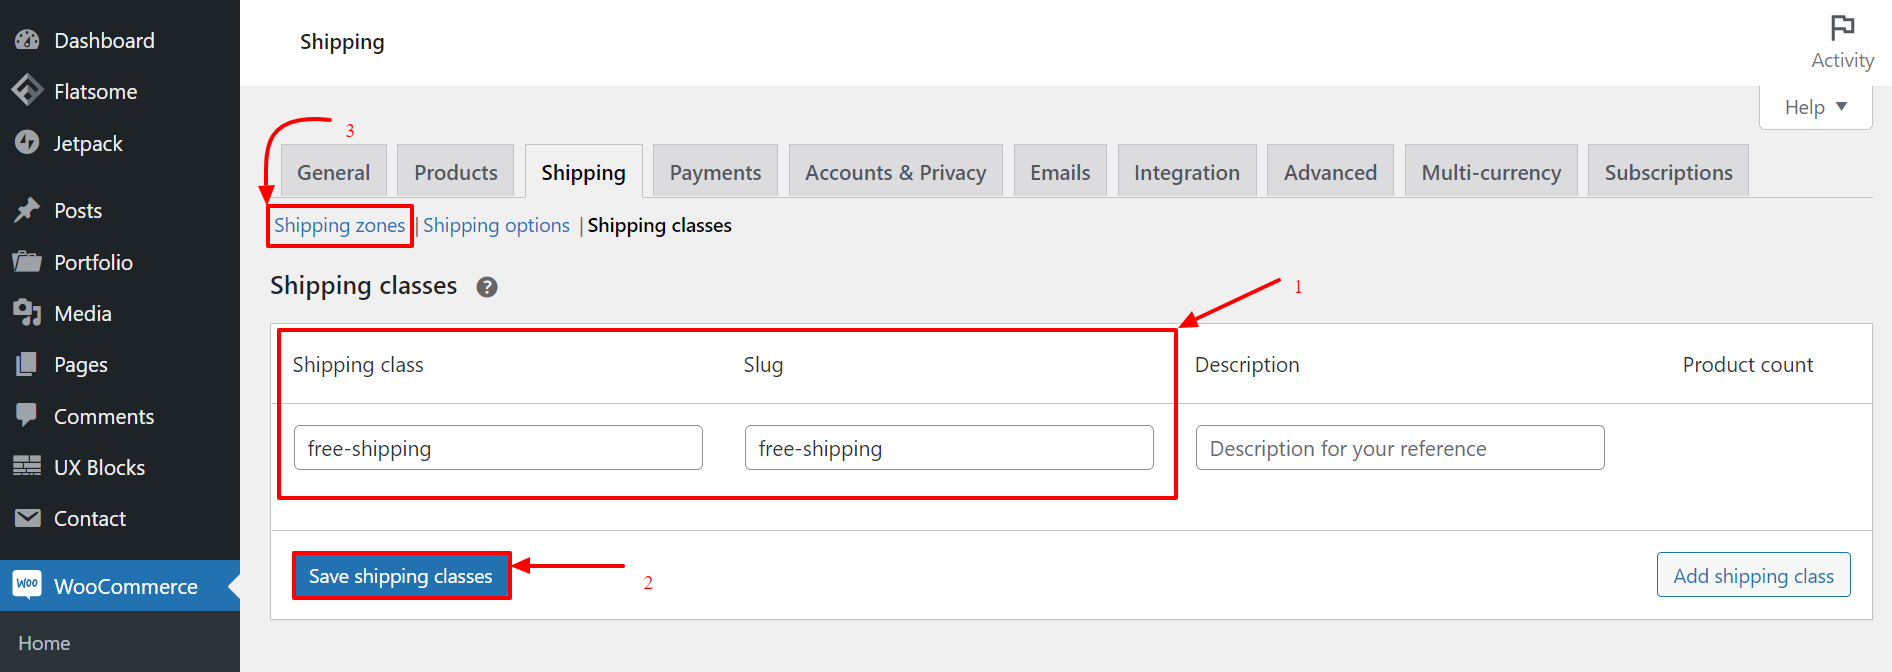 Step 6: After clicking the Shipping zones, the page of shipping zones will come up. Hover the pointer on your desired zone, and click on the Edit button.
 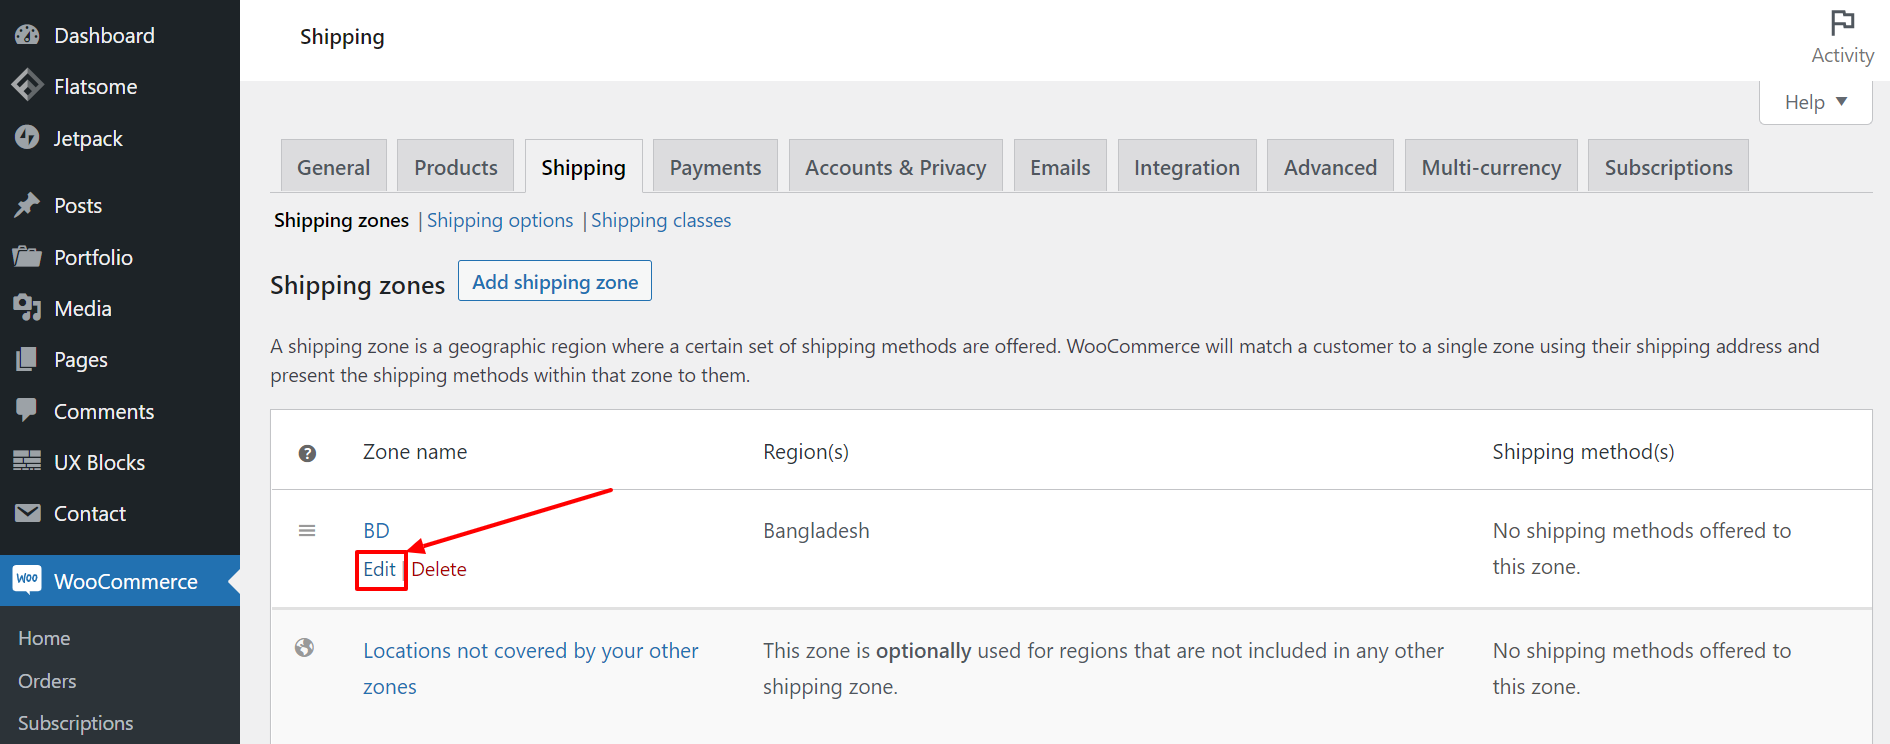 Step 7: A new page will appear. Click on the Add shipping method to add a shipping method.
 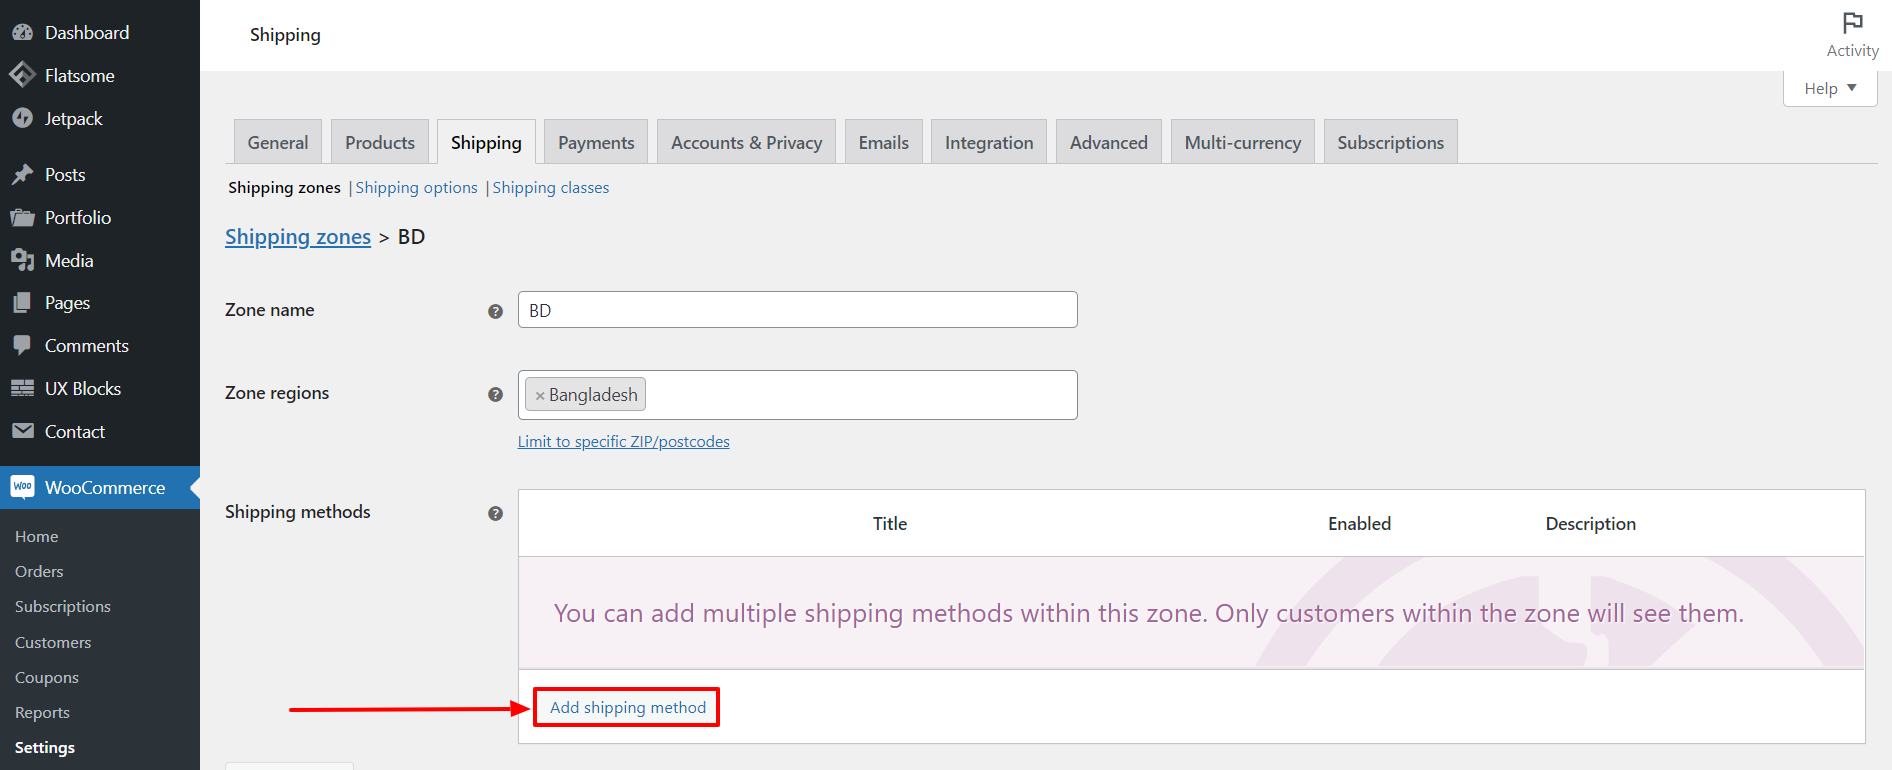 Step 9: A pop-up will appear. Click the drop-down, select Free shipping, then click on the Add shipping method.
  Step 10: After adding this method, click on the Save changes to make it effective.
 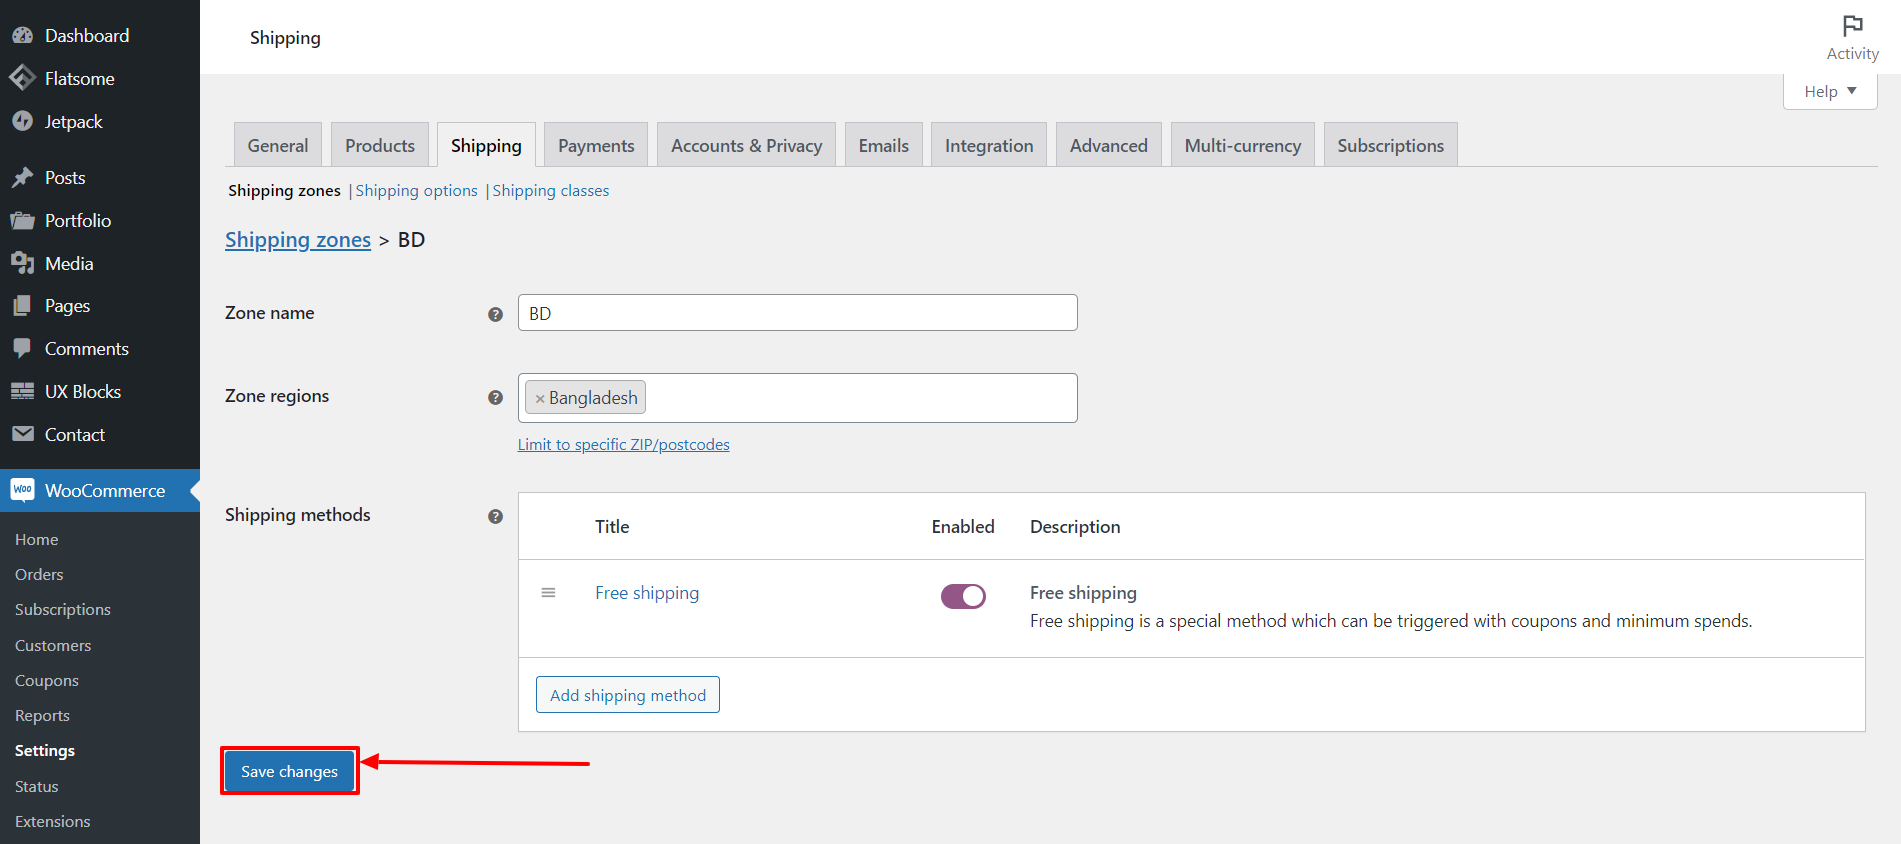 Step 11: Again go to the Dashboard, hover the pointer on Products, and click on Add Products.
  Now, you can use this class to make a single product with free shipping or multiple products with free shipping. We’ll demonstrate both ways.
 Step 13: Now, you can find all the women-related products here. Select all of them, then click on Bulk Actions and select Edit. After that click the Apply button.
 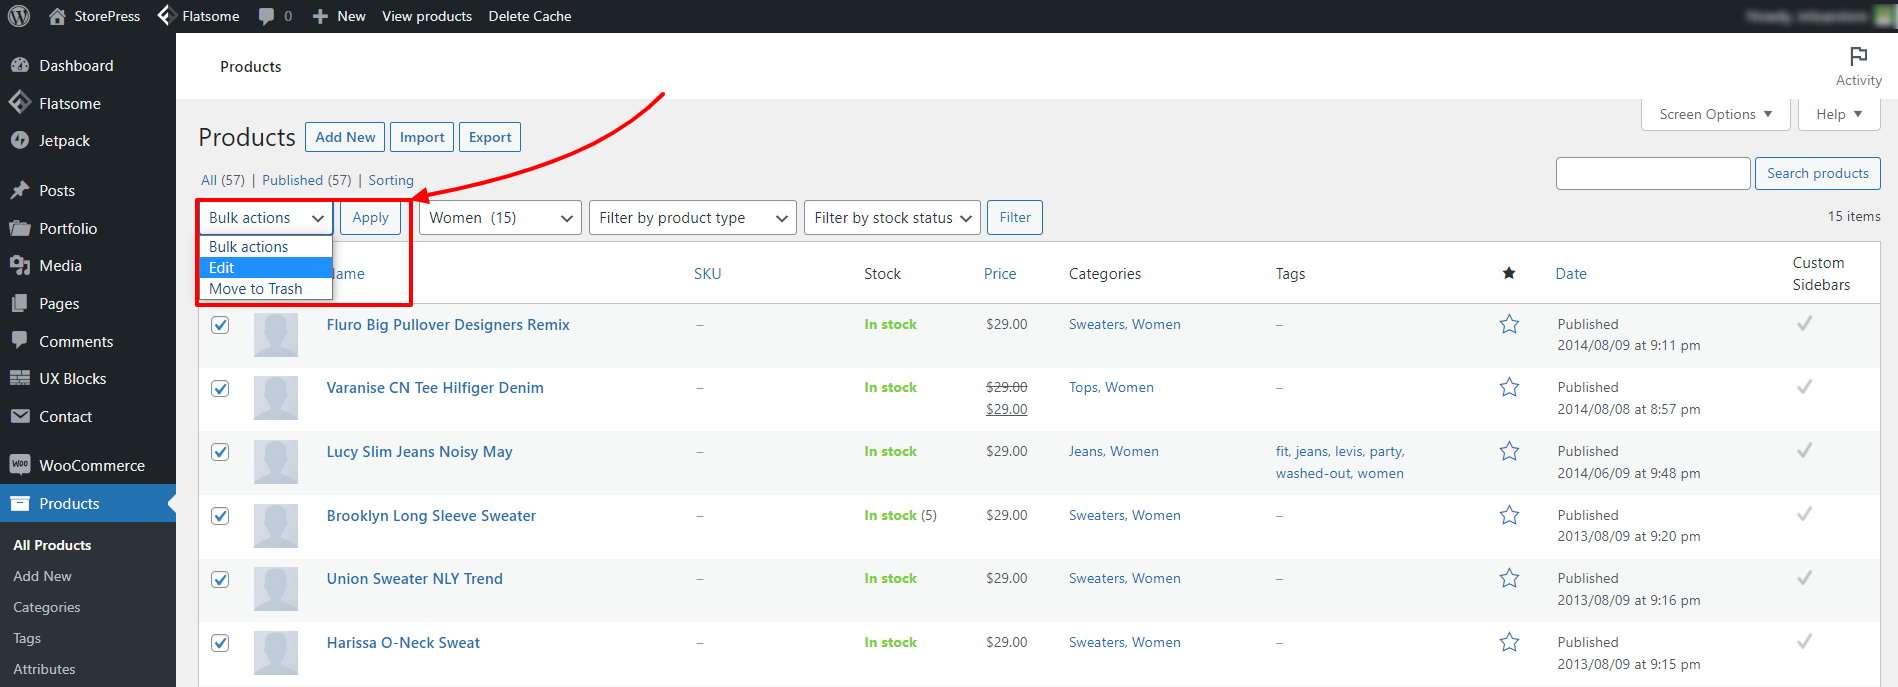 Step 14: A new page will appear after that. Here, click on the dropdown of the option Shipping. Then select free-shipping, and click the Update button to activate it.
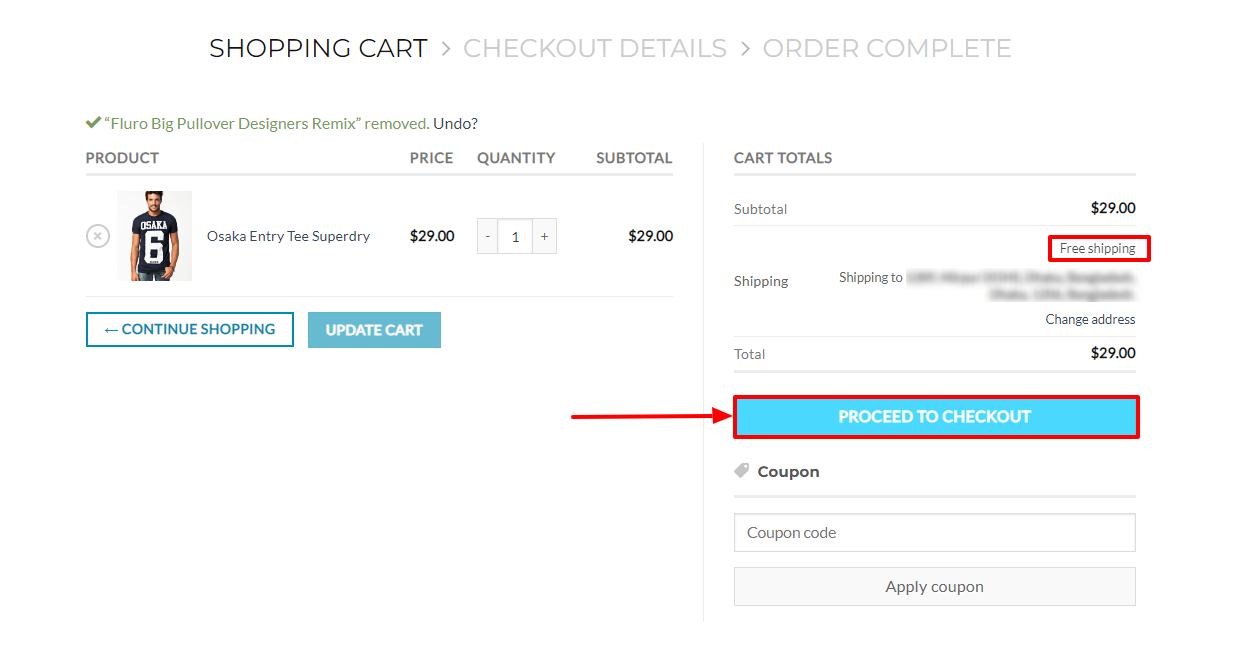
 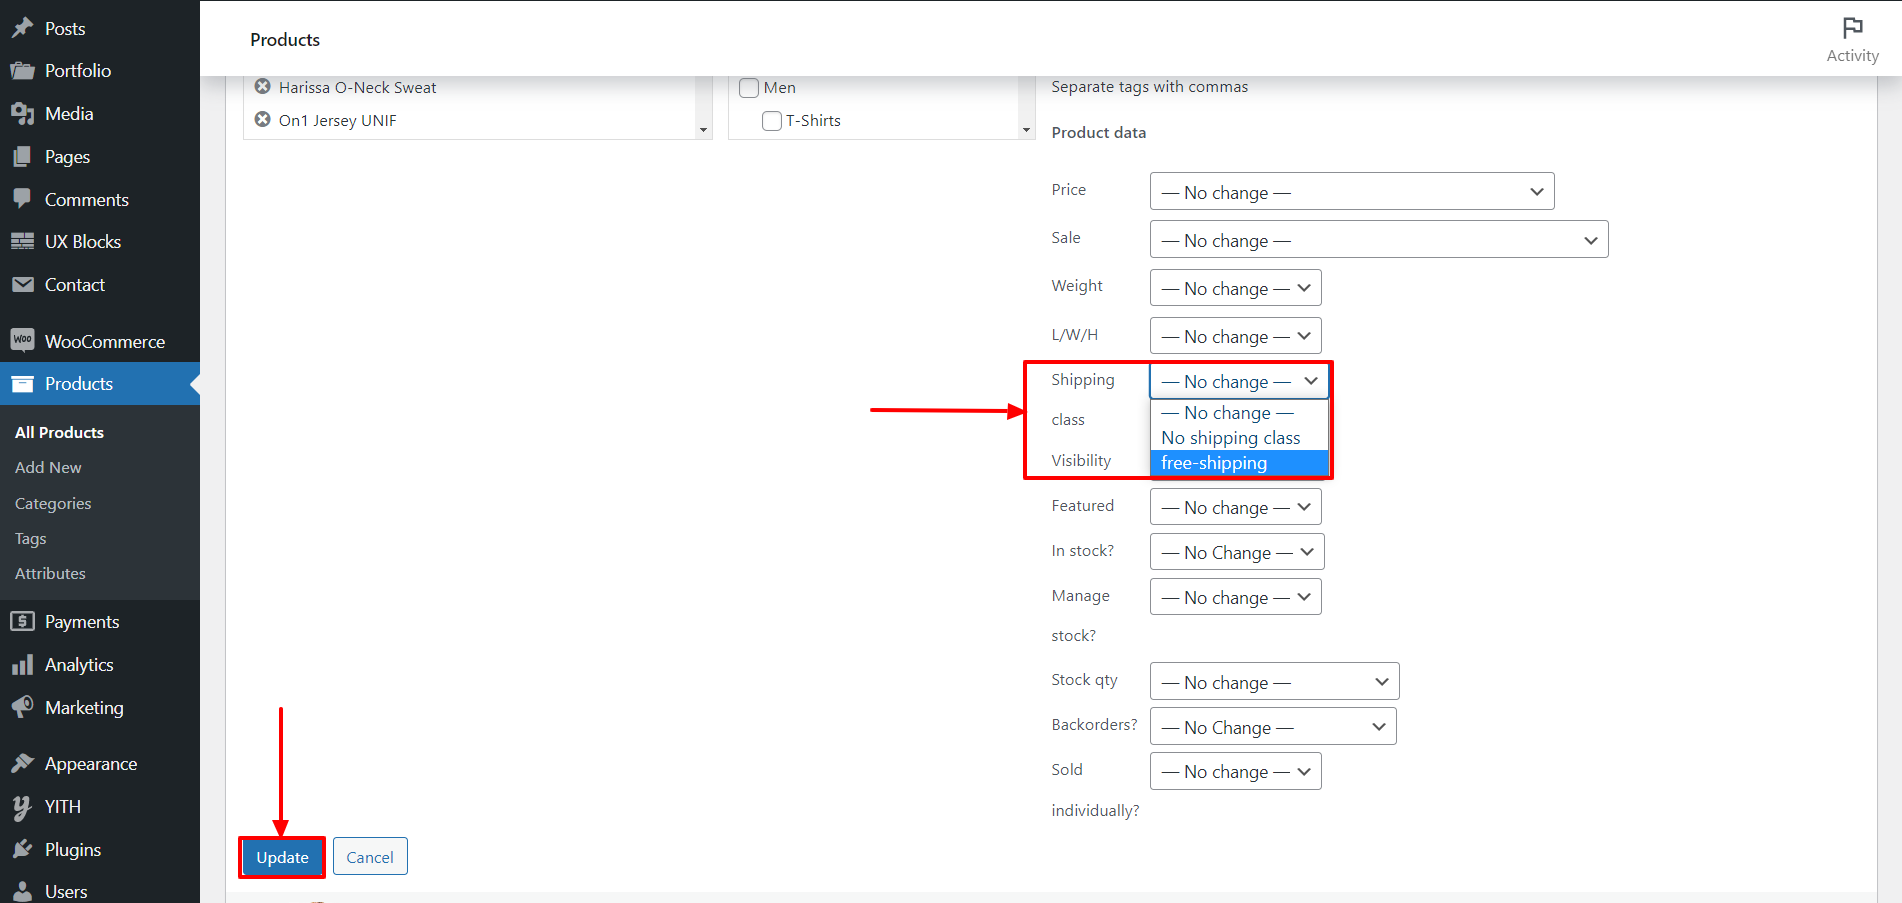 Final Preview Now, add any women-related product to your cart, and you’ll notice that there is no option for shipping charge. Free shipping has been applied to all of them.
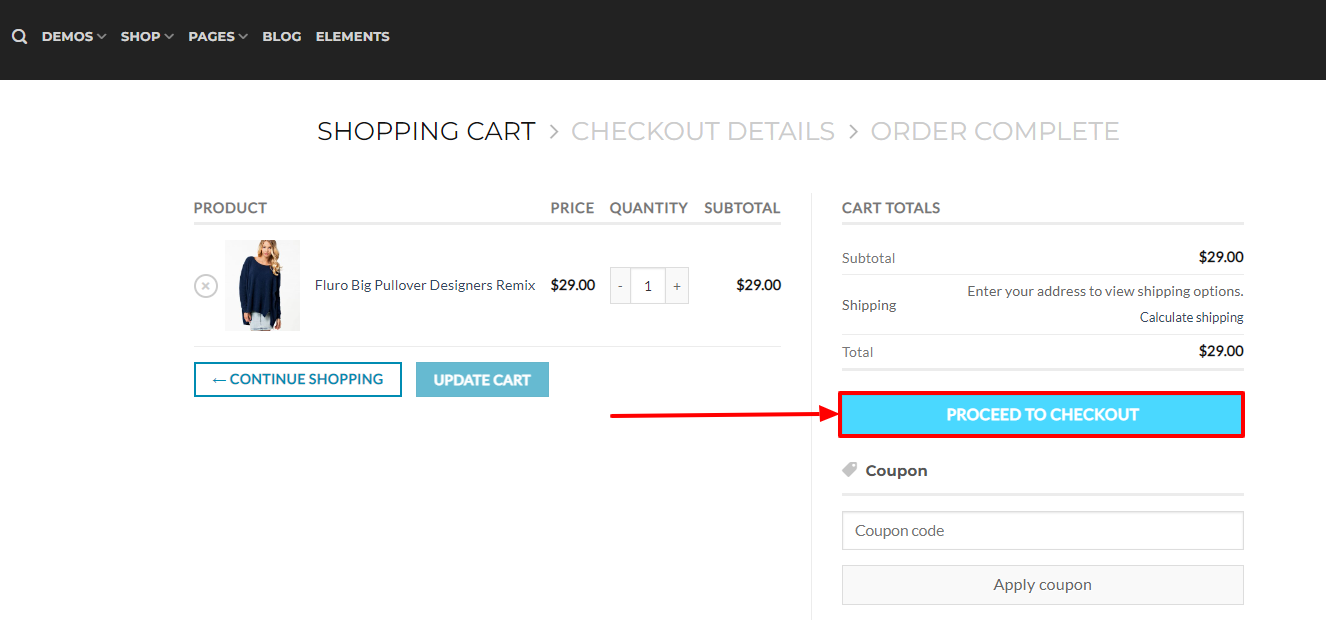
 Step 13: A new page will appear. Scroll down, and select the Shipping class “free-shipping”. Then click on the Update button.
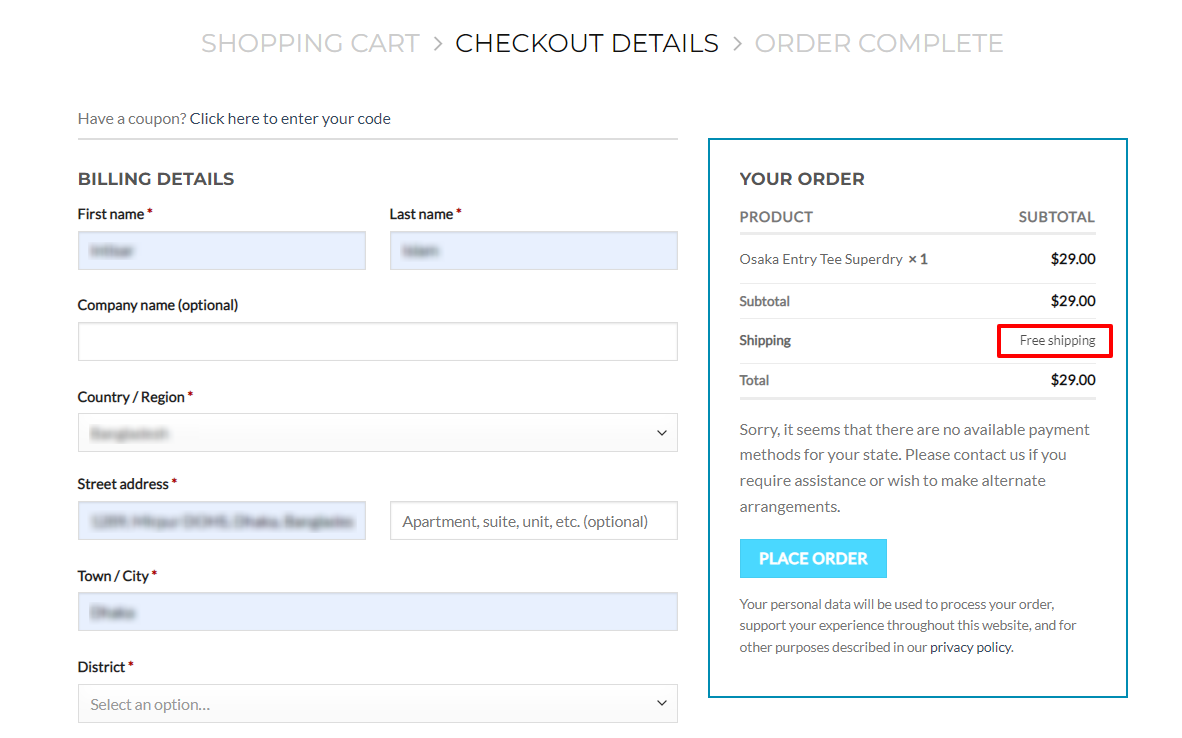
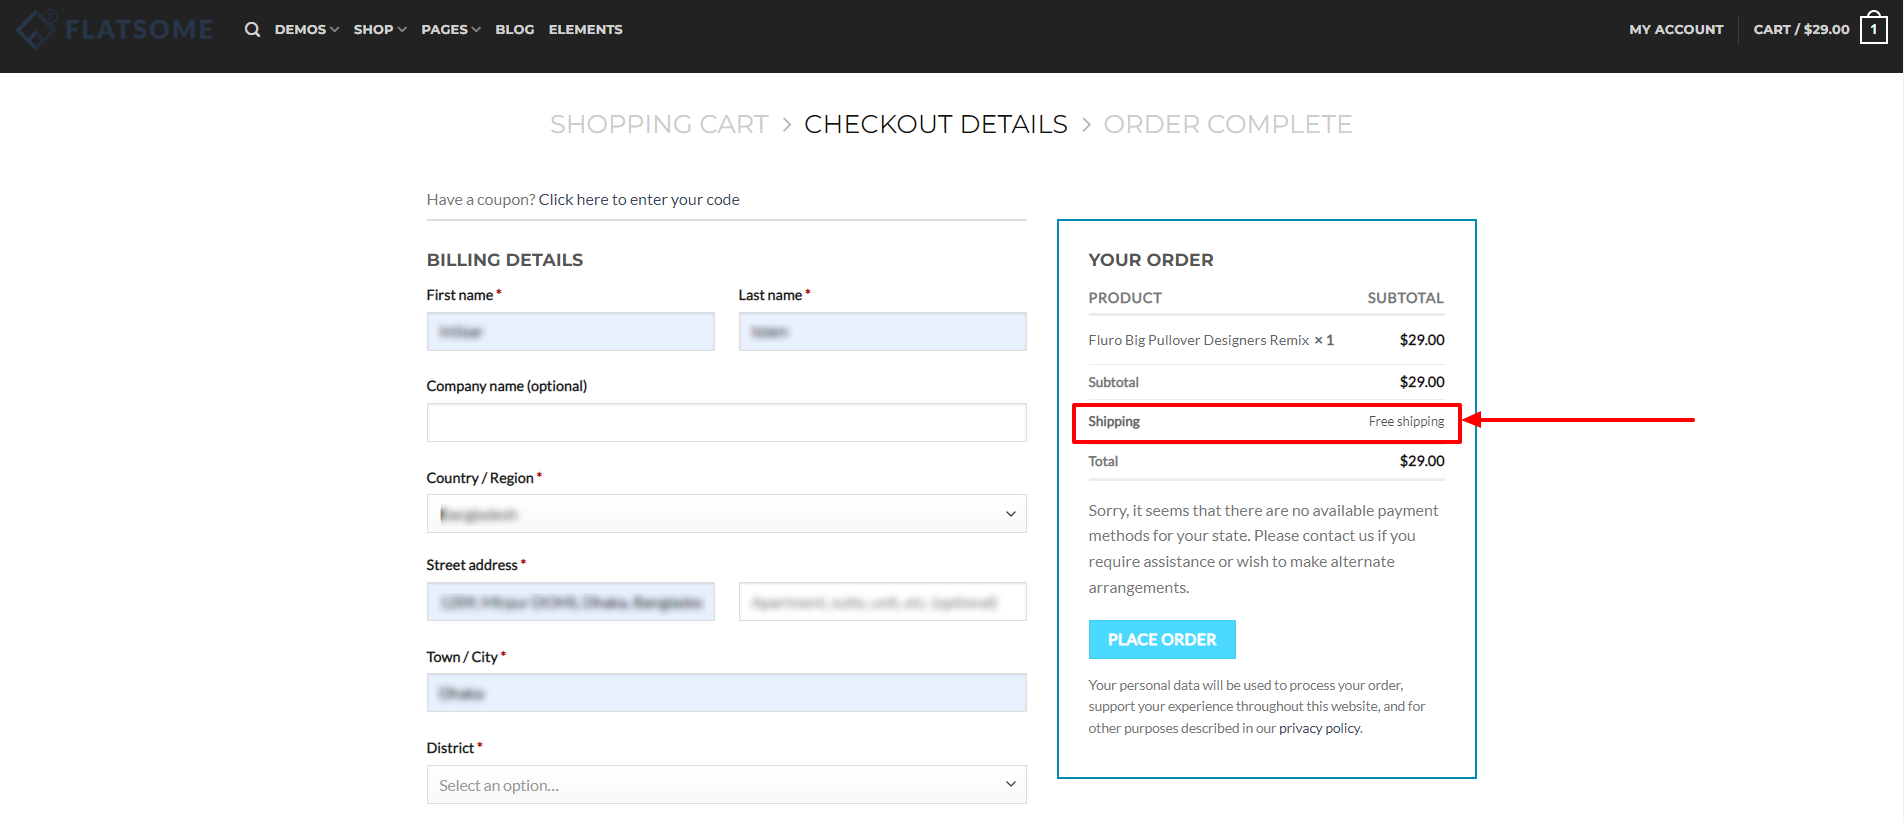
  Final Preview: Now, if you add this to your cart, and try to checkout, you’ll see that the shipping charge is free for this product.