WordPress admin notice is an essential component of the WordPress management system. It is used from time to time for displaying urgent notices or messages regarding the website or its content. Although you have a user management plugin in WordPress, a custom WordPress admin notice makes it easier to notify particular website users to perform specific tasks. This tutorial will demonstrate how you can easily add and manage the custom WordPress admin notice and put it to good use for yourself.
Benefits of Using the Custom WordPress Admin Notice
Generally, the admin notice section is used by WordPress itself to notify you of particular messages or warnings for your websites. You can take advantage of this useful feature and create your custom WordPress admin notice to display important messages to the website’s author, moderator, or even the admin. There is usually more than one person managing the WordPress website when you have massive content in it. If you want to notify something about the website, you need to let everyone know about it individually, which can be time-consuming. Instead, you can use the custom WordPress admin notice to notify the people responsible for managing your website all at once. Every time you send an email notice, the concerned people can see the admin notice and act accordingly.
How to Display Custom WordPress Admin Notice on Your Website
Displaying the custom admin notice is relatively easy. You can follow two ways to add and manage the WordPress admin notice and use them accordingly for your benefit. You can use a plugin from any WordPress plugin list to insert a WordPress admin notice or simply use custom coding into your WordPress core files but in this step, you should have knowledge about how to create custom shortcodes in WordPress. This tutorial will demonstrate both ways of adding and managing the WordPress admin notice on your website.
Method 1: Using Plugin to Add and Manage WordPress Admin Notice
Step 1:
From the WordPress dashboard, go to Plugin>Add New. Inside the WordPress plugin directory, search for the plugin Customizes WordPress Emails and Alerts. Click to install and activate the plugin. This plugin is compatible with all top SEO-friendly WordPress WooCommerce themes. 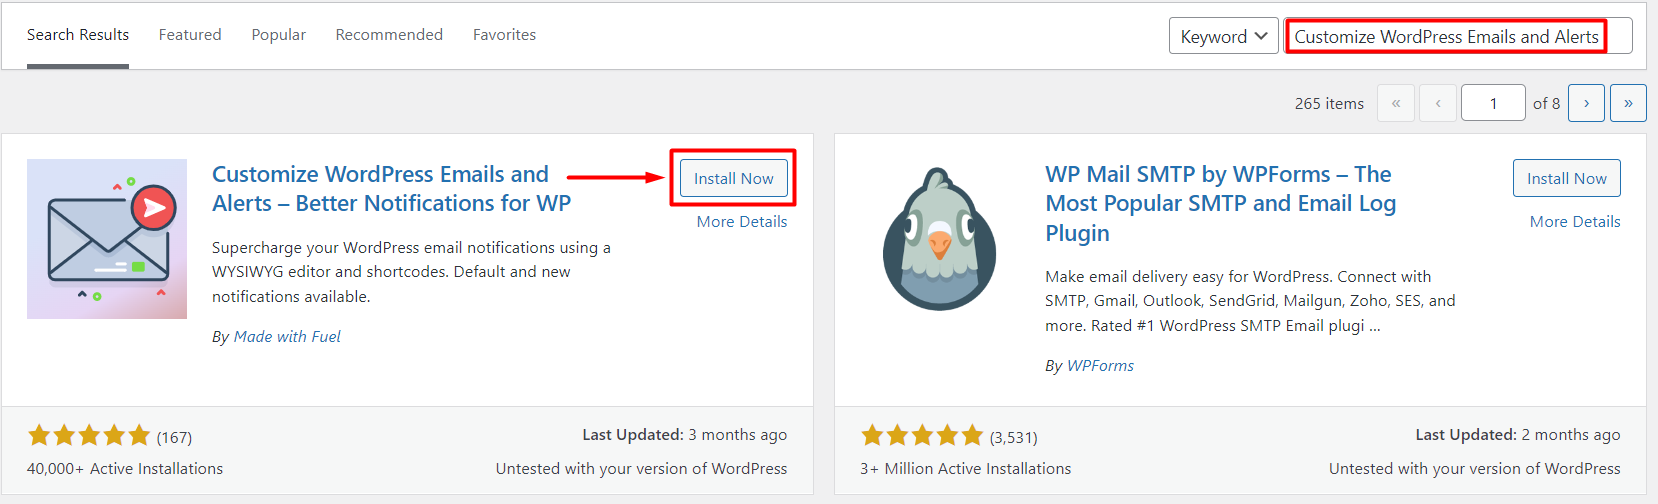
Step 2:
Visit the WordPress dashboard and hover on ‘Notifications.’ Click on ‘Add New’ to create a new custom WordPress admin notice. 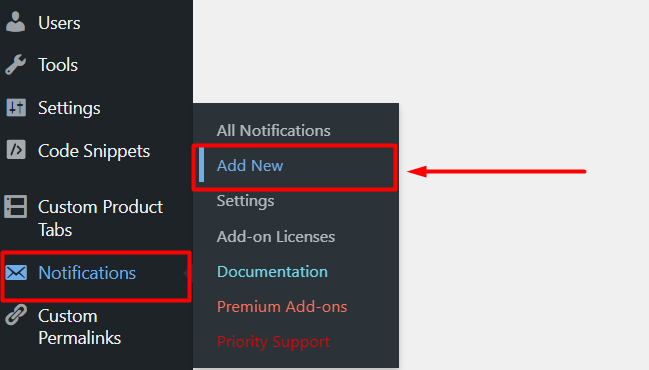
Step 3:
The title is the first field in the new notification section. Give a title for the notification that resembles or identifies the notification best. You can also learn how to add users to WordPress to get a better experience.
Step 4:
For the ‘Notification For’ field, you can choose the cause of the notification from several choices using the select box. For this tutorial, we will select the ‘User Role Changed-For Admin’ value. 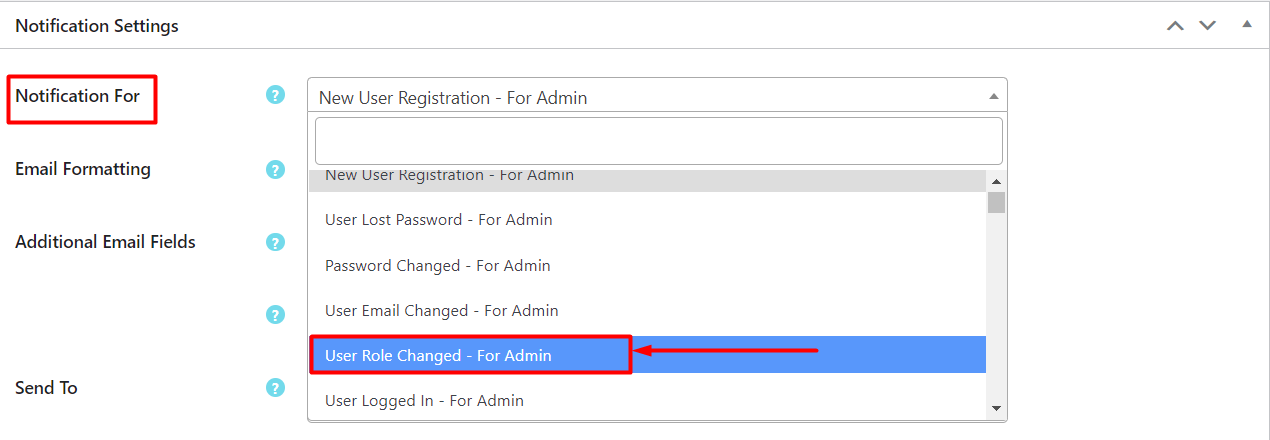
Step 5:
You can choose to whom you want to send the notice by using the ‘Send To’ field. Simply click on the respective field and select the type of users you want to send the notification to. You can also send notifications to your subscriber and you can collect subscribers by adding a newsletter to your WordPress.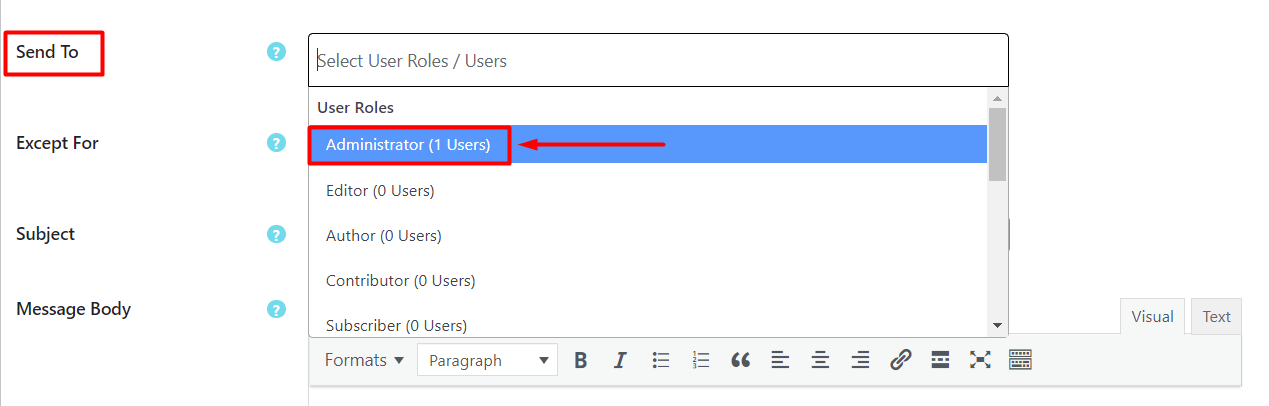
Step 6:
You can also choose not to show the notice to a particular type of user. In that case, the notice will be visible to everyone except the users you chose from this field. Note that you should only use the ‘Send To’ or ‘Except For’ field, using both fields can result in incorrect output or user type. 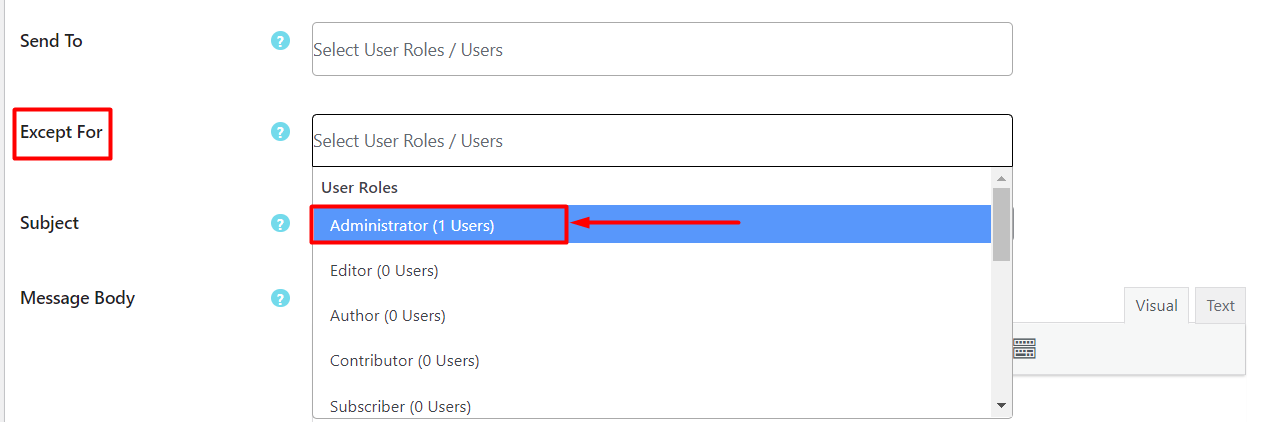
Step 7:
Now it is time time to write the actual notice. Write a subject for the notice in the ‘Subject’ field and write the notice inside the ‘Text’ field. 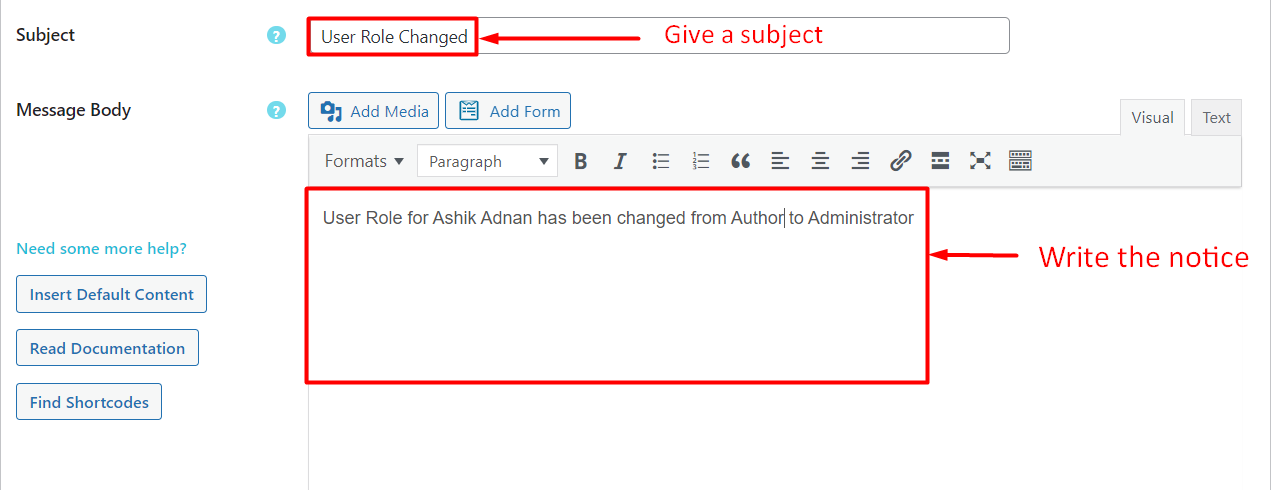
Step 8:
Now, let us save the notice and finish creating a WordPress admin notice. Scroll up and look to the top right corner, and you will find the ‘Save Notification’ box. Make sure you select ‘Notification Enabled’ and then click ‘Save’ to save and send your custom WordPress admin notice. Note that, You need to configure your server email to properly send and receive notices and emails using this plugin properly. If it is not working properly check your SMTP server error.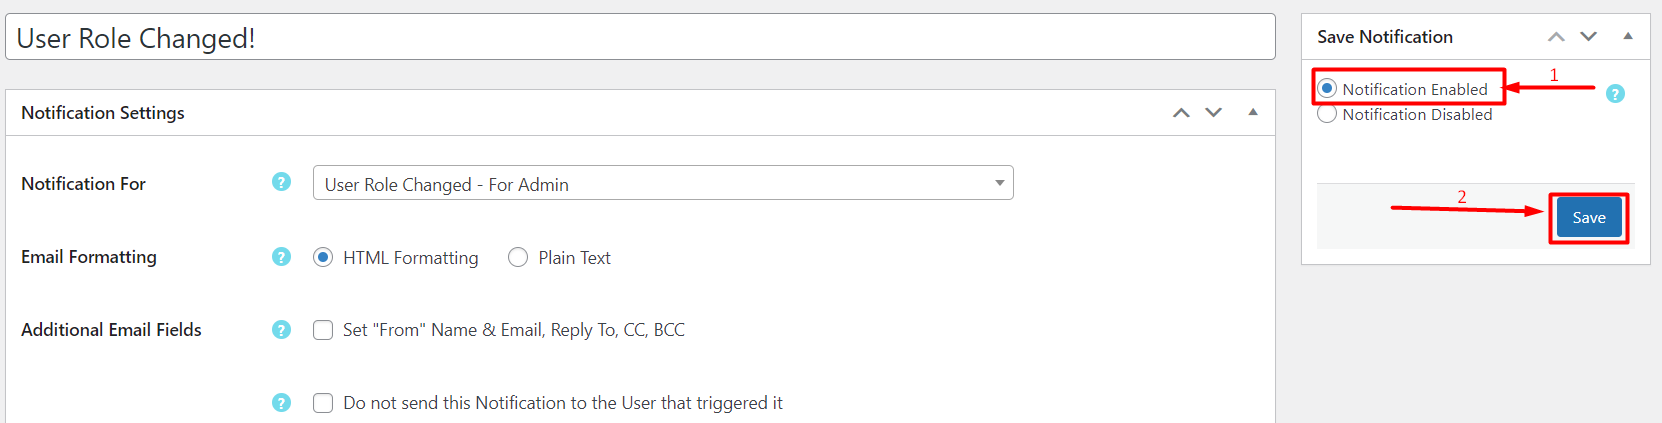
Method 2: Using Custom Code to Add and Manage WordPress Admin Notice
Step 1:
From the WordPress dashboard, hover on ‘Appearance’ and click ‘Theme File Editor.’ 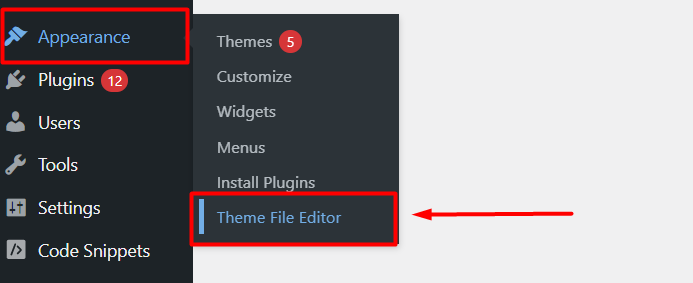
Step 2:
You will be redirected to the theme file editor. From the Theme Files section on the left, find the functions.php file and click to open it in the editor. This operation is the same for all top free WordPress WooCommerce themes to make better online stores. 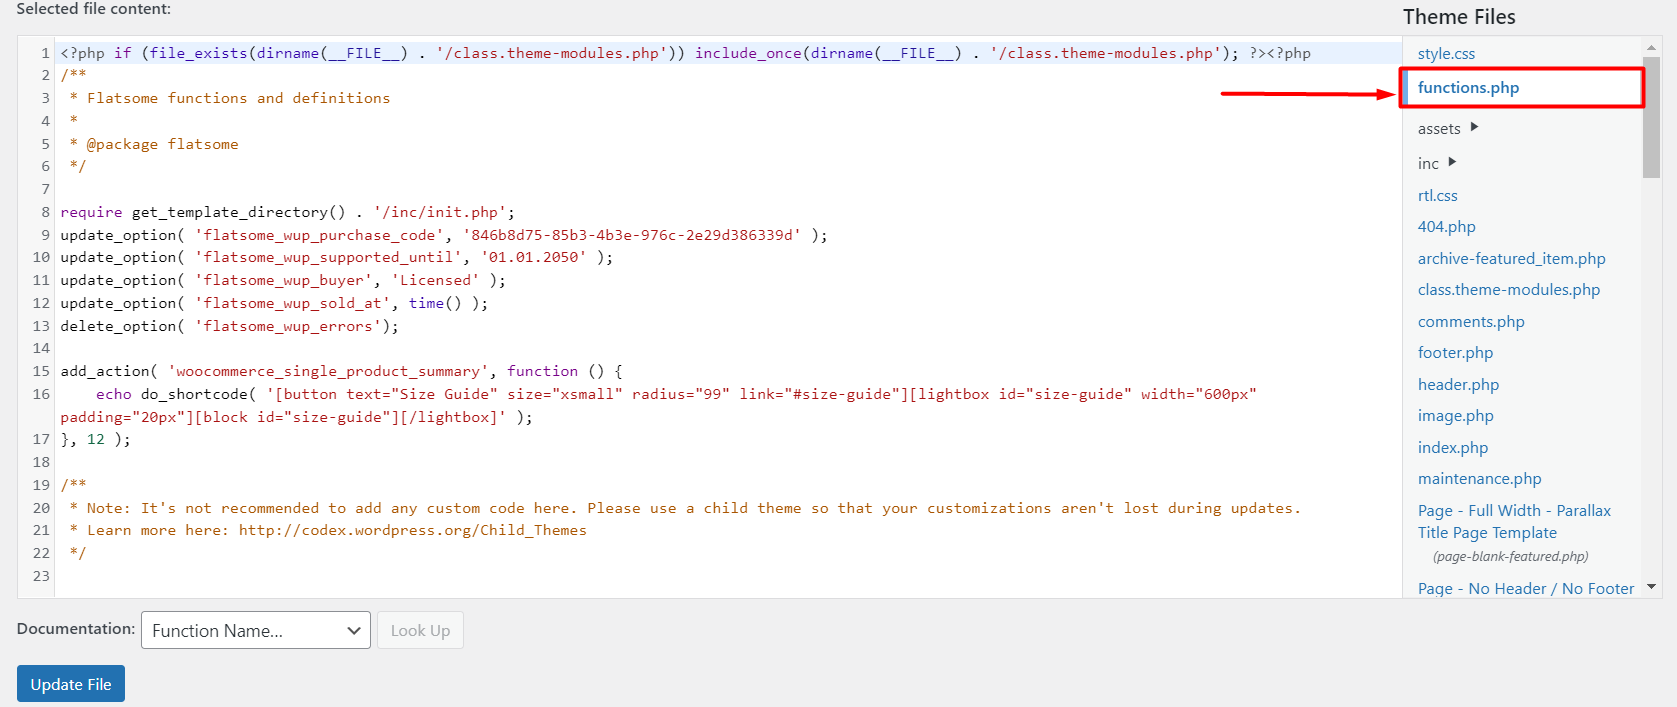
Step 3:
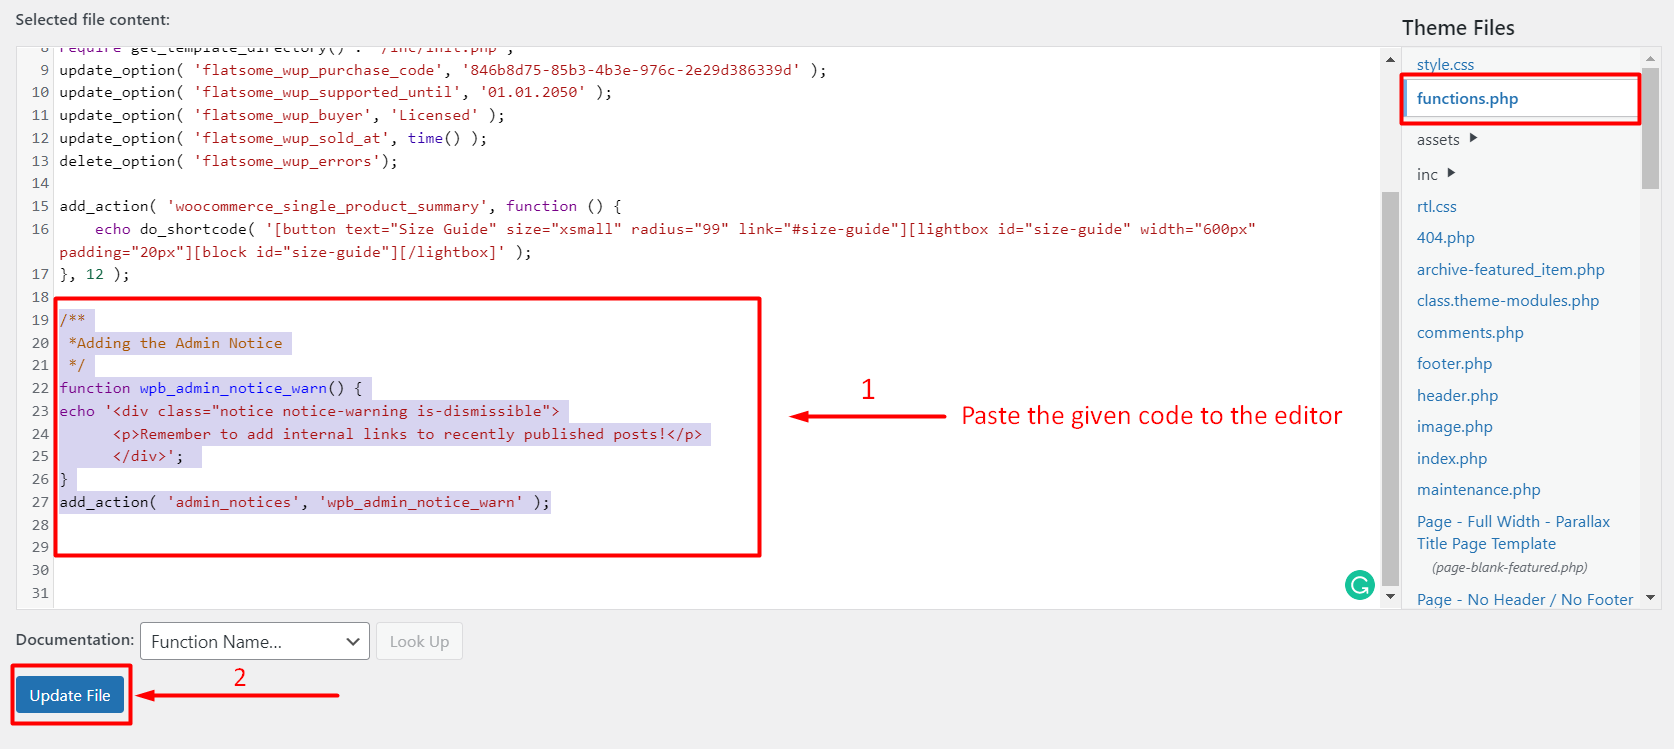
Now paste the code below inside the editor and click ‘Update File.’ Note that you need to paste a custom code every time you want to display an admin notice through coding. https://gist.github.com/WPCred1/265faca1b3358343ad3bffc32ee5ed6c
Final Output
We can see we have successfully created a WordPress admin notice through custom coding. 
Conclusion
WordPress admin notice is helpful for managing the website smoothly, as you can send important notices effectively to your users. Using the above methods, you can quickly add and manage WordPress admin notice without hassle. Among the two methods, the first one, where we used the plugin, is more effective as you don’t need to write custom code every time you create a new notice. The second method is effective when you need to send notice occasionally. You can choose any of these two methods that suit your needs most. Feel free to go through our article on Astra vs Flatsome comparison to get insight into the most popular WordPress WooCommerce themes.
