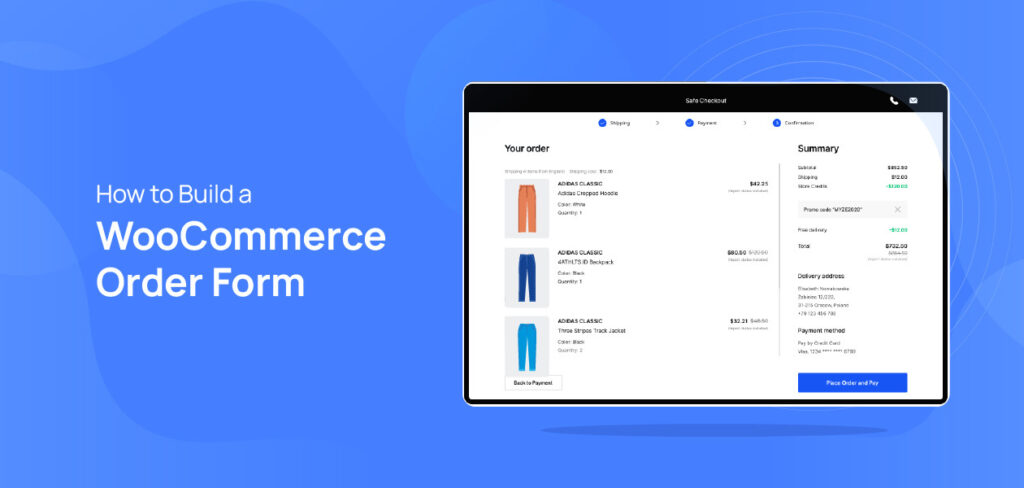
Building a WooCommerce order form is a very clear process. You can easily do it using a WooCommerce plugin. This article will demonstrate how to build a WooCommerce order form using a plugin. We’ll use two different plugins and show individually how to build WooCommerce order forms using those.
You can use any plugin to build the order form. We’re using these two just because they are free to use. No matter what plugin you use, this tutorial will help you to build the order form because most of the plugins work in the same way.
Why Do You Need a WooCommerce Order Form
An eCommerce website handles various types of visitors. Most of the users prefer to roam around the shop page and explore various types of products. But you may face some unique customers who prefer to order in bulk or want to view most products in a very short time.
This is a very tricky situation because you can’t change the whole site for some specific customers. Here comes the WooCommerce order form with a solution. Using it, you can display a maximum of your products easily, also they can order products within a very short time.
How to Build a WooCommerce Order Form Using WooCommerce Product Table Light
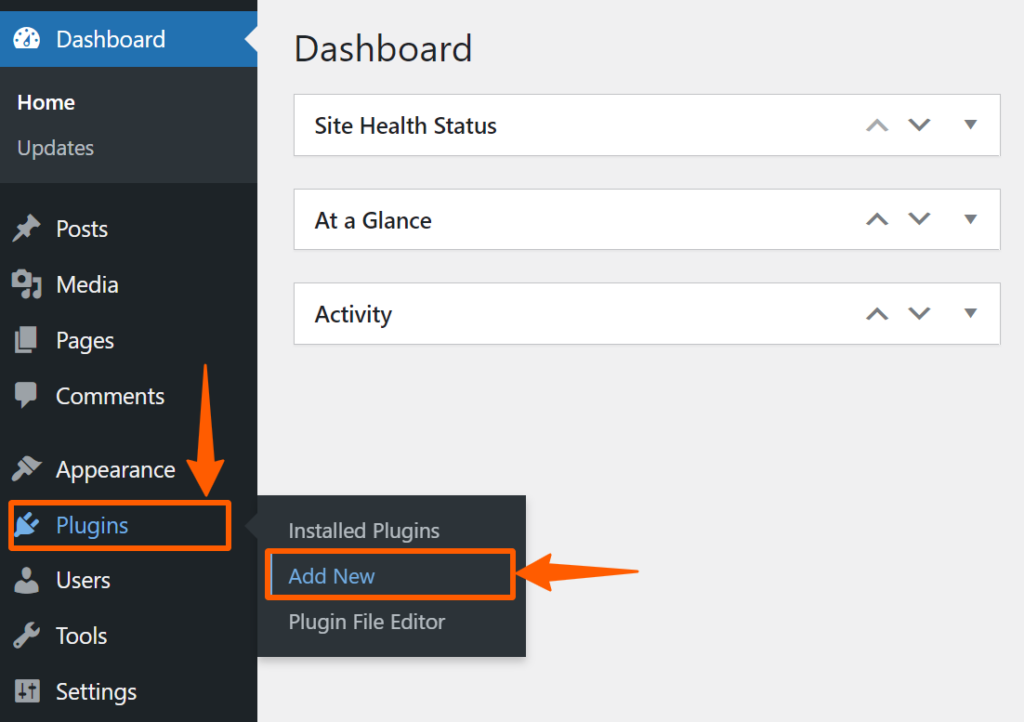
Step 1: Go to the WordPress Dashboard, hover on Plugins, then click Add New.
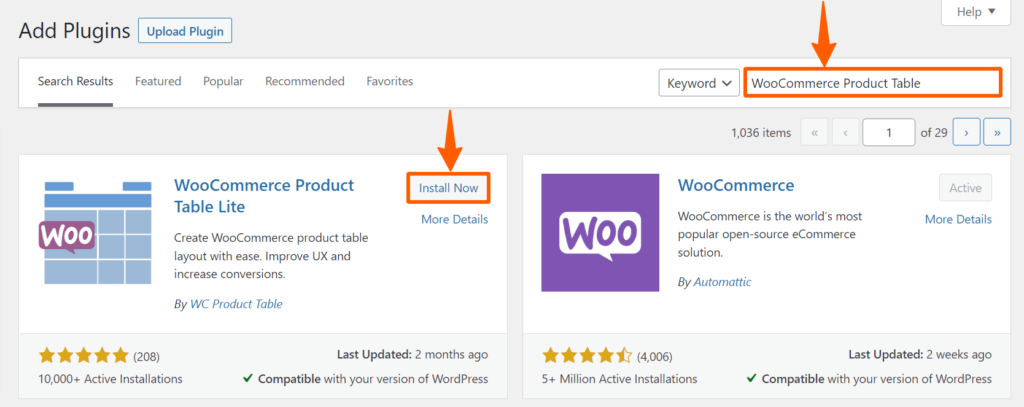
Step 2: You’ll be redirected to the WordPress plugin repository. Search for the WooCommerce Product Table, then install and activate it.
Step 3: After activation, you’ll find a new menu called Product Tables in the WordPress Dashboard Menubar. Hover on it, and click on Add New Table.

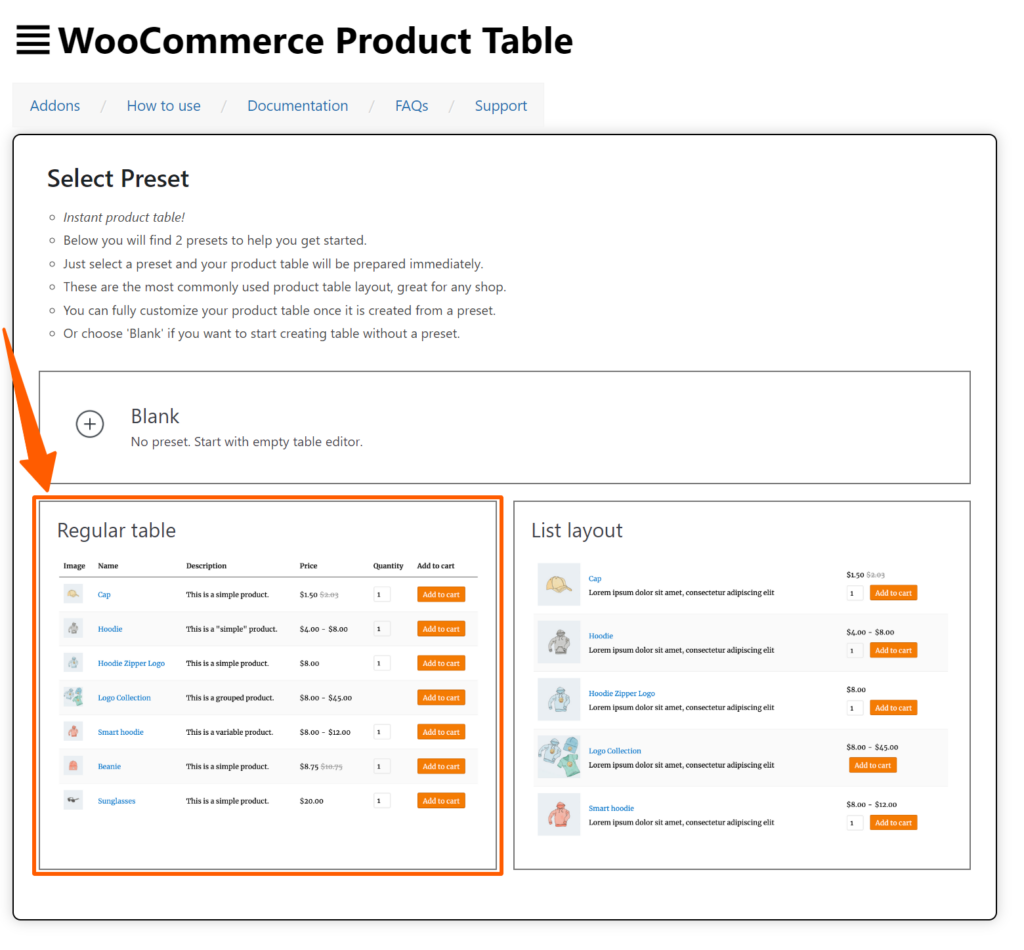
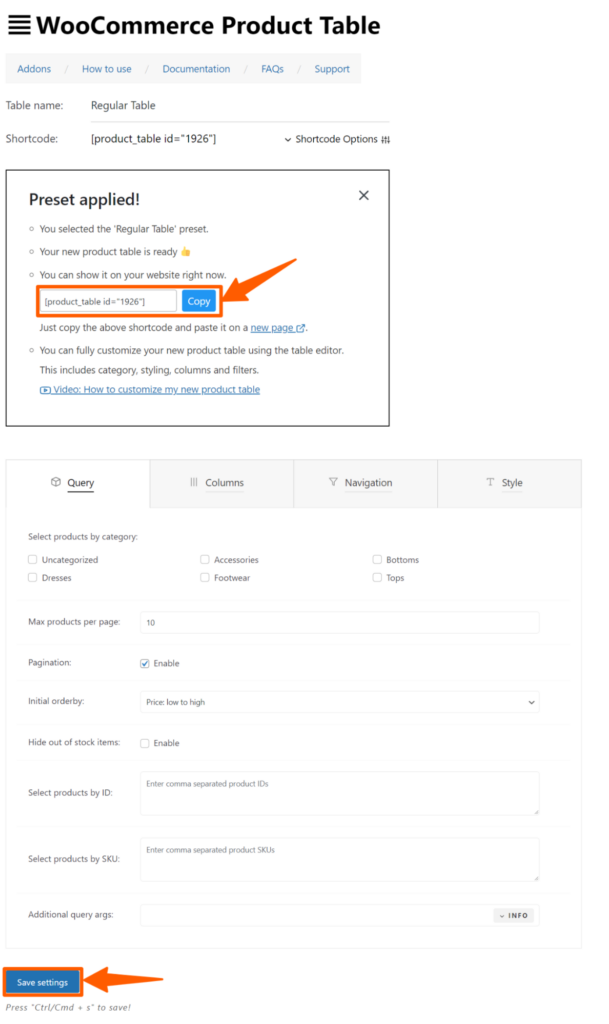
Step 4: Then you’ll find a page, where you can set how you want your product table. You can create a custom one or choose between two from here. We’re choosing the regular one for demonstration purposes.
Step 5: After choosing one, you can also customize various things on that table. Customize it, and click Save Changes at the bottom for saving it. You’ll be given a shortcode of the WooCommerce Product Table. Copy it.
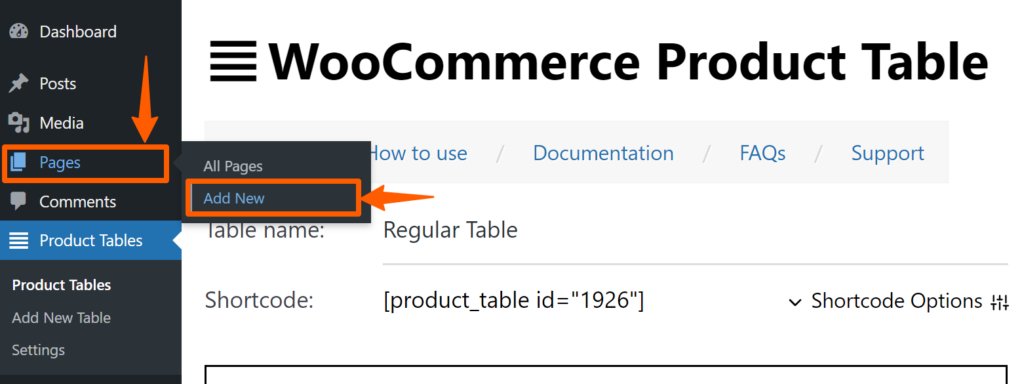
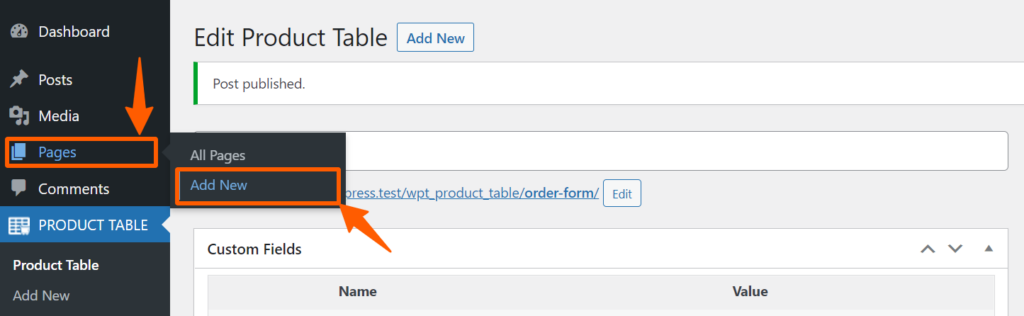
Step 6: Now, you need to create a page, and put the shortcode there. You can also add this shortcode to any existing page. For demonstration purposes, we’ll add a new page.
Hover on the Pages, then click on Add New.
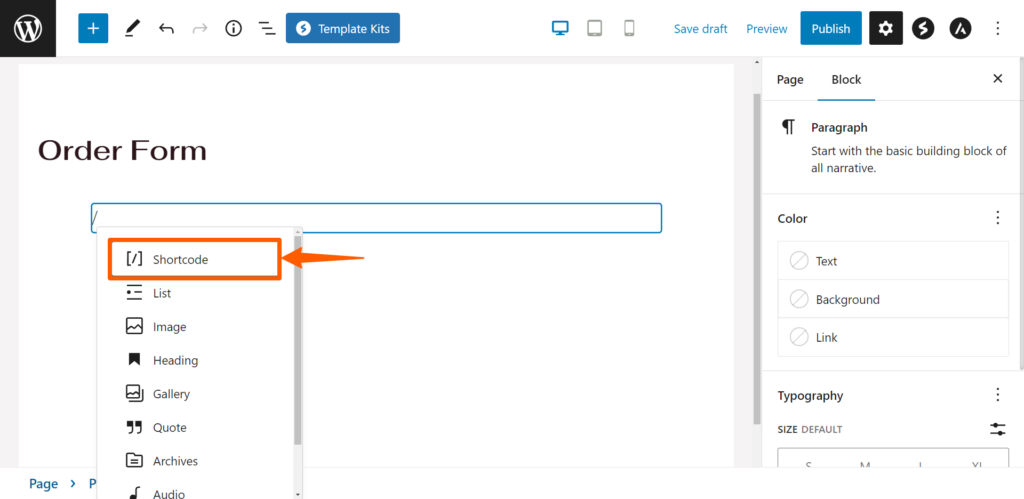
Step 7: Now, give a title of the page as we gave the Order Form. Then Type “/” and various options will come up, select Shortcode.
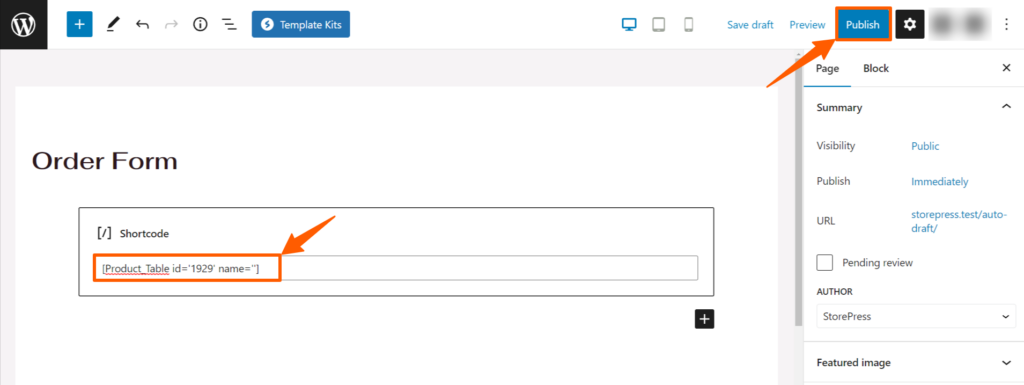
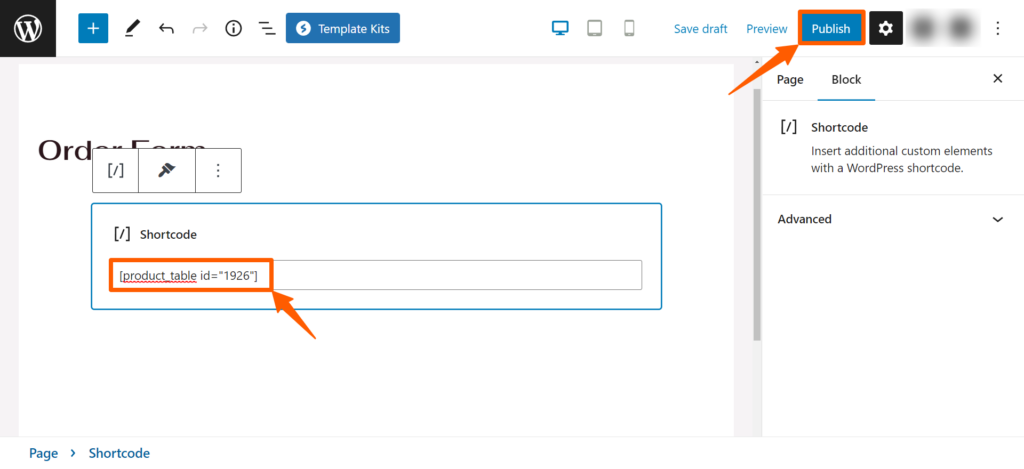
Step 8: Then paste the shortcode, and click on Publish to make it effective.
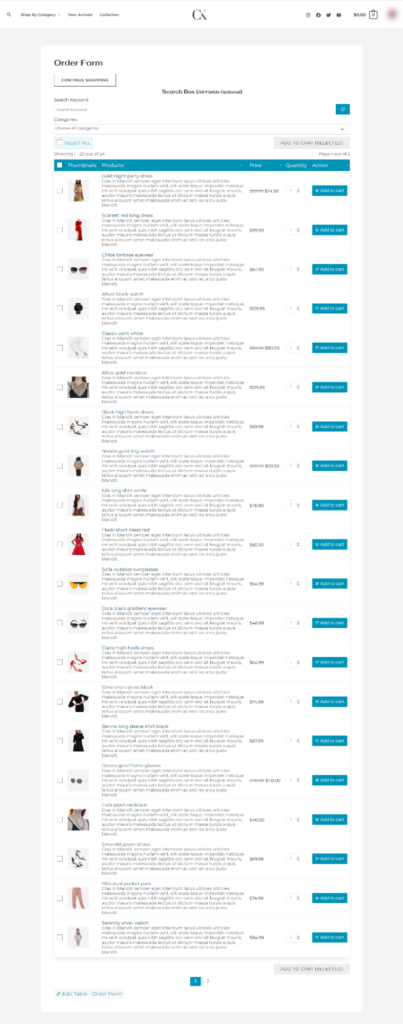
Preview
After publishing, go to the Order Form page, and you’ll see a page like this one.
How to Build a WooCommerce Order Form Using Product Table for WooCommerce
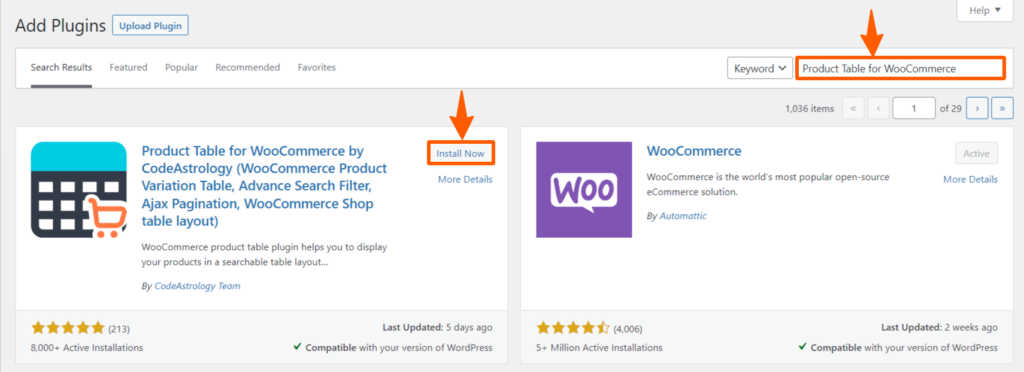
Step 1: Go to the WordPress Dashboard, hover on Plugins, and click Add New.
Step 2: Now, search for Product Table for WooCommerce. Then install, and activate it.
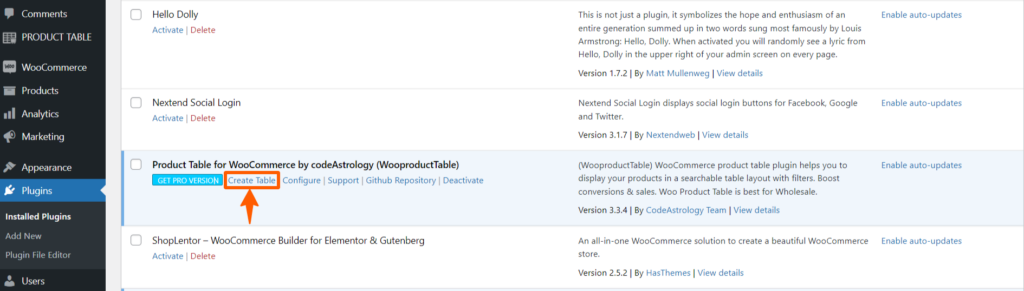
Step 3: After activation, you’ll be redirected to the plugin list page. Click Create Table under the plugin.
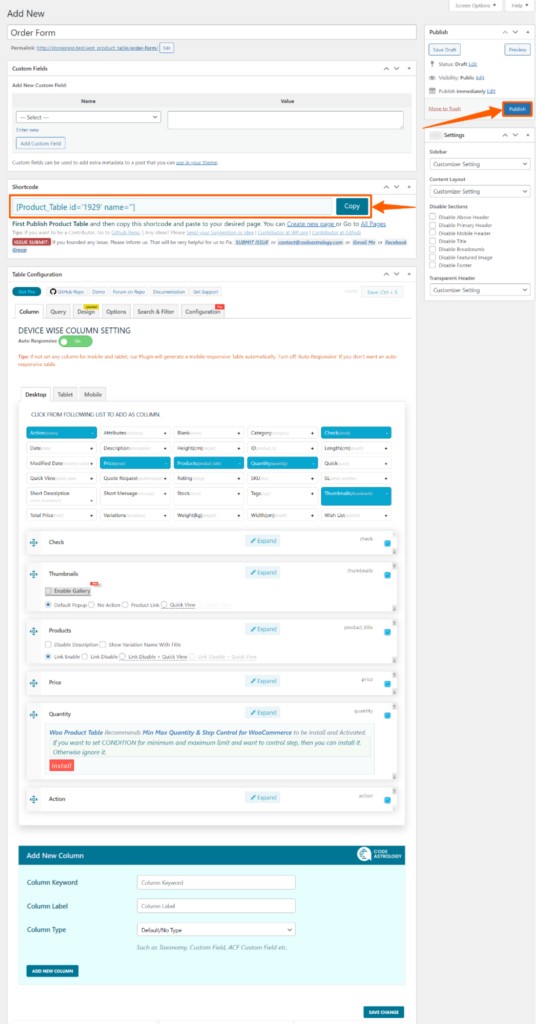
Step 4: A new page will appear. You can edit this page to customize your order form. Also, you can use the default version of it. After customizing, click on the Publish button to publish it. Then copy the shortcode of it.
Step 5: Now, hover on the Pages, and click on Add New.
Step 6: A new page will be created. Give a title as you want, then type “/” and select shortcode from the options.
Step 7: Now, paste the shortcode here, then click Publish button.
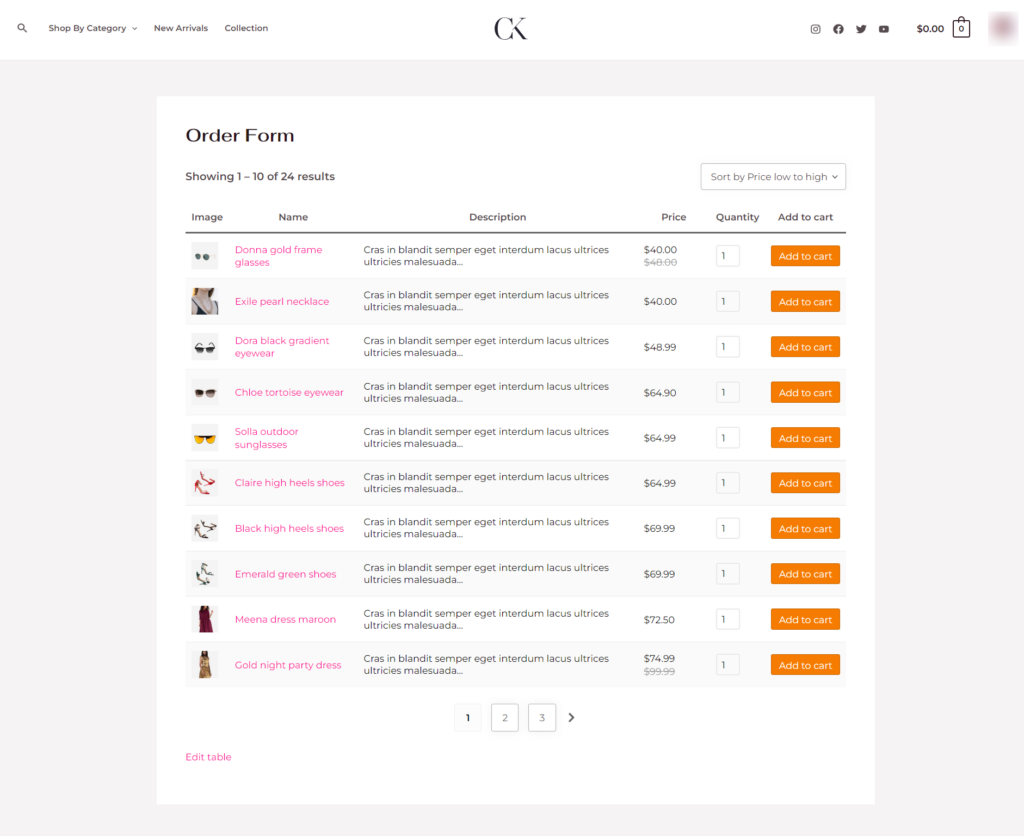
Preview
Now, your Order Form page will look like this.
Conclusion
We’ve demonstrated to build a WooCommerce order form on a new page. But you can also add them to any existing page. In that case, just add the shortcode where you want to add the order form and save it. Unfortunately, you won’t have any preview of that. It’ll be only visible after saving or publishing it.
We hope that you’ve successfully added the WooCommerce form to your eCommerce website without any issues. In case you’re facing any issues, feel free to reach us. We’re ready to help. If you’re trying new things in WooCommerce, try the useful WooCommerce plugins to grow more.