An invoice contains information about the purchase, and Packing Slip contains information about the product delivery. Both are very important for any eCommerce website. Creating those manually is a hassle. Adding a plugin that automatically generates WooCommerce PDF invoices and packing slips for each product can make the process smoother, and you can easily embed PDF in WordPress by following some steps.
Why Do You Need Invoices & Packing Slips?
A seller must provide an invoice while selling any product. It’s proof of buying, which the seller is legally obliged to provide. Besides that, it helps to create documentation of sales. Even you can use this for business analytics. Moreover, packing slips are more important for you than your user. It makes product delivery easy and effortless. So, to keep things easy and legal, you must use invoices and packing slips. In this tutorial, we’ll demonstrate how you can add PDF Invoices & Packing Slips to your WooCommerce site. For demonstration purposes, we’ll use the plugin “PDF Invoices & Packing Slips for WooCommerce” you can use any plugin that does the job. In most cases, the process is pretty similar.
How to Create WooCommerce PDF Invoices & Packing Slips
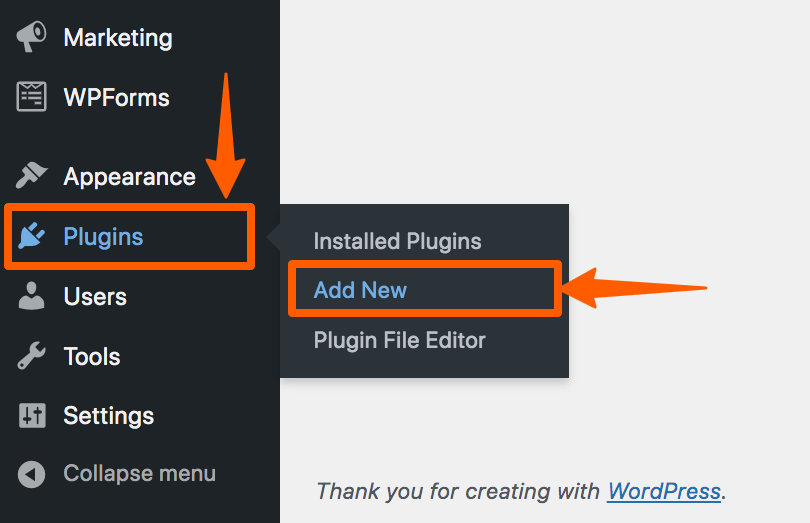
Step 1: Go to the WordPress Dashboard, hover on the Plugins and click Add New to add a new plugin.
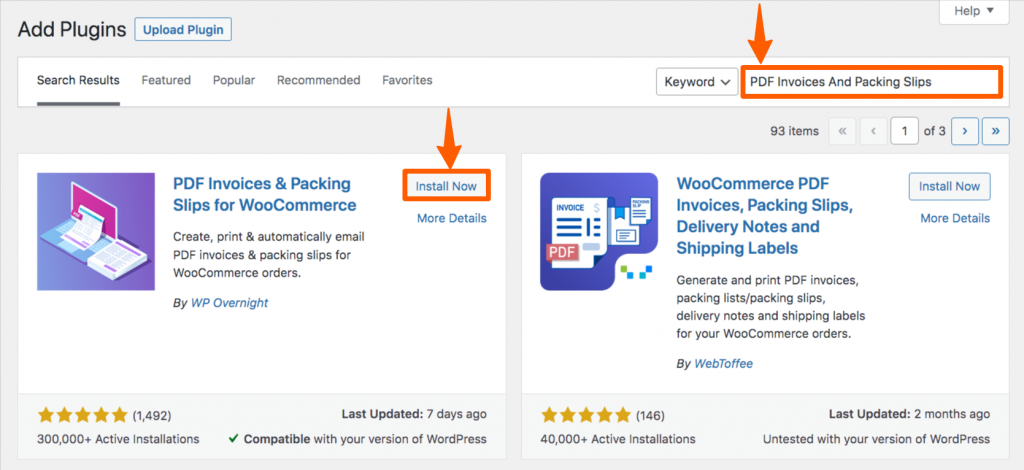
Step 2: You’ll be redirected to the Plugin page. Then install and activate PDF Invoices & Packing Slips for WooCommerce. If you struggle to install it, follow our complete WordPress plugin installation guideline.
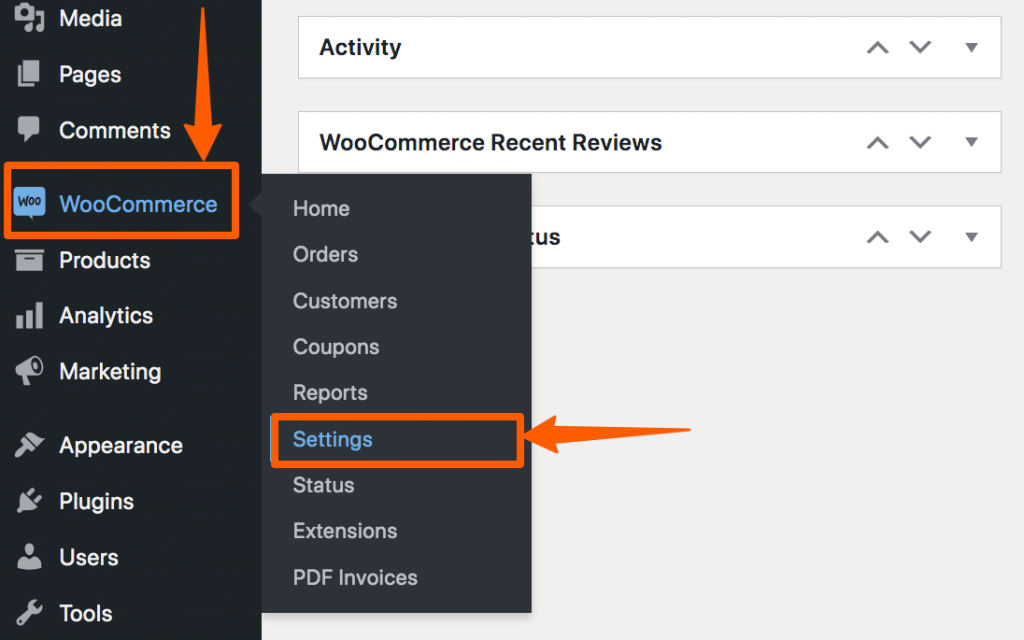
Step 3: After activating it, go to the WordPress Dashboard again, hover on WooCommerce, and click on Settings.
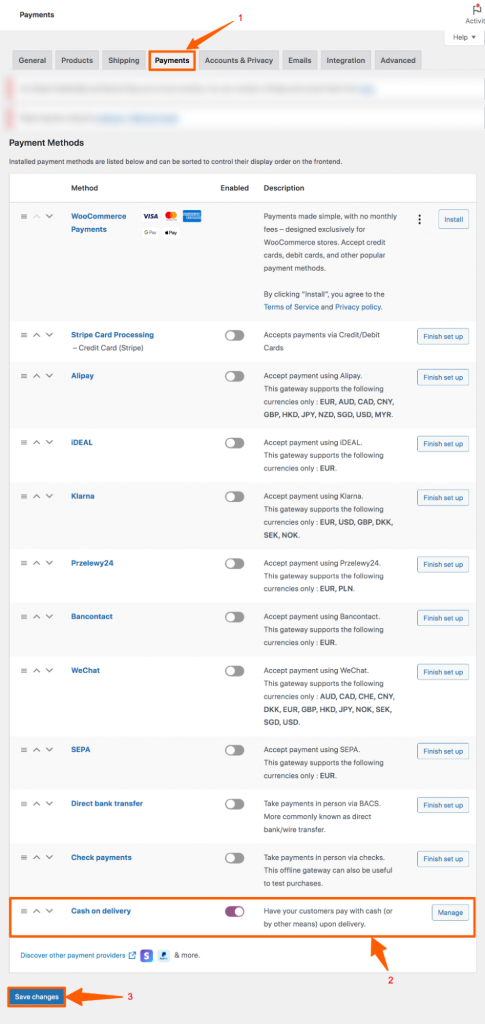
Step 4: A new section of settings will appear. Click on the Payments option, and select any payment method of your choice. If you’re uncomfortable with online transactions, you can try cash on delivery. You can find it at the bottom. You can also try multiple payment methods for your shop. For demonstration purposes, we’re using Cash On Delivery. After selecting a payment method, scroll to the bottom and click Save Changes.
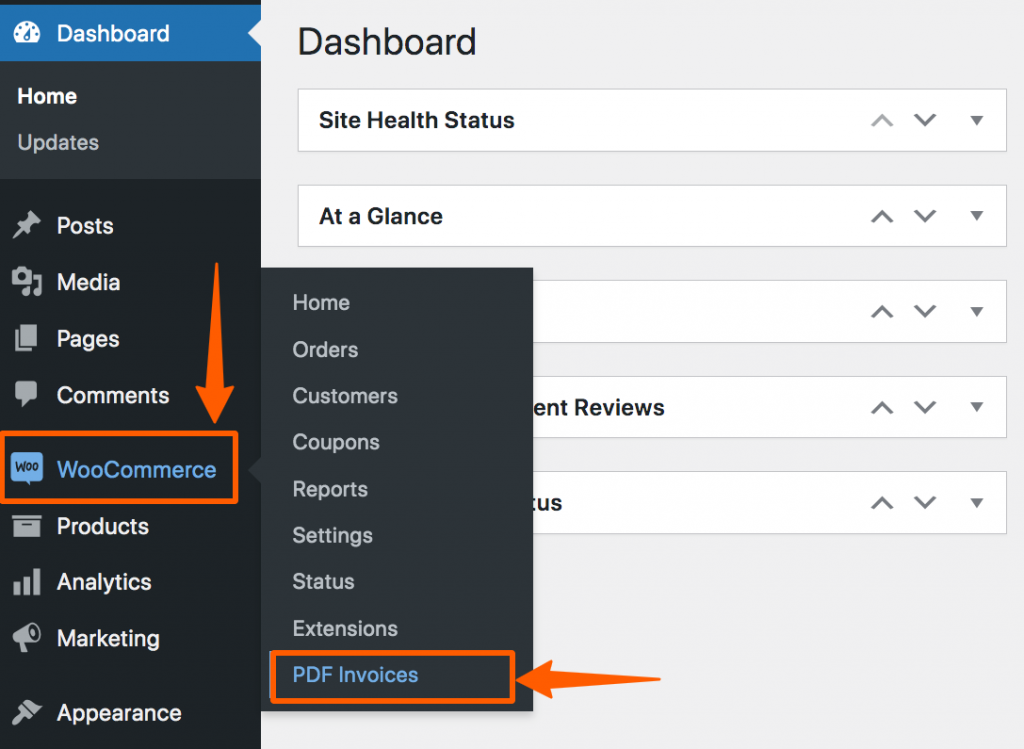
Step 5: Now go to the Dashboard again, hover on WooCommerce, and click PDF Invoices.
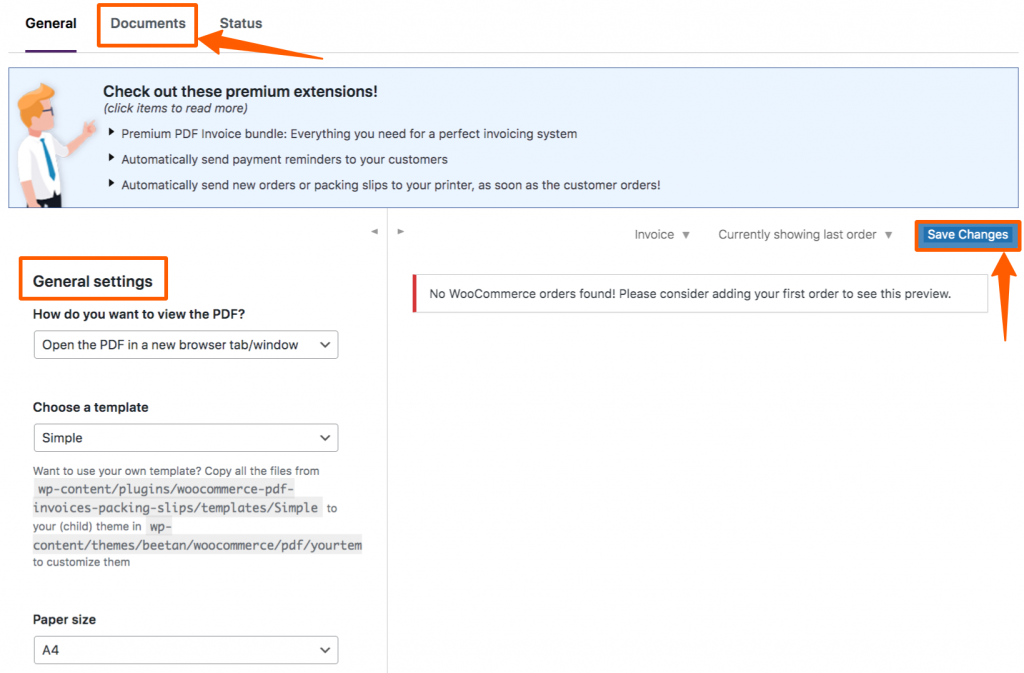
Step 6: You’ll find General Settings on the left. Fill up the forms according to your info. Then click Save Changes. After that, click on Documents on the top.
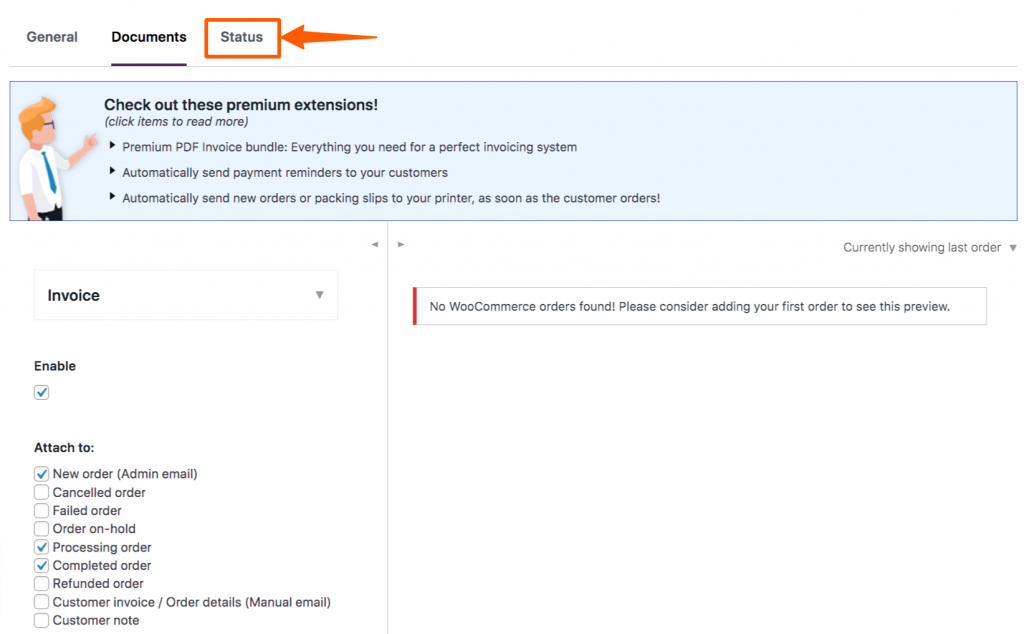
Step 7: Now, in the Document section, you can set in which situations the Invoice and Packing Slip will be generated. After enabling, and setting when it’ll be generated, click on Save Changes at the bottom and go to the Status section.
 Step 8: You can enable and disable some sections from here, such as guest access, automatic clean-up, document preview, etc. Save Changes after that.
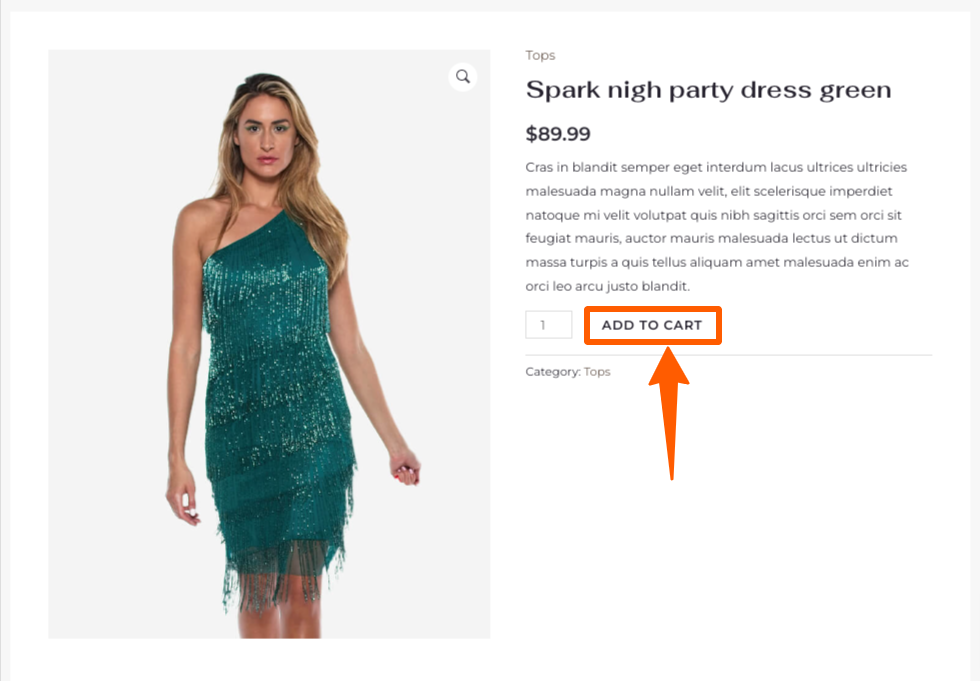
Step 9: Now, let’s find out how you can get the PDF Invoices and Packing Slips. Go to the site, and select any product for purchase. Click ADD TO CART.
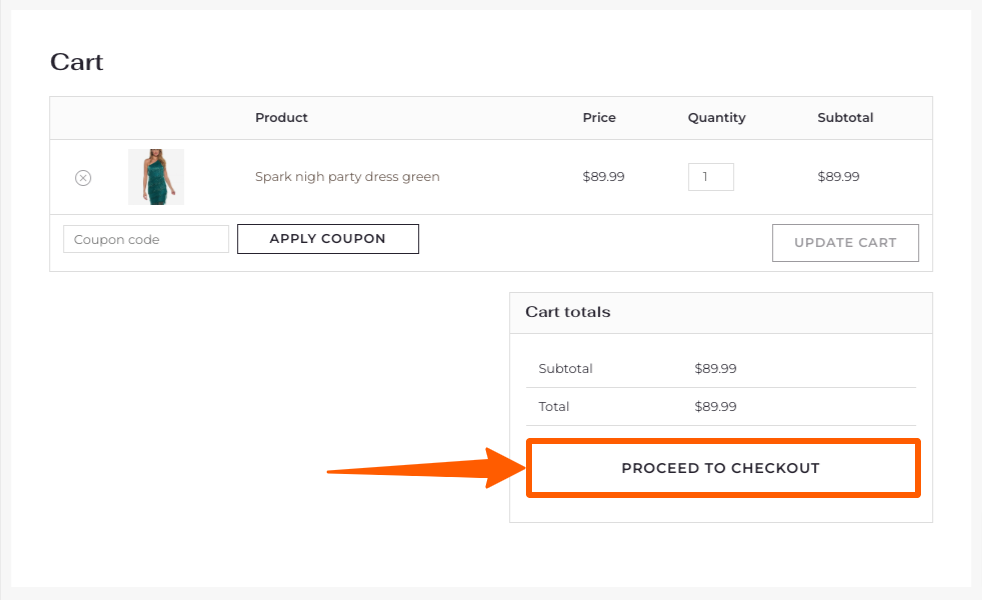
After adding it to the cart, click on proceed to checkout.
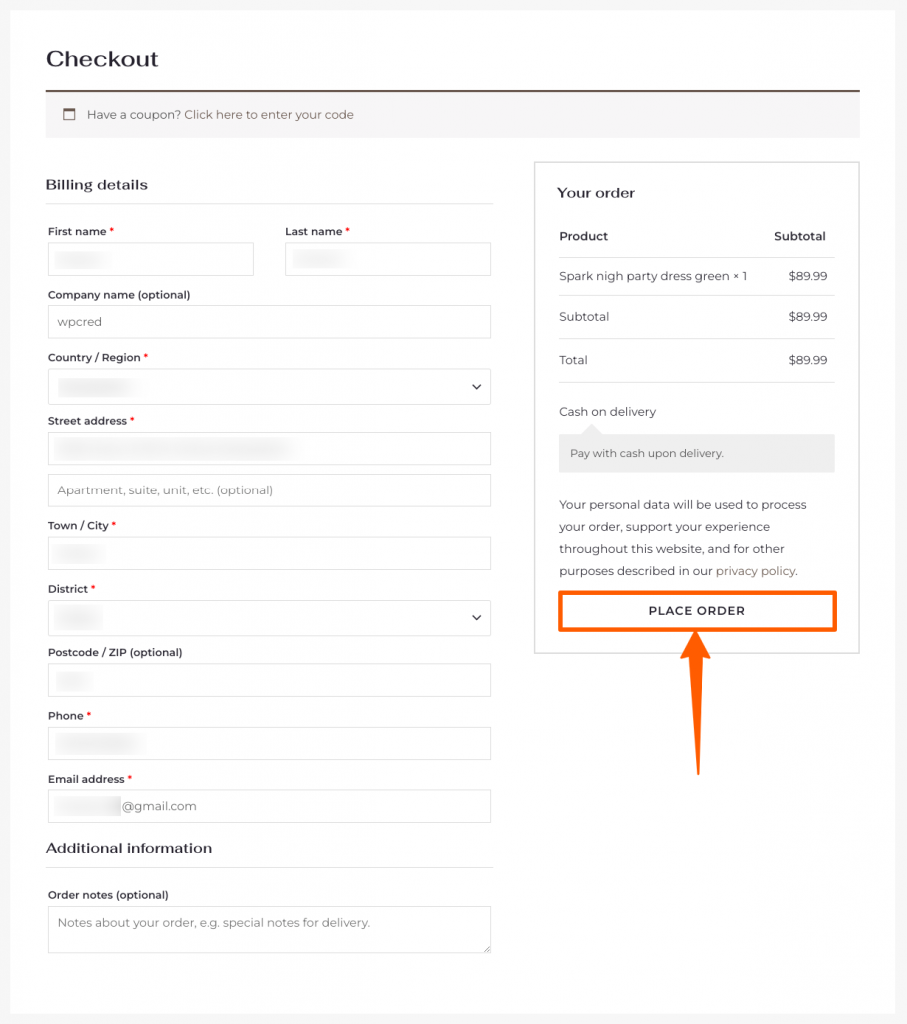
Give the information and place the order.
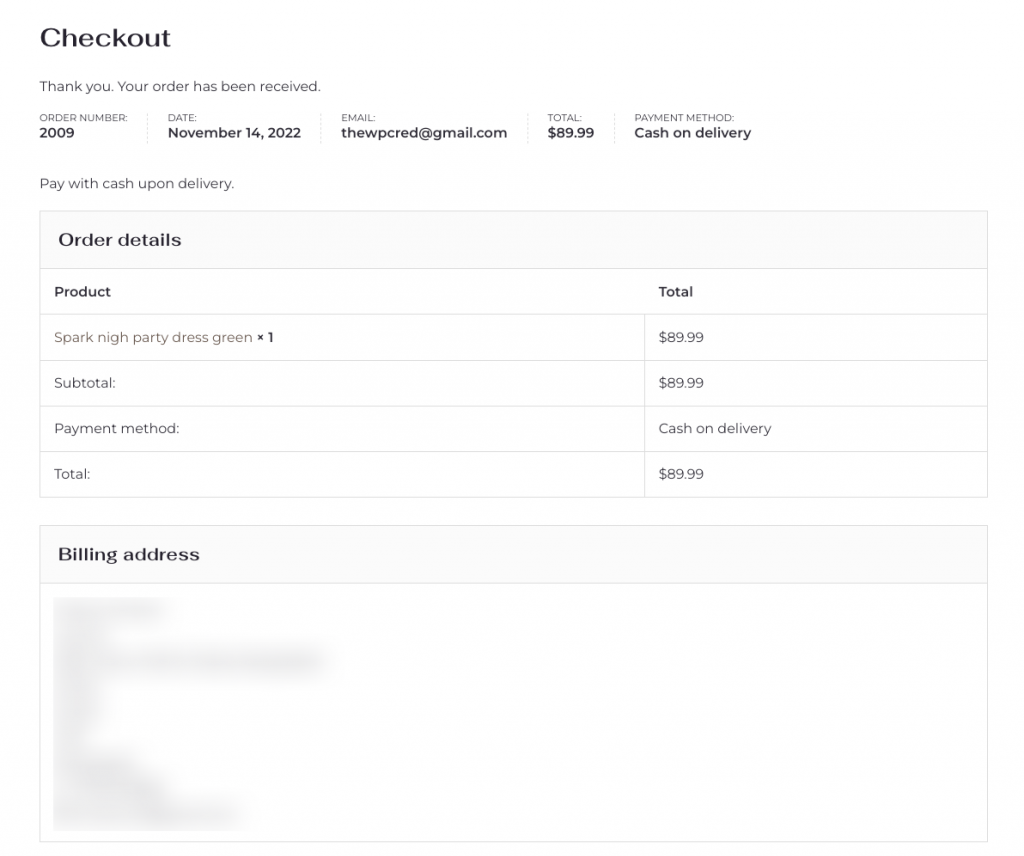
Now, you’ve successfully ordered a demo order to the site
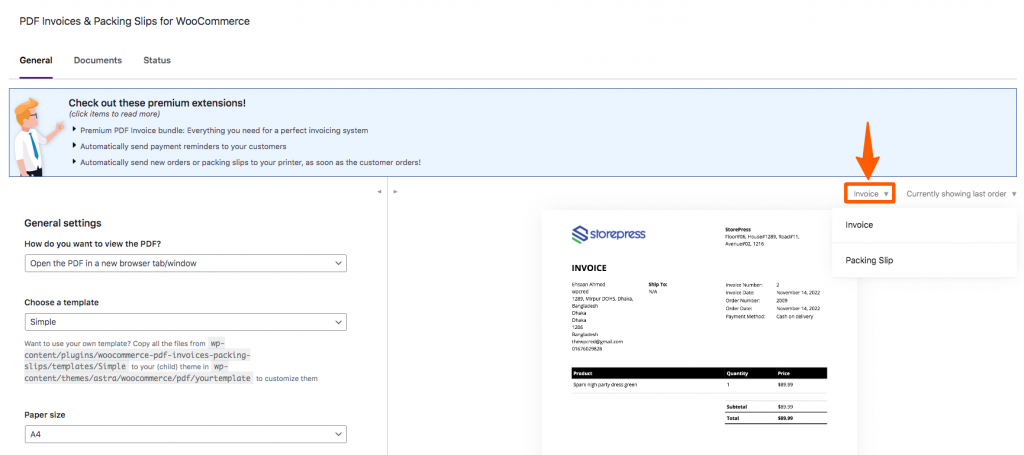
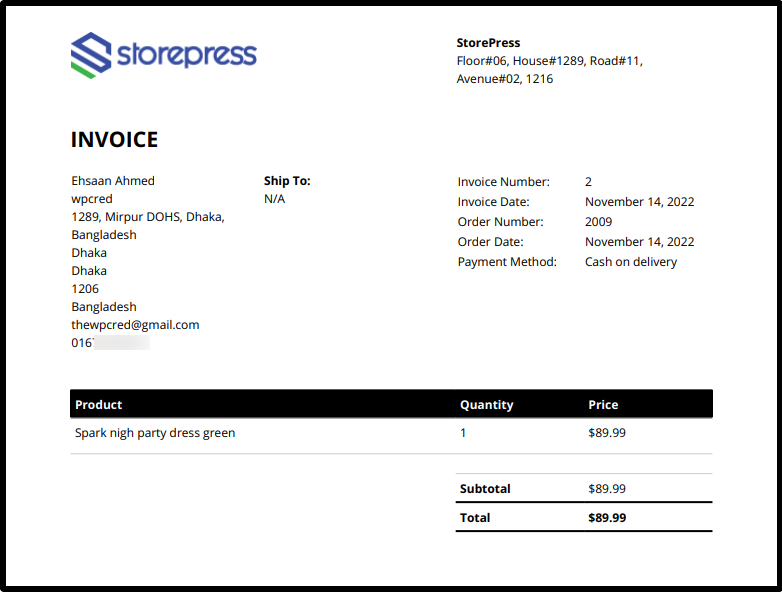
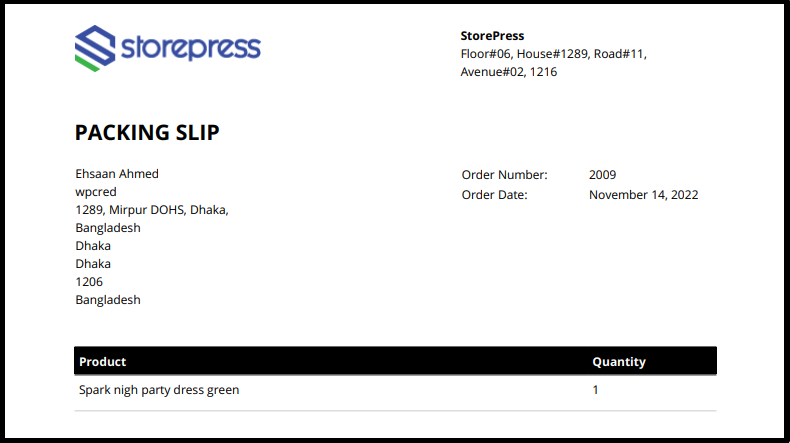
If you keep a different tab opened for PDF Invoices, you’ll find a preview of the Invoice for this order. You can also view the Packing Slip of that.
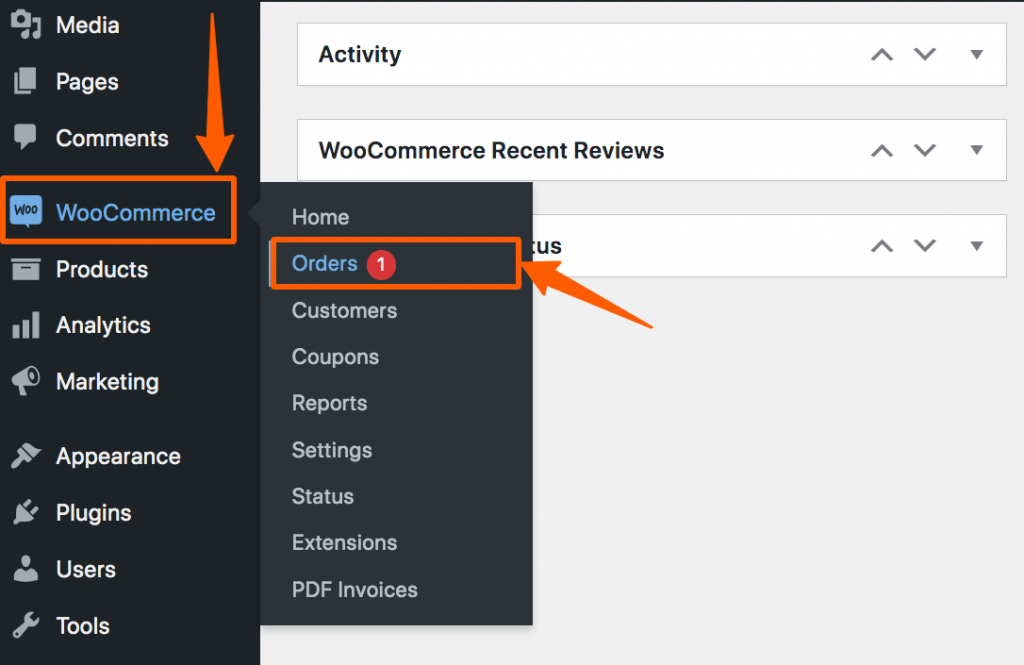
Step 10: Now, go to the WordPress Dashboard, hover on WooCommerce, and click Orders.
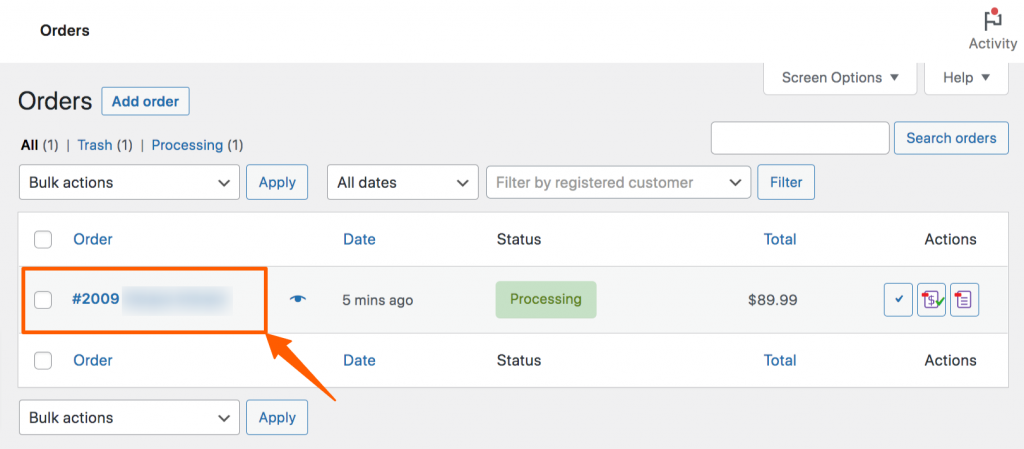
Step 11: You can see your orders from there. From there, click on order you just added. Generally, you will see the orders of your customers here. You can view and edit the order from there.
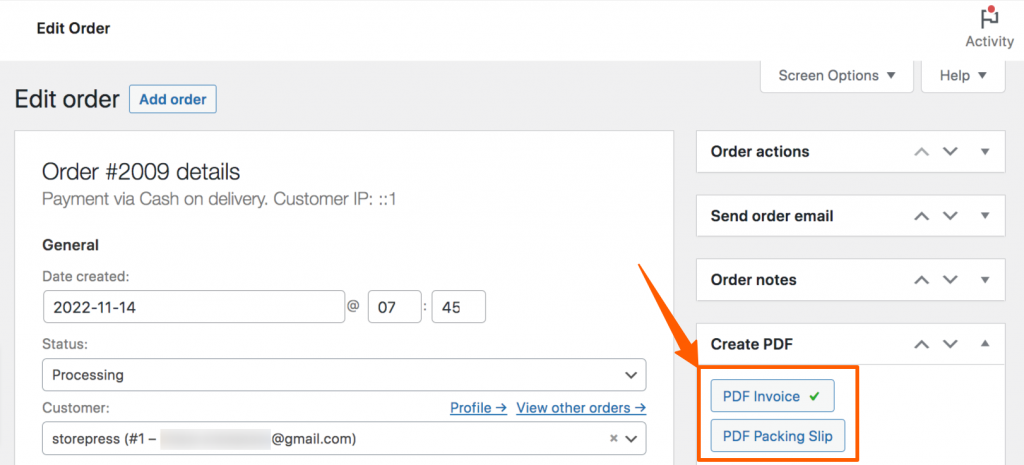
Step 12: Now, in this order, you’ll find two buttons on the right side under Create PDF section. You can download PDF Invoice & Packing Slip by clicking those buttons.
Preview The PDF Invoice and Packing Slip will look like this.
Conclusion
When using this plugin, also consider using a shipping plugin for WooCommerce. It’ll help you to adjust the shipping cost. .Automatically generated invoices and packing slips cut off huge hassles for eCommerce owners. Adding this can help you to be more efficient and make the process faster & smooth and you can also add Woocommerce plugin list that you need most. If you’re facing any issues while following this tutorial, feel free to let us know. We’ll try our best to help you.
