Integrating QuickBooks with WooCommerce is a straightforward process. You can integrate Quickbooks with WooCommerce using the WordPress dashboard and WooCommerce dashboard. We’ll demonstrate the most straightforward way to do that. If QuickBooks is something new to you, let’s get introduced to it before starting!
What Is QuickBooks?
QuickBooks is an accounting-based software solution that has made accounting easy for general people. It offers both cloud-based and non-cloud-based solutions for small and medium-sized businesses.
How Can It Help You?
QuickBooks has been helping too many local businesses since 1983. With time, they’ve upgraded themselves to be advanced. Now, they’ve got cloud-based solutions for websites. Using that, you can easily visualize your data, maintain your transaction, and calculate using a single hood. You don’t need to know accounting to run a WooCommerce store.
How Does It Work?
To use a cloud-based solution of QuickBooks, you need to create an account on quickbooks.com. Then you can manage your transactions and other financial matters from their dashboard. If you’re using a CMS, you need to install the app inside of your QuickBooks account, then integrate it with your website via the app. After that, you can see the data in your QuickBooks dashboard.
Benefits of Using QuickBooks
- Financial errors can be found very easily
- Highly customizable for calculating
- Supports most of the CMS platforms
- Easy to calculate transactions during an audit
How to Integrate Quickbooks with WooCommerce
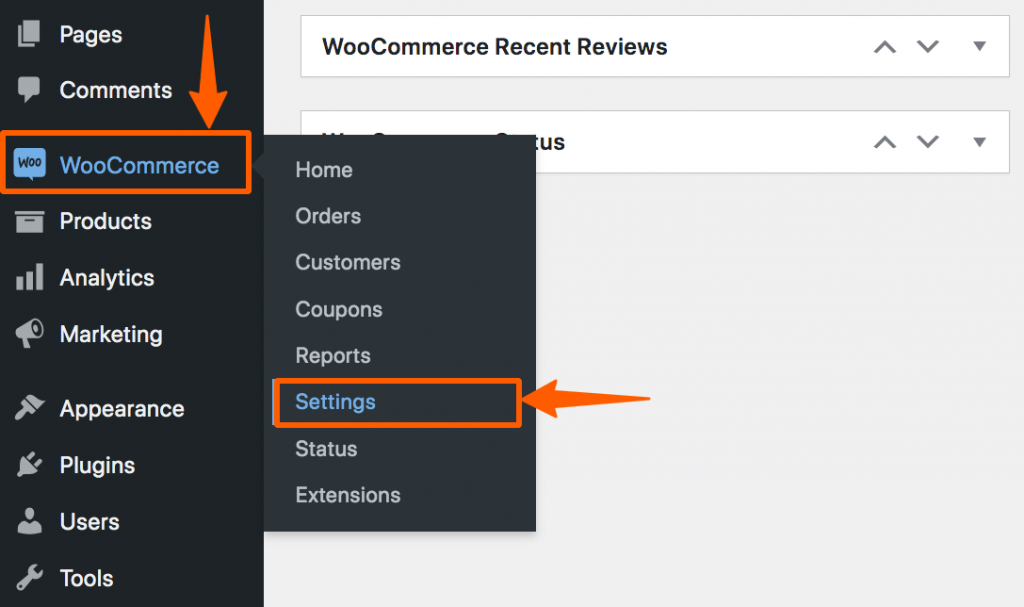
Step 1: Go to your WordPress Dashboard, hover on the dashboard menu WooCommerce, and click on Settings.
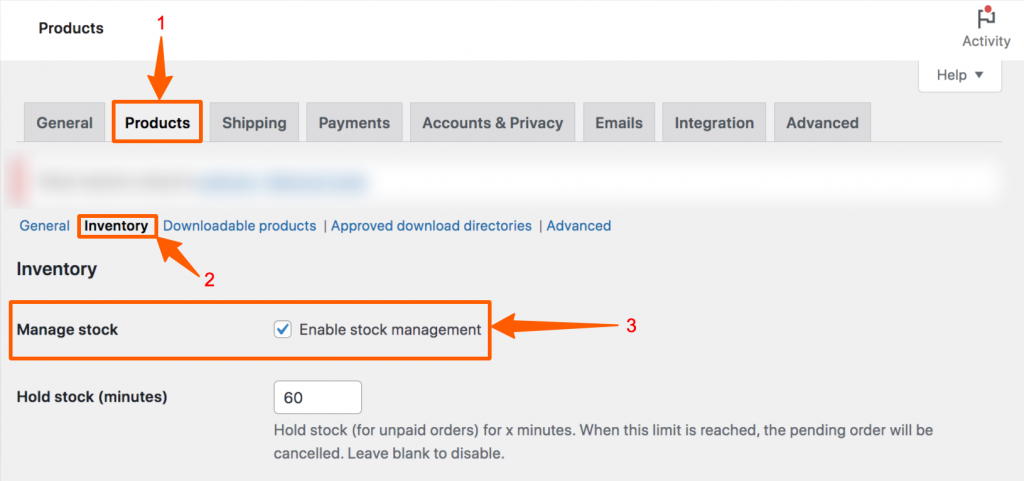
Step 2: Then, you’ll find the setting page. On that page, click on the Products section. Then click on Inventory to go to Inventory. In that section, Enable stock management.
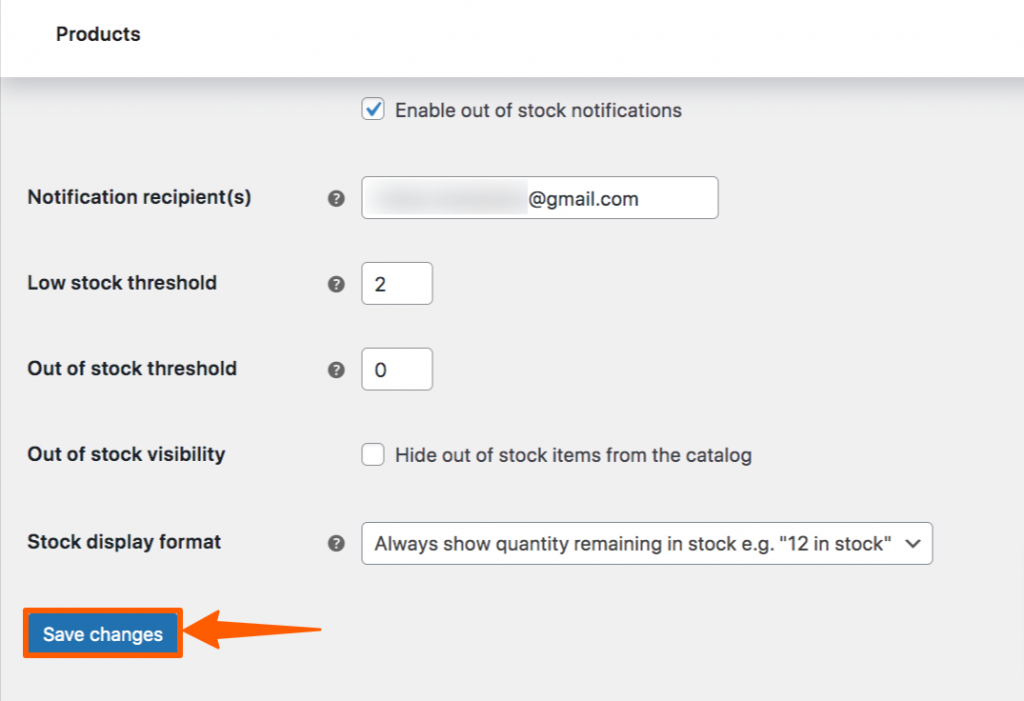
Step 3: After that, scroll down and find various stock functions. Click on Save changes to enable stock management.
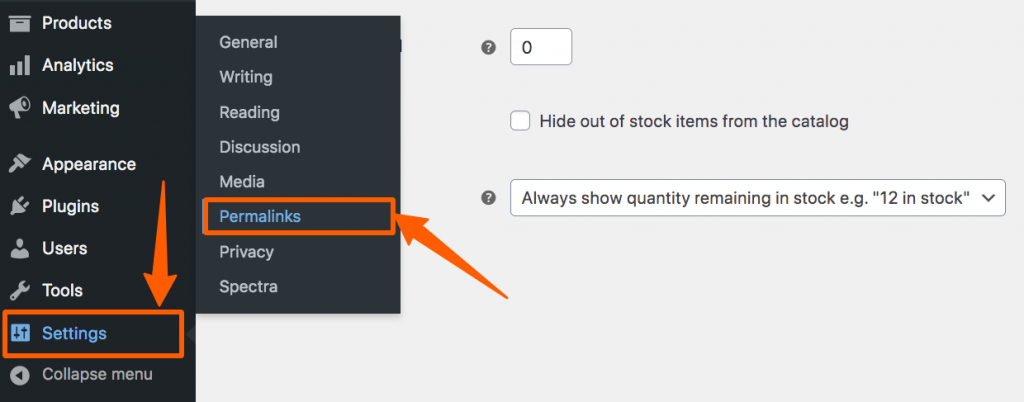
Step 4: Now, go to the Dashboard again. From the menu, hover on Settings, and click on Permalinks. You have to change permalinks in WordPress.
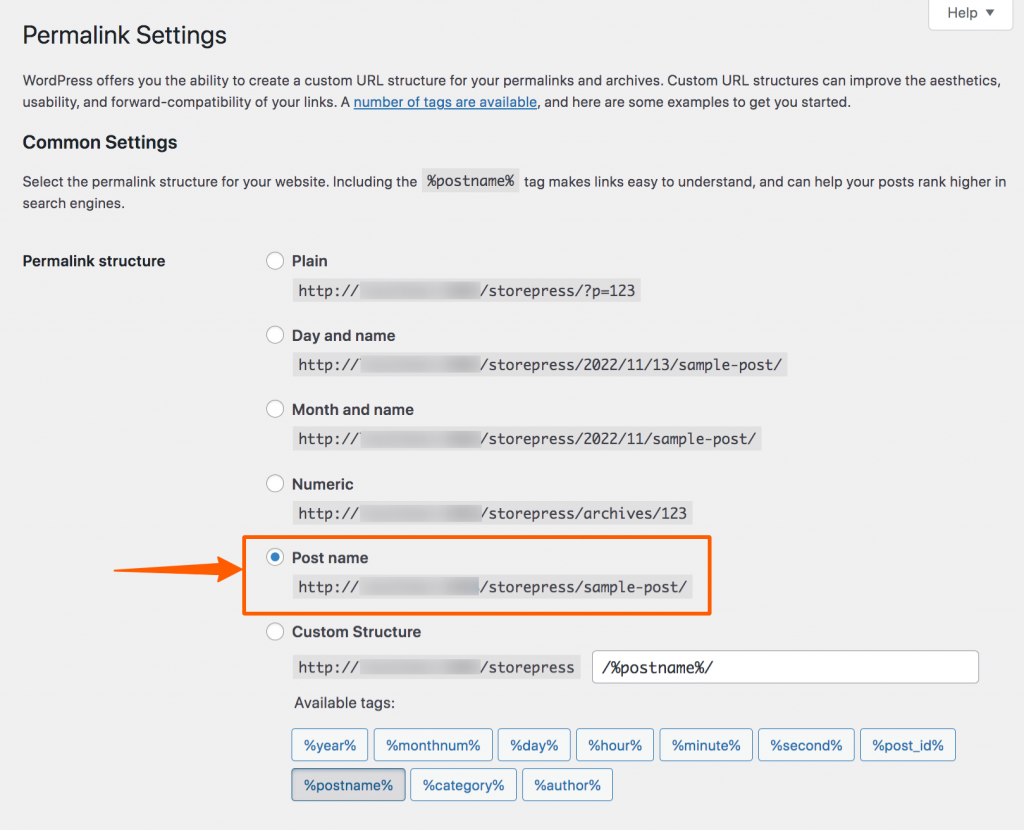
Step 5: Now, select the Post name as the Permalink structure
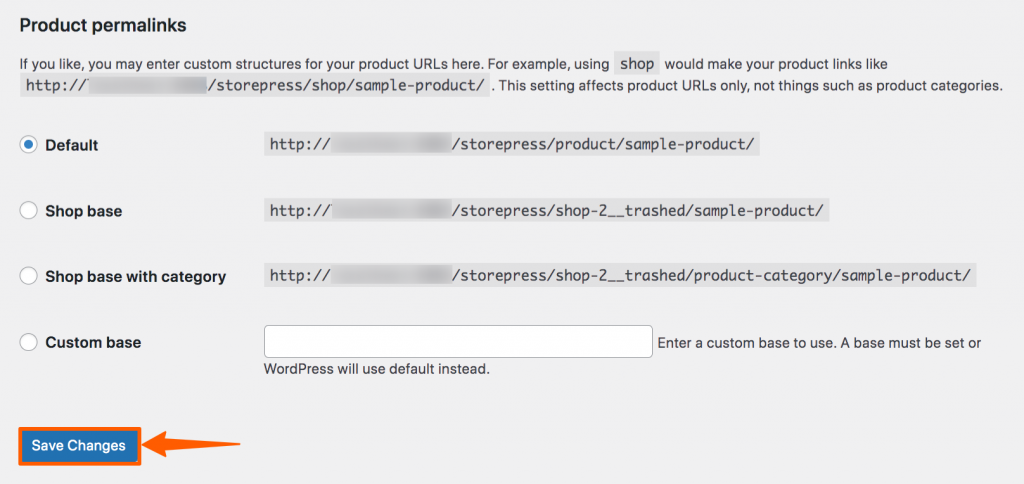
Step 6: Then scroll down and click Save Changes.
Step 7: Log In to QuickBooks. If you don’t have an account, create one. QuickBooks doesn’t offer any free services, so you need to purchase a plan to use it. If you want to use it for free, you can choose any plan and use it for free for the first 30 days(no card information required).
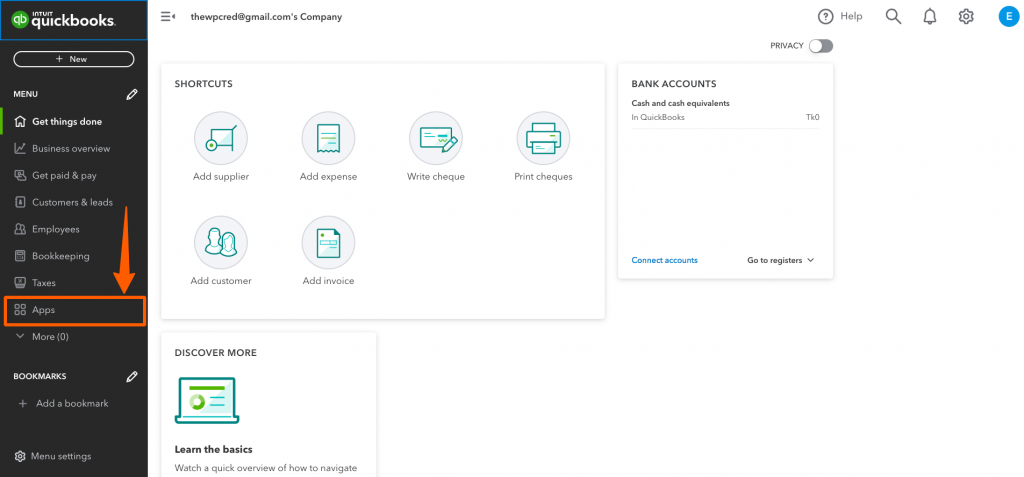
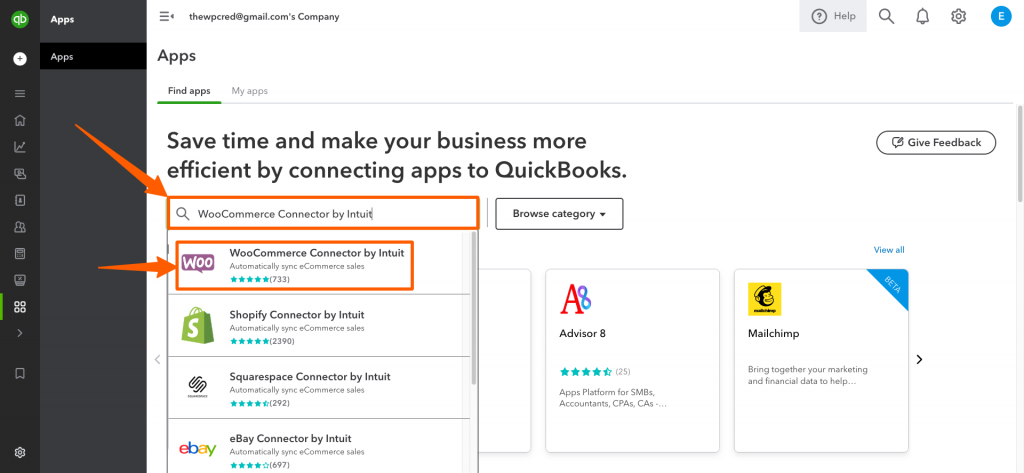
After logging in, you can find a dashboard like WordPress. Find the dashboard menu Apps. Click it.
Step 8: Now, you’ll find an app store. Search for WooCommerce, and you’ll find the app named WooCommerce Connector by Intuit.
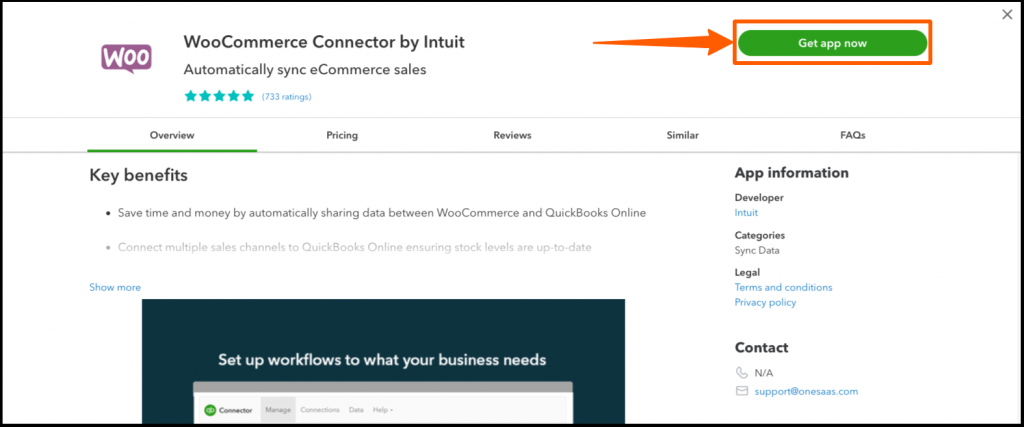
Step 9: Click on that, then install the app by clicking on Get app now.
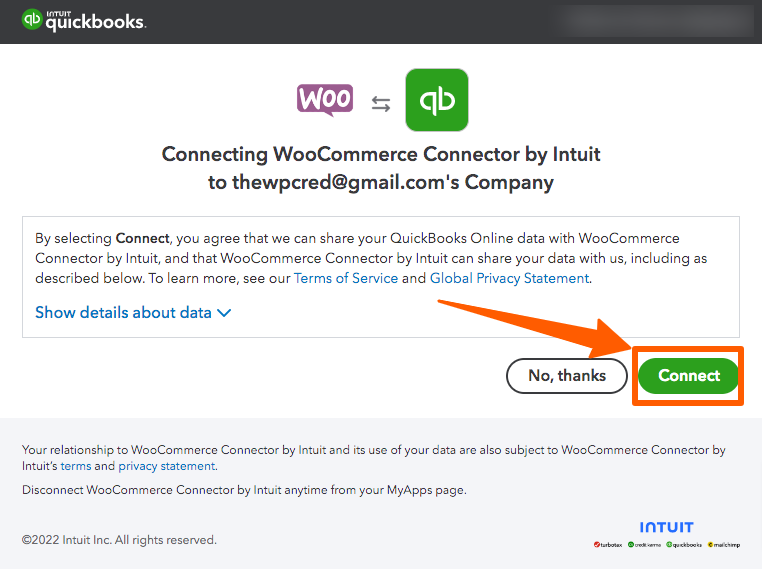
Step 10: After installing WooCommerce, it’s time to connect it with your site. Click on the Connect button to continue it.
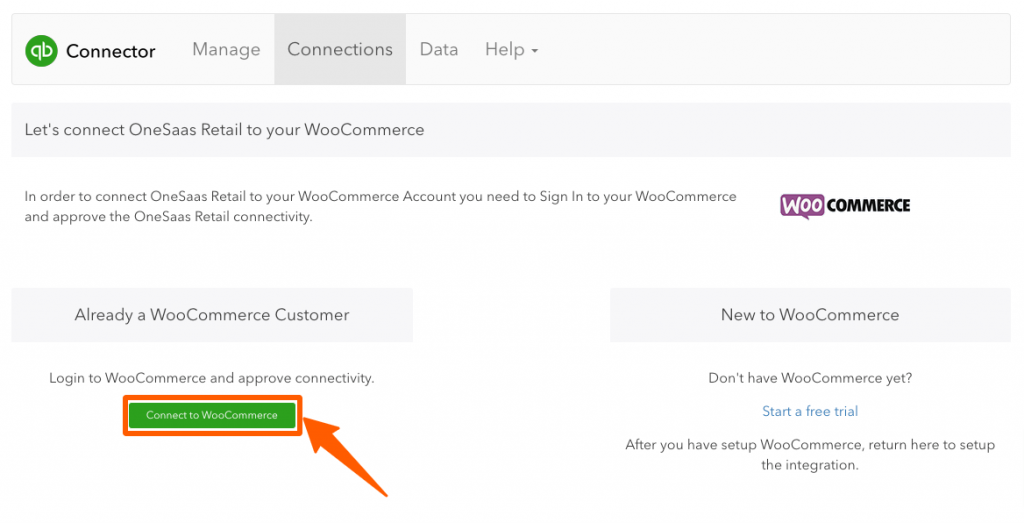
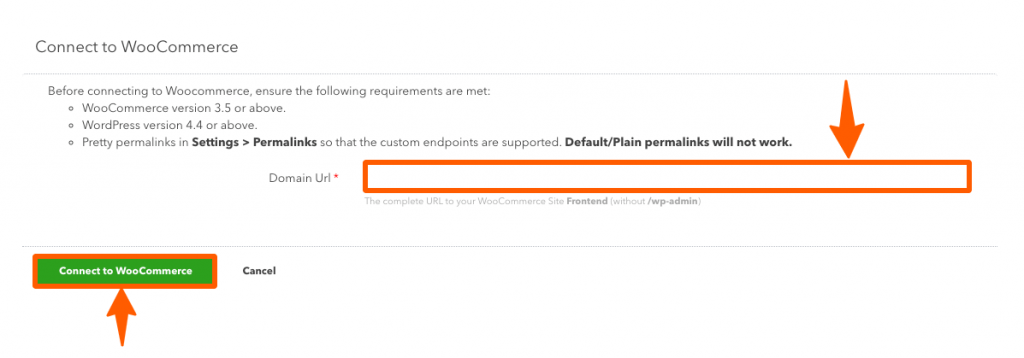
Step 11: Now, click on Connect to WooCommerce.
Step 12: Type your website’s URL here and click connect to WooCommerce.
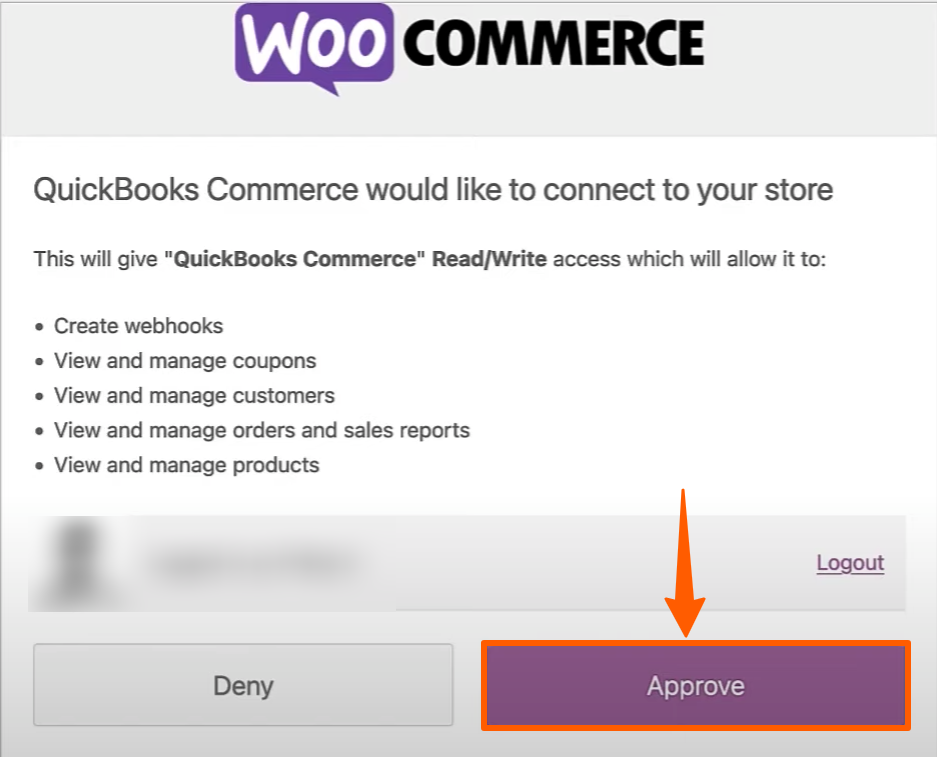
Step 12: Now, go to your WordPress Dashboard. There, you’ll find a pop-up asking permission to integrate with QuickBooks. Click on Approve to give permission.
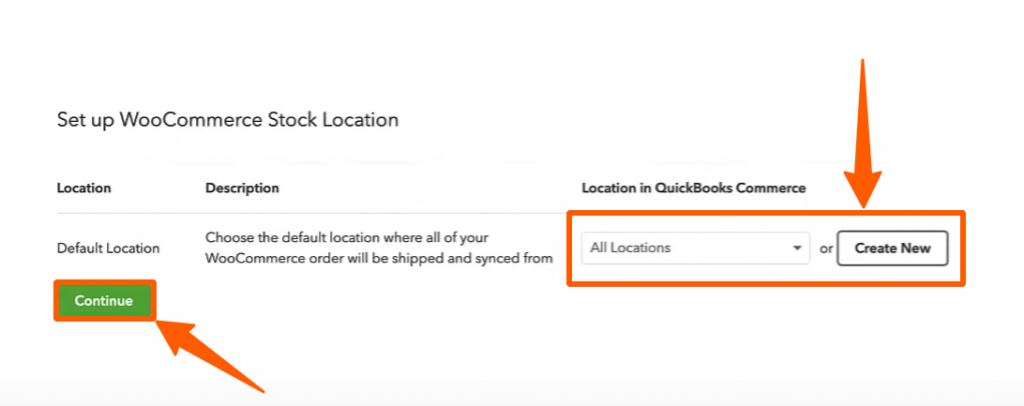
Step 13: After approval, go to the QuickBooks dashboard again. You’ll find a new function where you can add locations and create new stock. After filling them up, click on Continue.
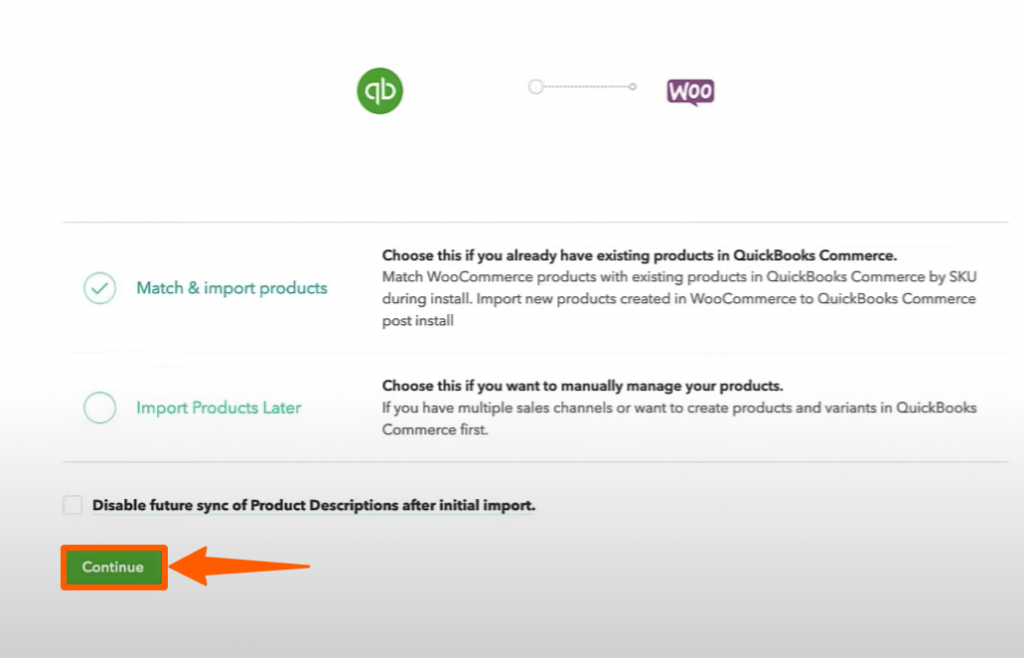
Step 14: A new page will appear where you can select when to import your products. Also, you can disable sync after the initial import. After selecting, click Continue.
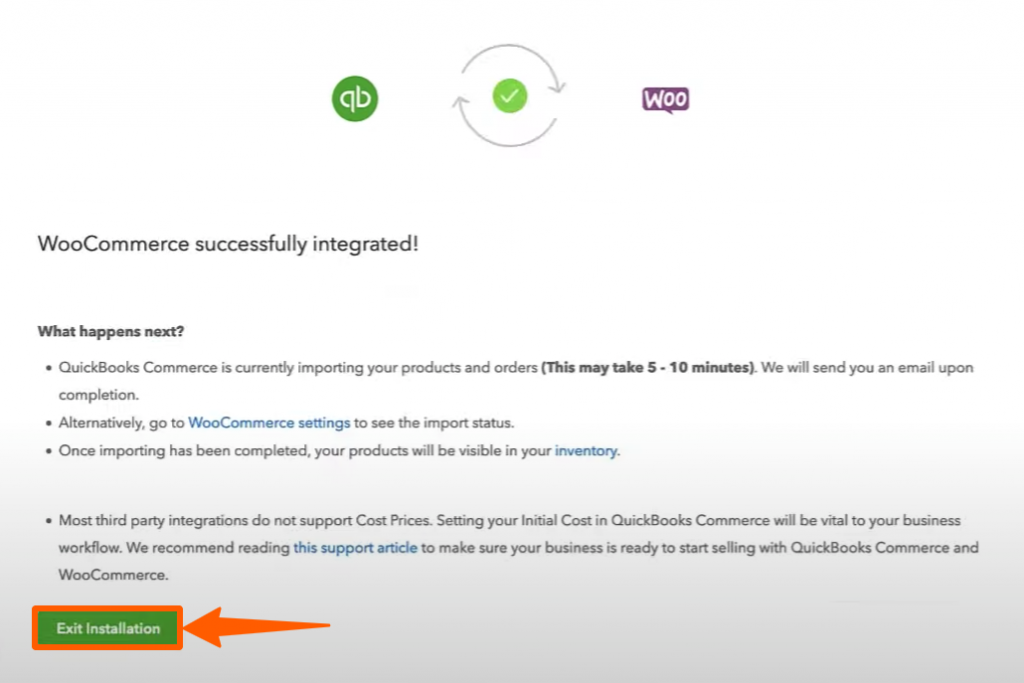
Step 15: Your products are imported, and your WooCommerce site successfully integrates with QuickBooks. Click Exit Installation.
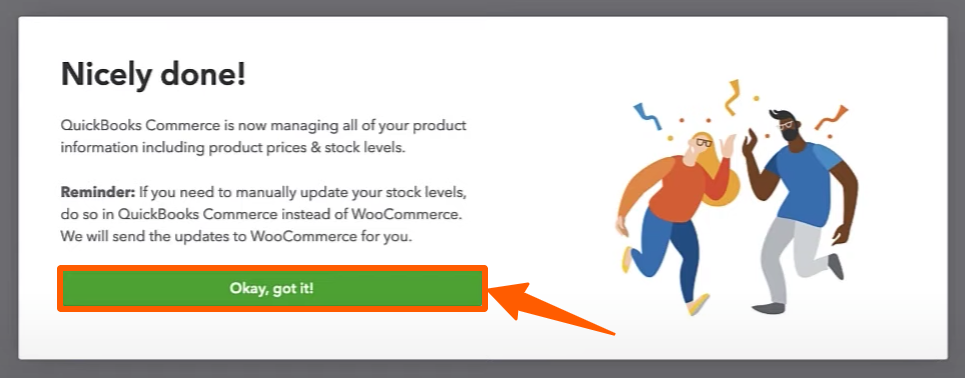
Step 17: You’ll receive a pop-up saying it’s done.
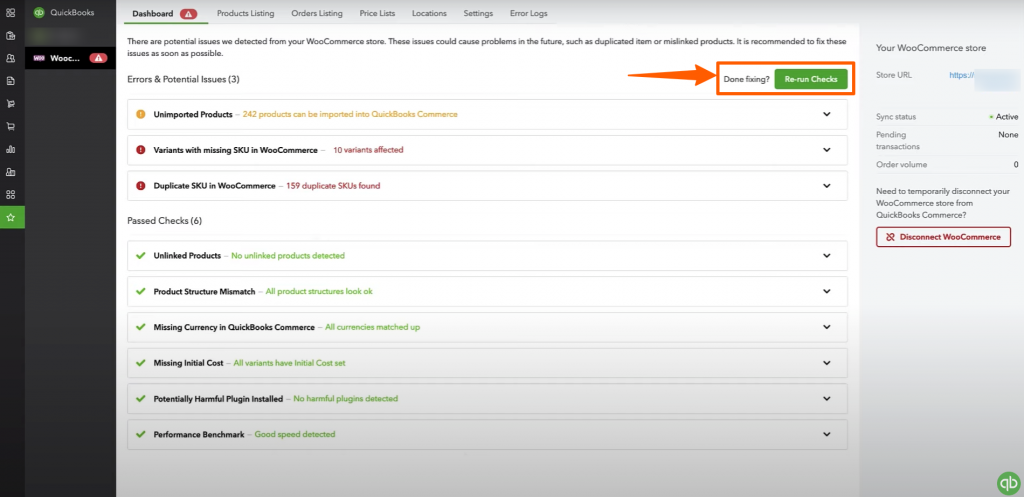
Now, your QuickBooks dashboard will look like this. You can fix your issue and re-run the import after setting them.
How to Disconnect QuickBooks with WooCommerce
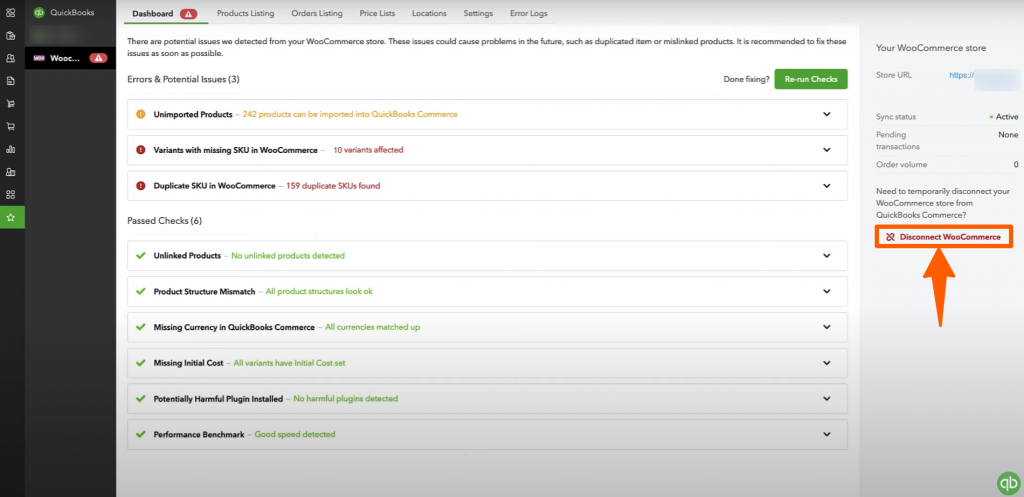
To disconnect QuickBooks from WooCommerce, go to the QuickBook dashboard. Then click on Disconnect WooCommerce.
Conclusion
Integrating QuickBooks with WooCommerce can be tricky because QuickBooks easily clash with other plugins like multi-currency, multi-language, etc. If you face any issues while integrating QuickBooks, try deactivating other plugins that may be causing the problem. Feel free to contact us if you’re facing any errors even after.
After setting up Quickbooks, you can also try using essential plugins for WooCommerce for boosting your sales.