
Revision in WordPress can occupy unnecessary spaces that make the database heavy. You don’t need those versions in most cases, so why keep them?
If you don’t want to keep those revised versions(which is the best practice), deleting them is the best option. Moreover, to prevent creating revisions, you can disable them permanently. In case you want to clear the unnecessary space it’s occupying but also want to keep revisions, you can limit the number of revisions per post.
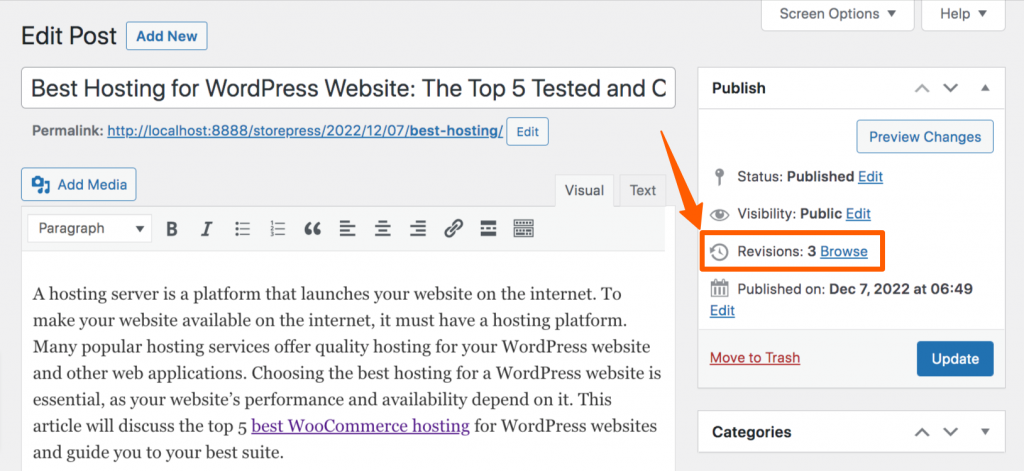
In this article, we’ve demonstrated 7 methods of disabling, enabling, limiting, and deleting revision in WordPress. We’ll also show how you can do these with plugin and without plugin. Let’s see how it looks, and get started! Before Removing Revisions
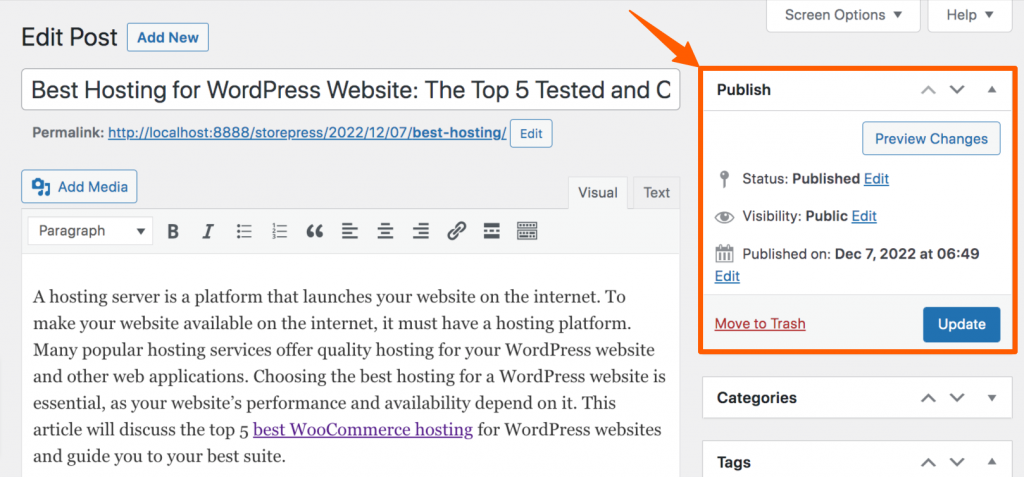
After Removing Revisions
How to Disable Revision in WordPress Using Plugin
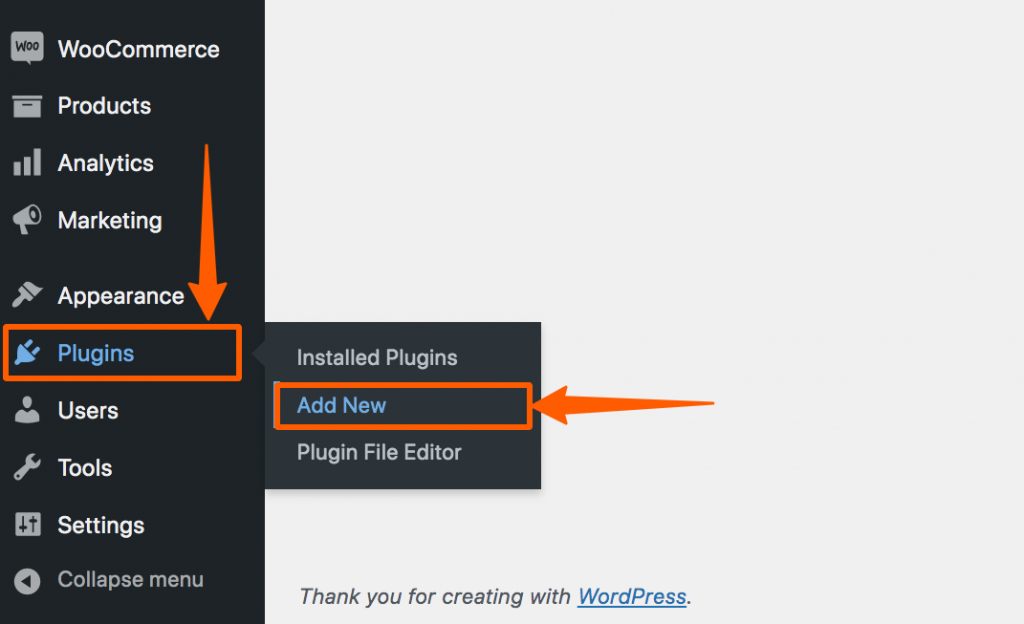
Step 1: Go to your WordPress Dashboard, hover on Plugins, then click on Add New to add a new plugin.
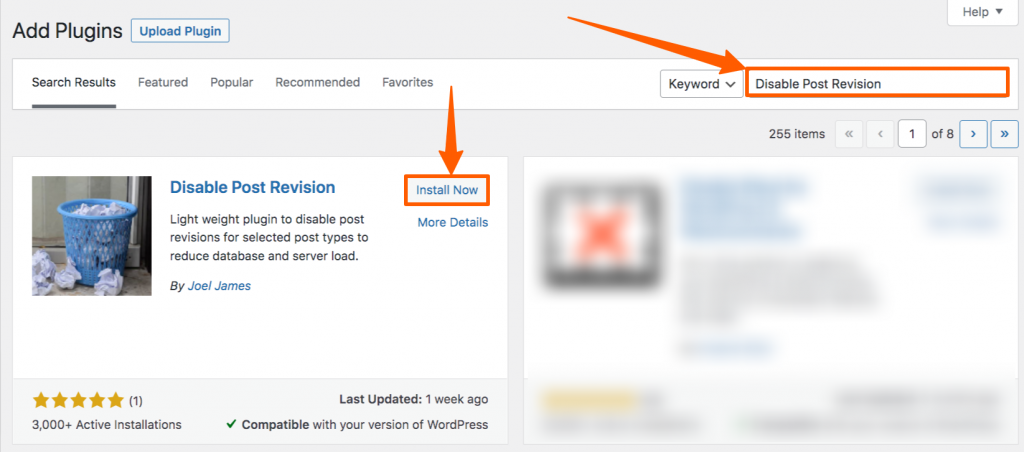
 Step 2: From the plugin directory, search for Disable Post Revision. Then install and activate it.
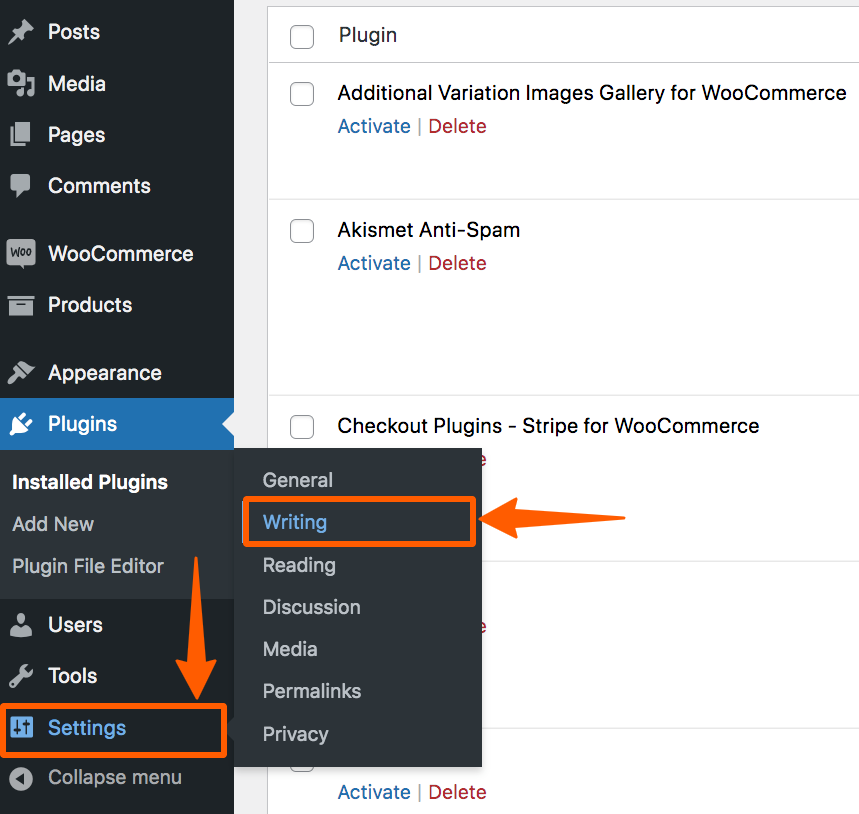
Step 3: After that, in the Dashboard, hover on Settings and click on Writing.
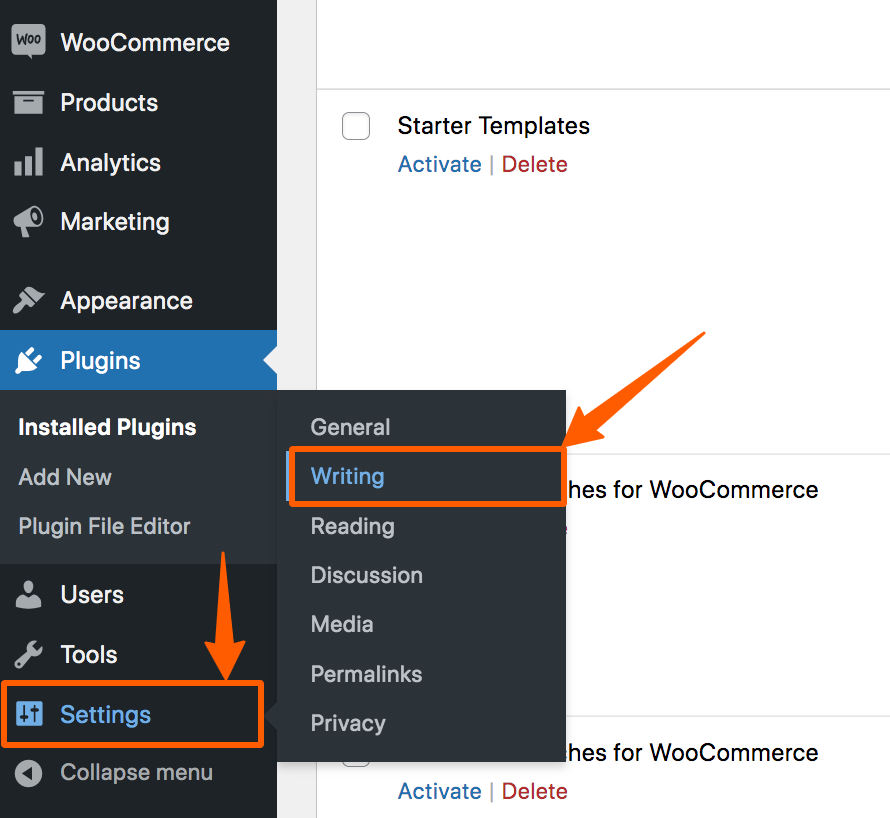
Step 4: A new page will appear where you can find an option called Disable Post Revision. Select Post on that section, and click Save Changes to save that setting. After saving that, there will be no revised version will be saved on your site.

How to Disable Revision in WordPress Without Plugin
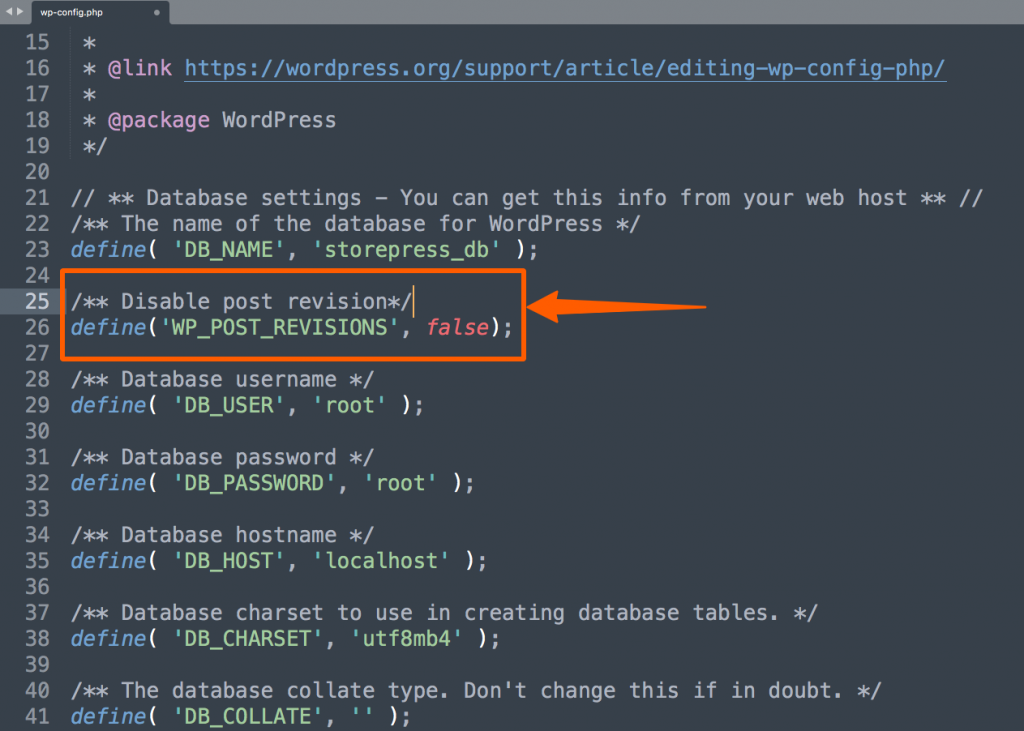
Step 1: To disable revisions manually, you’ll need to put some code in a specific file of your website. First, go to the files of your site, and from the root folder, find a file named wp-config.php. Then open it with your text editor or IDE.
 Step 2: Now, you need to put a line of code there, and save the file. After that, the revisions will be automatically disabled on your website. You can learn how to create a custom shortcode in WordPress if you want.
How to Enable Revision in WordPress
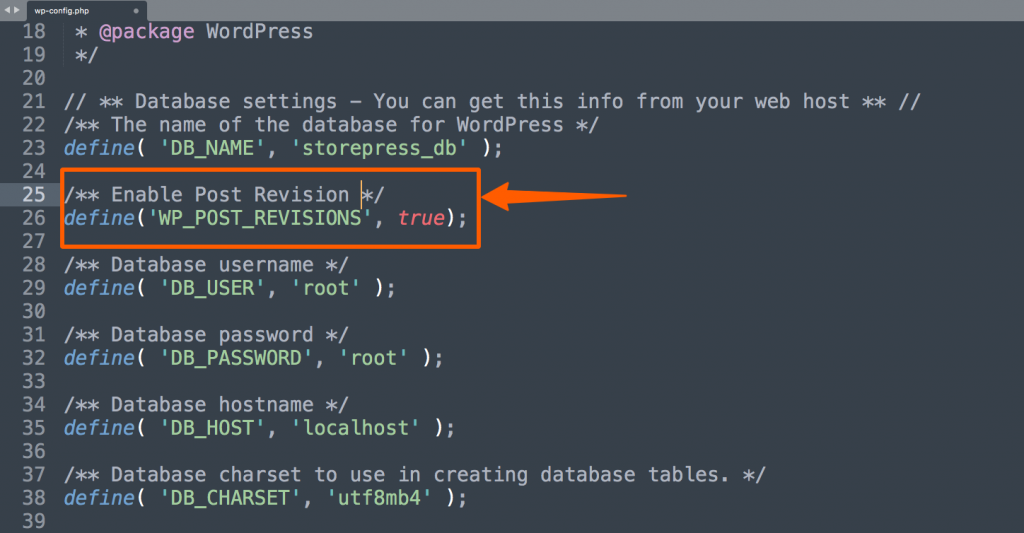
Step 1: To enable revisions, you need to go to your site files first. Then find the file named wp-config.php. You need to edit this file to enable WordPress revisions. So, open the using any IDE or text editor.
Step 2: After that, put this line of code in the file. If you find similar code already exists, then just change the “false” to “true”. Then save the file. Now, WordPress revision is enabled on your site.
How to Delete or Remove Revision in WordPress Using Plugin
Step 1: Go to the Dashboard, then hover on plugins and click Add New to add a new plugin.
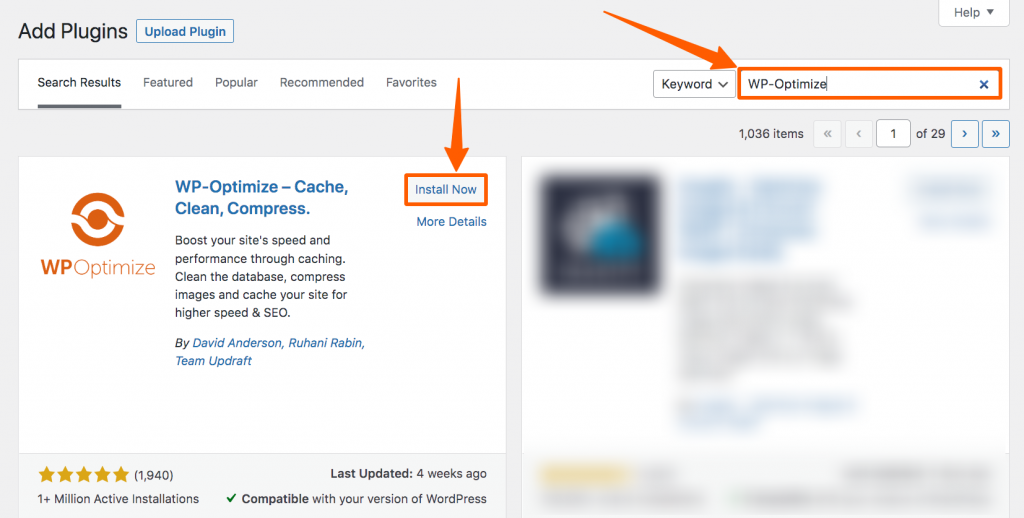
Step 2: Search for WP-Optimize, install, and activate it.
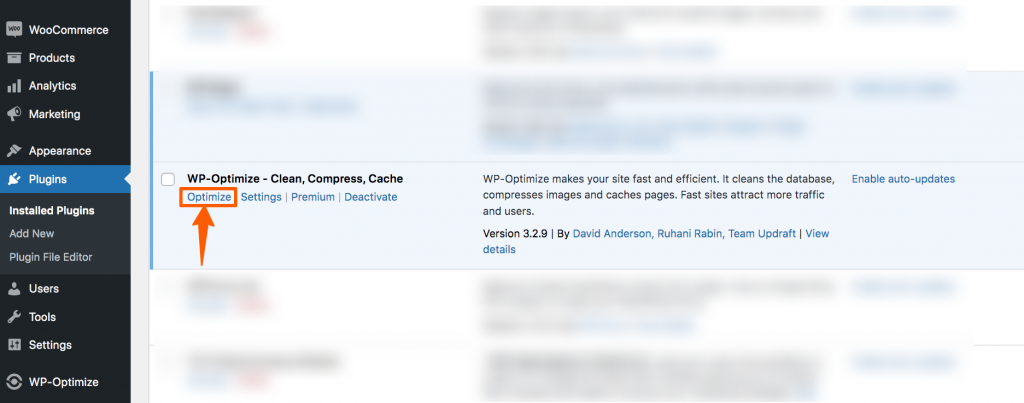
Step 3: After that, you’ll be redirected to the plugin list. If not, click on Plugins to go to the installed plugin list. Find the WP-Optimize and click Optimize.
Step 4: A new page will appear. You’ll find many options there. To delete revisions, click on the Run Optimization of “Clear all post revisions”.
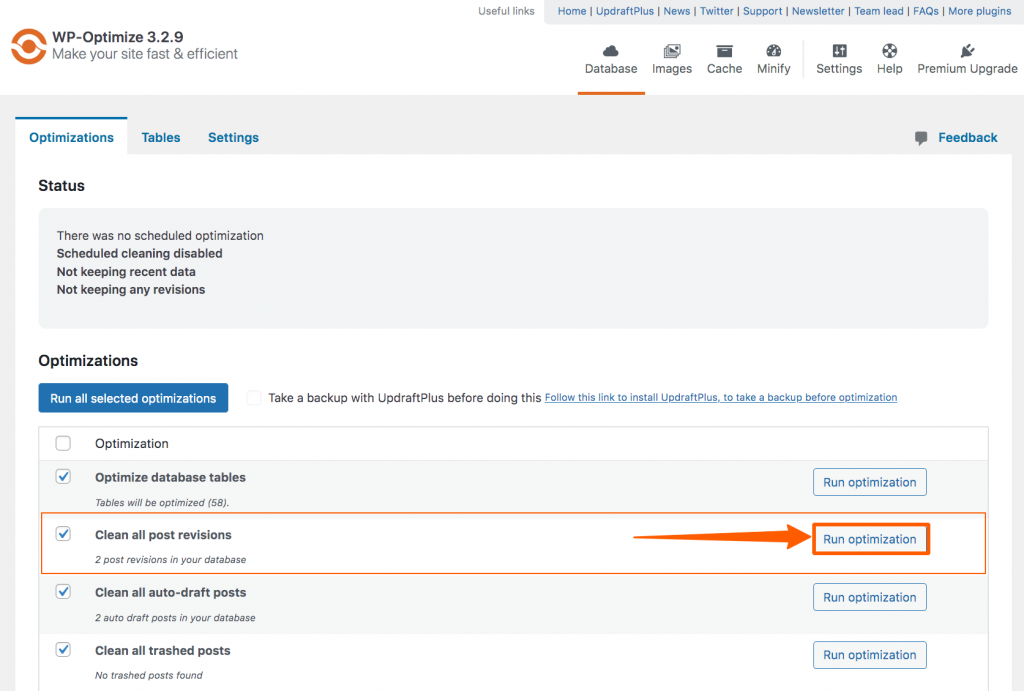
After clicking that, all of your revisions will be deleted.
How to Delete or Remove Revision in WordPress Without Plugin
Step 1: Go to phpMyAdmin
Step 2: Then go to the SQL tab
Step 3: Run a SQL query by entering the following code
It will delete all posts that contain the post_type tag revision.
How to Limit Post Revision in WordPress Using Plugin
Step 1: Go to the Dashboard, and click on Add New to add a new plugin.
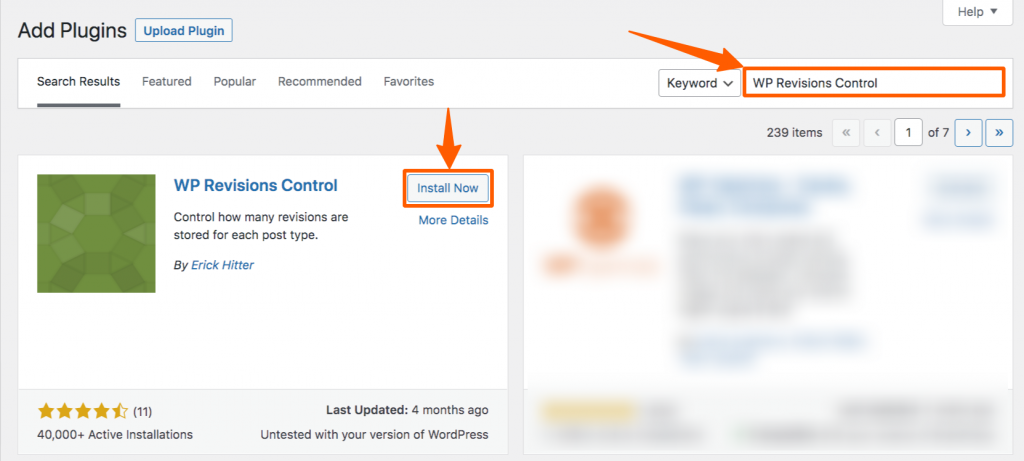
Step 2: Search for WP Revision Control. Then install and activate it.
Step 3: Now, go to the Dashboard again, hover on Settings, then click Writing.
Step 4: A new window will appear. Scroll down and you’ll find the WP Revision Control section. Fill the boxes according to your need, then click Save Changes to make this effective.
How to Limit Post Revision in WordPress Without a Plugin
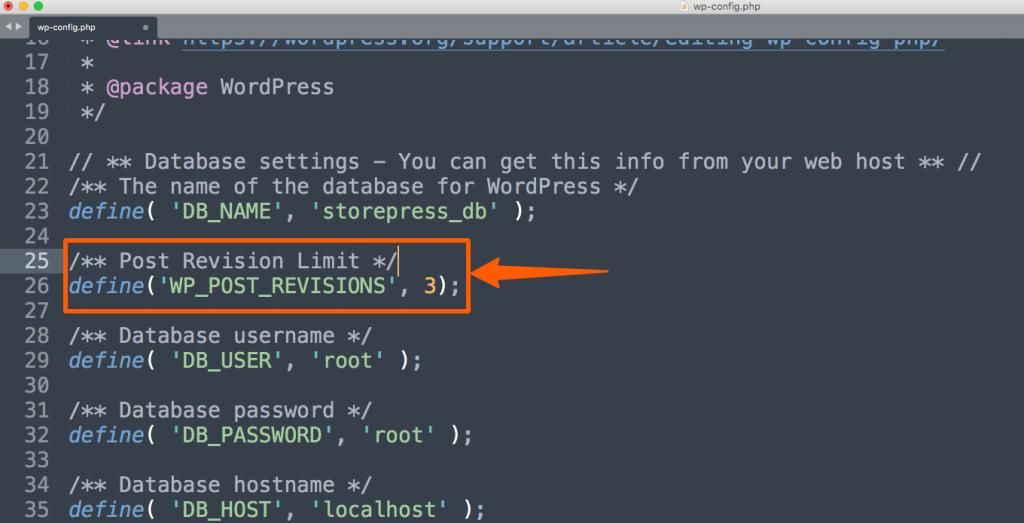
Step 1: To limit WordPress post revision without a plugin, go to the root folder of your website, then find the file wp-config.php. Now, you need to edit this file in order to limit WordPress post revisions.
Step 2: After opening that file, put this line of code there. We’ve written the number 3 for demonstration purposes. You need to write the number of the revised version you want.
When You Should Disable/ Delete Revision in WordPress
For Starters: If you’re starting your website, we recommend limiting your post revisions to 20. As a beginner, you’ll make frequent mistakes; that’s why having limited post-revisions will certainly help you. After creating a certain amount of posts, you’ll be confident about your posts, and then you can disable revisions.
Websites with 100+ Posts: In that case, you’ve already familiar with revision, and it’s the right time to delete all of your revisions. Also, disable the revision versions for upcoming posts. Before deleting previous revisions, it’s wise to go through the old posts to confirm that they are unnecessary.
Websites with 500+ Posts: Deleting 500+ posts’ revisions is a very sensitive issue. There can be lots of sensitive data. In such a case, we recommend you disable revisions first. After that, check each content manually. Though it could be time-consuming, it’ll help you to delete revisions securely. After checking all of that, delete all those revisions.
IMPORTANT: If multiple persons are working on the same site, inform everyone that you’ve disabled the revisions. You can also use the user-management plugin to control user access to your website.
Conclusion
We recommend you follow the “with plugin” methods if you’re uncomfortable with technical stuff. Otherwise, we recommend following “without plugin” ways. We hope you’ve successfully disabled, deleted, or limited post revisions. You can also create custom post type, and control that’s revisions. If you’re facing any issues while following this, feel free to contact us. We would love to solve your issue. If you find any change in the functionalities, let us know so we can update our article as soon as possible.
