
The background image is one of the first things visitors notice while visiting a website. That’s why using a unique background is necessary to catch their attention. Otherwise, your site will look similar to most websites. You can change the background image of your website to solve this problem and you can also create a video background if you want. If you’re using WordPress to manage your website, you’ll get a common white background after setting it up. So, to stay out of the crowd, you need to change the background of your website. In this article, we’ll demonstrate 3 methods to add or change the background of your website.
Benefits of Changing the Background
- Your site can get more attention than others
- Visually pleasing background positively impacts the visitors’ minds
- A smooth and eye-soothing background keeps visitors longer on your website
- It enhances the user experience
How to Add or Change Background Image in WordPress Using Built-in Functions (Header, Body, Footer)
You can add or change background images in WordPress using the built-in function of the theme. But not all themes offer this functionality as you can only change the background color in some themes. So, you need to check whether your theme is compatible. To check it, you can go to the WordPress theme repository and see if the Custom Background tag is present. 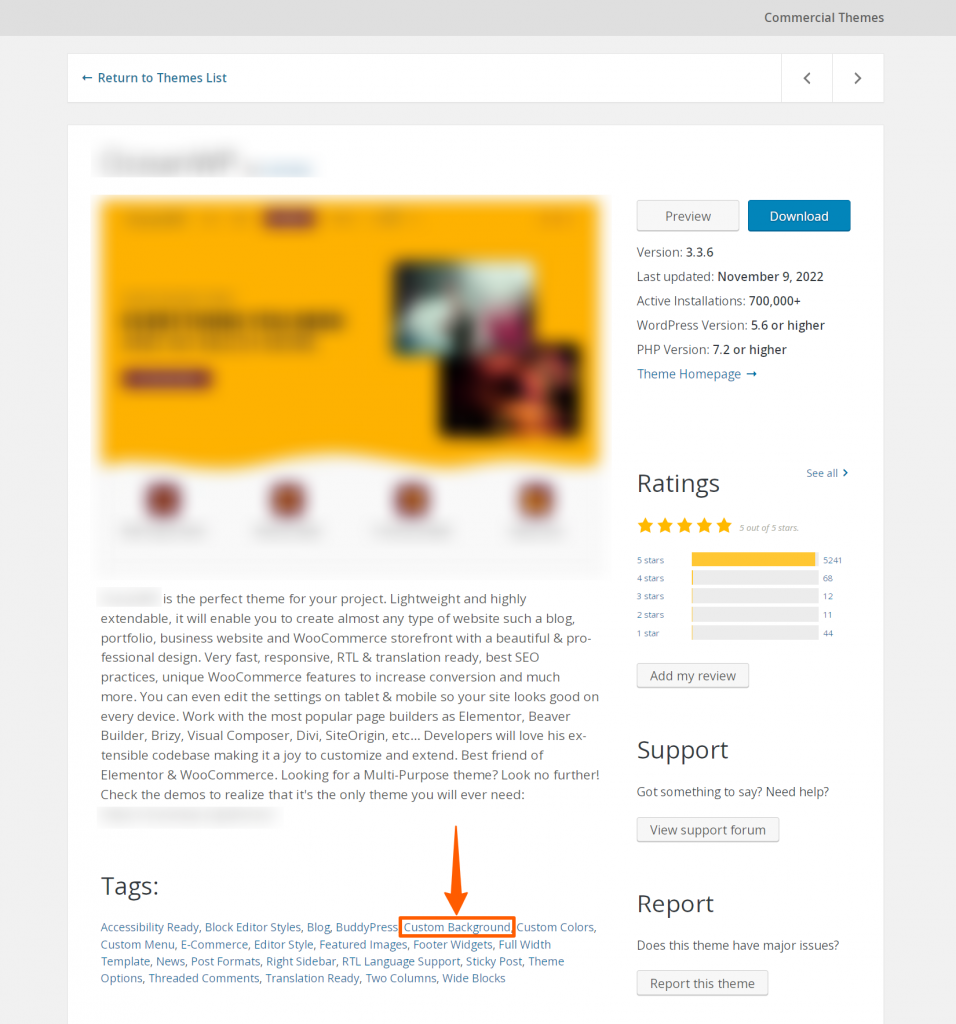 If it is compatible, then you can try this method, otherwise, you may need to follow the second method.
Change Background Image of The Header
Step 1: Go to the Dashboard, hover or Appearance, and click on Header. 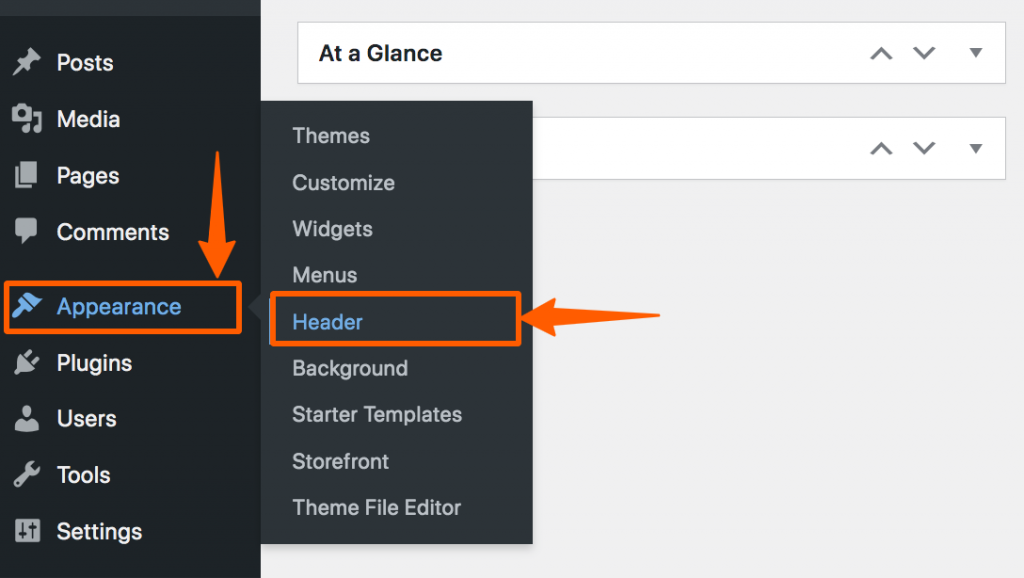 Step 2: Then, you’ll be redirected to the Customizer. Find and click on the Header.
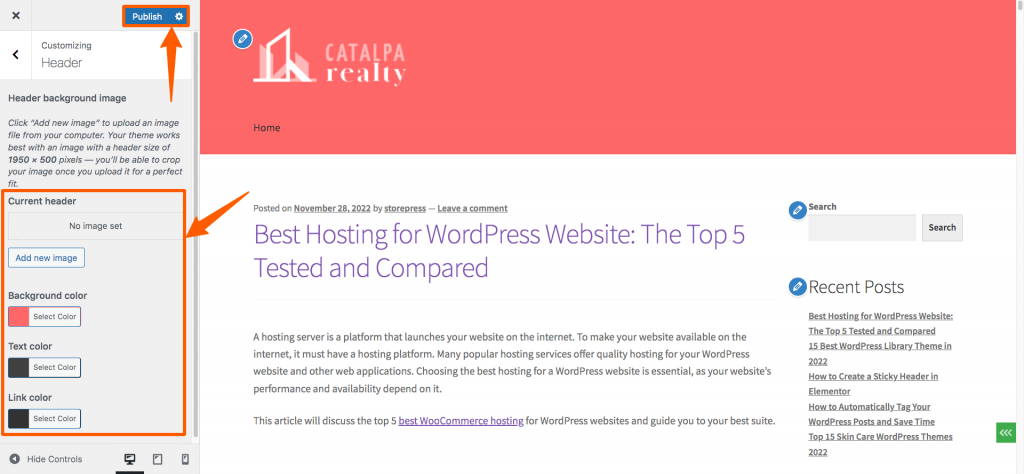
 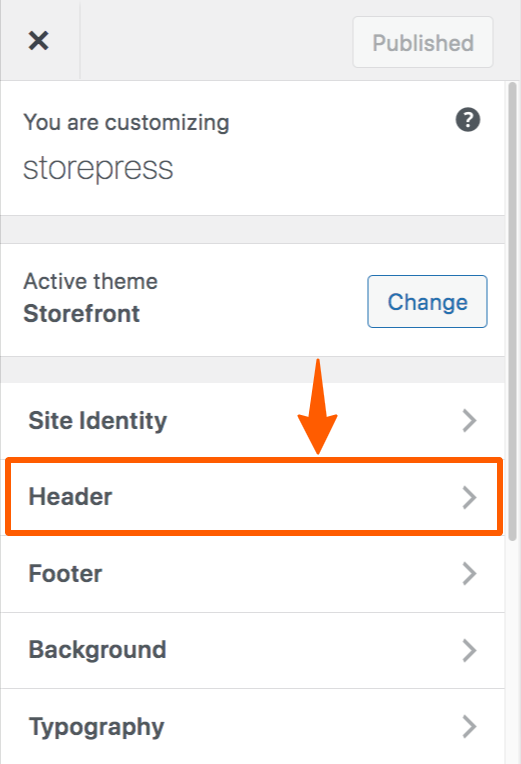 Step 3: On this page, you can select the background image, color, text color, or link color and even you can create a web page header design as well. Then Publish it. If you are using elementor you can also make a sticky header according to your will.
Change Background Image of The Body
Go to the WordPress Dashboard, hover on Appearance, then click Background. 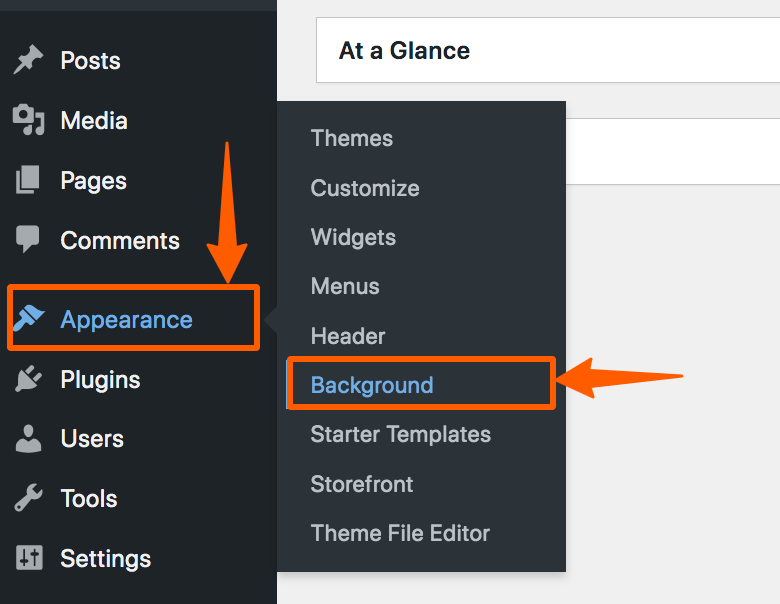 Then the customizer will appear on the left. Click on the Background there.
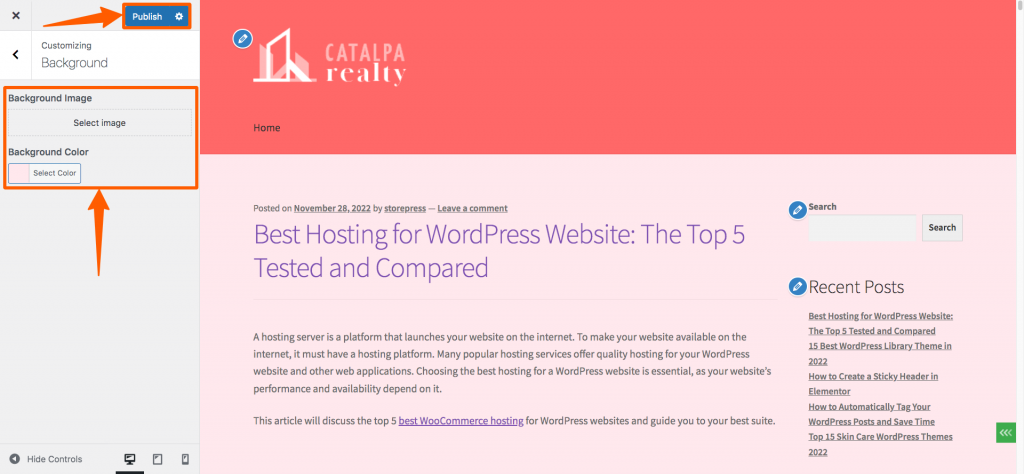
 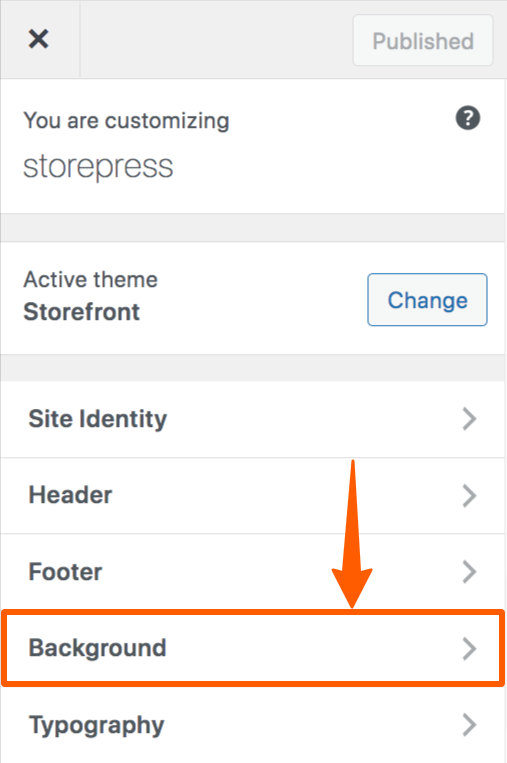 Now, you can edit the background of the body. Select any color, or image as your background. We’re selecting pink as the body background. Then click the Publish button to make it effective and it is compatible with all colorful WordPress themes.
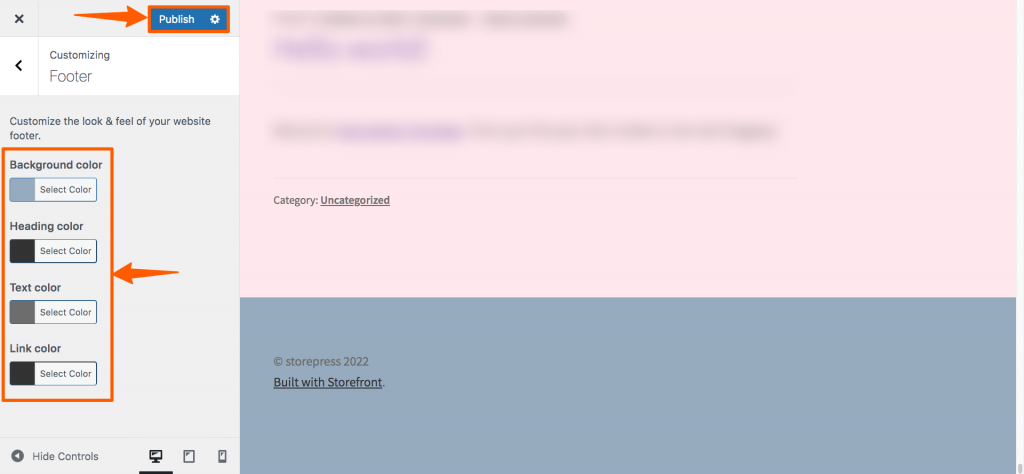
Change Background Color of The Footer
Go to the WordPress Dashboard, hover on Appearance, then click Customize. 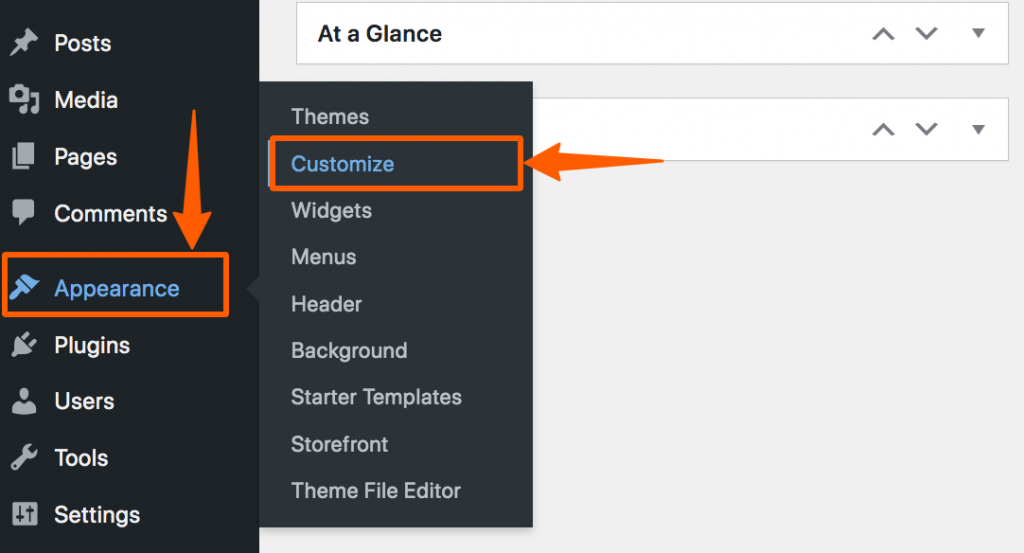 Click on the option Footer.
 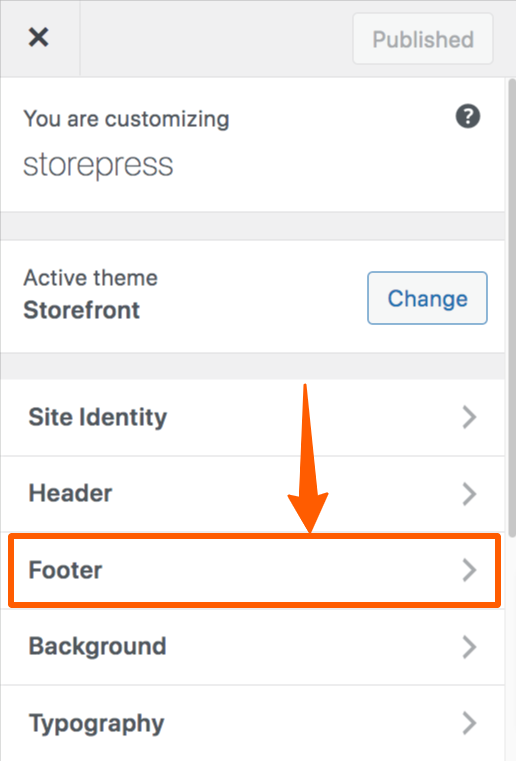 Now, you can change the footer background color, text color, link color, etc., and publish it. You can also add a payments icon to the footer if you need.
If you don’t have that option on your theme
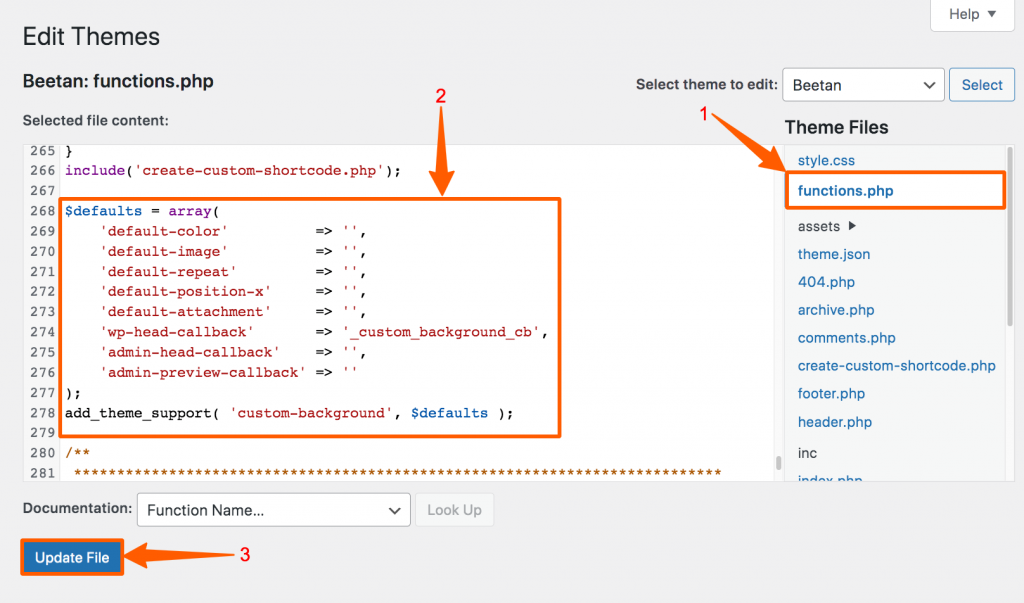
In this method, we need to edit the Theme File. If you update your theme after customizing the theme file, you’ll lose the customization. So, you need to update the theme without losing customization. Go to the Dashboard, hover on Appearance, then click on Theme File Editor.  Now, you’ll find the theme files. Find the functions.php file and, click it. Then paste the code into the file, and click Update File to save it. You can also find this function PHP file in your hosting panel. all the best hosting providers have this option in their Cpanel.
 https://gist.github.com/WPCred1/ec0f94d4e969bad8da905c7109986063 Afterward, go to the customizer where you can find options to edit the background color. Click Colors or Background Image. For demonstration, we’re clicking on Background Image.
 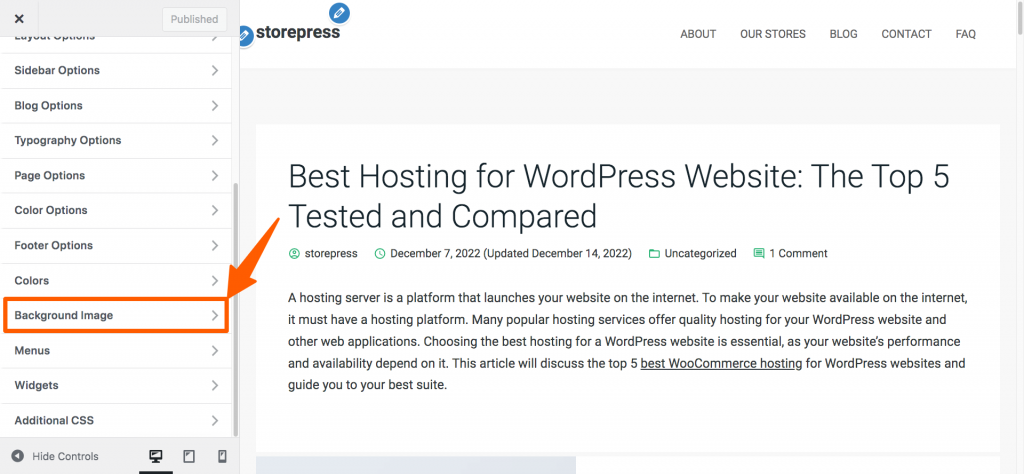 Now, you can change Background Image of your choice. Choose any, then click Publish to save it.
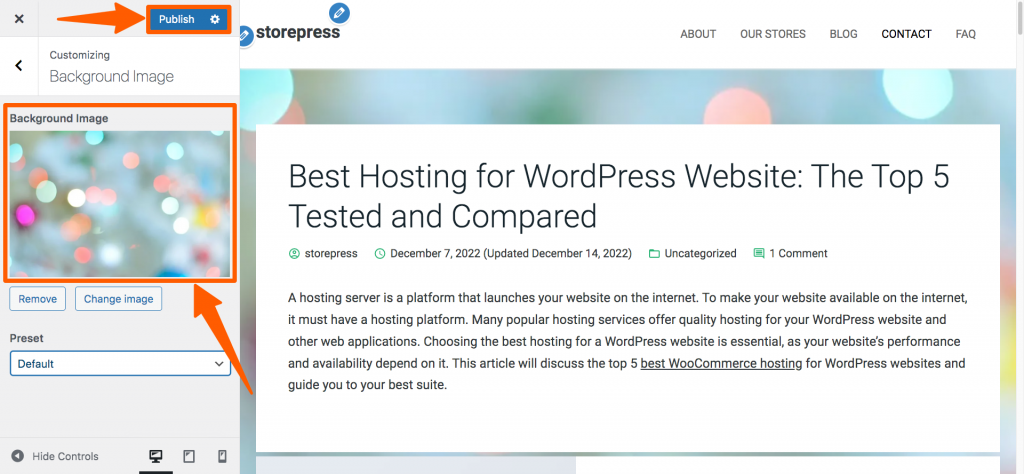
How to Add or Change Background Images in WordPress Using CSS
Step 1: Go to the page you want to change the background color. Then open the developer’s tool by using inspect or hitting F12. Then you’ll find an ID with a unique number. Copy that post id. 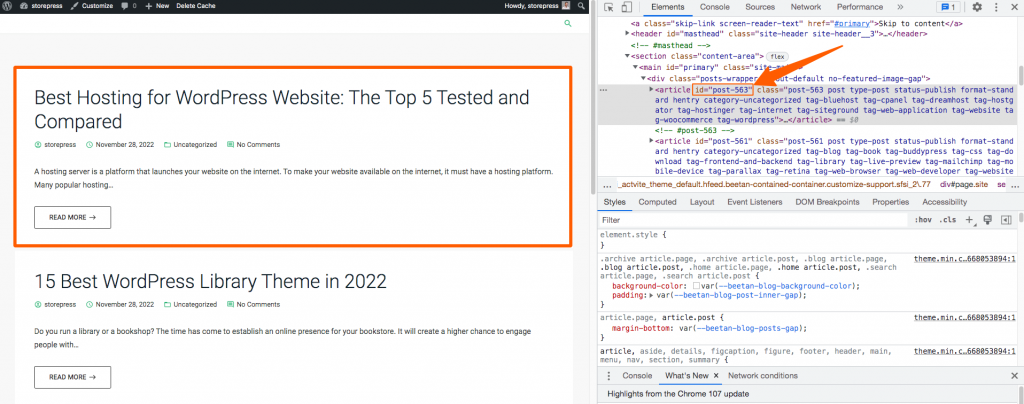 Step 2: Now, go to the WordPress dashboard, then hover on Appearance, and click on Customize. Step 3: Now, the customizer will be opened. Scroll down, find Additional CSS and click it.
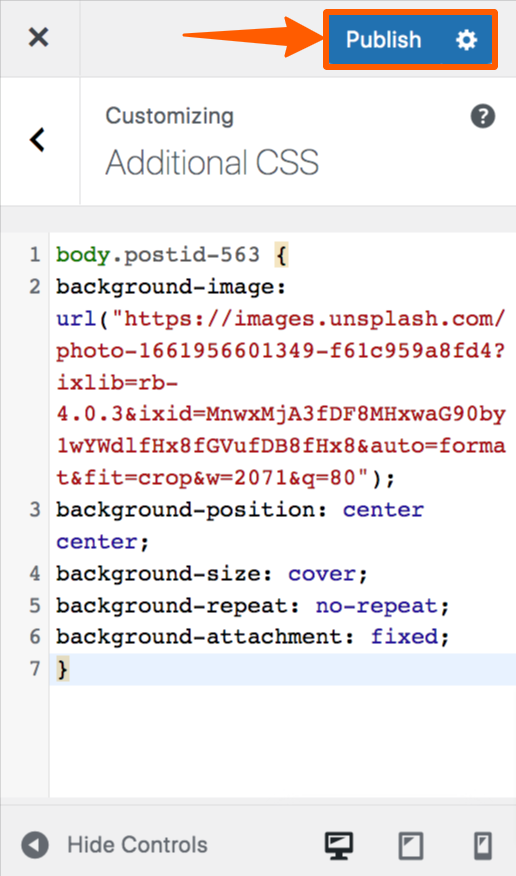
 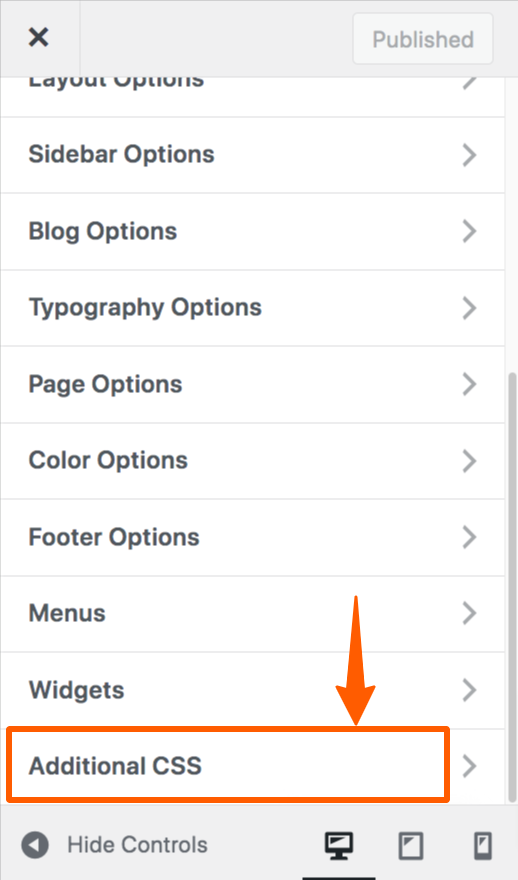 Step 4: Now, paste your desired code there. You can copy this code, but make sure to use your own post id, and image URL. Then click Publish button. You can also learn how to create WordPress custom shortcodes to get better experiences.
 https://gist.github.com/WPCred1/38c61b02abff61dc69546fd88a82163d Preview
How to Add or Change Background Image in WordPress Using Plugin
Step 1: Go to the WordPress Dashboard, hover on Plugins, then click Add New. 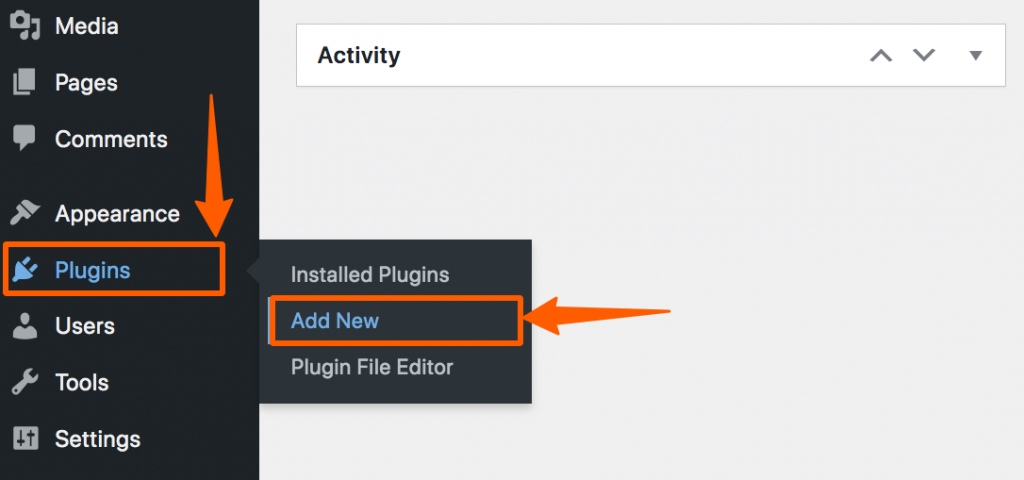 Step 2: In the WordPress Plugin repository list, search for Fullscreen BG Image, then Install and Activate it.
 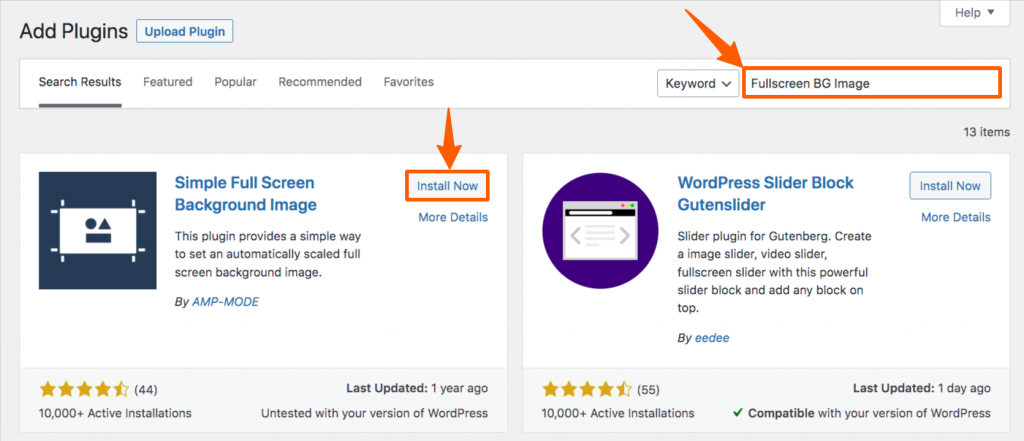 Step 3: Now, hover on the Appearance, and click Fullscreen BG Image.
 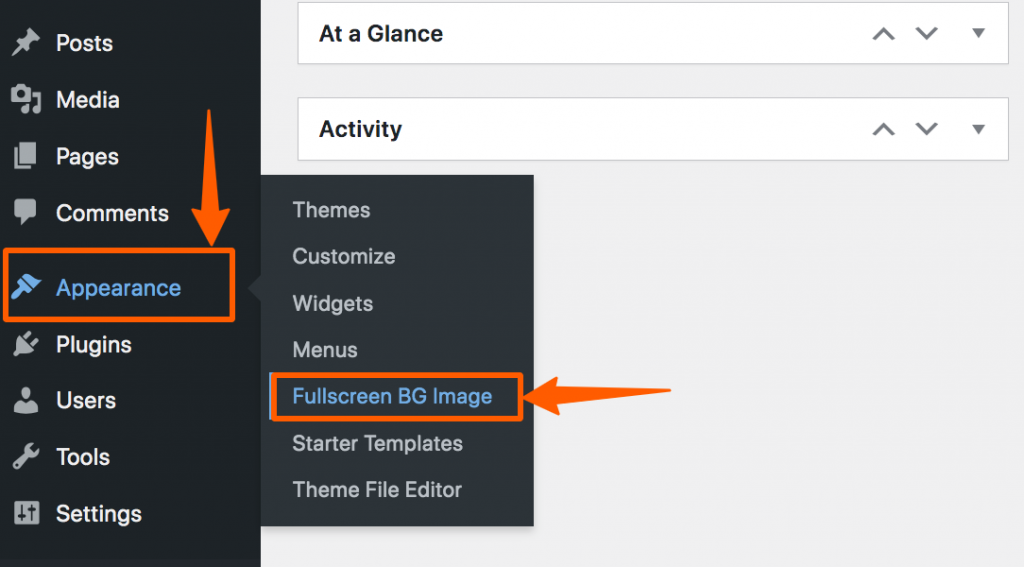 Step 4: Then, choose an image, and save it.
 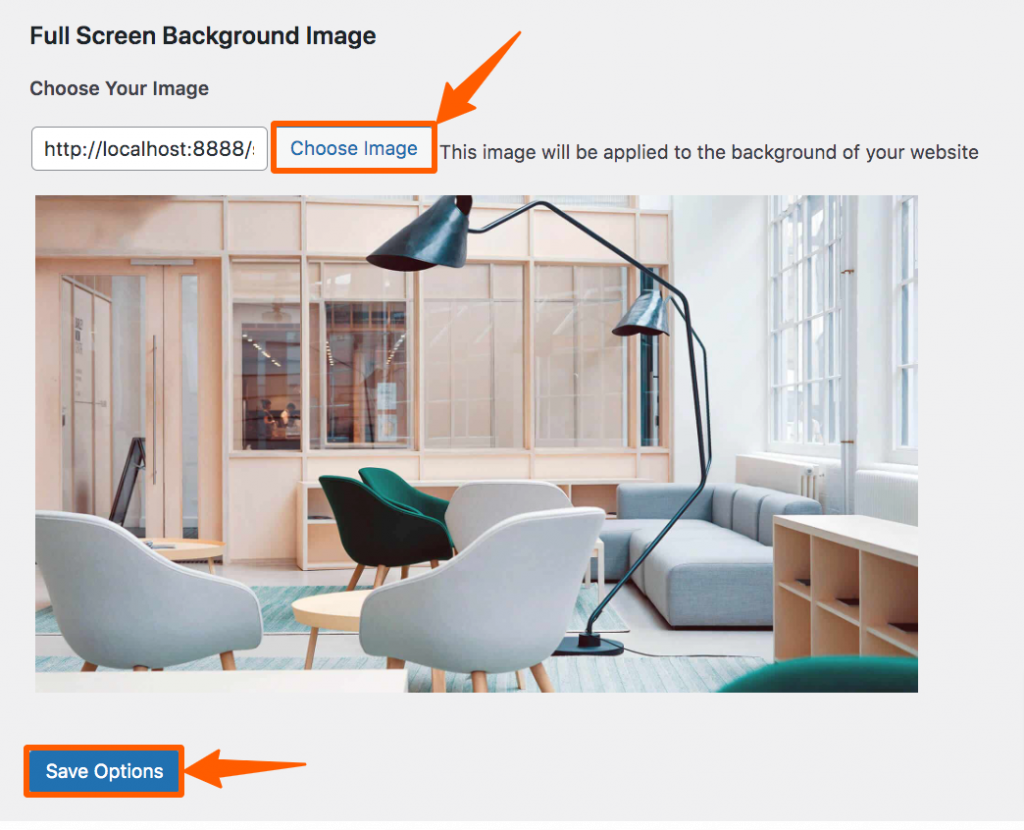 Though we’ve demonstrated the easiest ways, we recommend you try the third method if you want to avoid technical stuff.
Conclusion
Change the background of the header, footer, and body to create a unique web design to attract visitors. We recommend you use a light color if you’re using color as a background. In the case of using an image as background, we recommend you use a copyright-free, self-hosted and minimalistic image for better performance. We hope you’ve successfully added or changed your website’s background image. You can also use an image optimization WordPress plugin to optimize your photos perfectly. If you’re facing any issues regarding this, feel free to contact us. We would love to solve your problem.
