A WordPress multi step form is a dynamic and professional way to organize form fields section-wise. It lets users focus on each section individually and adequately fill out the form. Users can often be overwhelmed by many form fields in a form. That is why making WordPress multi step forms makes it easy for users to focus on the form and you don’t have to worry about exporting data to excel from that forms. This tutorial will demonstrate how quickly and effectively you can create a WordPress multi step form that will increase user efficiency.
Making a WordPress Multi Step Forms
The best way to create WordPress multi step forms is to use a form plugin that is feature-rich and dynamic. For this tutorial, we will be using the fantastic WP Forms that enables the user to quickly create professional and dynamic WordPress form. WP Forms comes in both free and premium versions. The free version has many premade fields and features enough to satisfy your needs without extra expenses. WPForms supports all top best modern WordPress themes.
Step 1:
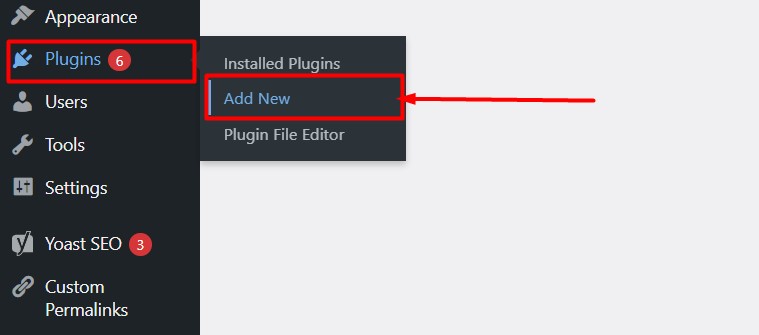
From the WordPress dashboard, hover on ‘Plugins’ and click ‘Add New.’
Step2:
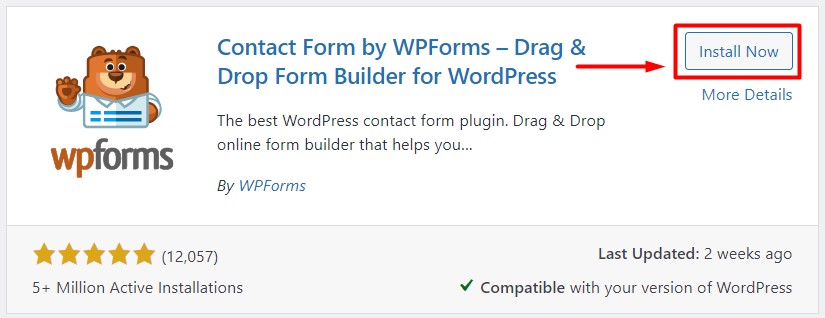
Inside the WordPress plugin list directory, search for WPForms. Click to install and activate the plugin.
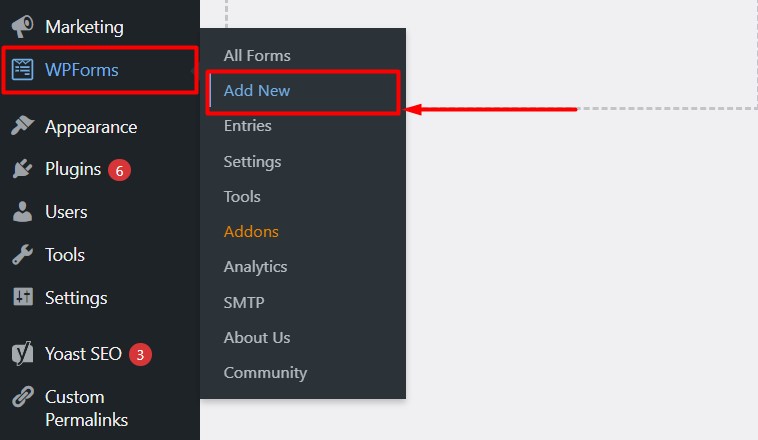
Step 3:
From the WordPress dashboard, hover on ‘WPForms’ and click ‘Add New.’
Step 4:
You will be taken to the form setup page. To start creating, enter a name suitable for the form, hover, and then hover and click on ‘Create Blank Form.’ This process is the same in any website made with the best SEO themes for WordPress.
Step 5:
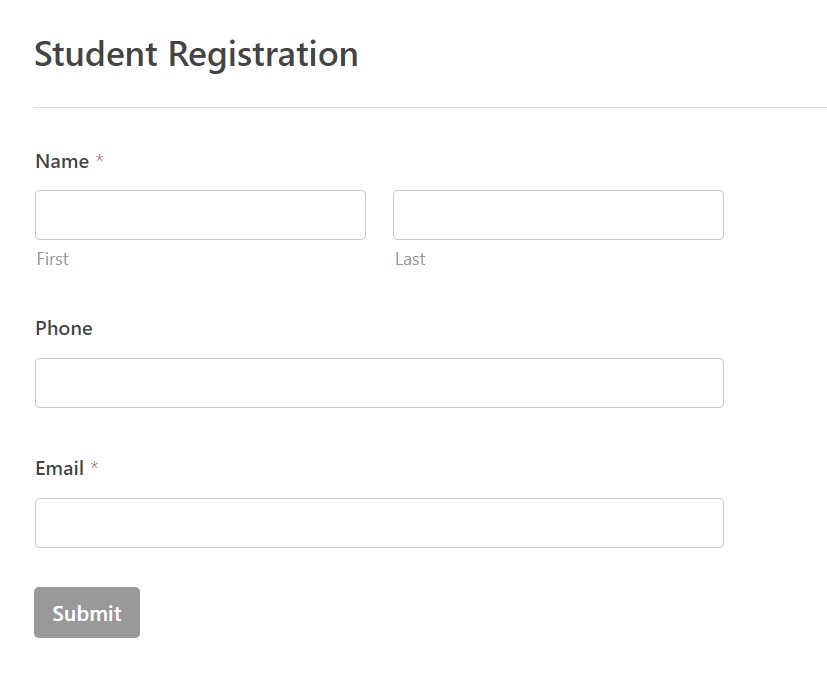
You will be redirected to the form building page. There will be many premade fields on the left side from where you will drag and drop the field to the right side. That is how you build a customized contact form for WordPress using WPForms which is incredibly simple.
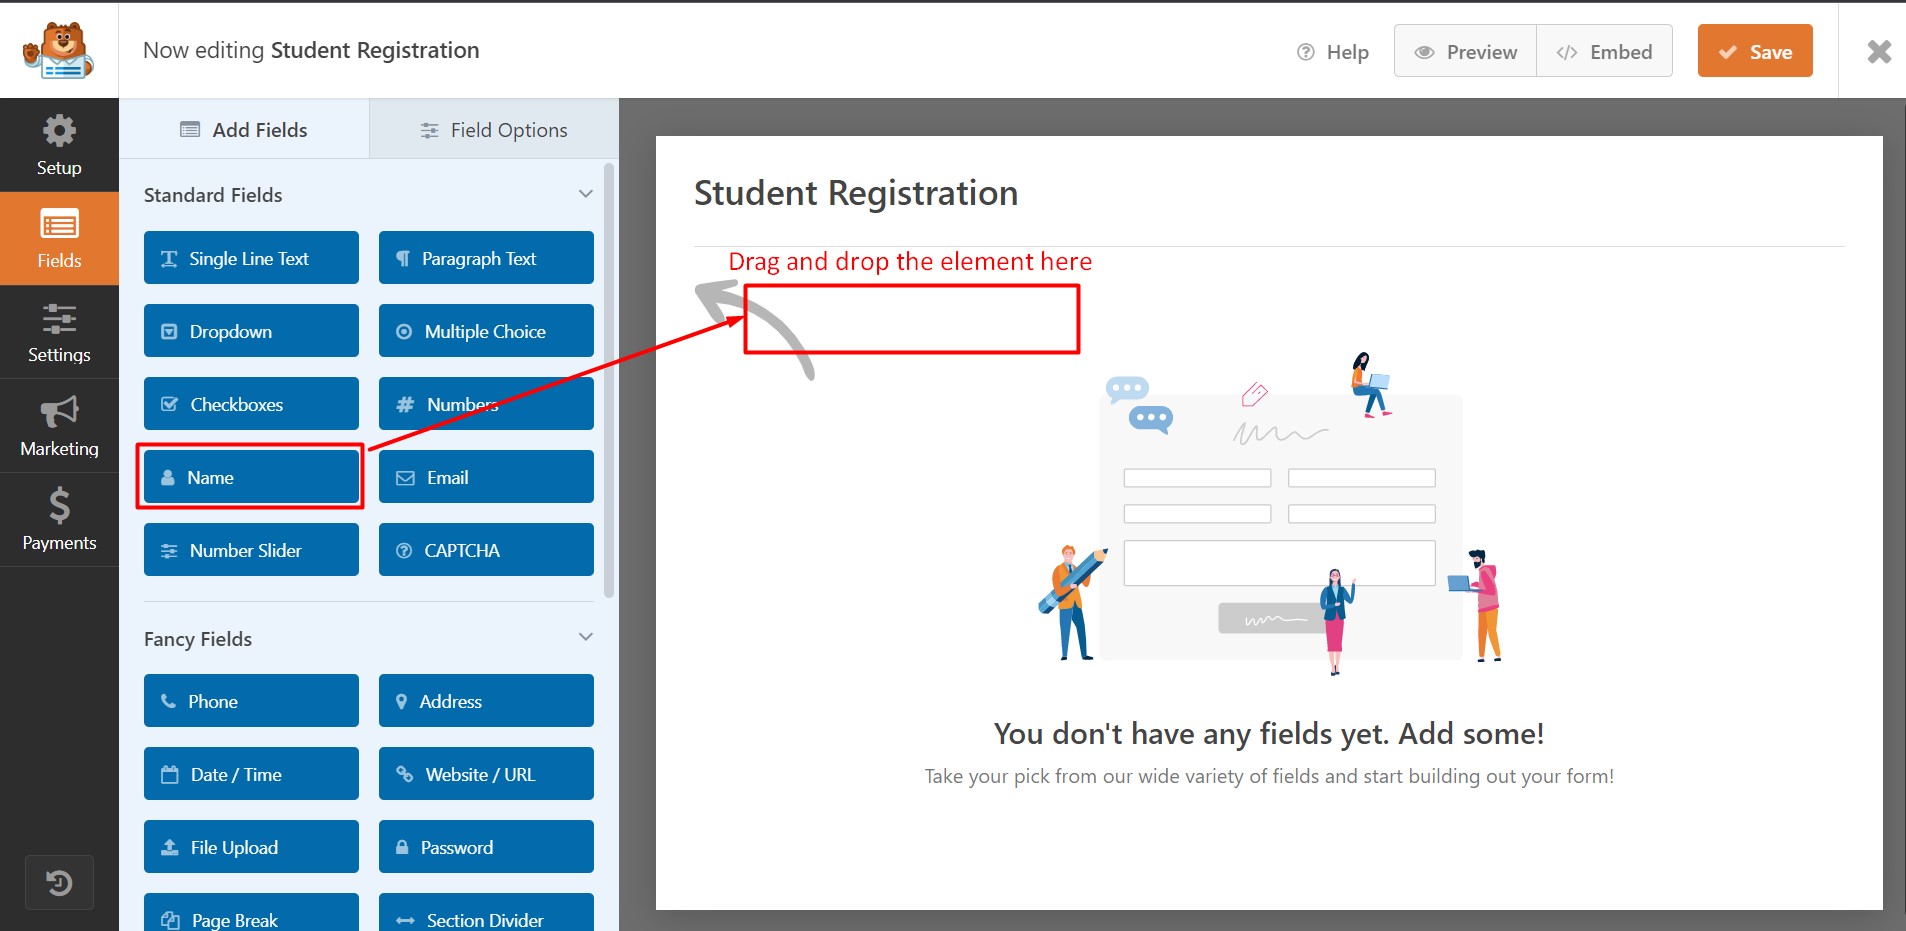
Step 6:
Drag and drop the Name field from the left section to the right. You will see that we have created our first dynamic form field.
Step 7:
Now follow this drag-and-drop method and add a few more fields to the form.
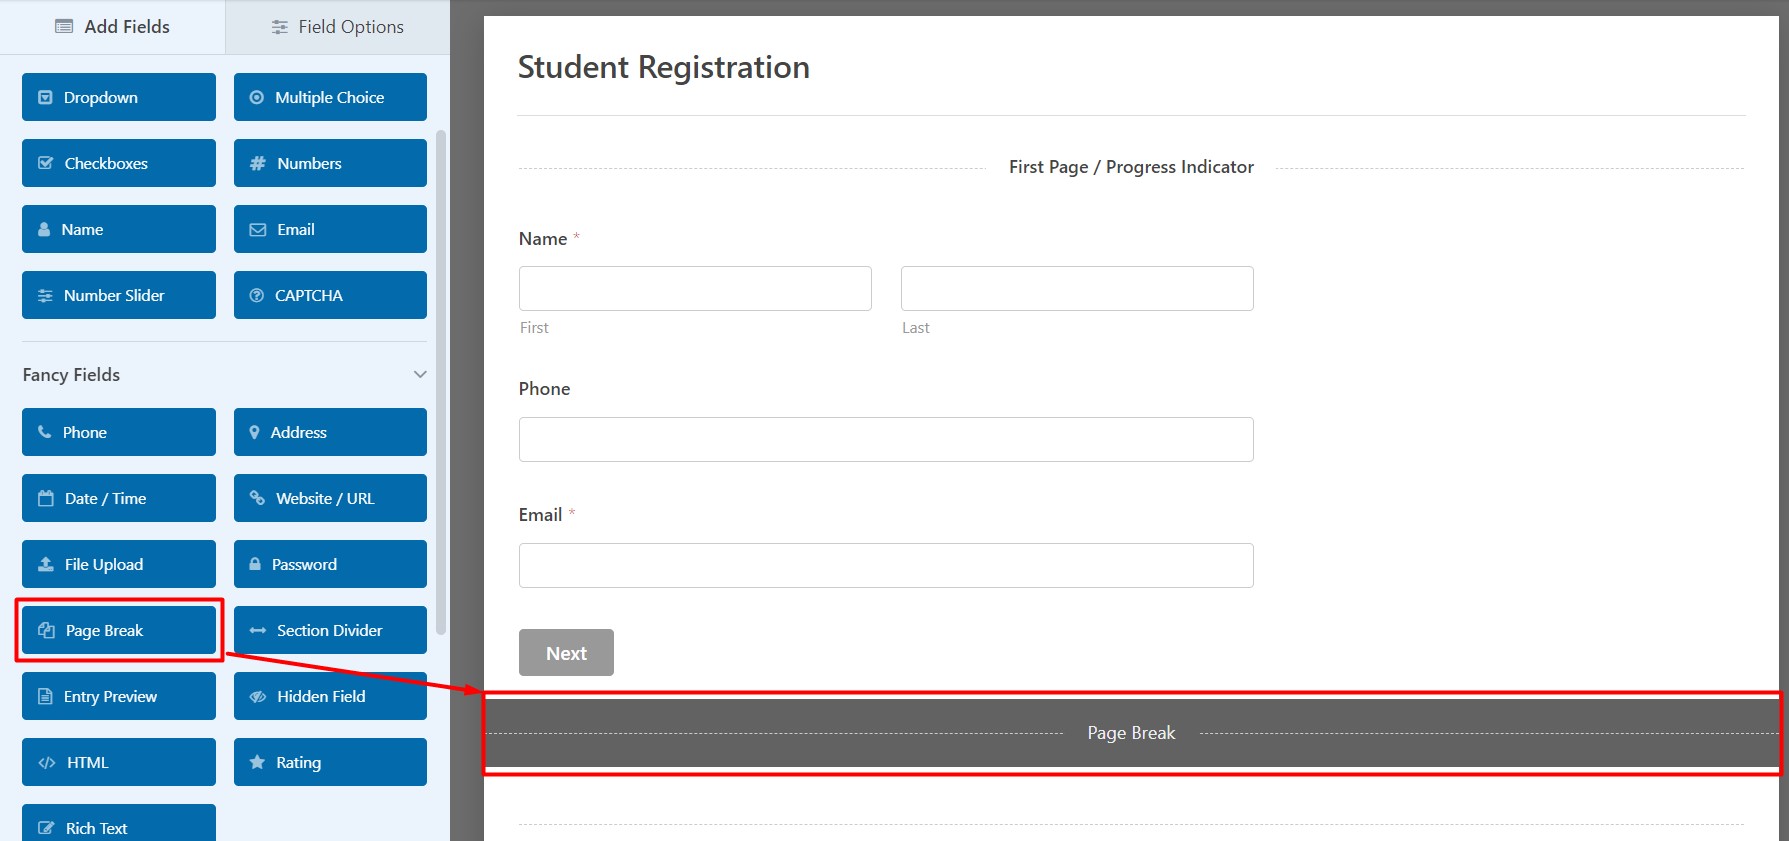
Step 8:
After adding a few fields to the form, we will move to the next page. Now we will add fields for the second page of our form. To do this, choose the field ‘Page Break’ from the ‘Fancy Fields’ section and place it under the last field of the page. Doing this will push the ‘Submit’ button to the next page and replace it with the ‘Next’ button.
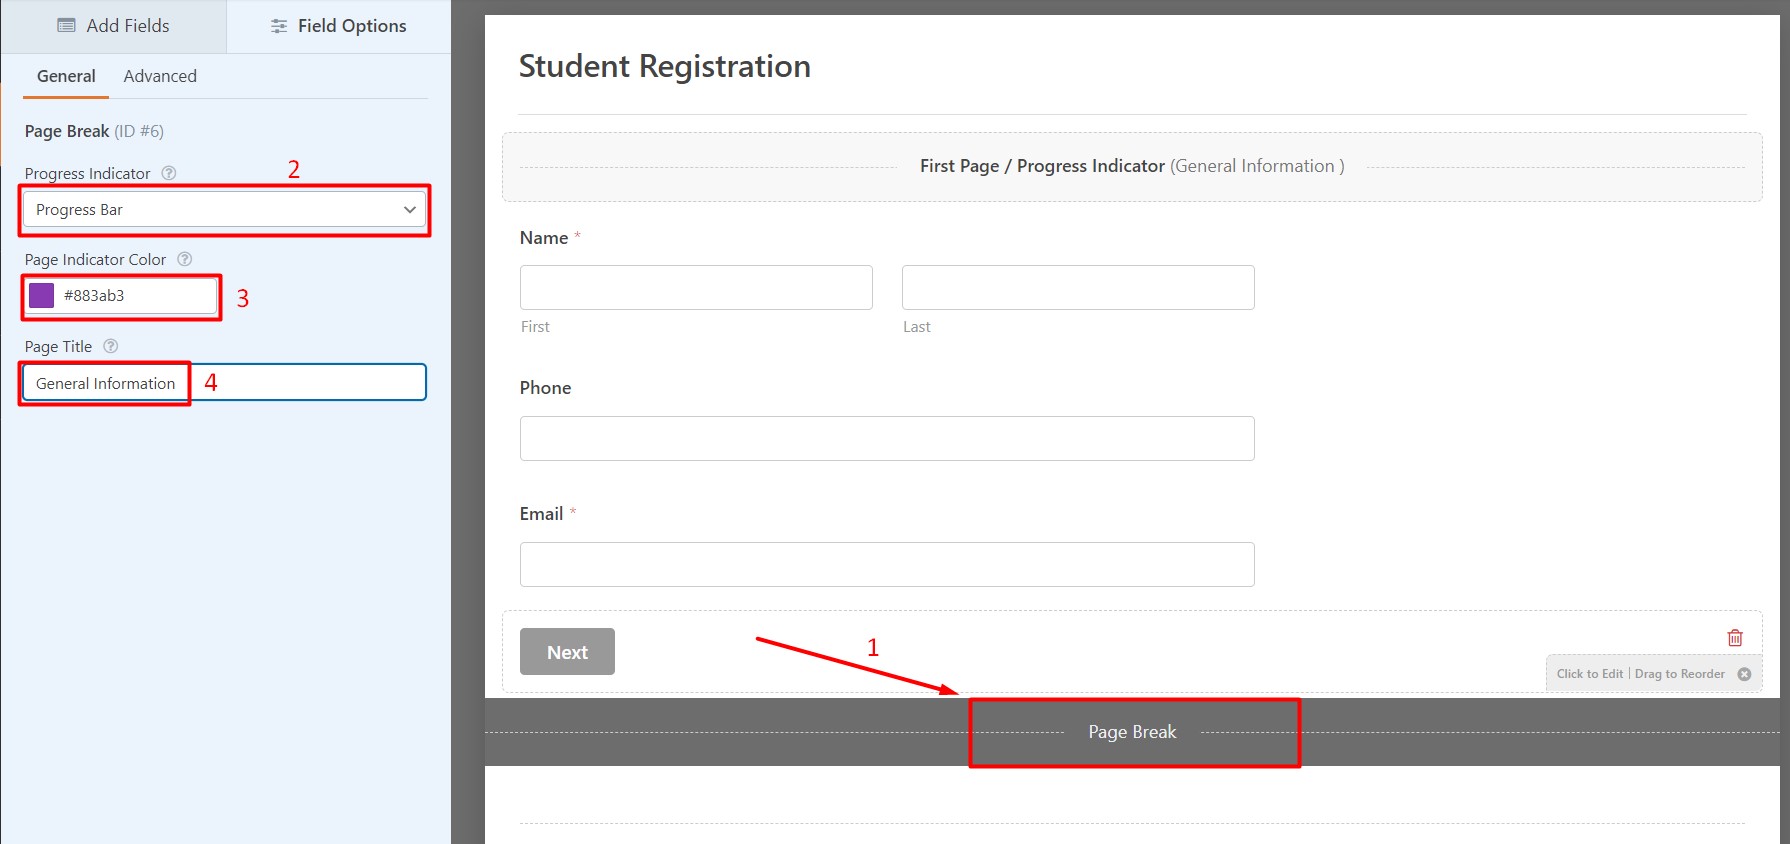
Step 9:
Click on the ‘Page Break’ field we have just added, and you will see a few customization options for the respective field. You may choose how the progress indicator should look from the available options like the circle, connector, etc. You can also choose the indicator color using the color options panel. Make sure to give a page title for the form page, so it looks more professional.
Step 10:
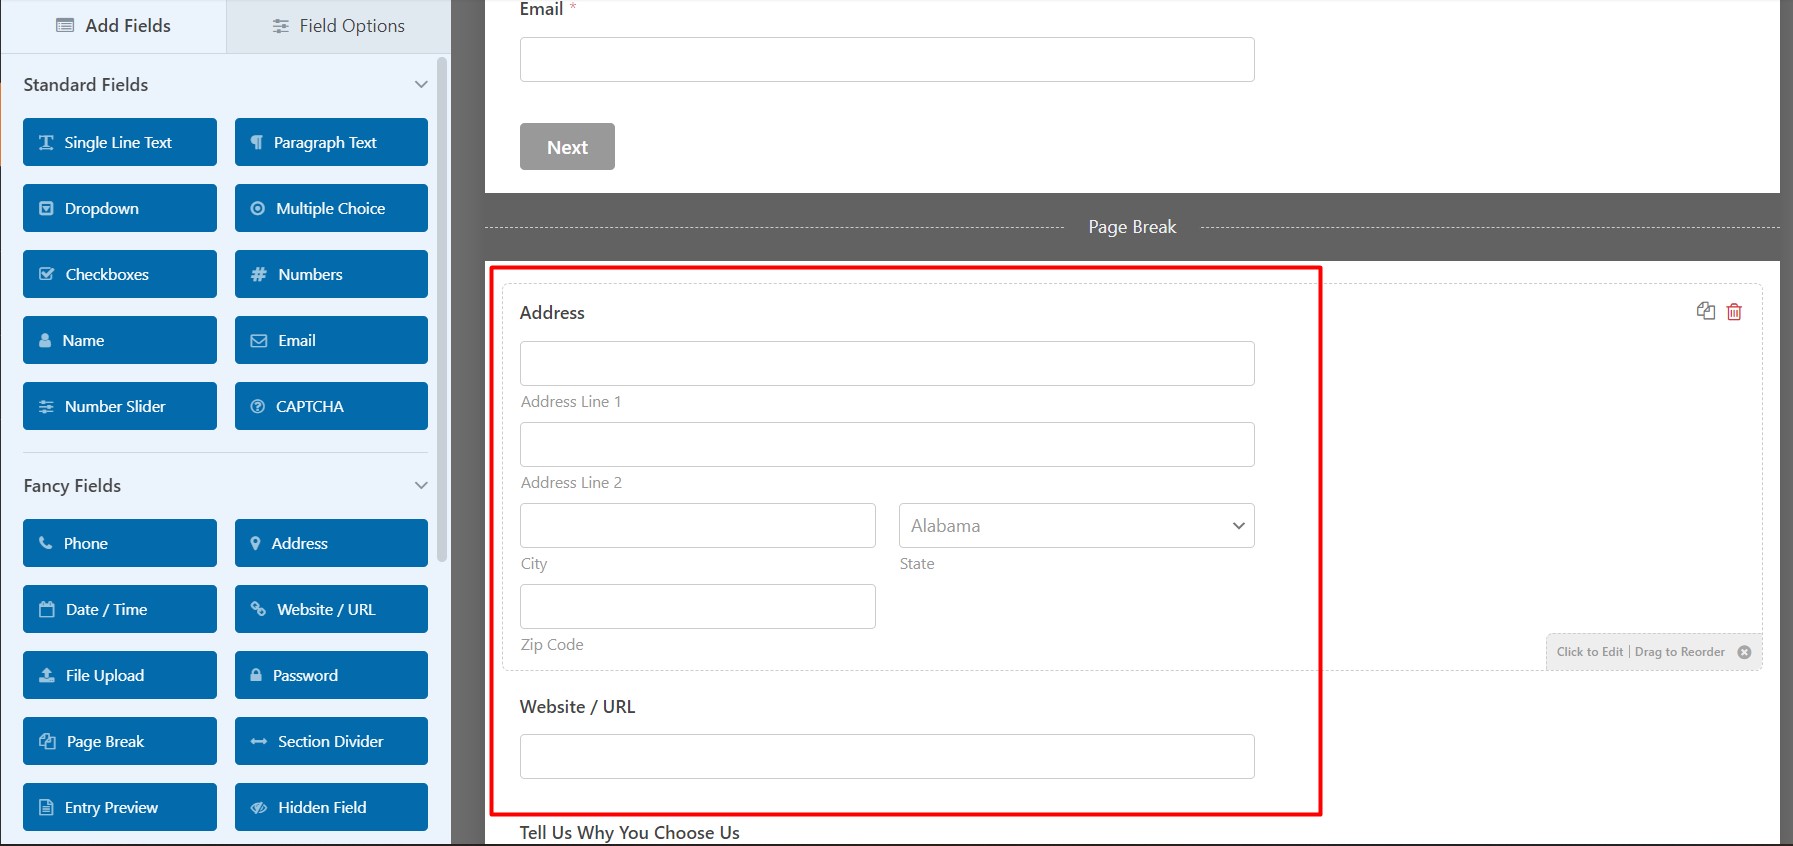
Now drag and drop more fields of your choice and start adding them after the page break field. These newly added fields will be added to the second page of the form.
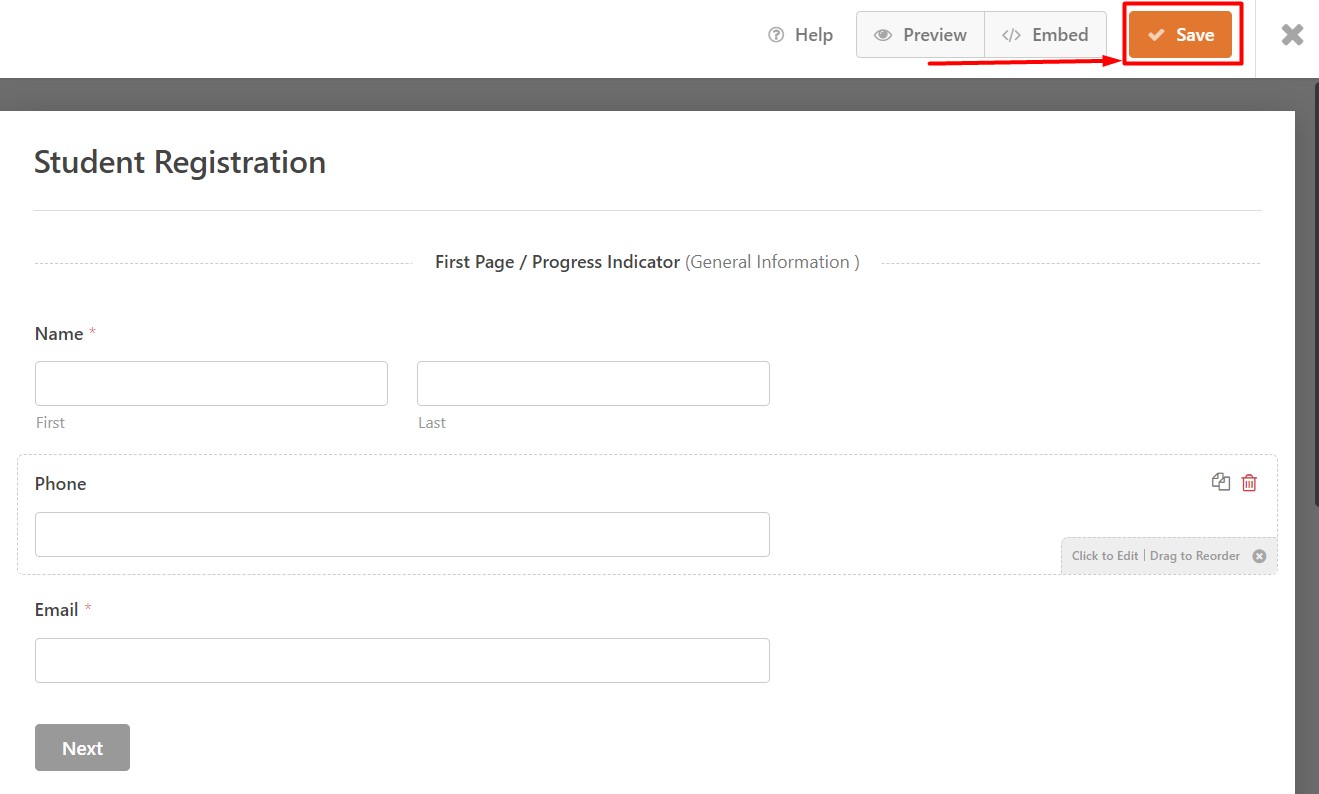
Step 11:
We have finished adding fields to the form. Click ‘Save’ on the top left corner to save our customized form.
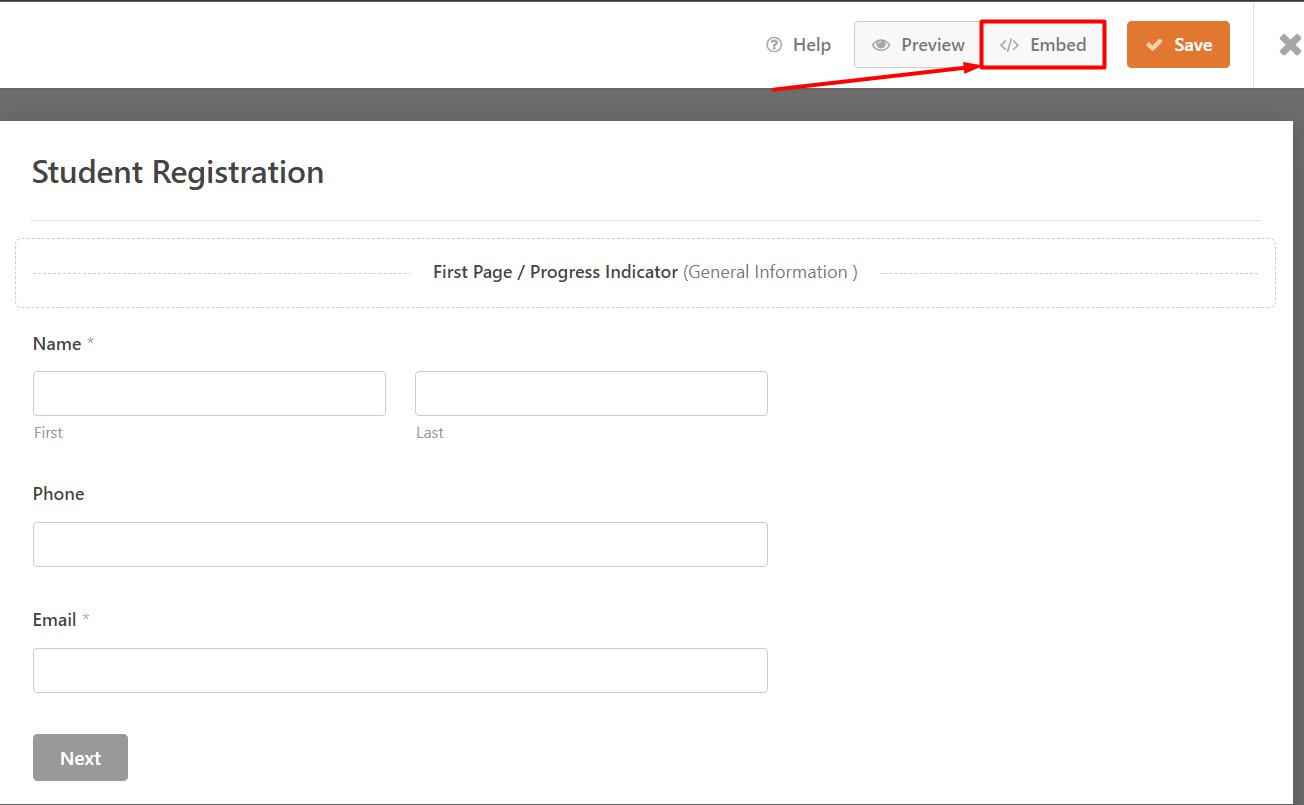
Step 12:
After creating our multi-page form, we need to embed the form to display and function properly. Click ‘Embed’ beside the save icon.
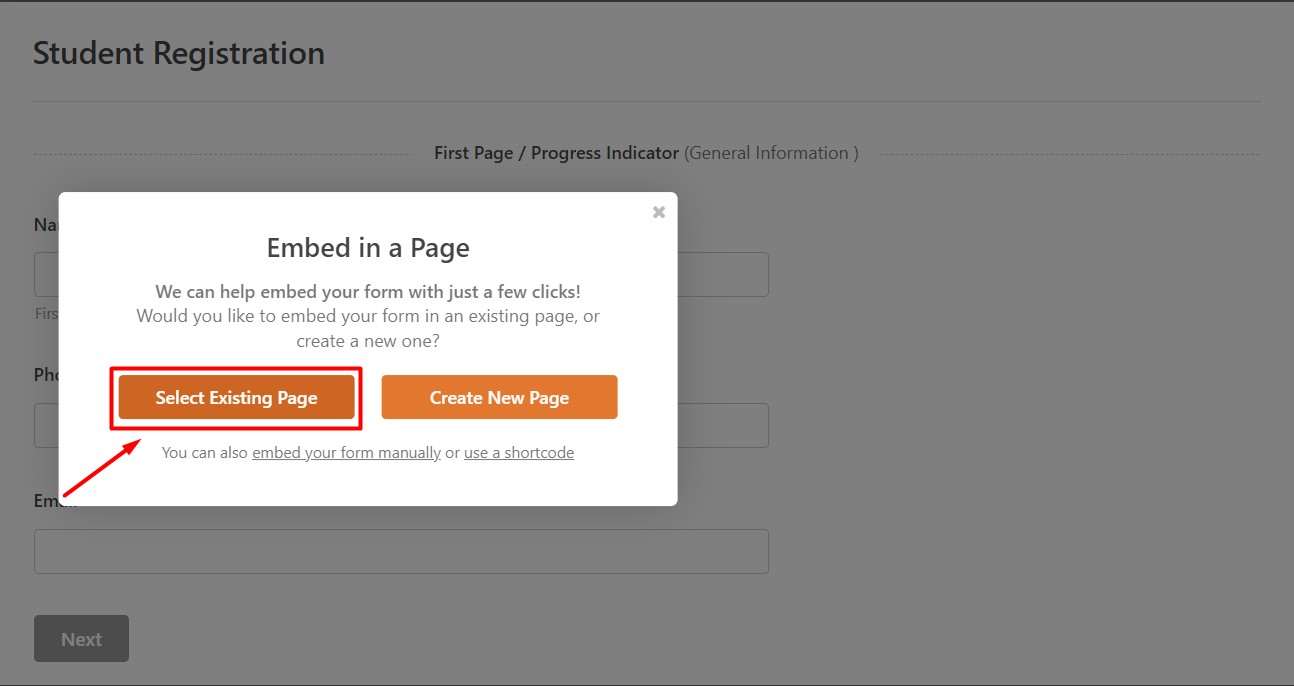
Step 13:
You will be offered a few options to embed the form on your preferred page. Click ‘Select Existing Page.’ These embedding options are compatible with any best free WooCommerce theme for eCommerce.
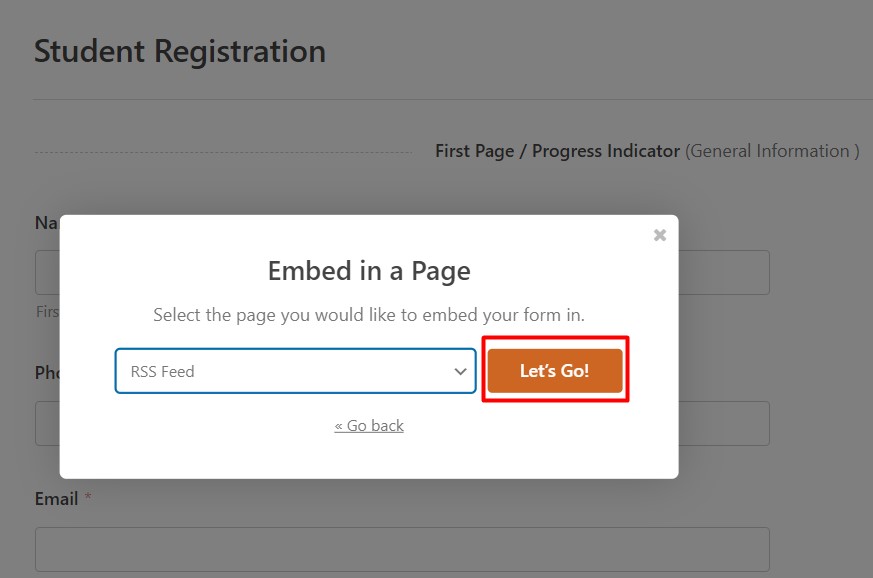
Step 14:
Choose the page you want to embed the form on and click ‘Let’s Go!’
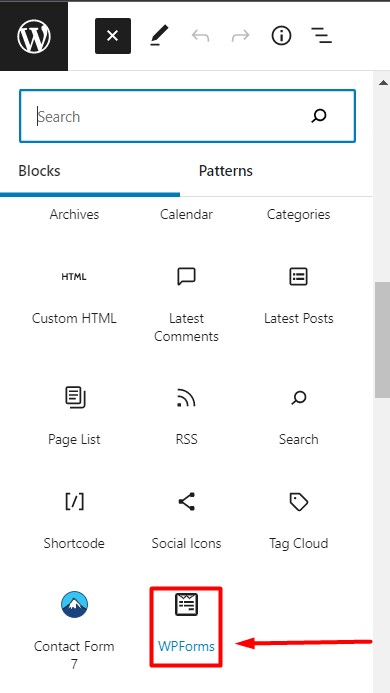
Step 15:
After the page opens in the Gutenberg block editor, add the block ‘WPForms’ to the editor.
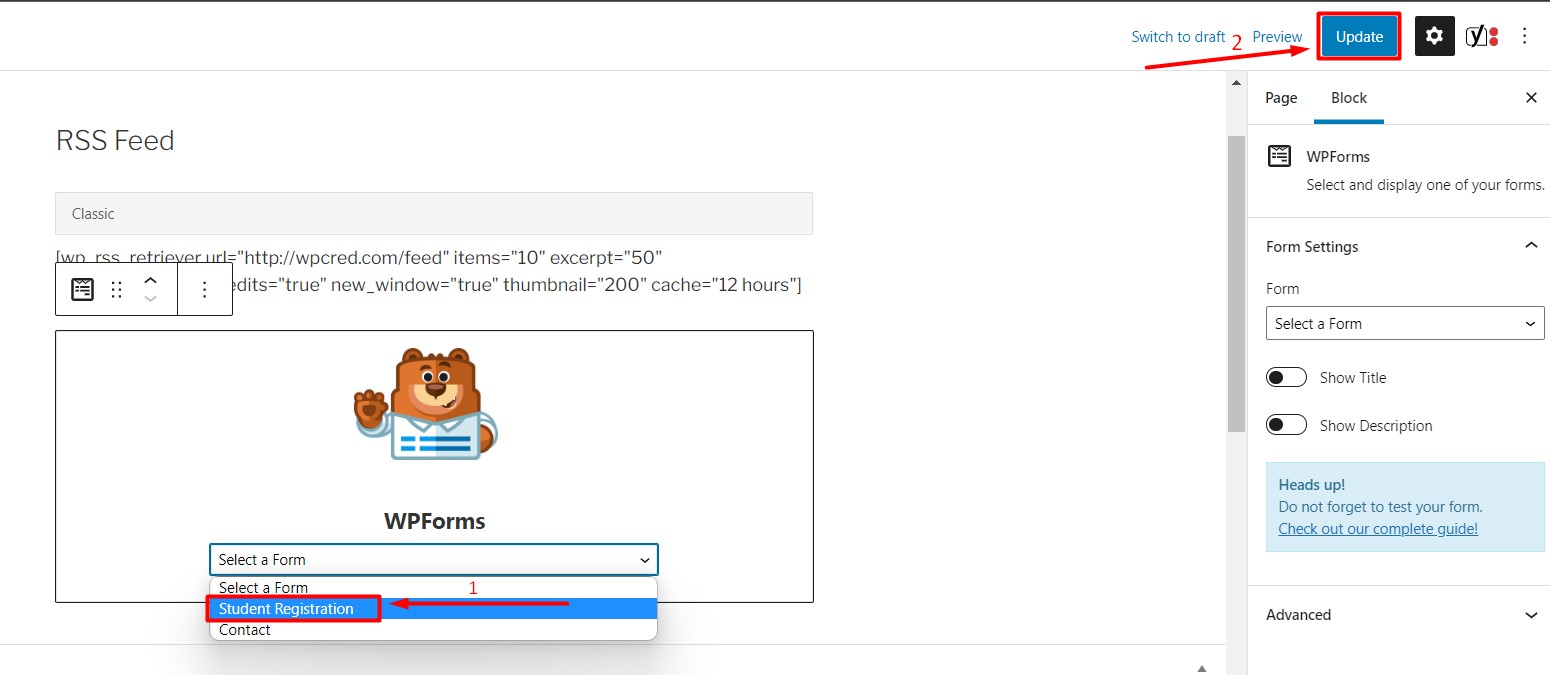
Step 16:
After adding the WPForms block to the editor, select the form you want to add and click ‘Update’ to save your customization. Now view the page you have added the form.
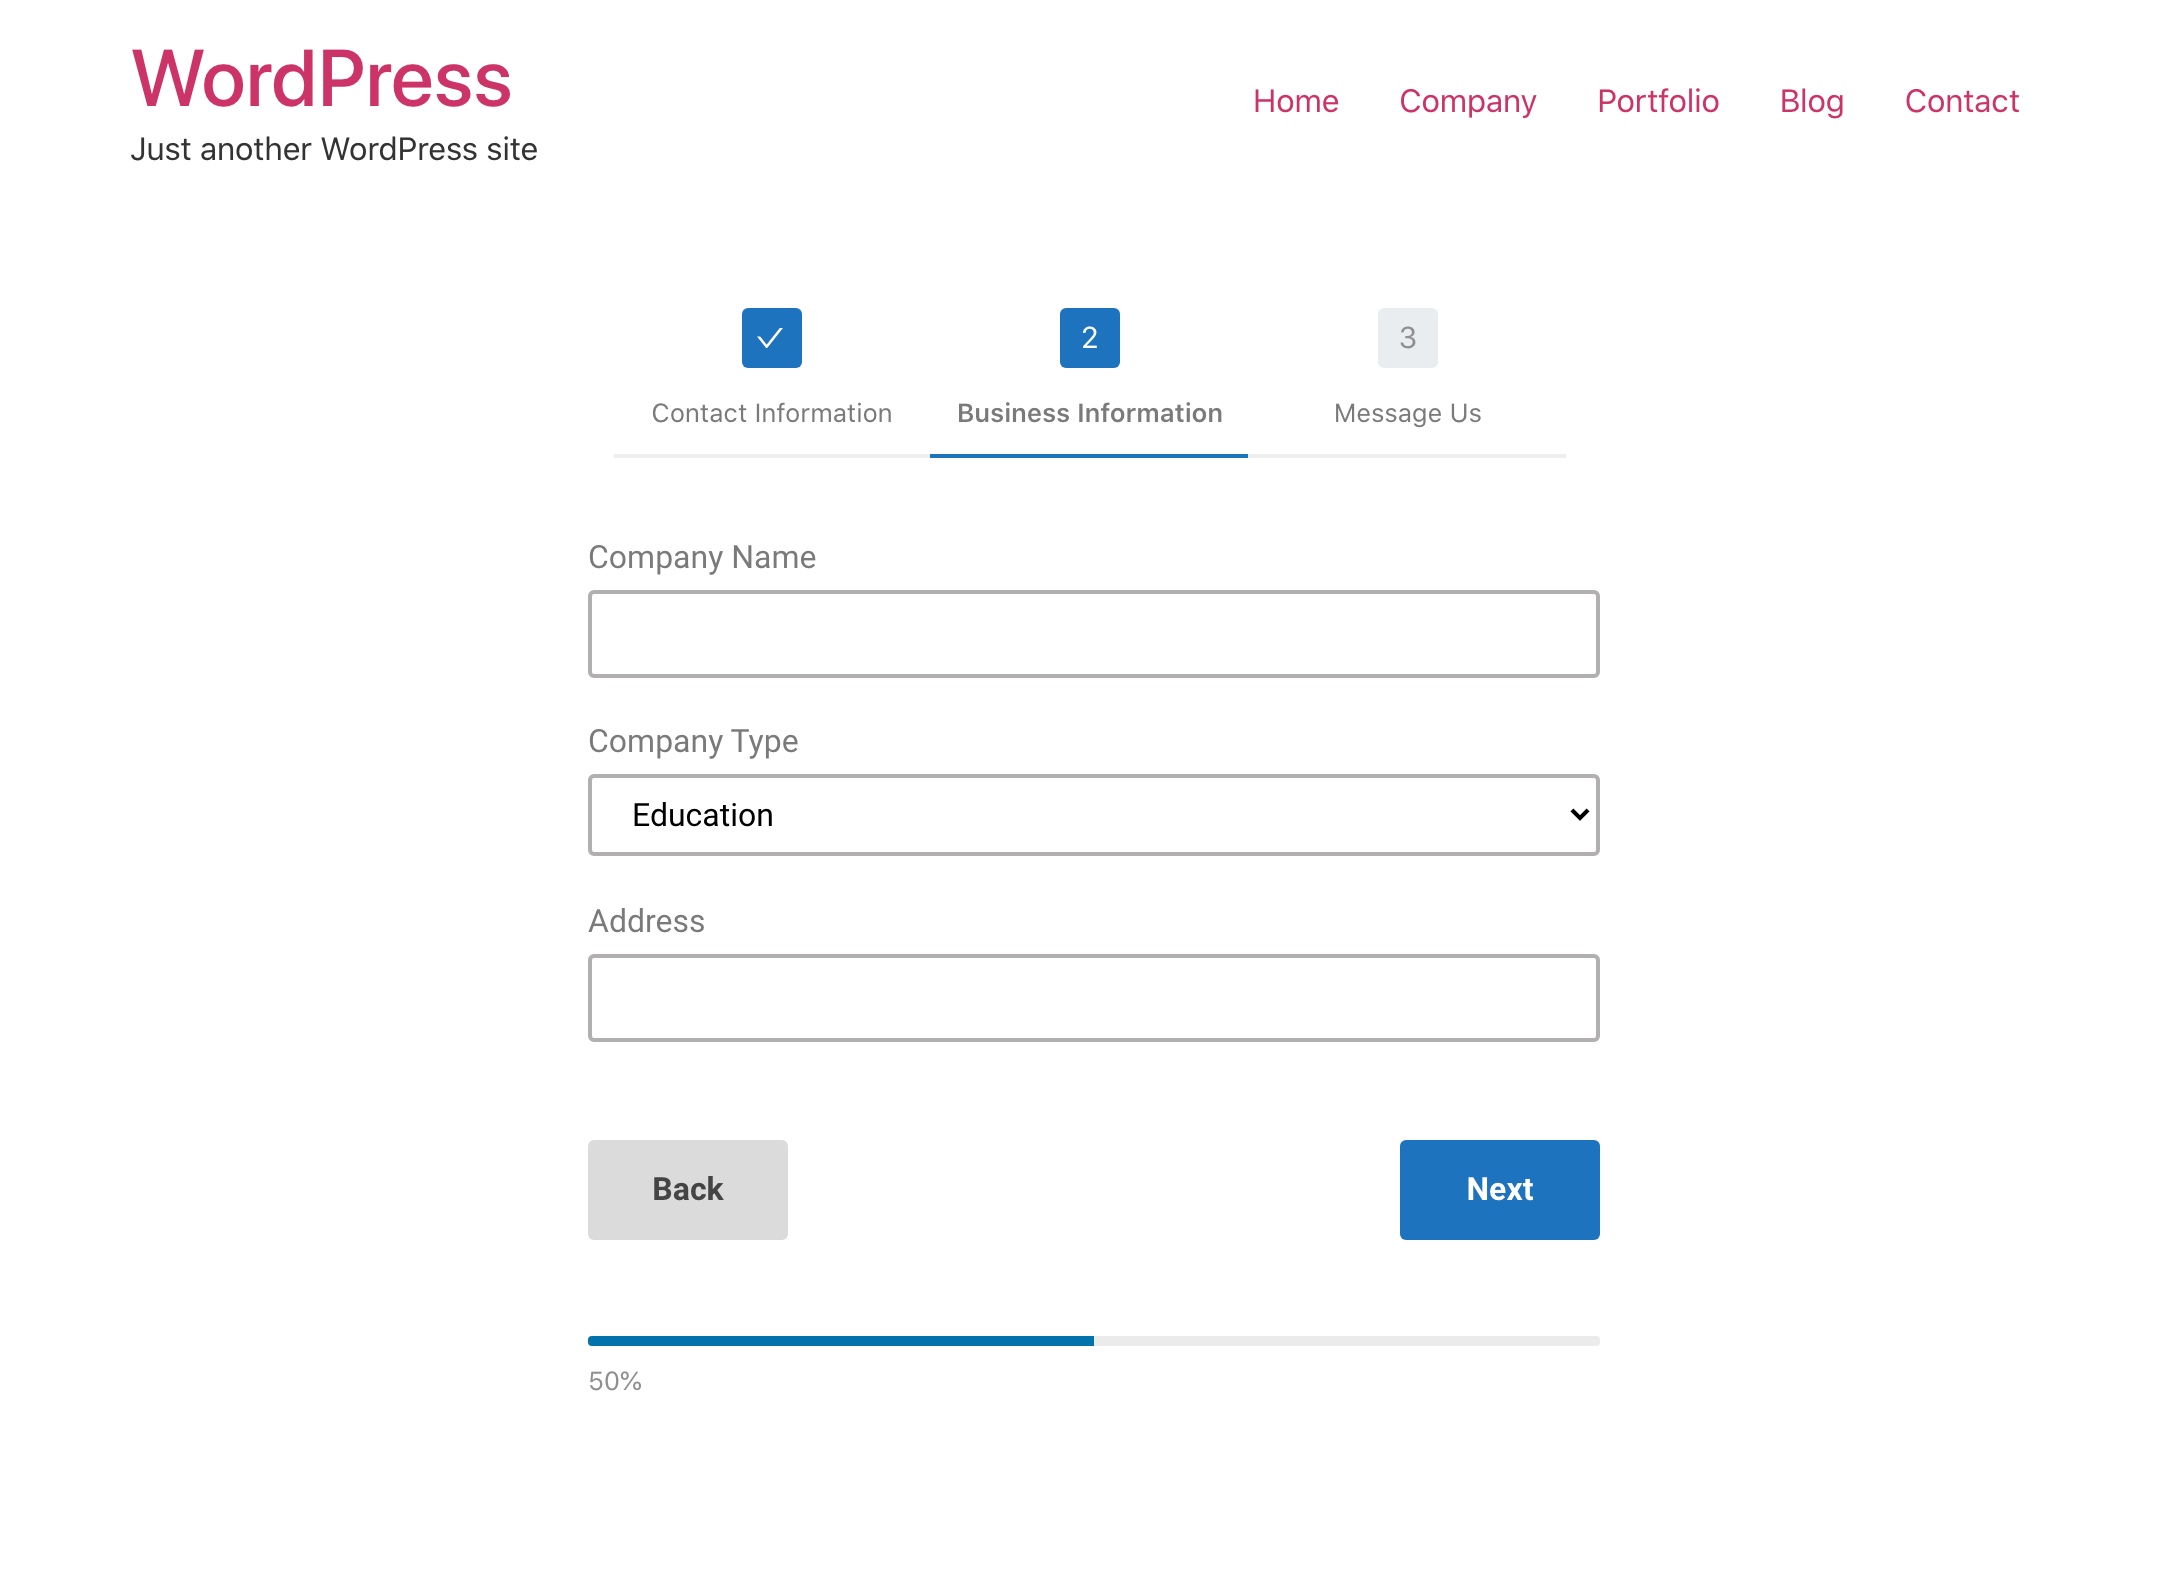
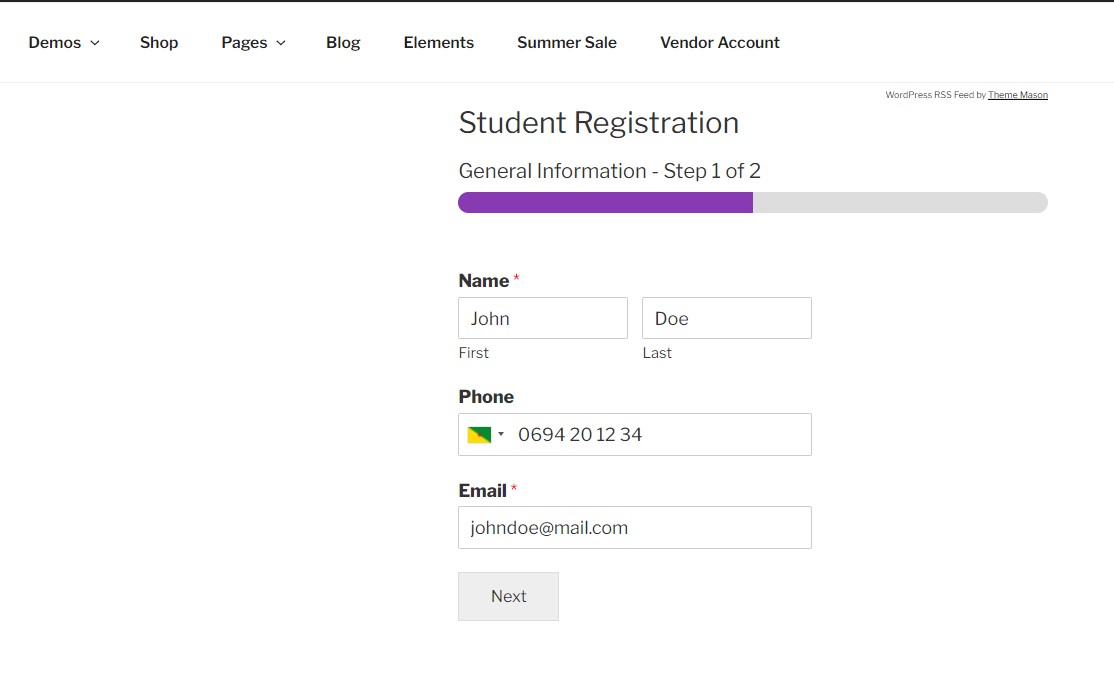
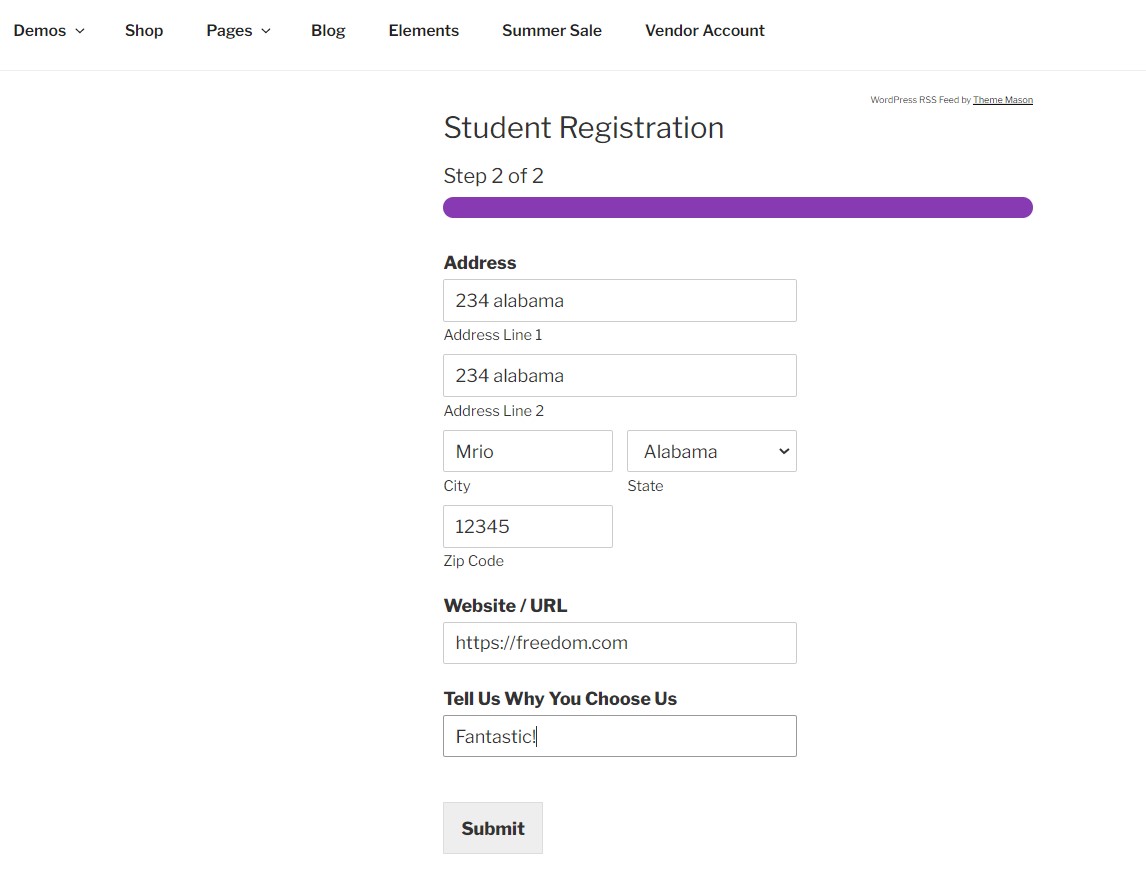
Final Output
You can see that we have successfully created and implemented a WordPress multi step form on our website. We created this form in two pages, and after filling the first page and clicking next, the form moves to the second page, where you can finally submit it. You can also know how to add Recaptcha to contact form 7 so that it can overcome some spammy activities.
Conclusion
Following the steps mentioned above, you can organize form fields in different sections and make your WordPress multi step form more readable and user-friendly. The free version of the WPForms plugin has enough features to satisfy your need, and you can always upgrade to the premium version if you need more dynamic features. We hope this tutorial will be helpful for you to learn about making a professional-looking WordPress multi step form. Feel free to go through our article on Rank Math vs Yoast SEO comparison to have better insights into the top WordPress SEO plugins.